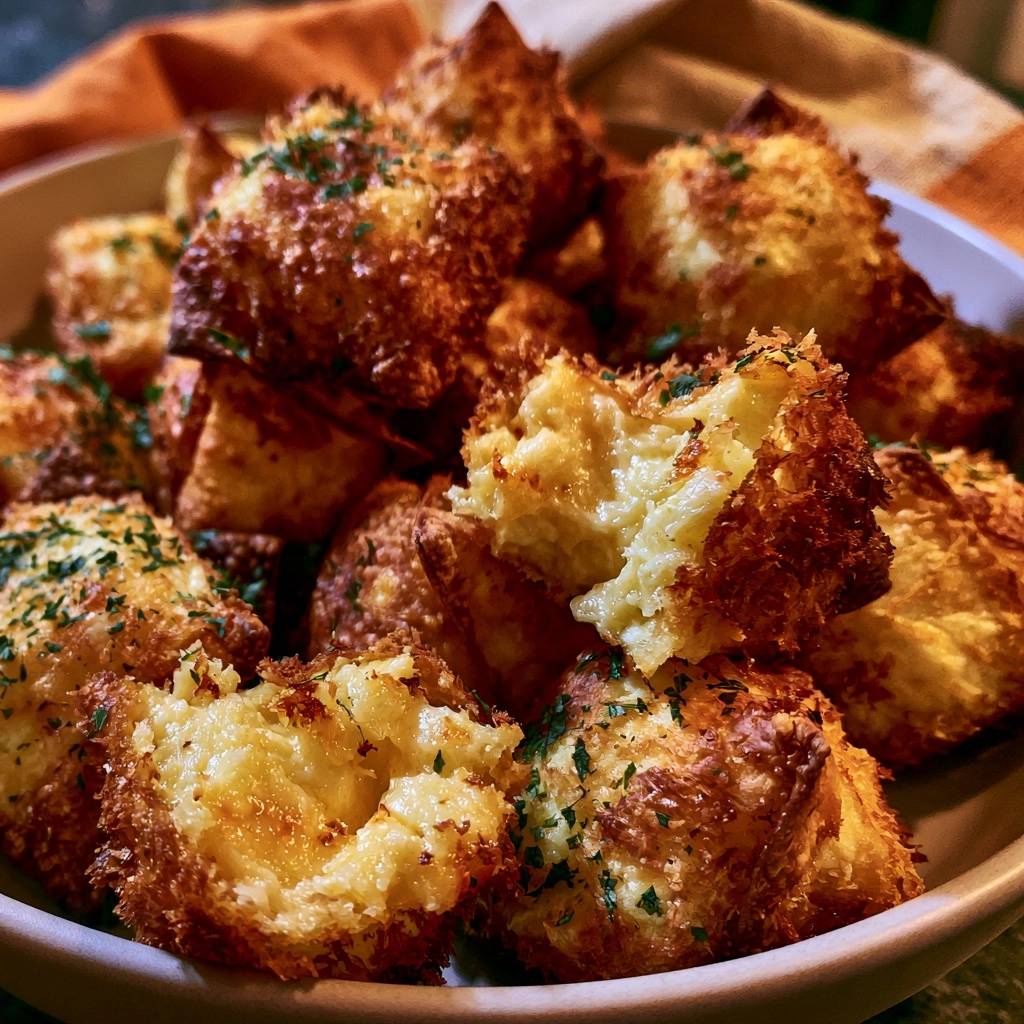
Imagine biting into a snack that offers a deafening, shattering crunch before giving way to a cloud-like, molten center of seasoned potato and sharp cheddar. Most homemade potato bites end up as sad, oil-soaked lumps that lose their structural integrity the moment they leave the pan. We’ve all been there, staring at a plate of mushy appetizers that promised a crispiness they just couldn’t deliver.
The secret to achieving a professional-grade crust isn’t just about cranking up the heat; it’s about the “Anti-Soggy Bottom” technique. By utilizing a double-bind coating and a strategic flash-chill, you create a rigid exterior that acts as a pressurized seal. This keeps the oil out and the creamy goodness in, ensuring every bite stays crunchy for hours rather than minutes.
If you want that perfect texture, the real trick lies in the moisture management of your base. You must use cold, stiff mashed potatoes because warm starch molecules are too loose to hold a shape under the intense heat of a deep fry. When you start with a cold, dense foundation, you’re already halfway to the best appetizer you’ve ever made.
The Structural Science of Crispy Loaded Potato Puffs
Frying is essentially a race between dehydration and oil absorption. When you drop a potato puff into hot oil, the moisture on the surface immediately turns to steam and escapes. If the exterior isn’t reinforced, the oil will rush in to fill the gaps left by that escaping steam, resulting in a greasy, heavy mess.
The flash-chill step is your primary defense because it creates a thermal barrier. By lowering the temperature of the potato core before frying, you delay the internal steam release. This gives the Panko breadcrumbs enough time to brown and harden into a structural shell before the cheese inside even begins to melt.
Furthermore, the starch in the potatoes undergoes a process called retrogradation when chilled. This makes the mash firmer and less likely to “weep” moisture into the breading. A dry, cold surface is the only way to ensure your coating sticks like a second skin rather than sliding off in the oil.
Why Cold Mashed Potatoes are Non-Negotiable
Freshly made mashed potatoes are full of agitated starch and steam, which is a recipe for disaster in this dish. You need potatoes that have spent at least four hours (or overnight) in the fridge. This resting period allows the starches to crystallize, providing the “grip” needed to hold the cheese and spices together.
If you’re making potatoes specifically for this recipe, avoid adding too much milk or butter. You want a thick, almost dough-like consistency. If your leftovers are a bit too creamy, you can stir in a tablespoon of flour or instant potato flakes to tighten the texture before you start shaping.
The Double-Bind Coating Explained
The flour-egg-panko sequence is a classic for a reason, but we take it a step further with the double-bind. The first layer of flour absorbs any lingering surface moisture, creating a dry “primer” for the egg wash. The egg then acts as a protein-rich glue that grabs onto the jagged edges of the Panko breadcrumbs.
For a truly indestructible crunch, the double-dip is your best friend. After the first Panko coating, dip the puff back into the egg and then back into the Panko. This creates a thicker, reinforced shell that can withstand the bubbling heat of the oil without cracking or leaking.
Essential Components for the Perfect Potato Filling
Quality ingredients are the backbone of this snack, and it starts with the cheese. I always recommend a sharp or extra-sharp cheddar. Because the frying process is so fast, you need a high-impact cheese that delivers a punchy flavor even in small amounts without adding excessive oiliness.
Fresh parsley is another non-negotiable for me. While dried herbs are convenient, they can taste dusty or metallic when fried. Fresh parsley provides a bright, grassy contrast to the rich potato and salty cheese, and it looks beautiful as it flecks through the golden crust.
Don’t forget the power of aromatics. Garlic and onion powders are used here instead of fresh versions because they distribute evenly throughout the mash. Fresh onions would release water as they cook, which could create steam pockets that cause your puffs to explode in the fryer.
Selecting the Right Potato Variety
Russet potatoes are the undisputed kings of the potato puff world. Their high starch content and low moisture levels mean they mash into a fluffy, dry consistency that holds its shape perfectly. They act like a sponge for the flavors of the cheese and spices.
Yukon Golds are delicious and buttery, but they can sometimes be too waxy or “heavy” for this specific application. If you do use Yukons, make sure you mash them very thoroughly and perhaps add a tiny bit of cornstarch to help them maintain their structure during the flash-chill phase.
Spice Ratios and Flavor Enhancers
The balance of garlic and onion powder is what gives these puffs that “craveable” quality. I use a 2:1 ratio of garlic to onion to ensure the savory notes are front and center. It’s a subtle background hum that complements the cheddar without overpowering the natural potato flavor.
Always taste your cold mash before you start rolling. Since potatoes are salt-magnets, you might need an extra pinch of salt or a few more cracks of black pepper. Remember, the breading will add some volume, so the filling should be seasoned quite aggressively.
Step-by-Step: Engineering the Ultimate Crunch
Success in the kitchen is often about the workflow. Before you even turn on the stove, make sure your station is organized. This is a technical process, and having everything in its place prevents the kind of frantic mistakes that lead to burnt crumbs or messy hands.
Phase 1: Mixing and Shaping for Uniformity
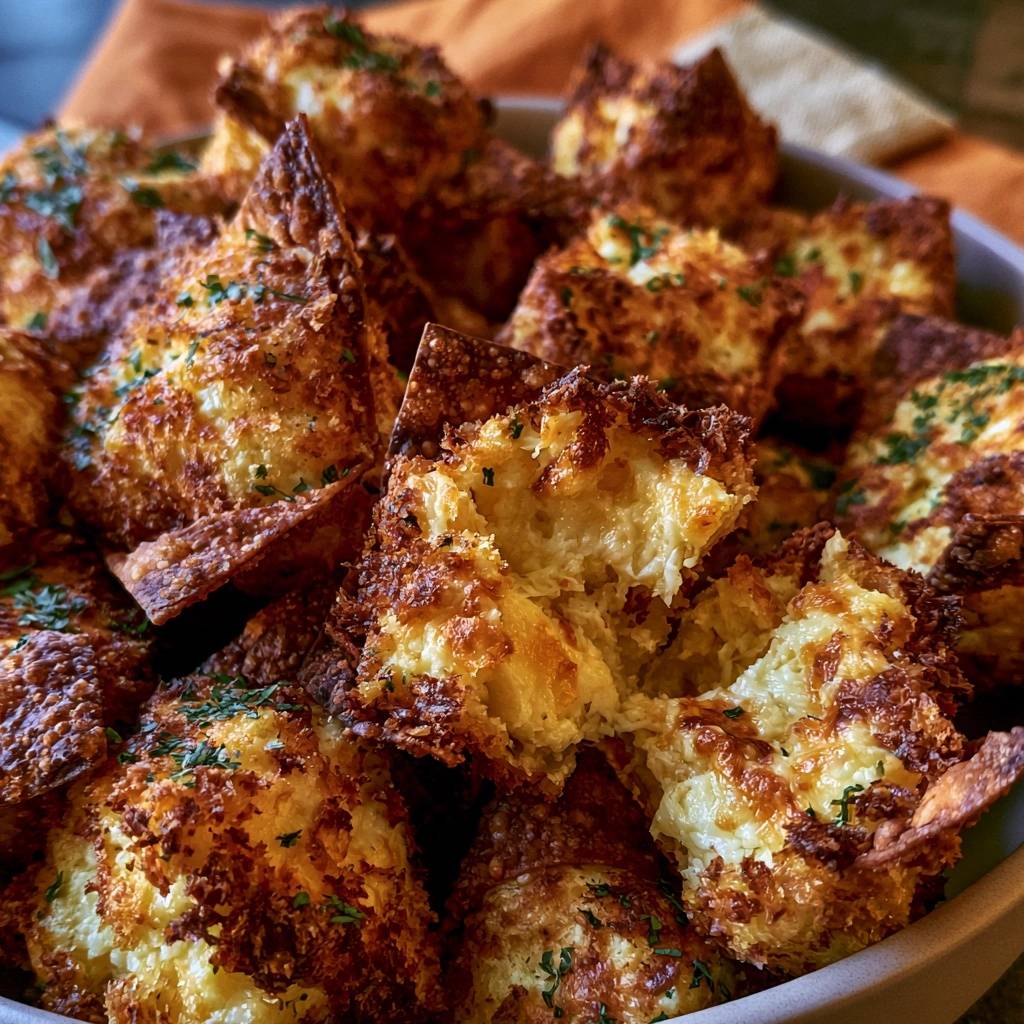
Start by folding your cheese and herbs into the cold mash using a stiff spatula. You want to see even distribution so every bite has a bit of everything. When it comes to shaping, I like to roll them into tight squares or cubes; the flat sides actually make it easier to get an even fry than perfect spheres.
Keep your portions consistent, about the size of a large walnut. If some are huge and others are tiny, the small ones will overcook and the large ones will have a cold, solid cheese center. Aim for uniformity to ensure every puff hits that molten stage at the same time.
Phase 2: The Flash-Chill Technique
Once your puffs are shaped, they need a quick trip to the freezer for 15 to 20 minutes. This isn’t about freezing them solid; it’s about “setting” the fats. This short window firms up the cheddar and the potato starch, making the puffs much easier to handle during the dredging process.
Be careful not to leave them in too long. If the centers actually freeze, they won’t heat through properly in the fryer, leaving you with a hot crust and an icy middle. You’re looking for a firm, cold-to-the-touch exterior that doesn’t deform when you pick it up.
Phase 3: The Triple-Dredge Station Setup
Line up your three bowls: flour, egg wash, and Panko. Use the “wet hand/dry hand” method to keep your fingers from becoming breaded themselves. Use your left hand for the dry flour and Panko, and your right hand for the egg wash. It keeps the process clean and efficient.
When you get to the Panko stage, don’t just roll the puff. Give it a gentle squeeze. Pressing the crumbs into the surface ensures they are anchored into the egg wash. This creates a dense, interlocking layer of breadcrumbs that won’t flake off when they hit the hot oil.
Phase 4: Precision Frying and Temperature Control
Heat your oil to exactly 350°F. If you don’t have a thermometer, dip the handle of a wooden spoon into the oil; if it bubbles steadily, you’re close. However, a thermometer is the only way to be sure. If the oil drops below 325°F when you add the puffs, they will start absorbing grease immediately.
Fry in small batches of four or five. Overcrowding the pan is the fastest way to drop the oil temperature and end up with soggy puffs. Watch for a deep, mahogany gold color. It should take about 3 to 4 minutes. The sound of the sizzling will actually change and become quieter as the surface moisture evaporates.
Troubleshooting Common Potato Puff Failures
If your puffs are bursting open in the oil, it’s usually because there was too much air trapped inside or the mash was too wet. Make sure you roll them tightly to expel any air pockets. If a puff does leak, remove it immediately so the escaping cheese doesn’t burn and ruin the rest of the oil.
If the breading is falling off, your flour coating was likely too thick. You only need a very fine dust of flour. If the flour layer is heavy, it creates a barrier that prevents the egg from actually sticking to the potato. Always shake off every bit of excess flour before the egg dip.
Preventing Oil Absorption and Greasiness
Never drain fried foods directly onto paper towels. While it seems intuitive, the paper towel actually traps steam underneath the puff, which softens the bottom crust within seconds. This is the “wicking” effect that ruins good frying.
Instead, use a wire cooling rack set over a baking sheet. This allows air to circulate around the entire puff, letting the steam escape freely while the excess oil drips away. This simple switch is the biggest secret to maintaining that “shattering” crunch for the long haul.
Managing Internal Temperature vs. External Color
If your Panko is getting dark too fast but the cheese isn’t melting, your oil is too hot. Turn the heat down and wait a few minutes before the next batch. The flash-chill protects the core, but it still needs those 3 to 4 minutes of moderate heat to turn the center into a molten delight.
If you find the centers are still a bit cool, you can pop the fried puffs into a 300°F oven for five minutes. The wire rack makes this easy. The oven will finish melting the cheese without darkening the breadcrumbs any further.
Flavor Variations and Creative Swaps
Once you master the base technique, you can start playing with the flavor profile. The double-bind method works with almost any savory potato filling. You can easily adapt these to suit whatever is in your pantry or whatever mood you’re in.
Smoky and Spicy Adaptations
For a smoky kick, add a teaspoon of smoked paprika to the flour dredge. It gives the puffs a beautiful reddish hue and a deep, campfire flavor. If you like heat, you can add finely minced jalapeños to the mash, but make sure you squeeze them in a paper towel first to remove all their liquid.
A pinch of cayenne pepper in the Panko bowl is another great way to add a “back-of-the-throat” heat that doesn’t compromise the texture of the filling. It pairs beautifully with the sharp cheddar.
Herb-Forward Profiles
If you want something a bit more sophisticated, swap the parsley for a mix of fresh chives and dill. This gives the puffs a “ranch” vibe that is incredibly refreshing. Fresh rosemary, minced very finely, can also add an earthy, piney note that feels very upscale.
Just remember the golden rule: if you’re adding fresh ingredients to the mash, they must be dry. Any extra water is the enemy of the crunch you’ve worked so hard to build.
Make-Ahead Strategies and Storage Logistics
These are the ultimate party food because you can do almost all the work in advance. In fact, they actually fry better if they’ve had time to sit and “cure” in the fridge or freezer. You can prep a massive batch on a Sunday and have snacks ready for the whole week.
Freezing Raw Puffs for Future Frying
To freeze them for later, follow the recipe all the way through the Panko coating. Place the raw puffs on a tray in the freezer for two hours until they are rock hard. Then, transfer them to a heavy-duty freezer bag. They will stay fresh for up to two months.
When you’re ready to eat, you can fry them straight from frozen. Just add an extra two minutes to the cook time and keep the oil at 350°F. Do not thaw them first, or the breading will become soggy as the potato releases moisture during the defrosting process.
Reheating for Maximum Texture Retention
If you have leftovers, please stay away from the microwave. It will turn your beautiful, crispy puffs into rubbery, sad lumps. The microwave heats by vibrating water molecules, which is the exact opposite of what a fried crust needs.
The best way to reheat is in an air fryer at 370°F for 3 to 4 minutes, or in a conventional oven at 400°F for about 8 minutes. Place them back on that wire rack to ensure the bottoms stay as crisp as the tops. They’ll come back to life with nearly the same crunch as the day they were made.
Optimal Pairings for Crispy Loaded Potato Puffs
Because these puffs are rich, salty, and fried, they crave acidity to balance the palate. A heavy dipping sauce can sometimes be too much, so look for something with a bit of a tang. It cuts through the fat and makes you want to go back for another bite.
Creamy and Acidic Dipping Sauces
A simple garlic-herb yogurt dip is my favorite pairing. Mix some Greek yogurt with lemon juice, fresh dill, and a grated garlic clove. The cool, tart yogurt is the perfect foil for the hot, crispy potato. It’s much lighter than a traditional mayo-based dip.
A zesty sour cream and chive sauce is another classic choice. Add a splash of hot sauce or a teaspoon of prepared horseradish to give it some “zip.” That sharp hit of acid is what keeps the dish from feeling too heavy.
Complementary Side Dishes
If you’re serving these as part of a meal, pair them with a very crisp green salad dressed in a sharp vinaigrette. The bitterness of arugula or radicchio works wonders alongside the sweet, starchy potato. It cleanses the palate between every crunchy bite.
Roasted vegetables like asparagus or charred broccoli also make great companions. They provide a different kind of texture and a nutritional balance that turns a plate of potato puffs into a well-rounded dinner.
Expert Tips for Professional Results
Always use an oil with a high smoke point, like vegetable, canola, or peanut oil. These can handle the 350°F heat without breaking down or smelling “off.” Avoid olive oil for deep frying, as its flavor is too strong and it can’t handle the sustained temperature needed for that perfect crust.
The final secret is the “salting window.” As soon as the puffs come out of the oil and hit the wire rack, hit them with a tiny pinch of fine sea salt. The residual oil on the surface will grab the salt and hold it, ensuring the seasoning is perfectly distributed on the exterior.
Lastly, don’t be afraid of the color. A pale puff is a soggy puff. You want a deep, golden brown that looks almost like a toasted almond. That color is the visual indicator that the Panko has fully dehydrated and reached its maximum crunch potential.
How do I store leftover potato puffs?
Store any leftovers in an airtight container in the refrigerator for up to 3 days. To maintain the best texture, do not stack them on top of each other, as this can trap moisture. When you are ready to eat them again, use an oven or air fryer to reheat; avoid the microwave at all costs as it will make the breading soggy and the potato center gummy.
Why did my potato puffs fall apart while frying?
This usually happens for two reasons: the mashed potatoes were too warm/runny, or the oil wasn’t hot enough. If the potato mixture is too soft, it will melt before the crust can harden. Ensure you use cold, stiff leftovers and always use a thermometer to verify your oil is at 350°F. The flash-chill step in the freezer is also vital for keeping the puff’s shape during the initial contact with the oil.
Can I use something other than Panko breadcrumbs?
While you can use traditional breadcrumbs, you will lose that signature “shattering” crunch. Panko is made from crustless bread and has a larger, airier surface area that creates a much crispier shell. If you must substitute, crushed saltine crackers or cornflakes can work in a pinch, but Panko is the gold standard for this specific recipe.
Can I bake these instead of frying them?
You can bake them at 425°F for about 15-20 minutes, but the texture will be significantly different. To get a golden color in the oven, you should toss the Panko in a little bit of melted butter or oil before coating the puffs. However, for the true “Anti-Soggy Bottom” experience, deep frying is the recommended method as it sets the crust instantly.
What is the best way to make the mashed potatoes if I don’t have leftovers?
Boil peeled Russet potatoes in salted water until tender, then drain them and let them sit in the hot pot for 2 minutes to allow excess steam to evaporate. Mash them without adding any liquid (no milk or cream), then stir in a small amount of butter. Spread the mash on a baking sheet and refrigerate until completely cold and firm before starting the recipe.
Crispy Loaded Potato Puffs
Course: AppetizerCuisine: AmericanDifficulty: easy4
servings25
minutes15
minutes40
Minutes310
kcalAmerican
Ingredients
2 cups cold mashed potatoes (must be stiff/thick, not runny)
1/2 cup shredded sharp cheddar cheese
2 tablespoons finely chopped fresh parsley (plus more for garnish)
1/2 teaspoon garlic powder
1/4 teaspoon onion powder
1/4 teaspoon black pepper
1/2 cup all-purpose flour (for dredging)
2 large eggs, beaten with 1 tablespoon water
2 cups Panko breadcrumbs
Vegetable oil for frying (enough to submerge puffs)
Directions
- Prepare the Filling: In a large bowl, combine the cold mashed potatoes, shredded cheese, parsley, garlic powder, onion powder, and pepper. Mix until fully incorporated. The mixture should be firm enough to hold its shape.
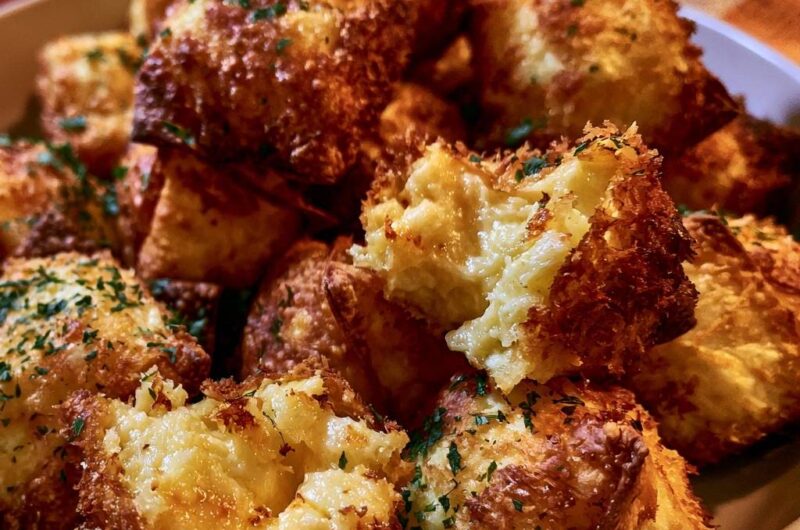
- Shape and Flash-Chill: To solve the soggy bottom issue, the potato mixture must be cold. Scoop tablespoon-sized portions and roll them into tight squares or cubes to match the visual structure in the photo. Place them on a parchment-lined tray and freeze for 15-20 minutes. This firming step prevents the potato from melting or absorbing oil during frying.
- The Triple-Coat Station: Set up three bowls: one with flour, one with the beaten egg wash, and one with Panko breadcrumbs.
- Dredge and Coat: Remove the potato puffs from the freezer. Roll each puff in flour (shake off excess), dip into the egg wash, and then roll thoroughly in the Panko. Press the crumbs firmly into the surface to create a thick, protective shell. For maximum crunch, dip back into the egg and Panko a second time.
- Heat the Oil: Heat 2-3 inches of oil in a heavy skillet or Dutch oven to 350°F (175°C). Use a thermometer to ensure the temperature is accurate; too low will cause sogginess, too high will burn the Panko before the cheese melts.
- Fry: Fry the puffs in small batches for 3 to 4 minutes, turning occasionally until deep golden brown. Because the centers were chilled, the outside gets perfectly crisp before the inside has a chance to release steam and soften the crust.
- Drain and Serve: Drain on a wire rack rather than paper towels to allow air to circulate, ensuring they stay crunchy on all sides. Garnish with fresh parsley and serve immediately while the center is molten and the shell is shattering.
Notes
- For the best results, drain the puffs on a wire rack instead of paper towels to allow air circulation and prevent the bottom from steaming and becoming soft.