
Imagine biting into a golden, burnished shell that shatters with a distinct crunch, revealing a molten, creamy cheese center. That satisfying sound is the hallmark of a perfect toasted ravioli, yet so many home cooks end up with a limp, greasy disappointment. When the breading turns soft and the pasta feels rubbery, it’s usually because moisture has won the battle against your crust.
The secret to a restaurant-quality appetizer isn’t just the oil temperature; it’s the “Anti-Soggy Bottom” philosophy. Most recipes fail because they treat the pasta like a boiled dinner rather than a fried delicacy. By managing moisture from the very first step, we ensure that the exterior stays rigid and crisp while the inside transforms into a pillowy, cheesy delight.
The real trick to this recipe is skipping the boiling water entirely. I’ve found that using cold, refrigerated ravioli straight from the package provides just enough internal moisture to steam the pasta dough during the fry without saturating the breadcrumbs. This moisture management, combined with a specific high-heat flash fry, creates a structural wall that locks in flavor and locks out grease.
The Science of the Shatter-Crisp Barrier
Frying pasta is a delicate dance of thermodynamics. When you drop a breaded ravioli into hot oil, the water inside the cheese and dough begins to turn into steam. In a poorly breaded ravioli, that steam migrates outward, soaking into the breadcrumbs and turning your golden crust into a soggy sponge.
Therefore, we utilize a “Triple-Stage Dredge” to build a fortified barrier. This isn’t just about flavor; it’s about engineering. The flour absorbs surface moisture, the egg provides a protein-rich glue, and the breadcrumbs create a textured shield. This shield allows the internal steam to cook the pasta dough while the exterior remains dry and brittle.
Furthermore, the double-breading technique creates a thicker structural wall. This extra layer is essential because it prevents the cheese from expanding and blowing out the sides of the ravioli. You want the steam trapped just enough to melt the filling, but not so much that it compromises the integrity of the crunch.
Why Refrigerated Pasta Beats Frozen or Dried
Choosing the right pasta is the most important decision you’ll make at the grocery store. Refrigerated ravioli is the “Goldilocks” of options because it has a supple texture that cooks quickly in hot oil. It contains just the right amount of hydration to soften in two minutes without needing a preliminary boil.
Frozen ravioli, on the other hand, is a recipe for disaster in a deep fryer. As the ice crystals melt, they release a massive amount of water that will either cause the oil to splatter dangerously or turn the breading into mush. If you only have frozen, you must thaw them completely and pat them bone-dry before starting the process.
Dried, shelf-stable ravioli is also a poor choice for this method. The dough is far too dense and dehydrated to soften during a quick flash-fry. If you use dried pasta, you’ll end up with a crunchy exterior and a center that feels like chewing on a guitar pick. Stick to the refrigerated section for the best results.
Essential Components for Crispy Toasted Ravioli
Success starts with your pantry. While the ingredients are simple, their quality and preparation dictate the final texture. You aren’t just looking for flavor; you’re looking for components that can withstand 350°F heat without burning or falling apart.
For the breading, fine-crumb Italian breadcrumbs are vastly superior to Panko for this specific dish. Panko is wonderful for many things, but its large flakes leave too many gaps on the flat surface of a ravioli. Fine crumbs create a solid, interlocking coat that ensures every millimeter of the pasta is protected and crisped.
Additionally, the cheese you mix into the breading matters. Use a finely grated Parmesan that looks almost like a powder. Large shreds of cheese will melt and burn on the outside of the ravioli before the pasta is cooked, whereas a fine grate integrates perfectly into the crumbs for a salty, savory finish.
The Flour and Egg Wash Foundation
The first two bowls of your dredging station are the most critical for adhesion. All-purpose flour serves as the primer; it sticks to the damp pasta dough and creates a dry surface for the egg to cling to. Without this flour base, the egg wash will simply slide off the smooth pasta, leading to “bald spots” on your fried ravioli.
Your egg wash should consist of large eggs whisked with a splash of whole milk. The fat in the milk helps the egg coat the ravioli more evenly, while the proteins in the egg act as the ultimate culinary cement. This mixture is what allows the breadcrumbs to stay put during the violent bubbling of the frying process.
Seasoning the Breadcrumb and Parmesan Blend
Since we are frying quickly, we need to pack as much flavor into the crust as possible. Garlic powder and dried oregano provide that classic “pizza parlor” aroma that everyone loves. Avoid using fresh garlic in the breading, as the tiny bits will burn in the hot oil and become bitter.
The Parmesan cheese adds a punch of umami and helps with the browning process. However, keep an eye on the ratio. Too much cheese in the breading can make the crust greasy, so stick to the measurements provided to maintain that perfect balance of salt and crunch.
Step-by-Step: The Double-Breading Architecture
Setting up your workspace is the key to a stress-free fry. Arrange your bowls in a clear line: flour, then egg, then breadcrumbs. Use the “dry hand, wet hand” method to keep your fingers from becoming breaded along with the pasta. Use your left hand for the dry flour and crumbs, and your right hand for the egg wash.
Executing the Triple-Stage Dredge
First, drop the ravioli into the flour and toss it until it’s completely white. Shake off every bit of excess flour; you only want a thin film. Next, submerge it in the egg wash, ensuring no dry spots remain. Finally, press it firmly into the breadcrumb mixture, using your palm to ground the crumbs into the dough.
For the ultimate “shatter-crisp” experience, go back for a second dip. Return the breaded ravioli to the egg wash and then back into the crumbs. This double-layering creates a thick, professional-grade shell that is virtually indestructible in the oil. It’s the difference between a snack and a masterpiece.
Maintaining the 350°F Oil Equilibrium
Temperature control is where most home cooks fail. If your oil is too cold, the ravioli will sit and soak up grease like a sponge. If it’s too hot, the outside will char before the cheese inside has a chance to soften. Use a clip-on thermometer to ensure you hit that 350°F sweet spot.
When you add the ravioli to the pan, do it in small batches. Adding too many pieces at once will cause the oil temperature to plummet. Wait for the oil to return to 350°F between batches to ensure every single ravioli gets that immediate, high-heat sear that locks in the crunch.
The Critical Cooling Rack Protocol
The biggest mistake you can make is placing your freshly fried ravioli onto a pile of paper towels. While it seems logical to soak up the oil, you are actually creating a steam trap. The heat leaving the ravioli hits the paper towel, turns into moisture, and immediately softens the bottom crust.
Instead, use a wire cooling rack set over a baking sheet. This allows air to circulate around the entire ravioli, including the bottom. By elevating the food, the steam can escape freely into the air rather than being forced back into the breading. This simple step preserves the “shatter” factor for much longer.
Furthermore, the first 60 seconds after frying are when “carry-over” cooking happens. The residual heat from the crust continues to melt the cheese center. If you crowd them on a plate too soon, they will steam each other. Give them space on the rack to breathe and set their structure before serving.
Troubleshooting Common Toasted Ravioli Failures
If you notice your ravioli are “exploding” or leaking cheese, you are likely frying them for too long. Once the ravioli puff up slightly and turn golden brown, they are done. The internal pressure of the melting cheese will eventually find a weak spot in the dough if left in the oil for more than two or three minutes.
If the breading is flaking off in the oil, you probably skipped the flour step or didn’t press the crumbs firmly enough. The flour is the anchor for the entire system. Additionally, make sure your ravioli aren’t touching each other in the pan, as they can stick together and pull the breading off when you try to flip them.
Flavor Variations and Filling Swaps
While cheese is the classic choice, this technique works beautifully with other fillings. Mushroom-filled ravioli offer an earthy, savory alternative that pairs perfectly with a touch of truffle salt in the breading. If you use spinach and ricotta ravioli, consider adding a pinch of nutmeg to the flour dredge to highlight the greens.
For more ideas on flavorful additions, check out this Italian wedding soup.
For a sweeter profile, butternut squash ravioli can be “toasted” using the same method. In this case, swap the oregano for a little dried sage and use a brown butter dipping sauce instead of marinara. The double-breading technique remains the same regardless of the filling inside.
For a different take on ravioli fillings, explore this creamy mushroom ravioli.
Optimal Pairings: Beyond Basic Marinara
A thick, rich marinara is the traditional partner for toasted ravioli because the acidity of the tomatoes cuts through the richness of the fried crust. However, you can branch out. A spicy arrabbiata sauce adds a kick of heat that complements the salty Parmesan perfectly.
If you prefer something creamy, a roasted garlic dipping sauce or a thick pesto aioli works wonders. The key is to keep the sauce thick; a watery sauce will immediately ruin the crunch you worked so hard to achieve. Always serve the sauce on the side rather than drizzling it over the top.
Round Out Your Meal
If you enjoyed this take on crispy ravioli, explore these other Italian-inspired dishes.
- For a different pasta preparation, consider making Spinach and Cheese Ravioli Marinara, focusing on a sauce that avoids common pitfalls.
- If you liked the idea of a baked pasta dish, try this Skillet Rigatoni Bolognese Bake for a hearty and satisfying option.
Make-Ahead Strategies and Storage
You can actually bread these ravioli up to four hours in advance. In fact, letting the breaded ravioli sit in the refrigerator for 30 minutes before frying helps the crust “set” and adhere even better to the pasta. Just keep them in a single layer on a parchment-lined tray so they don’t stick together.
If you have leftovers, never use the microwave, as it will turn the pasta into a rubbery mess. Instead, use an air fryer at 375°F for 3-4 minutes or a toaster oven. This dry heat will reactivate the oils in the breading and restore that original crunch. They will stay fresh in an airtight container in the fridge for up to three days.
Expert Tips for High-Volume Entertaining
When cooking for a crowd, you don’t want to be stuck at the stove while everyone else is eating. You can fry the ravioli in batches and keep them warm in a 200°F oven. Keep them on the wire rack inside the oven so the air continues to circulate; this will keep them crispy for up to 45 minutes.
Another pro tip is to season the ravioli the very second they come out of the oil. While the surface is still slightly wet with hot oil, the extra Parmesan and fresh parsley will stick much better. This creates a beautiful, professional presentation that looks like it came straight from a high-end bistro.
Frequently Asked Questions
Can I use an air fryer for this recipe?
Yes, you can use an air fryer, though the texture will be slightly different. To get a golden color, you must spray the breaded ravioli generously with a high-heat oil spray before cooking. Air fry at 400°F for about 6-8 minutes, flipping halfway through. It won’t be quite as indulgent as the shallow-fry method, but it is a great lower-fat alternative.
Why is my ravioli chewy instead of tender?
Chewy ravioli usually happens when the oil is too hot. If the outside browns in under 60 seconds, the pasta dough hasn’t had enough time to hydrate and soften from the internal steam. If your ravioli feels like cardboard, lower the heat slightly and aim for a 2-minute total fry time. This allows the heat to penetrate the dough properly.
Do I really need to skip the boiling step?
Absolutely. Boiling the ravioli introduces far too much moisture into the equation. When you boil pasta, the starch on the surface becomes gummy, which prevents the flour and egg from sticking correctly. Furthermore, the excess water trapped in the dough will steam the breading from the inside out, making it impossible to achieve a long-lasting crunch.
What is the best oil for frying pasta?
You want a neutral oil with a high smoke point. Vegetable oil, canola oil, or grapeseed oil are all excellent choices. Avoid using extra virgin olive oil for this recipe; its smoke point is too low for a 350°F fry, and it will impart a strong flavor that can overwhelm the delicate cheese and herbs in the breading.
How do I prevent the cheese from leaking out?
The double-breading technique is your best defense against leaks. By dipping the ravioli in the egg and crumbs twice, you create a thick “shell” that holds the cheese in place even as it melts and expands. Also, check your ravioli before breading; if any have broken seals or holes in the dough, set them aside and don’t fry them, as they will definitely leak.
Toasted Ravioli
Course: AppetizerCuisine: Italian-AmericanDifficulty: easy4
servings15
minutes10
minutes410
kcal25
MinutesA crunchy, golden-brown appetizer featuring refrigerated cheese ravioli double-breaded in a Parmesan and herb mixture, then fried to perfection to ensure a shatteringly crisp shell.
Ingredients
1 pound refrigerated cheese ravioli (fresh, not frozen)
1/2 cup all-purpose flour (for the base coat)
2 large eggs
1/4 cup whole milk
1 1/2 cups Italian seasoned breadcrumbs (fine crumb)
3/4 cup grated Parmesan cheese, divided
1 teaspoon garlic powder
1/2 teaspoon dried oregano
Vegetable oil for frying
1/4 cup fresh parsley, finely chopped
2 cups thick marinara sauce, warmed for dipping
Directions
- To solve the soggy bottom issue, start with cold, refrigerated ravioli. Do not boil the pasta first; the moisture from boiling is the enemy of a crisp crust.
- Set up a three-bowl dredging station:
- Bowl 1: All-purpose flour.
- Bowl 2: Whisked eggs and milk.
- Bowl 3: Combine breadcrumbs, 1/2 cup Parmesan cheese, garlic powder, and oregano.
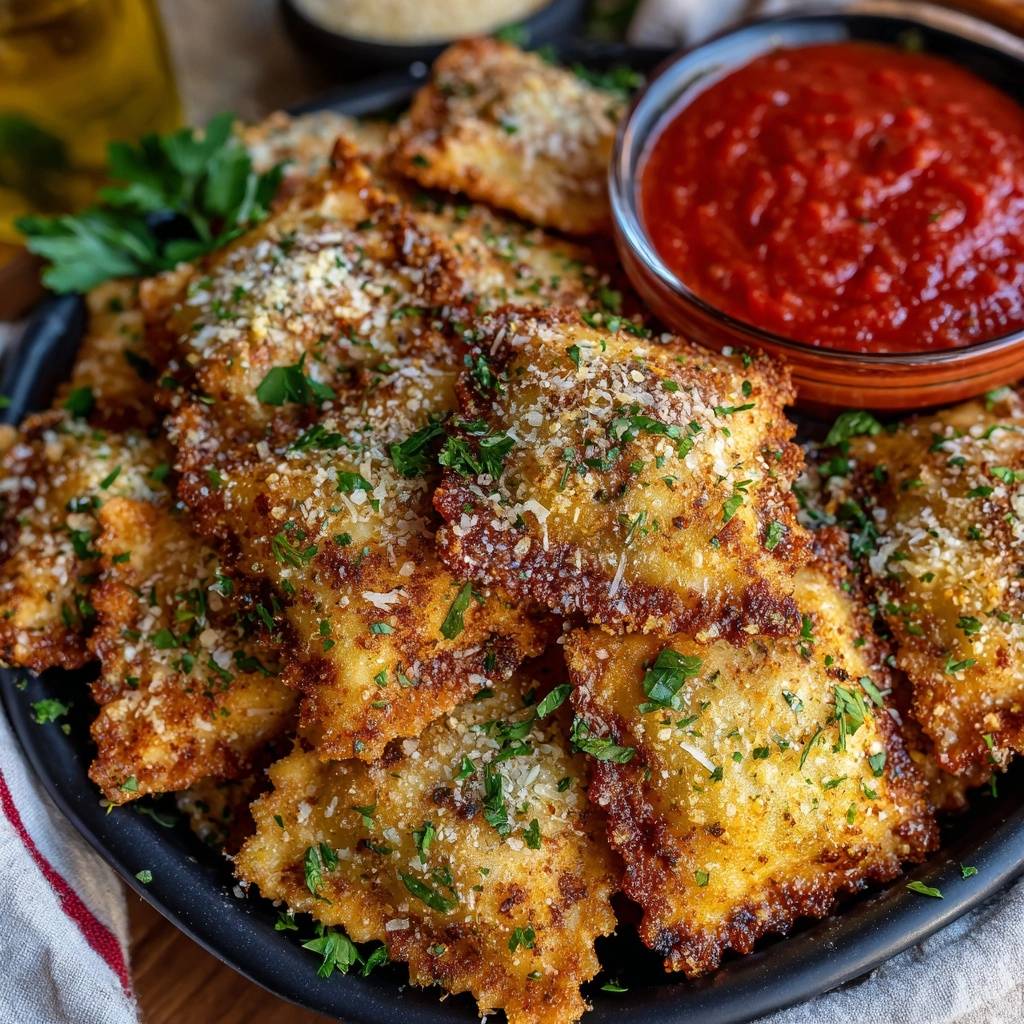
- Dredge each ravioli first in flour (shaking off excess), then dip into the egg wash, and finally press firmly into the breadcrumb mixture. For the ultimate “shatter-crisp” barrier shown in the image, dip it back into the egg and then the crumbs a second time (double-breading).
- Heat one inch of vegetable oil in a heavy skillet to 350°F (175°C). Use a thermometer; if the oil is too cool, the pasta will absorb grease.
- Fry the ravioli in small batches for 1 to 2 minutes per side until deep golden brown and slightly puffed. Do not overcrowd the pan, as this drops the oil temperature and leads to sogginess.
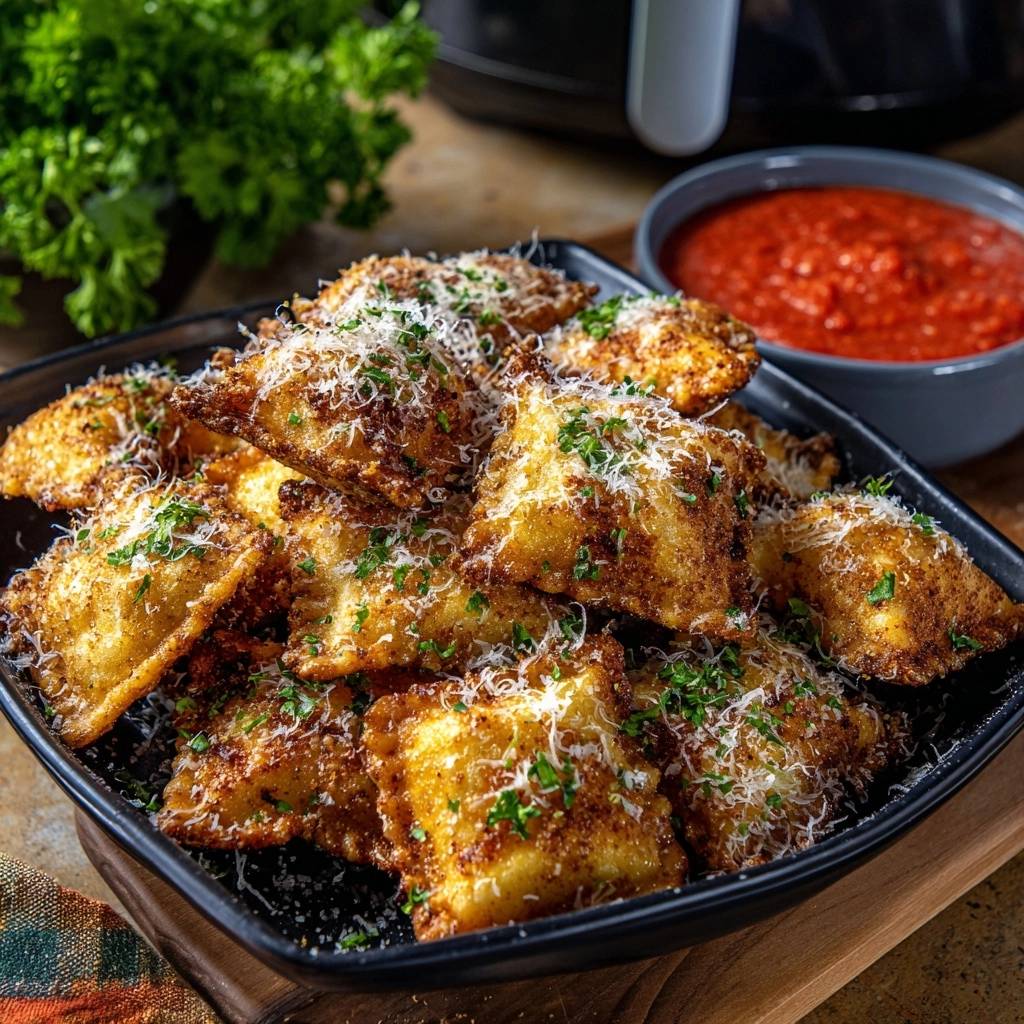
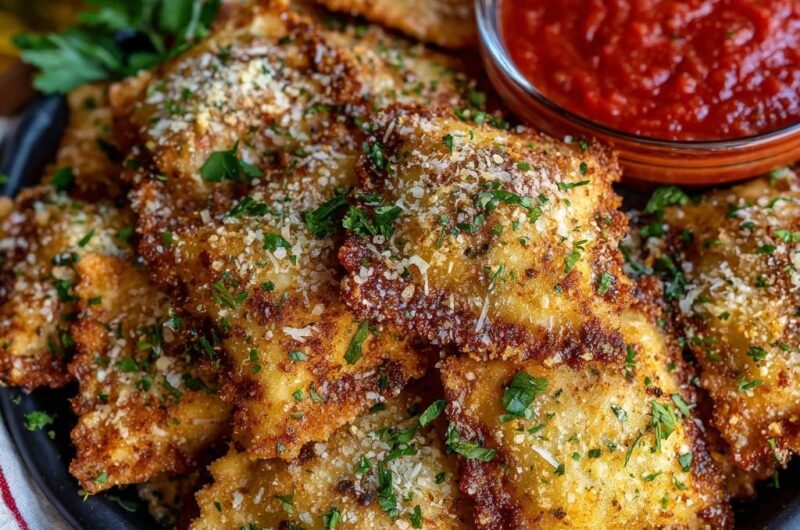
- Immediately transfer the fried ravioli to a wire cooling rack set over a baking sheet. Never drain them on paper towels, as the trapped steam underneath will soften the bottom crust.
- While hot, generously sprinkle with the remaining 1/4 cup Parmesan cheese and fresh parsley. Serve immediately with a side of thick, warm marinara sauce.
Notes
- Do not boil the ravioli before breading. Use a wire cooling rack instead of paper towels to prevent the bottoms from becoming soggy. Double-breading creates the ultimate crunch barrier.


