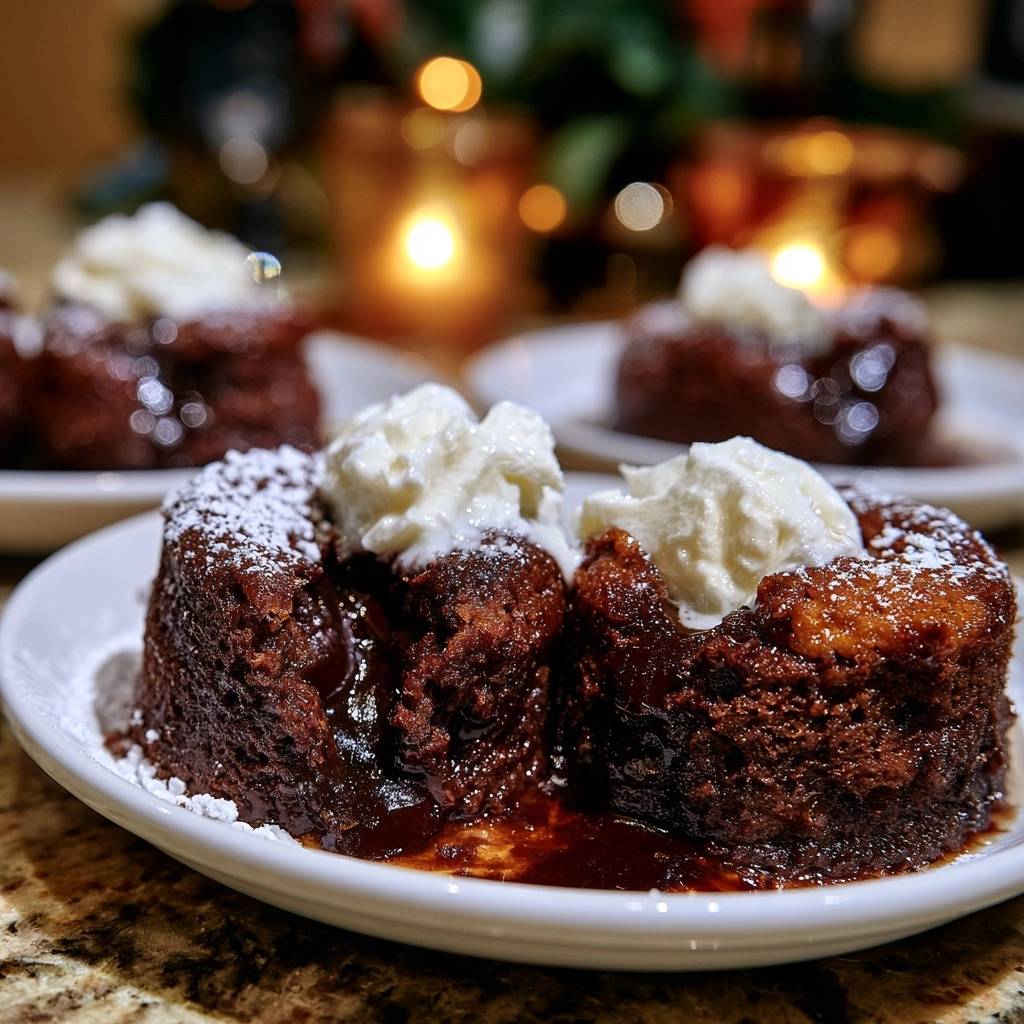
The moment your spoon pierces the delicate, cocoa-dusted crust of a perfect lava cake, time seems to slow down. You’re looking for that dramatic, slow-motion flow of warm, velvety chocolate that pools onto the plate. It’s a sensory experience that balances the airy, soufflé-like exterior with a core so rich it feels like a liquid truffle.
However, most home bakers struggle with the narrow window between a raw, messy puddle and a boring, overbaked chocolate muffin. The frustration of serving a “lava” cake that is solid all the way through is real. This recipe solves that volatility by focusing on temperature control rather than just luck.
The secret to a guaranteed molten center isn’t just the bake time; it’s the 15-minute chill step. By cooling the batter before it hits the heat, you create a thermal barrier. This ensures the outside sets into a sturdy cake wall while the heart of the dessert stays perfectly fluid. It’s a professional trick that removes the guesswork from your kitchen.
The Physics of the Molten Core
Baking at 425°F is a deliberate choice to create a massive temperature differential. At this high heat, the proteins in the eggs and the starch in the flour coagulate almost instantly upon contact with the ramekin walls. This creates the structural “shell” that holds the dessert together during the inversion process.
Therefore, the 15-minute chill step is your insurance policy. By lowering the starting temperature of the batter, the heat of the oven has to work twice as hard to reach the very center. While the outside reaches the setting point of 160°F, the core remains significantly cooler, staying in its luscious, liquid state.
Without this chill step, the heat penetrates the small 6-ounce ramekin too quickly. In a standard oven, the transition from liquid to solid happens in a matter of seconds. This thermal barrier gives you a much wider margin for error, ensuring you hit that “sweet spot” every single time you bake.
Why High-Quality Semi-Sweet Chocolate Matters
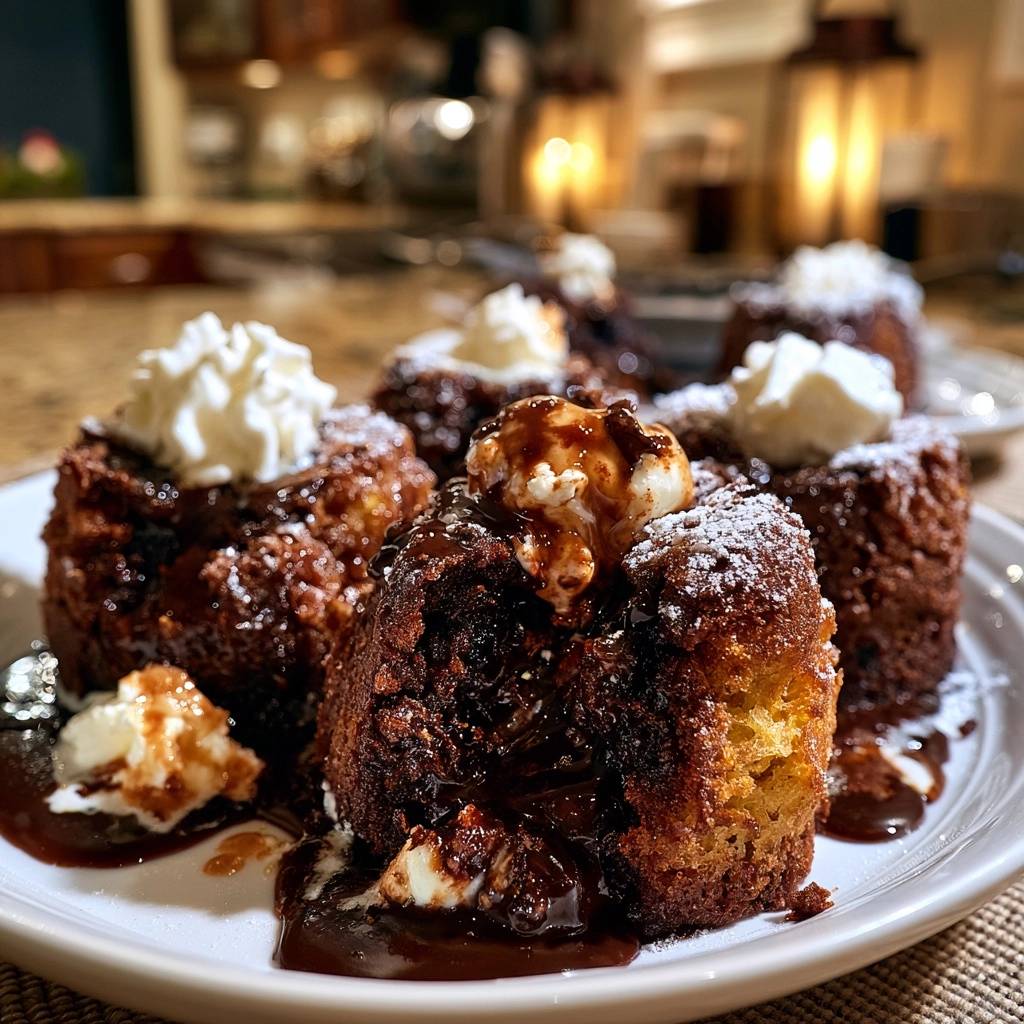
You should always reach for high-quality chocolate bars rather than standard chocolate chips for this recipe. Chocolate chips often contain stabilizers and soy lecithin designed to help them keep their shape under heat. While great for cookies, these additives prevent the smooth, silky flow required for a true lava effect.
Look for semi-sweet chocolate with a cocoa percentage between 60% and 70%. This range provides the perfect viscosity and a sophisticated balance of bitterness and sugar. Professional-grade chocolate has a higher cocoa butter content, which translates to a more luxurious mouthfeel that coats the palate without feeling waxy.
Essential Components for Decadent Chocolate Lava Cakes
Every ingredient in this short list serves a structural or textural purpose. We use two whole eggs for structure and two additional yolks for pure decadence. Those extra yolks provide the emulsifiers and fats needed to create a custard-like interior that feels much richer than a standard cake batter.
Unsalted butter is the preferred choice here because it allows you to control the seasoning precisely. You want to taste the depth of the cocoa, not a hit of salt. Furthermore, we only use two tablespoons of flour. This minimal amount provides just enough gluten to hold the walls up without making the crumb heavy or bready.
Preparing Ramekins for a Flawless Release
The “Butter and Cocoa” method is a non-negotiable step for a professional finish. Firstly, grease the ramekins thoroughly with softened butter, reaching every corner of the bottom. Instead of using white flour, which leaves unsightly pale streaks on your dark cake, use unsweetened cocoa powder to dust the inside.
In addition to the aesthetic benefits, the cocoa powder adds an extra layer of toasted chocolate flavor to the crust. Make sure to tap the ramekins upside down to remove any excess powder. A clean rim is also vital; any batter stuck to the top edge can act like glue, preventing the cake from rising evenly or releasing cleanly.
Step-by-Step: Emulsifying the Chocolate Base
Melting the chocolate and butter is the first step in building your flavor foundation. Use a microwave-safe bowl and heat in 30-second bursts, stirring vigorously between each. This prevents the chocolate from scorching, which can happen quickly due to its high sugar and fat content. If chocolate gets too hot, it becomes grainy and loses its shine.
Once the mixture is glossy and smooth, you must let it sit for about 5 minutes. This cooling period is critical because you’ll eventually fold this into your egg mixture. If the chocolate is too hot, it will scramble the eggs on contact, ruining the texture. You’re looking for a temperature that feels warm to the touch but not uncomfortably hot.
During this rest, the chocolate begins to slightly thicken, which helps it incorporate more evenly into the aerated eggs. A smooth emulsion here ensures that the final cake has a uniform crumb and a consistent molten center. Patience in this stage prevents a “broken” batter that leaks fat during the baking process.
Aerating Eggs for a Light Crumb
Since this recipe doesn’t use baking powder or soda, all the lift comes from the air you beat into the eggs. Whisk the eggs, yolks, and sugar until they reach the “ribbon stage.” This means the mixture should be pale yellow, thick, and fall off the whisk in a slow, trailing ribbon that holds its shape for a few seconds.
This aeration provides the delicate, sponge-like texture that contrasts so beautifully with the liquid core. When you fold in the chocolate and flour, do it gently with a spatula. Use a “cut and fold” motion to keep as much air in the batter as possible. Overmixing at this stage will deflate the bubbles and result in a dense, tough cake.
The Critical 15-Minute Chill Technique
This is the step that separates amateur lava cakes from restaurant-quality results. After portioning the batter into your prepared ramekins, place them in the refrigerator for exactly 15 minutes. You’ll notice the batter becomes slightly more viscous and firm as the butter and chocolate begin to set.
This density change is what protects the center from the intense 425°F heat. It essentially gives the outside of the cake a “head start” to bake while the center stays cold. By the time the center finally warms up to a liquid state, the outer walls are already baked through and strong enough to stand on their own.
Precision Baking and the Jiggle Test
When the timer hits 12 minutes, it’s time for the “jiggle test.” Carefully shake the baking sheet; the edges of the cakes should look firm and matte, but the center should have a distinct, jelly-like wobble. If the entire top looks liquid, give it another 60 to 90 seconds. If the top is completely firm, pull them out immediately.
After removing them from the oven, let the cakes rest in the ramekins for exactly one minute. This brief rest is vital for carry-over cooking. The residual heat from the ceramic ramekin finishes setting the very bottom of the cake, which becomes the top once inverted. This ensures the cake doesn’t collapse the moment it hits the plate.
Inverting the Cakes Without Structural Failure
To unmold, run a thin knife or a small offset spatula around the inside edge of the ramekin to ensure no parts are sticking. Place a dessert plate upside down over the top of the ramekin. Firmly holding both the plate and the ramekin (use a towel, it’s hot!), flip them over in one confident motion.
Let it sit inverted for about 10 seconds to allow gravity to do the work. Slowly lift the ramekin straight up. If the cake feels too fragile or you see a crack forming, don’t panic. You can always serve these directly in the ramekins; they will taste just as incredible, and the molten surprise remains intact beneath the surface.
Troubleshooting Common Lava Cake Failures
If your cake turns out like a solid muffin, the most likely culprit is overbaking or skipping the chill step. Every oven is different, so if your first batch is solid, reduce the bake time by 2 minutes next time. Also, check your oven temperature with a thermometer; many ovens run hotter than the dial suggests.
If the cake collapses or “blows out” on the plate, the walls weren’t quite set enough. This usually happens if the oven wasn’t fully preheated or if the cakes were inverted too quickly without that one-minute rest. Ensure your oven has been at 425°F for at least 20 minutes before the ramekins go in.
Elevating the Presentation with Pairings
The richness of semi-sweet chocolate begs for a bit of acidity or a temperature contrast. Fresh raspberries or a tart raspberry coulis are classic for a reason; the fruit’s brightness cuts through the heavy cocoa butter. A few pomegranate seeds can also provide a sophisticated pop of color and crunch.
For a temperature play, a dollop of cold, homemade whipped cream is essential. Use Madagascar vanilla bean paste in your cream to add tiny black flecks and a deep floral aroma. Finally, a tiny pinch of flaky sea salt on top of the finished cake will intensify the chocolate flavor and add a professional touch to the palate.
Make-Ahead Strategies for Entertaining
You can actually prepare the batter and fill the ramekins up to 24 hours in advance. Cover them tightly with plastic wrap and keep them in the refrigerator. This makes them the perfect stress-free dessert for dinner parties since the messy prep work is done long before guests arrive.
However, if the batter has been chilling for hours rather than 15 minutes, you will need to add 1 to 2 minutes to the baking time. The batter will be much colder and denser, so it takes a bit longer for the heat to penetrate. Note that these cakes do not freeze well after baking, as the “lava” will eventually soak into the cake walls.
Expert Tips for Professional Results
Firstly, always use room temperature eggs. Cold eggs can cause the melted butter and chocolate to seize up or clump, preventing a smooth emulsion. If you’re in a hurry, place the whole eggs in a bowl of warm water for 5 minutes to take the chill off before cracking them.
Secondly, sift your flour and cocoa powder. Because this recipe uses so little flour, any small clumps will be very noticeable in the finished product. Sifting ensures the dry ingredients incorporate instantly with minimal folding, which helps preserve the air you worked so hard to beat into the eggs.
Thirdly, use a heavy-duty, light-colored baking sheet. Thin pans can warp in a 425°F oven, and dark pans can absorb too much heat, scorching the bottoms of the cakes before the centers are ready. A sturdy pan provides the even heat distribution necessary for a consistent bake across all four ramekins.
Frequently Asked Questions
Can I use milk chocolate instead of semi-sweet?
It is generally not recommended. Milk chocolate has a much higher sugar content and lower cocoa butter stability, which often results in a greasy center that doesn’t hold its shape. The cake walls will also be much softer and more prone to collapsing during the inversion process.
Can I make these in a muffin tin if I don’t have ramekins?
Yes, you can use a standard muffin tin, but you must grease and cocoa-dust the wells very carefully. Since muffin wells are smaller than 6-ounce ramekins, reduce the baking time to 8-10 minutes. Be aware that releasing them from a muffin tin is much trickier than inverting individual ramekins.
Why did my chocolate seize and turn grainy when melting?
Chocolate usually seizes because of a tiny amount of moisture (like a drop of water from a wet spoon) or excessive heat. Ensure all your equipment is bone-dry. If using a microwave, never skip the stirring steps, as “hot spots” in the bowl can easily scorch the chocolate and ruin the texture.
How do I know if my oven is actually at 425°F?
Most home ovens are off by 10 to 25 degrees. For a precision recipe like lava cakes, I highly recommend using a cheap oven thermometer. If your oven is too cool, the cake will be raw; if it’s too hot, you’ll end up with a solid muffin before the timer even goes off.
Can I store and reheat leftovers?
You can store leftover cakes in an airtight container in the fridge for up to 3 days. To reheat, use the microwave for about 15-20 seconds. While the center won’t be quite as “flowy” as the first bake, it will still be soft and delicious. Do not freeze these, as the texture of the molten core becomes grainy upon thawing.
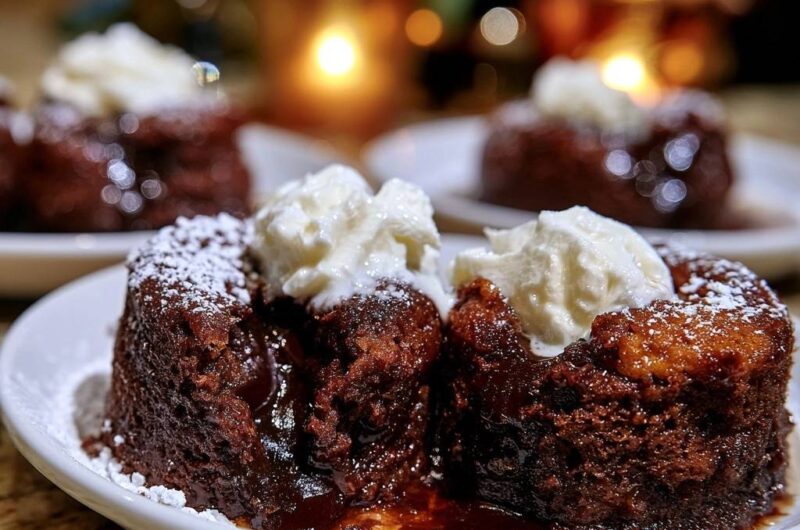
Decadent Chocolate Lava Cakes
Course: DessertCuisine: French and AmericanDifficulty: easy4
servings15
minutes12
minutes42
Minutes410
kcalFrench and American
Ingredients
6 ounces high-quality semi-sweet chocolate, chopped
1/2 cup unsalted butter
2 large eggs plus 2 egg yolks, room temperature
1/4 cup granulated sugar
1 pinch salt
2 tablespoons all-purpose flour
1 tablespoon unsweetened cocoa powder (for dusting ramekins)
Powdered sugar for dusting
Whipped cream for topping
Directions
- Preheat your oven to 425 degrees F (218 degrees C). Generously grease four 6-ounce ramekins with butter and dust them with cocoa powder, tapping out the excess to ensure a clean release and a dark, professional finish.
- Melt the chopped chocolate and butter together in a microwave-safe bowl in 30-second increments, stirring in between until completely smooth. Let the mixture cool for about 5 minutes so it doesn’t scramble the eggs.
- In a separate medium bowl, beat the eggs, egg yolks, sugar, and salt with a whisk or electric mixer until the mixture is thick, pale yellow, and doubled in volume.
- Gently fold the melted chocolate mixture into the egg mixture using a spatula. Sift the flour over the top and fold it in just until no white streaks remain. Do not overmix, or the cake will lose its tender crumb.
- To solve the overbaking problem, pour the batter into the prepared ramekins and place them in the refrigerator for exactly 15 minutes before baking. This chills the center of the batter, ensuring it stays liquid while the high heat of the oven sets the outer walls.
- Place the chilled ramekins on a sturdy baking sheet and bake for 12 to 14 minutes. The sides should be firm and slightly browned, but the center should still look soft and have a distinct jiggle when shaken.
- Let the cakes cool in the ramekins for exactly 1 minute. Run a thin knife or offset spatula around the edges to loosen, then place a plate over the top of each ramekin and invert.
- Dust heavily with powdered sugar and top with a generous dollop of whipped cream. Serve immediately while the center is hot and flowing.
Notes
- The secret to the molten center is the 15-minute refrigeration step before baking, which prevents the middle from setting as quickly as the exterior.