
Most grain bowls suffer from a fatal flaw: the dreaded mush factor. You’ve likely experienced it before—a pile of water-logged quinoa that turns your vibrant toppings into a soggy mess. This recipe changes the game by focusing on high-contrast textures, featuring a specific steam-dry method for the grains and a shatteringly crisp coating on the chicken.
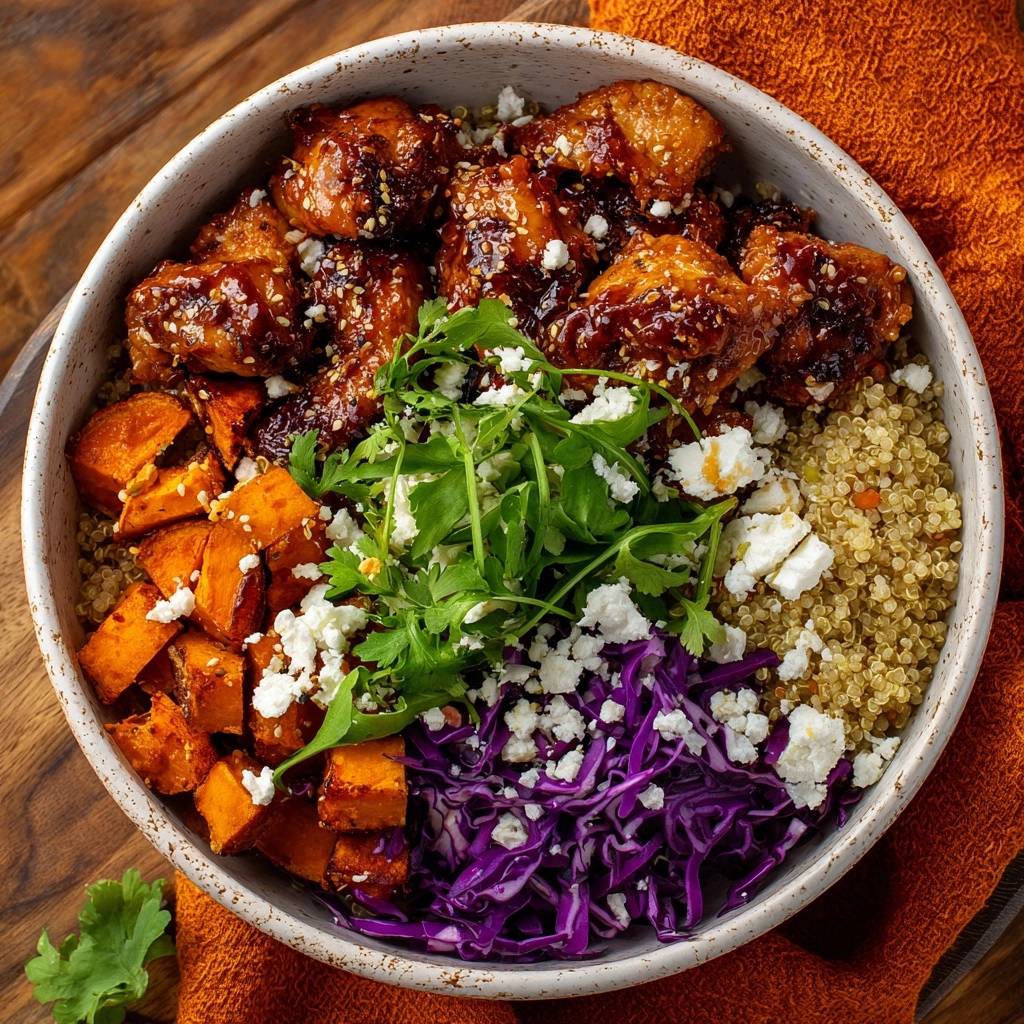
The beauty of these Glazed Chicken and Sweet Potato Quinoa Bowls lies in the balance of flavors. You get the earthy sweetness of roasted potatoes, the sharp tang of feta, and a sticky, lacquered glaze that clings to the chicken without making it soft. It’s a restaurant-quality meal that actually holds up during meal prep because we’ve engineered the moisture out of the base.
The secret to that addictive crunch on the chicken is a simple cornstarch dredge. Unlike flour, cornstarch creates a thin, gluten-free barrier that crisps up instantly in a hot skillet. This crust acts like a sponge for the glaze, soaking up the honey-garlic flavors while maintaining its structural integrity against the fresh greens and cabbage.
The Science of Fluffy, Non-Mushy Quinoa
Quinoa isn’t actually a grain; it’s a seed, and it behaves differently than rice or oats. Most instructions on the back of the bag suggest a 2:1 water-to-quinoa ratio, which is almost always too much liquid. This excess water causes the delicate “tail” or germ of the seed to over-expand, resulting in a texture that feels more like porridge than a fluffy base.
To achieve a distinct, caviar-like pop in every bite, we use a 1.5:1 ratio. This tighter ratio ensures the quinoa absorbs just enough water to cook through without becoming saturated. However, the real magic happens during the rest period. By leaving the lid on for ten minutes after the heat is off, you allow the residual steam to finish the cooking process gently.
This “Steam-Dry” method allows the moisture to distribute evenly throughout the pot. When you finally lift the lid and fluff it with a fork, the remaining steam escapes into the air rather than being trapped in the seeds. You’re left with individual grains that are light, airy, and ready to soak up the juices from the chicken and sweet potatoes.
Why Rinsing Saponins Changes Everything
If you’ve ever found quinoa to have a bitter or “soapy” aftertaste, saponins are the culprit. This is a natural coating the plant produces to ward off insects. Even if the package says “pre-washed,” a quick thirty-second rinse in a fine-mesh strainer under cold water makes a massive difference in the final flavor profile.
Rinsing removes that bitter edge, allowing the natural, nutty sweetness of the quinoa to shine. In this specific bowl, a clean-tasting base is essential. It provides a neutral canvas that lets the bold honey-garlic glaze and the peppery arugula take center stage without any distracting metallic or bitter notes.
Essential Components for the Perfect Texture Contrast
When building a bowl, the choice of protein determines the success of the glaze. While many reach for chicken breasts, chicken thighs are the superior choice here. Thighs contain more intramuscular fat, which means they stay juicy and tender even after being seared at high heat to achieve that golden-brown crust.
The cornstarch coating is our second essential component. It creates a crisp, craggy surface area that is perfect for “trapping” the sauce. Because cornstarch is pure starch with no protein, it fries up much crispier than all-purpose flour. This ensures that even after you toss the chicken in the liquid glaze, it retains a satisfying bite.
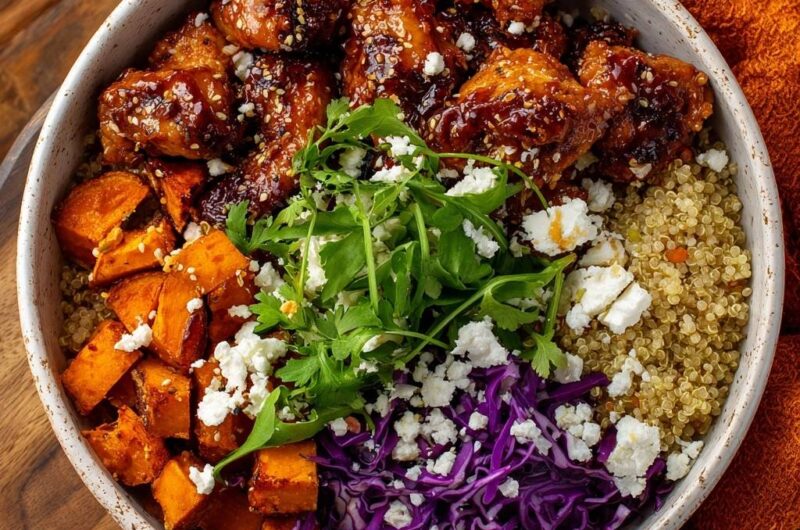
Freshness provides the final contrast. The shredded red cabbage isn’t just for color; it adds a raw, peppery crunch that offsets the soft, roasted texture of the sweet potatoes. By combining cooked and raw elements, you keep the palate engaged and prevent the meal from feeling heavy or one-dimensional.
Selecting the Right Sweet Potato Variety
Not all sweet potatoes are created equal when it comes to roasting. For this recipe, look for Jewel or Beauregard varieties, often labeled simply as “yams” in US grocery stores. These have a higher sugar content and orange flesh that caramelizes beautifully at 400 degrees F.
The high heat of the oven triggers the Maillard reaction, turning the natural sugars into a deep, savory sweetness. If you use a starchier variety like the Japanese white sweet potato, you’ll get a fluffier interior but less of that sticky, caramelized exterior that pairs so well with the honey-garlic chicken.
The Role of Feta and Fresh Aromatics
A great dish needs a hit of acid and salt to wake up the flavors. Feta cheese provides a creamy, salty punch that cuts right through the richness of the glazed chicken. It acts as a bridge between the warm roasted components and the cool, fresh greens.
Arugula and cilantro bring the “aromatic” element. Arugula’s natural pepperiness balances the sweetness of the honey and potatoes, while cilantro adds a bright, citrusy finish. Without these fresh herbs, the bowl can lean too far into the “sweet” category; with them, it becomes a balanced, complex meal.
Step-by-Step: Achieving the Perfect Sear and Glaze
Success in the kitchen often comes down to heat management. You want your skillet hot enough to sear the chicken instantly, but you need to be ready to pivot once the glaze hits the pan. If the pan is screaming hot when you add the sauce, the sugars will burn before they have a chance to coat the meat.
Start by ensuring your chicken pieces are relatively uniform in size. This ensures they all finish cooking at the same time. When you toss them in the cornstarch, shake off any excess. You want a thin, even veil of starch, not a thick paste, which can become gummy in the skillet.
Once the chicken is golden and the potatoes are tender, the final assembly happens fast. This is where you transform individual ingredients into a cohesive dish. The goal is a “lacquered” finish—a sauce that is thick enough to coat the back of a spoon and sticks to the chicken like a second skin.
Phase 1: Roasting for Maximum Caramelization
When you spread your cubed sweet potatoes on the baking sheet, give them space. Overcrowding the pan is the fastest way to end up with soggy potatoes. If the cubes are touching, they release steam, which prevents the edges from getting those crispy, dark brown bits.
You’ll know they are done when the centers feel soft when pierced with a fork and the bottoms have a deep, golden hue. Don’t be afraid of a little char on the edges; that bitterness provides a necessary counterpoint to the sweet glaze we’ll be adding later.
For another simple yet satisfying meal, check out this Chicken & Sweet Potato Rice Bowl.
Phase 2: The Cornstarch Dredge and Skillet Technique
Heat your olive oil until it shimmers before adding the chicken. Use the “single layer” rule: if you can’t see the bottom of the pan between the chicken pieces, you’re cooking too much at once. Work in batches if necessary to maintain the pan’s temperature.
Resist the urge to move the chicken too soon. Let it sit undisturbed for at least 3-4 minutes. This allows the cornstarch to form a solid crust. Once it releases easily from the pan, flip the pieces to brown the other side. The chicken should sound “clinky” against the side of the pan when it’s ready.
Phase 3: Reducing the Sauce to a Lacquer
When you pour the glaze into the skillet, it will bubble vigorously. This is the water evaporating, leaving behind the concentrated sugars and aromatics. As the sauce reduces, it will transition from a thin liquid to a thick, glossy syrup.
Toss the chicken constantly during this stage. The residual cornstarch from the chicken’s crust will actually help thicken the sauce, creating a velvety emulsion. Stop as soon as the sauce clings to the meat; if you go too long, the sugars will break down and the sauce may become oily.
Troubleshooting Common Grain Bowl Pitfalls
If your chicken isn’t getting crispy, your pan likely wasn’t hot enough or you crowded the pieces. To fix this, remove the chicken, wipe the pan, add fresh oil, and get it shimmering before returning the chicken to the heat. Ensure the chicken is dry before dredging in cornstarch, as moisture is the enemy of a good sear.
For quinoa that feels too crunchy or undercooked, don’t add more water directly to the pot. Instead, sprinkle a tablespoon of water over the top, cover tightly, and put it back on low heat for 5 minutes. This creates a mini-steam chamber that softens the grains without drowning them.
Flavor Variations and Protein Swaps
This bowl is incredibly versatile. If you want a vegetarian option, roasted chickpeas make an excellent substitute for the chicken. Toss the chickpeas in the cornstarch and pan-fry them exactly like the chicken for a crunchy, protein-packed alternative that holds the glaze beautifully.
You can also play with the acidity. If you find the bowl too sweet, swap the red cabbage for quick-pickled radishes or red onions. Simply soak sliced radishes in apple cider vinegar and a pinch of salt for 10 minutes. The sharp, vinegary bite cuts through the honey-garlic sauce and adds a bright pop of pink to the presentation.
Meal Prep and Storage Strategies
To keep these bowls fresh for up to four days, store the components strategically. Keep the quinoa, sweet potatoes, and chicken in one airtight container, but keep the fresh cabbage, greens, and feta in a separate small bag or container. This prevents the moisture from the vegetables from softening the chicken crust.
When reheating, the oven or an air fryer is your best friend. A quick 5-minute blast at 350 degrees F will re-crisp the chicken and potatoes far better than a microwave. If you must use a microwave, heat the quinoa and chicken separately, then add the cold, fresh components last to maintain that vital temperature contrast.
Expert Tips for Professional Presentation
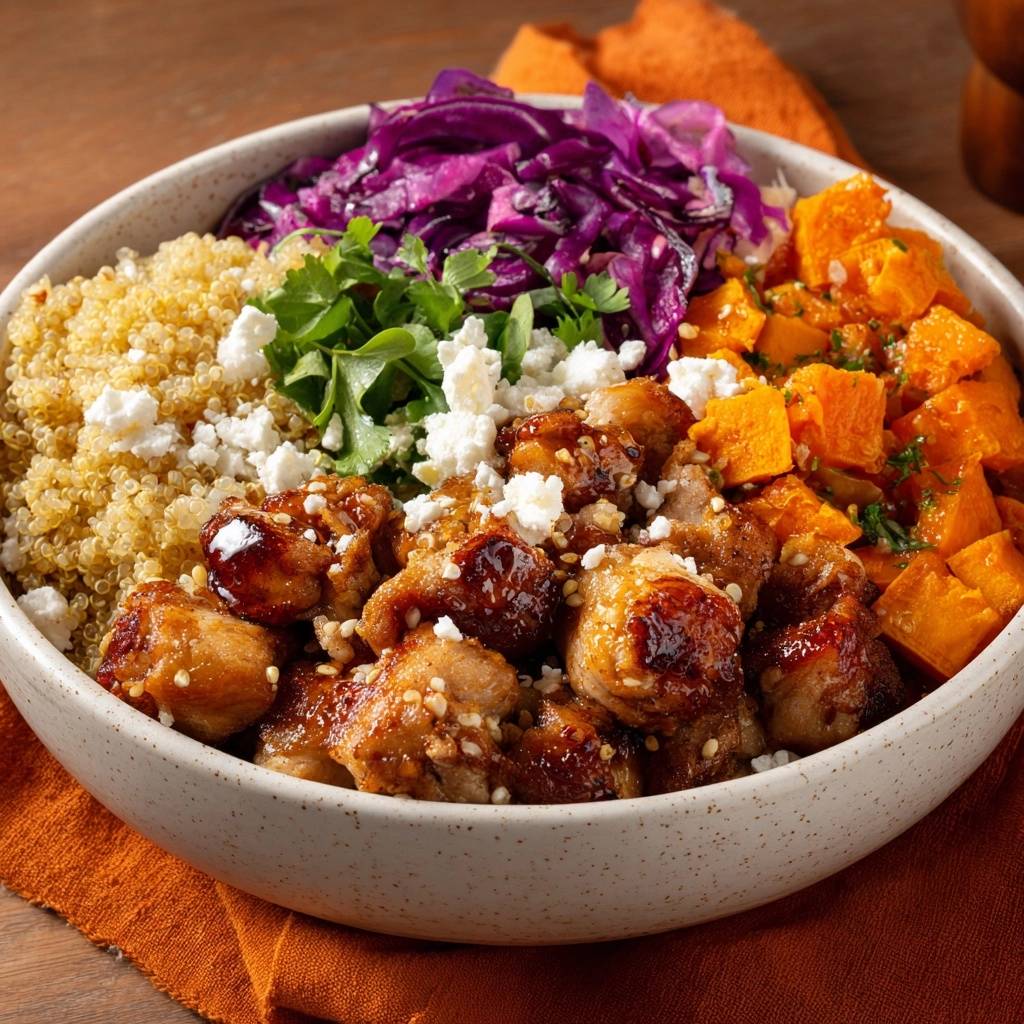
Presentation is about more than just looks; it’s about how the flavors hit your tongue. Arrange your bowl in sections rather than mixing everything together immediately. This allows you to control the ratio of ingredients in every forkful and keeps the colors vibrant.
Place the fresh arugula and cilantro mix in the center at the very last second. The residual heat from the chicken and potatoes will slightly wilt the greens, releasing their oils and aroma without making them slimy. Top with the feta last so the white crumbles stand out against the purple cabbage and orange potatoes.
Choosing the Right Bowl for Heat Retention
A wide, shallow ceramic bowl is ideal for this dish. Ceramic holds heat better than glass, keeping your chicken and quinoa warm while you eat. The shallow shape provides more surface area, which means you can see all the beautiful components at once and get a bit of everything in every single bite.
How do I prevent the quinoa from sticking to the bottom of the pot?
The key is using a heavy-bottomed pot and the lowest heat setting possible. Once the water reaches a boil and you turn the heat down, the quinoa should gently simmer. If your stove runs hot, use a heat diffuser or move the pot to a smaller burner. The 10-minute rest period with the heat off also helps the grains release naturally from the bottom as they finish steaming.
Can I use frozen sweet potatoes for this recipe?
You can, but the texture will be softer. Frozen sweet potatoes are usually blanched before freezing, which breaks down their cell structure. To get them as crispy as possible, toss them in a little extra olive oil and roast them directly from frozen at 425 degrees F. Avoid thawing them first, as this will make them mushy.
What is the best way to rinse quinoa without a fine-mesh strainer?
If you don’t have a fine-mesh strainer, you can use the “bowl and plate” method. Place the quinoa in a large bowl, cover with water, and swish it around with your hand. Carefully tilt the bowl to pour off the water while holding a plate over the edge to catch the grains. Repeat this 3-4 times until the water runs clear.
Why did my chicken glaze turn out runny instead of sticky?
A runny glaze usually means it hasn’t reduced enough or the pan wasn’t hot enough when the sauce was added. The sauce needs to boil to evaporate the water and thicken the sugars. If it’s too thin, keep simmering it over medium heat for another minute or two. The cornstarch on the chicken should naturally help thicken it as you toss the pieces.
Is there a substitute for feta cheese?
If you aren’t a fan of feta, goat cheese is a wonderful alternative that offers a similar creamy, tart flavor. For a milder option, try shaved parmesan or even small cubes of fresh mozzarella. If you want to keep it dairy-free, a dollop of hummus or a few slices of avocado can provide that necessary creamy element to balance the crunch.
How can I make this recipe spicier?
The honey-garlic base is quite mild, but it’s easy to kick up the heat. Add a teaspoon of red pepper flakes to the oil before frying the chicken, or whisk a tablespoon of sriracha or chili-garlic sauce into the glaze before pouring it into the pan. The sweetness of the potatoes and honey will balance the heat perfectly.
Glazed Chicken and Sweet Potato Quinoa
Course: Main CourseCuisine: AmericanDifficulty: medium4
servings15
minutes25
minutes510
kcal40
MinutesA nutritious and flavorful meal prep bowl featuring crispy cornstarch-coated chicken thighs in a honey garlic glaze, roasted sweet potatoes, and a specialized cooking technique to ensure quinoa is never soggy.
Ingredients
1 cup quinoa, rinsed thoroughly
1.5 cups water
1 lb chicken thighs, cut into bite-sized pieces (for maximum juiciness)
1/2 cup cornstarch (for the crispy coating shown in the image)
2 large sweet potatoes, cubed
2 cups shredded red cabbage
1/2 cup crumbled feta cheese
1/2 cup fresh cilantro and arugula mix
1/2 cup honey garlic glaze or teriyaki sauce
3 tablespoons olive oil (divided)
1 tablespoon sesame seeds
Salt and pepper to taste
Directions
- To solve the soggy quinoa problem, place rinsed quinoa and 1.5 cups of water in a pot. Bring to a boil, then reduce heat to the lowest setting, cover, and simmer for 15 minutes. Turn off the heat but DO NOT open the lid. Let it sit undisturbed for 10 minutes. This trapped steam finishes the cooking without adding excess water. Finally, fluff with a fork to release remaining moisture.
- Preheat your oven to 400 degrees F. Toss cubed sweet potatoes with 1 tablespoon of olive oil, salt, and pepper. Spread on a baking sheet and roast for 20 to 25 minutes until the edges are caramelized and tender.
- While potatoes roast, prepare the crispy chicken. Season chicken pieces with salt and pepper, then toss in cornstarch until evenly coated. Heat 2 tablespoons of olive oil in a large skillet over medium-high heat. Fry the chicken in a single layer until a golden-brown crust forms on all sides and the chicken is cooked through (about 8-10 minutes).
- Once the chicken is crispy, pour the glaze into the skillet. Toss rapidly for 1-2 minutes over medium heat until the sauce reduces into a thick, sticky lacquer that clings to the crispy coating. Sprinkle with sesame seeds.
- Prepare the fresh components by finely shredding the red cabbage and washing the cilantro and arugula.
- Assemble the bowls by placing a generous bed of the fluffy, dry-steamed quinoa at the bottom. Arrange the sticky glazed chicken, roasted sweet potatoes, and shredded cabbage in distinct sections.
- Garnish the center with the fresh green herb mix and top the entire bowl with a generous amount of crumbled feta cheese. Serve immediately to enjoy the contrast between the hot, crispy chicken and the fresh, cool greens.
Notes
- The key to non-soggy quinoa is the 10-minute resting period with the lid closed after simmering. Use chicken thighs instead of breasts for maximum juiciness and flavor.


