
Imagine biting into a hash brown that actually shatters. You know that specific, high-pitched crunch that gives way to a cloud-like, steaming interior? That is the holy grail of breakfast, yet most home versions end up as a sad, grey, mushy pile of disappointment. It’s frustrating when you follow a recipe only to have the potatoes steam in their own juices rather than fry into a golden disc.
The secret isn’t a fancy gadget or a secret ingredient; it’s a technical understanding of moisture management and starch behavior. Most people fail because they underestimate how much water a potato actually holds. By mastering the “double-squeeze” method and controlling the surface starch, you can achieve restaurant-quality results that stay crispy even after they leave the pan.
I’ve found that the real trick lies in the “papery” feel of the shreds before they ever touch the oil. If your potatoes feel damp, they’re going to fail. We’re going to dive deep into the physics of the potato to ensure every single patty you flip is a structural masterpiece with those iconic lacy, browned edges.
The Physics of Potato Moisture and Starch
When it comes to frying, water is the ultimate enemy of the Maillard reaction. This chemical reaction is what creates that beautiful brown color and savory flavor we crave. If there is excess moisture on the surface of your potato shreds, the heat of the oil will be spent evaporating that water into steam rather than browning the potato.
Russet potatoes are the non-negotiable choice for this dish because of their high starch and low moisture content. Unlike waxy potatoes, Russets have a cellular structure that allows them to dehydrate quickly on the outside while remaining fluffy on the inside. This high starch content also acts as a natural glue, helping the patty hold its shape without becoming a gummy mess.
Why Russets Outperform Waxy Varieties
If you try to use a Yukon Gold or a Red potato, you’ll likely end up with a soggy center. These varieties have more sugar and moisture, which leads to a limp texture. Russets, however, have large starch granules that swell and separate when cooked, creating that perfect “fluff” factor. This internal texture provides a beautiful contrast to the dehydrated, crispy exterior shell.
Essential Components for Structural Integrity
While the potato is the star, the supporting cast is what keeps the show together. We use a tiny amount of all-purpose flour as a structural binder. It might seem insignificant, but that tablespoon of flour absorbs any microscopic surface moisture that the towel missed. This creates a thin, starchy paste that welds the shreds together into a cohesive patty.
For seasoning, onion powder is vastly superior to fresh onions in this specific application. Fresh onions are full of water, and as they cook, they release that moisture directly into your crisping potato shreds. Onion powder provides that savory, aromatic punch without compromising the structural integrity of the crust. Fine sea salt and cracked black pepper round out the profile, ensuring the flavor is as bold as the crunch.
Selecting the Right Cooking Fat
The choice of fat determines the final flavor and the crispness level. Vegetable oil is a reliable workhorse because it has a high smoke point, allowing you to get the pan screaming hot without the oil breaking down. However, clarified butter, or ghee, is the gold standard for flavor. Since the milk solids have been removed, it won’t burn like regular butter, but it still provides that rich, nutty aroma that pairs perfectly with potatoes.
The Double-Squeeze Technique for Maximum Crunch
This is the most critical part of the entire process. After grating your potatoes, you must transfer them to a clean kitchen towel or cheesecloth. Twist the towel and squeeze with all your might over the sink. You’ll be shocked at how much liquid comes out. But don’t stop there; the “rest and repeat” method is the real pro move.
Let the potatoes sit in the towel for about two minutes. This brief rest allows the cell walls to relax and release even more trapped moisture. Squeeze a second time, and you’ll find another few tablespoons of liquid. By the time you’re done, the potato shreds should feel dry, papery, and almost brittle to the touch. This is the only way to ensure they fry instead of steam.
Step-by-Step: Constructing Golden Crispy Hash Brown Patties
Once your potatoes are bone-dry, move them to a bowl and work quickly. You want to toss them with the flour and seasonings immediately. If you let the salted potatoes sit for too long, the salt will begin to draw out even more internal moisture, making the mixture wet again. The goal is to have every shred lightly coated in a dry seasoning film.
The flour should be distributed evenly so there are no clumps. This ensures that when the patty hits the hot oil, the flour instantly fries into a crisp lattice. If the mixture looks even slightly wet or shiny, you haven’t squeezed enough or you’ve waited too long to start frying.
Achieving the Perfect Pan Sear
Your oil needs to be shimmering and just starting to show tiny wisps of smoke before the potatoes go in. If the oil is too cold, the potatoes will simply soak it up like a sponge, resulting in a greasy, heavy patty. You want to hear a loud, aggressive sizzle the moment the potato hits the metal.
Avoid the temptation to overcrowd the pan. If you put too many patties in at once, the temperature of the oil will plummet. This causes the potatoes to release moisture and stick to the bottom. Cook in batches if necessary to maintain that high-heat environment required for a shatter-crisp crust.
The Art of the Metal Spatula Press
Once the potato mounds are in the pan, use a sturdy metal spatula to press them down firmly. This increases the surface area contact with the hot pan, ensuring every bit of potato gets browned. Don’t worry about making them perfectly neat; you actually want “feathered” edges.
Those thin, wispy shreds that stick out around the perimeter of the patty will cook faster than the center. These become the extra-crunchy, lacy bits that are arguably the best part of the hash brown. Pressing down also helps the binder do its job, locking the shreds into a solid disc that won’t fall apart when you flip it.
If you enjoy crispy textures, you might also like these crispy roasted potato wedges.
Troubleshooting Common Hash Brown Failures
If your patties are falling apart, it’s usually due to one of two things: too much moisture or flipping too early. If the crust hasn’t fully set, the structural bond isn’t strong enough to survive the flip. Wait until you see a deep, dark golden ring around the bottom edges before you even think about sliding that spatula underneath.
If your potatoes are turning a weird grey color, that’s just oxidation. It happens when the starch reacts with oxygen in the air. While it looks unappealing, it doesn’t affect the taste. To prevent this, work quickly once the potatoes are peeled. If you’re prepping a large batch, you can keep the grated shreds in a bowl of cold water with a squeeze of lemon juice, but you must dry them exceptionally well afterward.
Optimal Serving Pairings and Presentation
These patties are the ultimate canvas for a hearty breakfast. They pair beautifully with soft-scrambled eggs, where the creamy texture of the eggs offsets the crunch of the potato. For a modern twist, try topping them with smashed avocado, a sprinkle of chili flakes, and a squeeze of lime.
For a hearty meal that’s sure to satisfy, try this crispy fried chicken and mashed potatoes.
The most important tip for serving is the cooling method. Never place hot hash browns directly onto a paper towel. The heat from the patty will create steam against the paper, which then gets absorbed back into the bottom of the hash brown, making it soggy. Instead, use a wire cooling rack. This allows air to circulate around the entire patty, keeping it “shatter-crisp” on both sides.
Make-Ahead Strategies and Freezing Instructions
You can actually make your own “convenience” hash browns that taste better than the boxed stuff. To freeze them, par-fry the patties for about 3 minutes per side until they are just starting to turn golden but aren’t fully crisp. Let them cool completely on a wire rack, then freeze them in a single layer on a baking sheet.
Once they are frozen solid, transfer them to a freezer bag. When you’re ready for breakfast, don’t thaw them! You can pop them straight into an air fryer at 400°F for about 8-10 minutes or bake them in a hot oven. This second “cook” finishes the browning process and results in an incredibly crispy texture with zero morning prep work.
Expert Tips for Flavor Customization
Once you’ve mastered the base technique, you can start playing with flavors. A teaspoon of smoked paprika adds a wonderful depth and a hint of “bacon-like” aroma without using meat. Garlic powder or finely minced fresh chives can also be tossed in with the flour for an extra savory kick.
For a truly decadent version, try a cheese-crusted hash brown. About one minute before the patty is finished cooking, sprinkle a tablespoon of finely grated parmesan directly onto the top, then flip it over for the final 30 seconds. The cheese will melt and fry into a lacy, salty crust that takes the crunch to a whole new level.
What to Try Next
Round out your meal with something sweet from these bread and dessert ideas.
- For a delightful baked treat, consider making this chocolate chip walnut banana bread, perfect for a comforting finish.
- If you’re craving something rich and chocolatey, this decadent chocolate lava cake recipe offers a gooey center that complements any meal.
Frequently Asked Questions
Can I use frozen shredded potatoes for this recipe?
Yes, you can use frozen shreds, but the preparation changes slightly. You must thaw them completely first. Frozen potatoes release a significant amount of water as they defrost, so the “double-squeeze” technique is even more important here. Once thawed and squeezed bone-dry, follow the recipe as written, including the addition of flour to help them bind.
Why did my hash browns stick to the pan?
Sticking usually happens for two reasons: the pan wasn’t hot enough or the pan isn’t well-seasoned. Always wait for the oil to shimmer before adding the potatoes. If you’re using a stainless steel skillet, try the “water drop” test; if a drop of water dances across the surface, it’s ready. Using a heavy-bottomed cast iron or a high-quality non-stick pan also helps significantly with release.
Can I bake these instead of frying them?
You can bake them, but you won’t get the same “shatter-crisp” texture. To bake, brush a sheet pan generously with oil, shape the patties, and bake at 425°F, flipping halfway through. For the best results, I recommend par-frying them in a pan first to set the crust, then finishing them in the oven if you are cooking for a large crowd.
How do I keep a large batch warm without them getting soggy?
The best way to keep hash browns warm is in a 200°F oven. Place a wire cooling rack inside a large baking sheet and set the finished patties on the rack. This keeps them off the flat surface of the pan, preventing steam buildup. They will stay perfectly crispy for about 30 to 45 minutes using this method.
What is the best way to reheat leftovers?
Avoid the microwave at all costs, as it will turn the potatoes into a gummy, soft mess. The best way to reheat is in a dry skillet over medium heat for about 2 minutes per side. Alternatively, an air fryer at 375°F for 3-4 minutes will bring back that original crunch perfectly. Store leftovers in an airtight container in the fridge for up to 3 days.
Hash Brown Patties
Course: BreakfastCuisine: AmericanDifficulty: easy4
servings15
minutes10
minutes210
kcal25
MinutesA foolproof recipe for crispy hash browns using Russet potatoes and a specific moisture-removal method to ensure a golden, crunchy exterior and tender center.
Ingredients
2 pounds Russet potatoes, peeled
1/2 teaspoon fine sea salt
1/2 teaspoon cracked black pepper
1/2 teaspoon onion powder
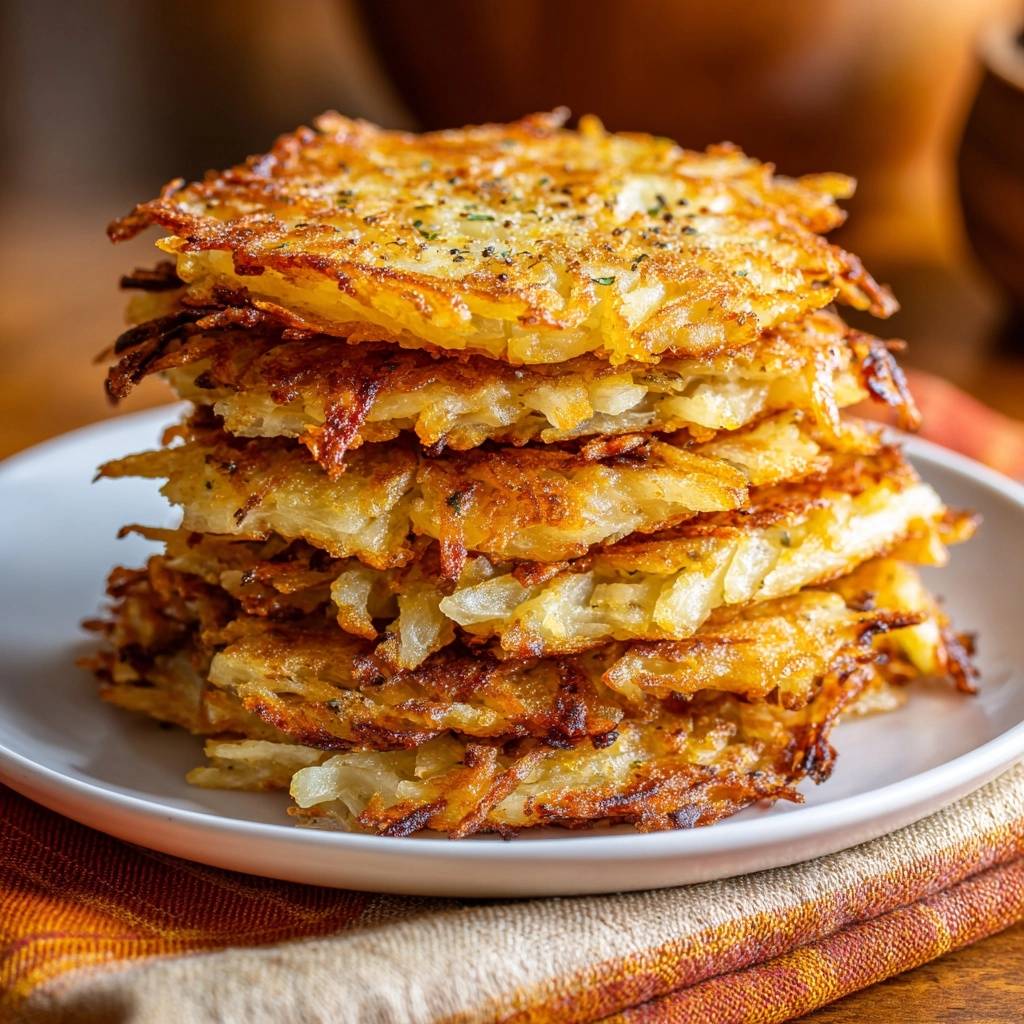
1 tablespoon all-purpose flour (essential for the structural integrity shown in the image)
1/3 cup vegetable oil or clarified butter
1 tablespoon fresh parsley or chives, finely chopped (for garnish)
Directions
- Grate the peeled potatoes using the large holes of a box grater.
- Place the shredded potatoes into a clean kitchen towel or several layers of cheesecloth. This is the critical step: twist the towel and squeeze with all your might over the sink. Let the potatoes sit for 2 minutes, then squeeze a second time. You must remove all liquid until the potato shreds feel dry and papery to the touch.
- Transfer the dry potatoes to a bowl. Sprinkle with the flour, salt, pepper, and onion powder. Toss immediately to coat. The flour absorbs any microscopic surface moisture and helps the lacy edges crisp up without the patty falling apart.
- Heat the oil in a large heavy-bottomed skillet over medium-high heat. The oil must be shimmering and hot before you add the potatoes to prevent sticking.
- Scoop about 1/2 cup of the potato mixture into the pan for each patty. Press down firmly with a metal spatula to flatten them into 1/2 inch thick rounds. Ensure the edges are slightly feathered for that extra-crispy visual effect.
- Fry for 4 to 5 minutes without moving them. This allows the deep golden crust to fully set.
- Flip carefully using a wide metal spatula and cook the other side for another 4 minutes until deep golden brown and crispy.
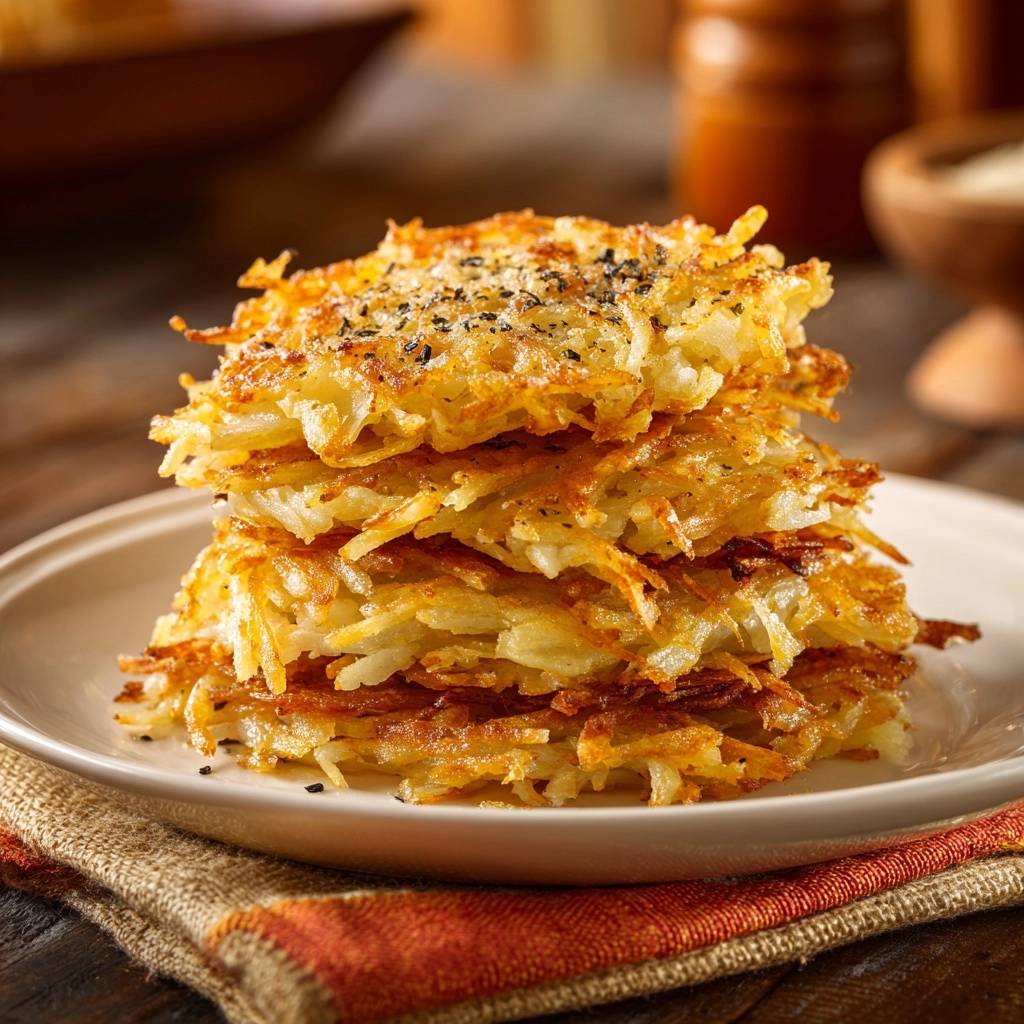
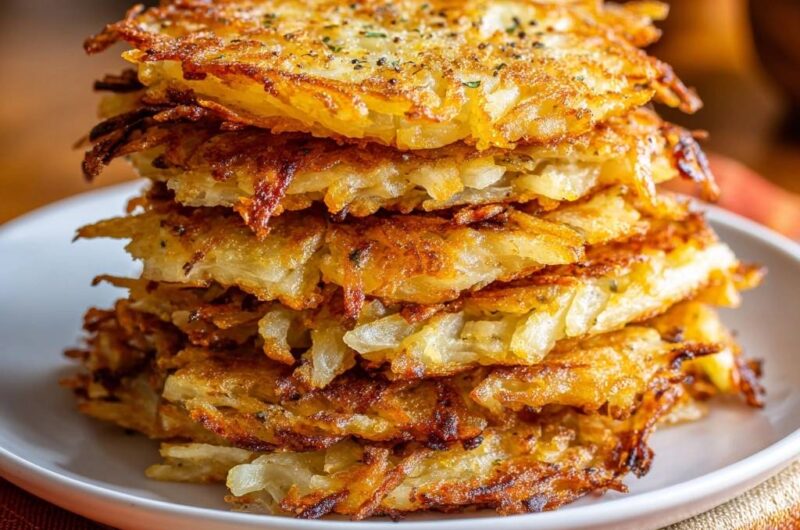
- Drain on a wire rack rather than a paper towel to keep the bottom from steaming. Garnish with extra cracked pepper and fresh herbs. Serve immediately while the exterior is still “shatter-crisp.”
Notes
- Drain the finished patties on a wire rack instead of paper towels to prevent them from steaming and becoming soft. The small amount of flour is essential for structural integrity and extra-crispy edges.


