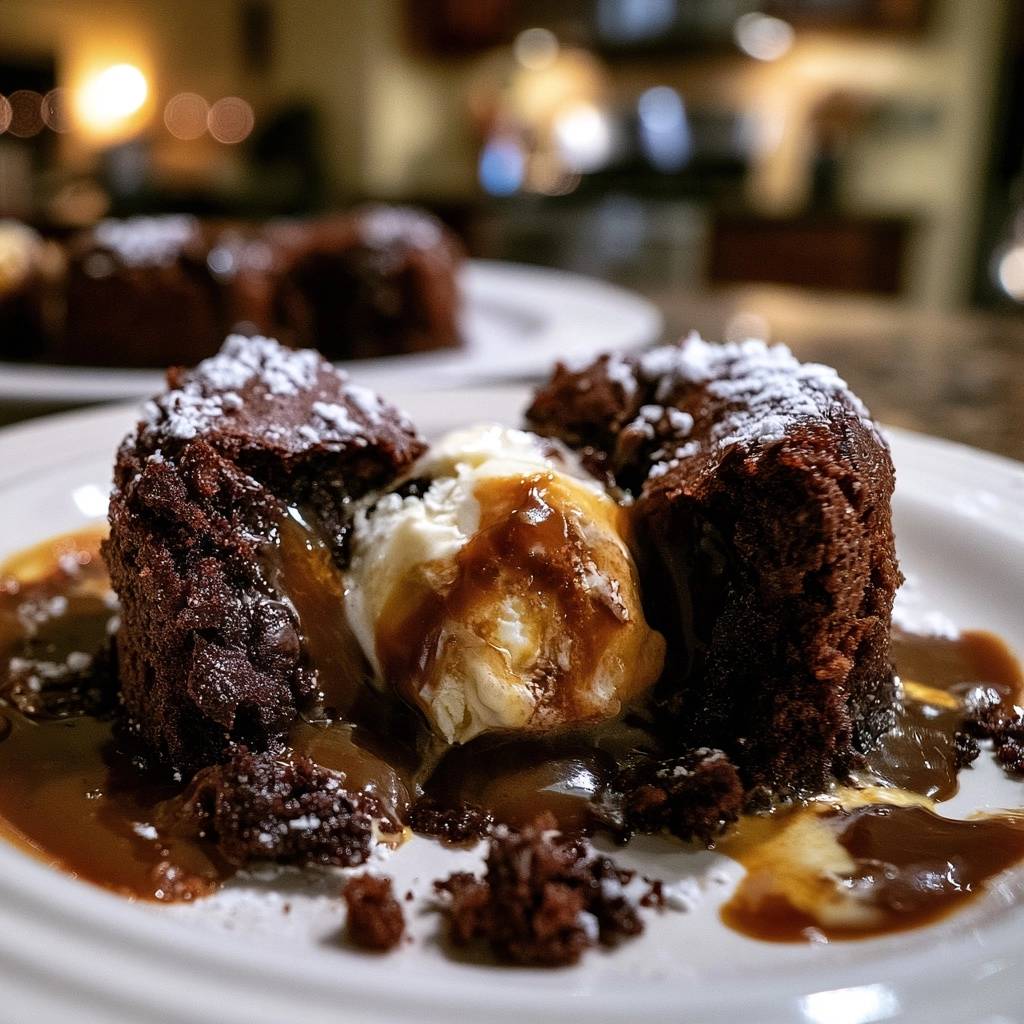
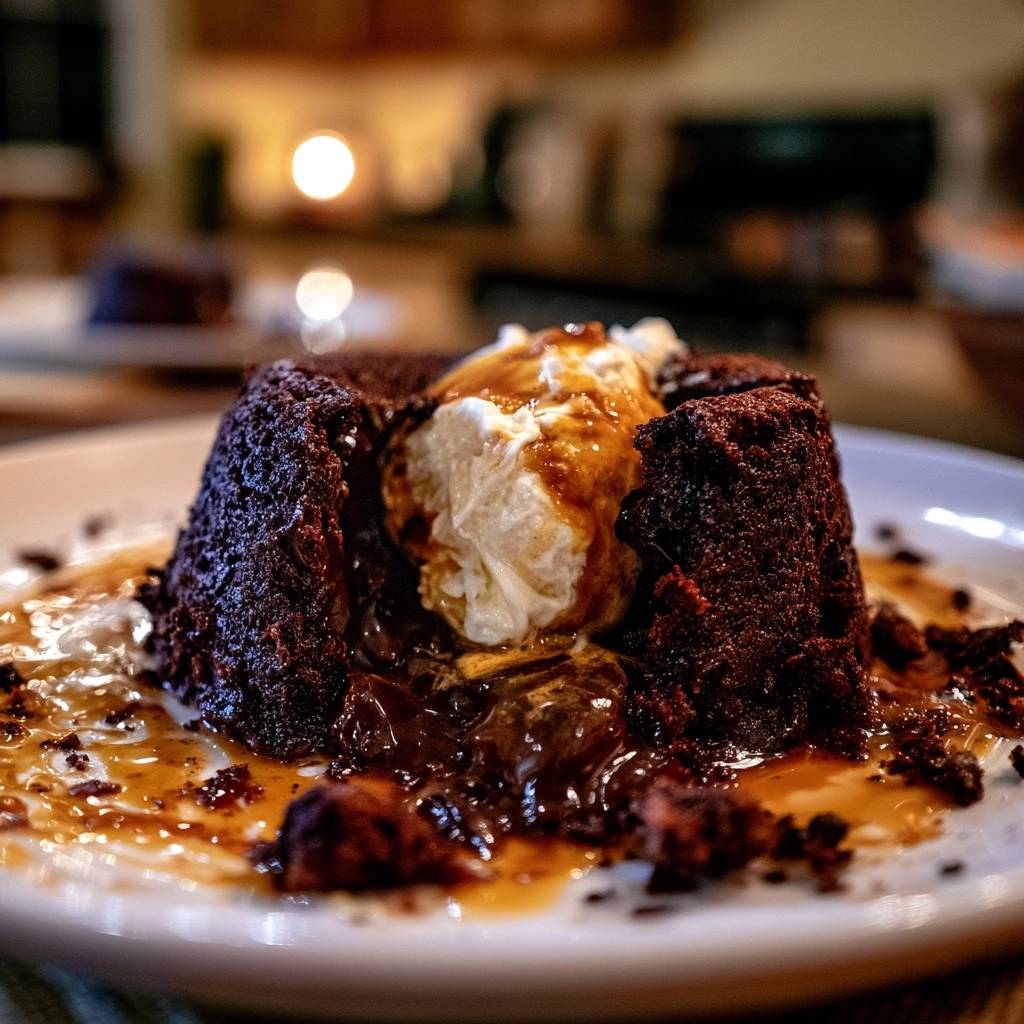
Imagine plunging your spoon into a warm, velvet-soft chocolate cake and watching a river of dark cocoa and shimmering gold caramel spill across the plate. This isn’t just a dessert; it’s a sensory event that balances the deep, earthy bitterness of 60% cacao with the sharp, buttery bite of sea salt. The outer shell offers a delicate, sponge-like resistance before giving way to a center that feels like liquid silk on the tongue.
Most home bakers struggle with the “lava” part because they rely on underbaking the batter, which often leads to a raw, floury taste or a cake that collapses into a puddle. This recipe solves that frustration by using a frozen ganache core. By inserting a solid center of chocolate and caramel, you guarantee a molten result every single time, regardless of slight variations in your oven’s temperature.
The secret to that professional, high-end restaurant finish lies in the temperature of your ingredients. While it’s tempting to rush, using room temperature eggs is the absolute key to success. Cold eggs will seize the melted butter and chocolate, turning your smooth batter into a grainy mess and preventing the cake from rising properly around its hidden treasure.
The Physics of the Fail-Safe Ganache Core
Creating a perfect Molten Chocolate Lava Cake with Salted Caramel Core is actually a lesson in thermal mass. When you bake a standard cake, the heat moves from the outside in until the center reaches a set temperature. By the time the middle is liquid gold, the outside is often overcooked. However, by inserting a frozen ganache cube, you’re essentially “cheating” the clock.
The frozen core has a much higher density and a lower starting temperature than the surrounding batter. As the ramekin sits in the hot oven, the cake walls bake and set into a sturdy structure, while the frozen cube slowly absorbs heat. Because the ganache is made with heavy cream, it has a lower melting point than the cake batter. Therefore, the core turns into a liquid state exactly as the cake walls become firm enough to hold it.
Using 60% cacao chocolate is vital for this chemical reaction. Darker chocolates with 70% or 80% cacao have less sugar and more cocoa solids, which can make the molten center too thick or “muddy.” The semi-sweet variety ensures the viscosity remains fluid enough to flow across the plate the moment the cake is breached with a fork.
Why Room Temperature Eggs are Non-Negotiable
When you beat eggs and sugar for three minutes, you’re creating a foam of tiny air bubbles. These bubbles provide the lift that makes the cake light rather than dense and leaden. Room temperature eggs have relaxed proteins that stretch easily, allowing them to trap significantly more air than cold eggs straight from the fridge.
Furthermore, room temperature eggs emulsify perfectly with the melted chocolate and butter. If the eggs are cold, they will cause the fats in the butter to solidify instantly. This results in a broken batter that won’t support the weight of the salted caramel core, likely causing the core to sink to the bottom and stick to the ramekin.
Selecting the Right Cacao Percentage
The structural integrity of your lava cake depends heavily on the sugar-to-fat ratio of your chocolate. A 60% semi-sweet chocolate provides the perfect balance of structural “grip” and liquid flow. It contains enough cocoa butter to melt into a smooth sauce but enough sugar to help the cake walls caramelize and hold their shape against the steam of the oven.
If you try to use a very dark 72% cacao bar, you might find the cake tastes too intense and the center stays somewhat sludge-like. Conversely, milk chocolate lacks the cocoa solids necessary to create a stable cake wall. Stick to high-quality baking bars rather than chocolate chips, as chips contain stabilizers that prevent them from melting into a truly fluid lava.
Essential Components for the Dual-Textured Center
Quality is everything when the ingredient list is this short. The heavy cream in the ganache core is what provides that luxurious, mouth-coating texture. It thins out the chocolate just enough so that it doesn’t re-solidify as the cake begins to cool on the plate. Without the cream, you’d just have a soft chocolate chunk in the middle instead of a flowing river.
You’ll notice this recipe only calls for two tablespoons of all-purpose flour. This is intentional. We want just enough gluten to bind the ingredients together without creating a “bready” or muffin-like crumb. The goal is a delicate, almost souffle-like exterior that highlights the richness of the butter and chocolate rather than the starch of the flour.
The Role of Salted Caramel Viscosity
The salted caramel you choose needs to be thick and “short,” meaning it shouldn’t be a thin, runny ice cream topping. A high-quality, jarred sea salt caramel or a homemade thick version works best. If the caramel is too thin, it will bleed into the chocolate ganache during the freezing process rather than staying as a distinct, gooey pocket of flavor.
Salt is the unsung hero here. It cuts through the intense sugar of the caramel and the richness of the chocolate. It wakes up your taste buds, making the chocolate taste “more like chocolate.” Without that hit of salt, the dessert can become cloying after just two bites. With it, you’ll find yourself scraping every last drop off the plate.
Butter and Cocoa Powder: The Release Mechanism
There is nothing more heartbreaking than a lava cake that sticks to the ramekin. To prevent this, you must be aggressive with your greasing. Use softened butter and coat every single millimeter of the inside of the ramekin. Don’t miss the top rim, as the cake will climb up the sides as it bakes.
While many recipes suggest dusting the buttered ramekins with flour, cocoa powder is the professional’s choice. Flour leaves unsightly white streaks on the dark, beautiful surface of the cake. Cocoa powder blends right in, adding an extra layer of toasted chocolate flavor to the crust while ensuring the cake slides out effortlessly when inverted.
Phase One: Preparing the Frozen Caramel Inserts
Start by making the “fail-safe” centers. You’ll melt one ounce of chocolate with the heavy cream in the microwave. Use 15-second bursts and stir gently in between. If you overheat chocolate, it will “seize” and become a gritty, dry clump that cannot be saved. Once it’s smooth, fold in your thick salted caramel.
Drop spoonfuls of this mixture into a silicone ice cube tray. You want them to be small enough to fit inside the ramekin with plenty of space for batter around the sides. Freeze these for at least 45 minutes. They need to be rock-solid so they don’t melt the moment they touch the warm cake batter during the assembly phase.
Phase Two: Aerating the Batter for Structure
This is the most active part of the process. You’ll beat the eggs, yolks, sugar, and salt until they reach the “ribbon stage.” This means when you lift the whisk, the batter should fall back into the bowl in a thick, slow-dissolving trail that sits on the surface for a few seconds. This aeration is what gives the cake its height and lightness.
When it’s time to add the melted chocolate and butter, put down the electric mixer and pick up a spatula. Use a gentle folding motion—cutting through the center and lifting from the bottom. If you stir too vigorously, you’ll pop all those hard-earned air bubbles, and your cake will turn out dense and flat. Sift the flour in last to ensure there are no lumps.
Phase Three: Assembly and the Hidden Core
Fill your prepared ramekins about halfway with the chocolate batter. Take your frozen chocolate-caramel cubes out of the freezer at the very last second. Place one cube right in the center of each ramekin. Don’t press it all the way to the bottom; it should “sit” on that first layer of batter.
Cover the cubes with the remaining batter until the ramekins are about three-quarters full. Use the back of a small spoon to gently smooth the top, ensuring the frozen core is completely sealed inside. If any part of the core is exposed, the steam will push the liquid out of the top during baking, and you’ll lose that “explosion” effect when you cut into it.
Precision Baking: Timing the Perfect Jiggle
At 425°F, the oven is hot enough to set the outside of the cake rapidly while the inside stays tender. Set your timer for 12 minutes and don’t walk away. Every oven is different, and 60 seconds can be the difference between a molten masterpiece and a solid chocolate muffin. You are looking for firm, set edges and a top that looks cooked but still has a slight, jelly-like jiggle in the center.
Never use a toothpick to test for doneness. If you poke a hole in the center, you’ll pierce the ganache core and the “lava” will leak out prematurely. Trust your eyes and the “jiggle test.” The cake should look slightly puffed and have pulled away from the sides of the ramekin by just a hair.
The Critical Two-Minute Rest and Inversion
When the cakes come out of the oven, they are incredibly fragile. You must let them rest in the ramekins for exactly two minutes. During this time, “carry-over cooking” happens. The intense heat from the ramekin continues to firm up the outer walls of the cake, making them strong enough to stand on their own once they are flipped onto a plate.
To invert, place a dessert plate upside down over the top of the ramekin. Using oven mitts, firmly grip both the plate and the ramekin and flip them over in one swift motion. Let it sit for ten seconds to allow gravity to do the work. Gently lift the ramekin straight up. If you feel resistance, run a thin paring knife around the edge one more time before trying again.
Troubleshooting Common Structural Failures
If your cake collapses the moment you remove the ramekin, the walls were underbaked. This usually happens if the oven wasn’t fully preheated or if the ramekins were placed too far apart on the baking sheet. Next time, ensure your oven thermometer confirms 425°F before the cakes go in. You can still eat a collapsed cake—it will just look more like a “molten mess,” but it will taste just as good.
If the center is solid, you likely overbaked the cake or didn’t freeze the ganache core long enough. If you live at a high altitude, the cake may rise faster and dry out quickly. In that case, try increasing the oven temperature by 15 degrees and shortening the bake time by 2 minutes to “sear” the outside while keeping the inside liquid.
Preventing the Caramel from Sinking
A common issue is the caramel core sinking to the very bottom, causing the cake to stick or the bottom to blow out. This is usually caused by batter that is too thin. Ensure you beat your eggs long enough to reach that thick ribbon stage. The air bubbles in the batter act like a life jacket, holding the heavy frozen core in place until the cake sets.
Correcting a Broken Molten Wall
Even the pros have a cake crack every now and then. If a wall breaks and the lava starts to leak out before you’re ready, don’t panic. Use a large scoop of vanilla ice cream to “plug” the hole. Dust the whole thing with a heavy layer of powdered sugar. The contrast of the white sugar and the dark cake will distract the eye, and your guests will just think the “overflow” was intentional.
Optimal Serving Temperatures and Pairings
A lava cake waits for no one. You must serve this immediately while the core is at its most fluid. The magic of this dessert is the temperature contrast. The cake should be steaming hot, which makes the cold vanilla ice cream melt into a creamy sauce that mingles with the salted caramel. It creates a “self-saucing” experience that is incredibly satisfying.
To cut through the intense richness, consider serving this with something tart. A few fresh raspberries or a drizzle of unsweetened raspberry coulis provides a bright acidity that cleanses the palate between bites. For a drink pairing, a double shot of espresso or a dark roast coffee is the perfect companion to the deep chocolate notes.
Advanced Preparation and Storage Techniques
You can actually prepare the ramekins with batter and the frozen core up to 6 hours in advance. Keep them in the refrigerator until you are ready to bake. If you are baking them straight from the fridge, you will need to add about 2 minutes to the total baking time. This is a fantastic trick for dinner parties so you aren’t stuck in the kitchen while your guests are at the table.
Once baked, these cakes do not store well. The “lava” center will eventually be absorbed by the surrounding cake, turning it into a standard chocolate cake. If you do have leftovers, store them in an airtight container in the fridge for up to 2 days. Reheat them in the microwave for 20 seconds; they will be delicious and moist, though they likely won’t have the same flowing center.
Expert Tips for Professional Presentation
For a true “restaurant” look, use a fine-mesh sieve to dust the powdered sugar. Hold the sieve high above the cake to get an even, snow-like coating rather than clumps. The white sugar against the dark chocolate creates a high-contrast visual that looks stunning in photos and on the table.
When you add the ice cream, place the scoop slightly off-center or directly on top of the “jiggle” spot. As the ice cream begins to melt, it will follow the path of the caramel lava. Finish with a final drizzle of extra salted caramel sauce over the ice cream, allowing it to drip down the sides of the cake. This layering of textures and temperatures is what makes this the ultimate chocolate dessert.
How do I know if my lava cake is done without a toothpick?
The best way to check for doneness is the “jiggle test.” Gently shake the baking sheet. The edges of the cake should look matte and firm, and they should be slightly pulling away from the sides of the ramekin. The very center (about the size of a quarter) should still wobble slightly. If the whole top is sloshing, it needs another minute. If the top is completely stiff and domed, it is likely overbaked.
Can I use a different type of chocolate?
While 60% cacao is the sweet spot for flavor and texture, you can use semi-sweet chocolate chips in a pinch. However, be aware that chips contain stabilizers designed to help them keep their shape under heat. This means your “lava” might be thicker and less fluid than if you used a high-quality chopped baking bar. Avoid milk chocolate for the main batter, as it lacks the structural strength to hold the liquid core.
Why did my lava cake stick to the ramekin?
Sticking is usually caused by one of two things: improper greasing or a “blowout.” Make sure you use softened butter to coat every nook and cranny of the ramekin, followed by a dusting of cocoa powder. If the frozen core was placed too close to the bottom or side, it might have melted through the batter and caramelized against the ceramic, acting like glue. Always ensure the core is fully “insulated” by batter on all sides.
Can I make these gluten-free?
Yes, this recipe adapts very well to gluten-free diets because it uses so little flour. You can substitute the two tablespoons of all-purpose flour with a 1:1 gluten-free flour blend or even almond flour. Since we aren’t relying on gluten for structure (we are relying on the egg foam), the texture remains remarkably similar to the original version.
How do I store and reheat leftovers?
Store any leftover cakes in an airtight container in the refrigerator for up to 2 days. To reheat, place a cake on a microwave-safe plate and heat on medium power for 20-30 seconds. While the center may not be as “molten” as it was fresh out of the oven, the ganache core will still soften into a fudgy, delicious center. Do not freeze the cakes once they have been baked, as the texture of the sponge will become grainy and unpleasant.
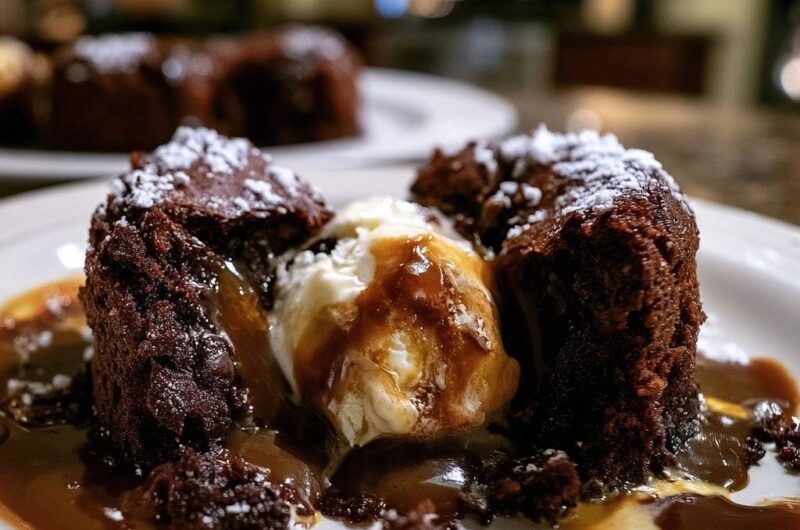
Molten Chocolate Lava Cakes with Salted Caramel Core
Course: DessertCuisine: French and AmericanDifficulty: easy4
servings20
minutes12
minutes32
Minutes480
kcalFrench and American
Ingredients
6 ounces high-quality semi-sweet chocolate (60% cacao), chopped
1/2 cup unsalted butter
2 large eggs plus 2 egg yolks, room temperature
1/4 cup granulated sugar
1 pinch salt
2 tablespoons all-purpose flour
1/4 cup heavy cream
4 teaspoons store-bought or homemade thick salted caramel sauce (for the core)
Powdered sugar for dusting
Vanilla ice cream and extra caramel sauce for serving
Directions
- The Fail-Safe Center: In a small microwave-safe bowl, combine 1 ounce of the chopped chocolate and 1/4 cup heavy cream. Heat for 30 seconds and stir until smooth. Stir in the 4 teaspoons of salted caramel sauce. Pour this mixture into a silicone ice cube tray (4 slots) and freeze for at least 45 minutes until solid. This frozen core is the secret to the dual-colored molten center.
- Preheat your oven to 425°F (218°C). Generously grease four 6-ounce ramekins with butter and dust with cocoa powder, tapping out the excess to ensure a clean release.
- Melt the remaining 5 ounces of chocolate and the 1/2 cup of butter together in a microwave-safe bowl in 30-second intervals, stirring between each, until completely smooth. Let it cool for 5 minutes.
- In a separate large bowl, beat the eggs, egg yolks, sugar, and salt with a whisk or electric mixer for 2-3 minutes until the mixture is thick, pale yellow, and leaves a trail.
- Gently fold the melted chocolate mixture into the egg mixture using a spatula. Sift the flour over the top and fold in until just combined. Do not overmix.
- Pour the batter into the prepared ramekins until they are half full. Place one frozen chocolate-caramel cube into the center of each ramekin. Top with the remaining batter, ensuring the cube is fully covered.
- Bake for 12 to 14 minutes. The edges should be firm and slightly pulled away from the sides, but the top center should still have a slight jiggle.
- Let the cakes cool in the ramekins for exactly 2 minutes. Run a thin knife around the edges and carefully invert each cake onto a dessert plate.
- Dust heavily with powdered sugar. Serve immediately by placing a scoop of vanilla ice cream directly into the center of the cake (as pictured) and drizzling with additional caramel sauce so it mingles with the molten core.
Notes
- The frozen core must be prepared at least 45 minutes in advance. Ensure eggs are at room temperature for the best volume when beating.