

Most people avoid one-pot pasta because they’re tired of the dreaded “mushy noodle” syndrome. It’s frustrating when you’re craving a hearty, comforting meal but end up with a pot of overcooked, waterlogged macaroni. This recipe changes that by focusing on the precise science of the simmer.
The culinary appeal here lies in the marriage of a smoky, robust chili and the creamy, indulgent soul of mac and cheese. By using a specific liquid-to-noodle ratio, we ensure the pasta stays firm while the sauce becomes naturally glossy and thick. It’s the ultimate weeknight win that doesn’t sacrifice quality for convenience.
The secret to this success is the staggered simmer technique. Instead of just dumping everything in and walking away, you’ll monitor the absorption at the halfway mark. This small adjustment prevents the pasta from becoming gummy and ensures every elbow is coated in a rich, velvety sauce that actually clings to the noodle.
The Science of Al Dente One-Pot Pasta
Cooking pasta directly in the chili base is fundamentally different from boiling it in a large pot of salted water. When you boil pasta traditionally, you wash away the starches into the drain. In a one-pot meal, those starches stay in the pan, acting as a natural thickening agent that creates a luxurious mouthfeel without needing a heavy roux.
However, this process requires a delicate balance of moisture. If you use too much liquid, the pasta will sit in a hot bath for too long and lose its structural integrity. If you use too little, the outside of the noodle softens while the inside remains chalky and raw. We aim for a “tight” simmer where the liquid barely covers the macaroni.
The staggered simmer prevents the noodles from becoming waterlogged. By covering the pot, you create a pressurized steam environment that cooks the pasta evenly from all sides. Opening the lid halfway through allows you to check the progress and release just enough steam to prevent the sauce from becoming too thin or the bottom from scorching.
Why Liquid Ratios Matter for Texture
This recipe calls for 2.5 cups of beef broth for 2 cups of dry macaroni. This isn’t an arbitrary number; it accounts for the liquid absorbed by the pasta and the moisture lost to evaporation. We start with 2 cups to keep the heat concentrated and the flavors intense.
The remaining half-cup of broth serves as your insurance policy. Every stove runs at a different temperature, and every pot retains heat differently. If you notice the liquid has vanished at the four-minute mark but the pasta still has a bite, adding that extra splash saves the dish from burning while finishing the cook perfectly.
Essential Components for Bold Chili Flavor
The foundation of any great chili mac is the protein. I recommend using 90/10 or 85/15 lean ground beef. While fat adds flavor, too much grease in a one-pot dish will separate and create an oily film on top of your cheese. Using a leaner cut ensures the sauce stays emulsified and clean on the palate.
Kidney beans provide a necessary textural contrast to the soft pasta. Always drain and rinse your canned beans thoroughly before adding them to the pot. The liquid inside the can is full of excess sodium and metallic-tasting starches that can throw off the balance of your carefully seasoned broth.
Fresh aromatics like yellow onion and garlic are non-negotiable. They provide a sweet, savory base that builds complexity. When you dice the onion, try to keep the pieces small so they melt into the sauce, providing flavor without adding chunky interruptions to the creamy texture of the macaroni.
The Spice Profile: Beyond Basic Chili Powder
While chili powder does the heavy lifting, adding ground cumin and smoked paprika creates a multi-dimensional flavor profile. Cumin adds an earthy, nutty warmth, while smoked paprika provides a hint of backyard grill flavor without needing a smoker. It’s about building layers of heat and aroma.
The most important step is “blooming” these spices. After the beef and onions are ready, stir the spices into the hot fat for about sixty seconds. You’ll know it’s working when the kitchen starts to smell incredible. This process unlocks fat-soluble flavor compounds that stay dormant if you simply stir the spices into the liquid later.
Selecting the Right Cheddar for Melting
If you want those iconic, gooey strands of cheese, you must grate your own cheddar from a block. Pre-shredded cheese is coated in cellulose or potato starch to keep it from clumping in the bag. Unfortunately, those anti-caking agents also prevent the cheese from melting smoothly into the sauce.
For an even smoother sauce, check out this cheesy ground beef macaroni recipe.
Sharp or extra-sharp cheddar is the best choice here. Because the chili flavors are so bold, a mild cheese will get lost in the mix. An extra-sharp variety provides a tangy punch that cuts through the richness of the beef and beans, making every bite stand out.
Step-by-Step: Executing the Staggered Simmer
Success with this dish comes down to managing the heat and the clock. You aren’t just boiling ingredients; you’re managing a transformation. By following these three distinct phases, you’ll ensure the beef is savory, the pasta is firm, and the cheese is perfectly melted.
Phase 1: Browning and Deglazing
Start by browning the beef over medium-high heat. You want to see some crispy, brown bits on the meat—that’s where the flavor lives. Once cooked, drain the grease into a heat-safe container. Leaving the grease in the pot is the number one reason for a “heavy” or oily chili mac.
Add your onions and cook until they are translucent and soft. When you add the garlic and spices, keep them moving. Garlic burns quickly, and burnt garlic will make the entire pot taste bitter. As soon as the spices smell toasted, you’re ready for the liquid.
Phase 2: The Controlled Boil and Cover
Before adding the pasta, bring the tomato sauce, beans, and the first 2 cups of broth to a vigorous rolling boil. If the liquid isn’t hot enough when the pasta hits the pot, the macaroni will sit and soak up lukewarm water, leading to a mushy texture. Heat is your friend here.
Once the pasta is in, stir it immediately to break up any clumps. Turn the heat down to medium-low and put the lid on tight. At the four-minute mark, do a quick check. If the pot looks dry, add that reserve broth. This keeps the environment moist enough for the pasta to finish cooking without sticking to the bottom.
Phase 3: The Residual Heat Melt
At the nine-minute mark, the pasta should be al dente. Don’t worry if there is a tiny bit of liquid left; it will thicken as it rests. The most common mistake is adding cheese while the pot is still boiling. This can cause the cheese to “break,” resulting in a grainy, oily mess rather than a smooth sauce.
Remove the pot from the heat entirely. Sprinkle your hand-grated cheddar over the top in an even layer. Put the lid back on and let it sit undisturbed for two minutes. This gentle, residual heat melts the cheese perfectly, creating a professional, glossy finish that looks as good as it tastes.
Troubleshooting Common One-Pot Obstacles
If your pasta is still firm but the liquid is gone, don’t panic. Add a quarter-cup of hot water or broth, stir, and cover for another two minutes. The key is adding small amounts of liquid at a time so you don’t overdo it and end up with soup.
If the sauce feels too thin after the pasta is cooked, simmer it uncovered for sixty seconds while stirring constantly. This allows excess moisture to evaporate quickly. If you notice the bottom of the pot is scorching, your heat is too high. Move the pot to a cool burner and stir in a splash of liquid to loosen the bits.
Customizing Your One-Pot Chili Mac and Cheese
This recipe is a fantastic canvas for your own preferences. If you like a bit of heat, stir in a small can of diced green chiles or a chopped jalapeño during the onion-sauteing phase. It adds a bright, acidic kick that balances the heavy cheddar.
For a leaner version, ground turkey or ground chicken works beautifully. Since these meats have less fat, you might need to add a teaspoon of olive oil to the pan to properly bloom your spices. You can also swap kidney beans for black beans or pinto beans depending on what’s in your pantry.
Optimal Sides and Serving Suggestions
Since this dish is very rich and savory, it pairs best with something crisp and bright. A simple green salad with a sharp vinaigrette or a lemon-based dressing provides a refreshing contrast. The acidity helps cleanse the palate between bites of cheesy pasta.
If you want to lean into the comfort food theme, honey-sweetened cornbread is a classic choice. For toppings, think about temperature and texture. A dollop of cool Greek yogurt or sour cream and a handful of fresh cilantro can brighten the entire bowl and add a creamy finish.
Storage, Reheating, and Meal Prep Strategy
Pasta is like a sponge; it will continue to absorb moisture as it sits in the fridge. If you have leftovers, store them in an airtight container for up to three days. When you’re ready to eat, you’ll notice the mixture has thickened significantly.
To reheat, add a splash of broth or water to the bowl before microwaving or heating on the stove. This restores the creamy consistency of the sauce. While you can freeze this dish for up to two months, be aware that the pasta may soften slightly upon thawing. Reheat from frozen slowly on the stovetop for the best results.
Expert Tips for the Perfect Batch
Firstly, use a heavy-bottomed pot or a Dutch oven. These vessels distribute heat more evenly, which is crucial for preventing the pasta from sticking or burning at the bottom. Thin pots often have “hot spots” that can ruin a one-pot meal.
Secondly, follow the “Don’t Over-Stir” rule. While you need to stir occasionally to prevent sticking, over-stirring releases too much starch and can physically break the macaroni elbows. Let the steam do the work under the lid.
Thirdly, let your cheese sit at room temperature for fifteen minutes before adding it to the pot. Cold cheese can shock the sauce and take longer to melt, whereas room-temperature cheese integrates almost instantly into a silky blanket.
Finally, never skip the two-minute rest at the end. This allows the starches to settle and the sauce to fully adhere to the noodles. It’s the difference between a dish that’s “runny” and one that has that perfect, thick chili-mac consistency.
How do I prevent the pasta from getting mushy?
The key is the liquid-to-pasta ratio and the cooking time. By using exactly 2.5 cups of liquid for 2 cups of pasta and checking it at the 4-minute mark, you control the hydration. Always stop cooking when the pasta is al dente (firm to the bite), as it will continue to soften slightly during the 2-minute resting period with the cheese.
Can I use a different type of pasta?
Yes, but stick to short shapes like penne, rotini, or shells. Avoid long noodles like spaghetti, which tend to clump together in a one-pot chili base. Keep in mind that different shapes have different cook times; shells might cook faster than thick penne, so start tasting for doneness a minute or two early.
What is the best way to store and reheat leftovers?
Store leftovers in an airtight container in the refrigerator for up to 3 days. Because the pasta absorbs the sauce over time, the dish will be much thicker the next day. To reheat, add a tablespoon or two of broth or water per serving to loosen the sauce and restore the creamy texture. Heat in the microwave or on the stovetop over low heat.
Why is my sauce oily or greasy?
This usually happens if the ground beef wasn’t drained thoroughly after browning. Even lean beef releases fat that can prevent the cheese from emulsifying into a smooth sauce. Always drain the excess grease into a jar or paper-towel-lined bowl before adding your onions and spices to ensure a clean, velvety finish.
Can I make this recipe without beans?
Absolutely. If you aren’t a fan of beans, simply omit them. You don’t need to adjust the liquid levels significantly, though you might find you have a slightly higher sauce-to-pasta ratio. You could also substitute the beans with extra diced bell peppers or corn for added texture and flavor.
Can I use pre-shredded cheese from a bag?
While you can use it in a pinch, it isn’t recommended for the best results. Bagged shredded cheese is treated with anti-caking agents like cellulose, which prevents the cheese from melting into a smooth, cohesive sauce. For that classic “cheese pull” and a glossy texture, grating a block of sharp cheddar by hand is the way to go.
Chili Mac and Cheese
Course: Main CourseCuisine: AmericanDifficulty: easy6
servings10
minutes20
minutes495
kcal30
MinutesThis recipe solves the problem of mushy pasta in chili mac by using a precise liquid ratio and specific simmering method. It combines savory ground beef, kidney beans, and spices with elbow macaroni and sharp cheddar cheese for a comforting, one-pot meal.
Ingredients
1 pound lean ground beef (85/15 or 90/10)
1 small yellow onion, finely diced
2 cloves garlic, minced
1 tablespoon chili powder
1 teaspoon ground cumin
1/2 teaspoon smoked paprika
1 can (15 ounces) tomato sauce
1 can (15 ounces) kidney beans, drained and rinsed
2 ½ cups beef broth (divided)
2 cups dry elbow macaroni
2 cups shredded sharp cheddar cheese (hand-grated for better melting)
1/4 cup sliced green onions for garnish
Salt and black pepper to taste
Directions
- In a large pot or deep skillet, brown the ground beef over medium-high heat until fully cooked. Drain the excess grease thoroughly to ensure the sauce remains thick and not oily.
- Add the diced onion to the beef and cook for 3 to 4 minutes until translucent. Stir in the garlic, chili powder, cumin, and smoked paprika, cooking for 1 minute until the spices are toasted and fragrant.
- Pour in the tomato sauce, kidney beans, and 2 cups of the beef broth. Bring the mixture to a vigorous rolling boil.
- Add the dry macaroni to the boiling liquid. Stir immediately to prevent sticking. Reduce the heat to medium-low and cover with a tight-fitting lid.
- Simmer for 8 to 9 minutes. Halfway through (at the 4-minute mark), remove the lid and give it a quick stir. If the pasta has absorbed the liquid too quickly, add the remaining 1/2 cup of broth. Replace the lid immediately.
- At the 9-minute mark, remove the lid. The pasta should be al dente and the sauce should be thick. If there is too much liquid, simmer uncovered for 1 additional minute while stirring.
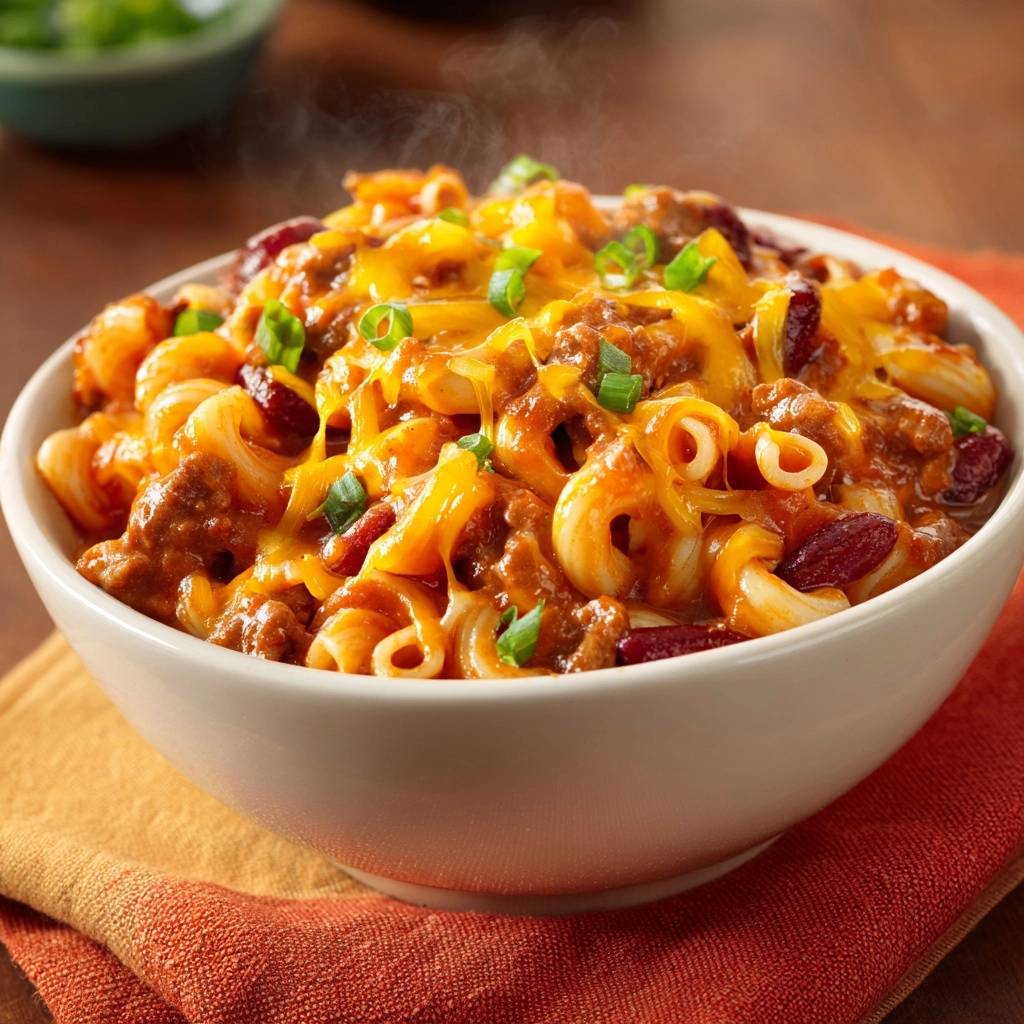
- Remove from heat. Sprinkle the shredded cheddar cheese evenly over the top. Cover the pot for 2 minutes without stirring to allow the cheese to melt into the distinct, gooey strands seen in the image.
- Garnish generously with fresh green onions and serve immediately to maintain the perfect pasta texture.
Notes
- Hand-grate the cheddar cheese for better melting. Use the staggered simmer technique to prevent the pasta from becoming overcooked and mushy.


