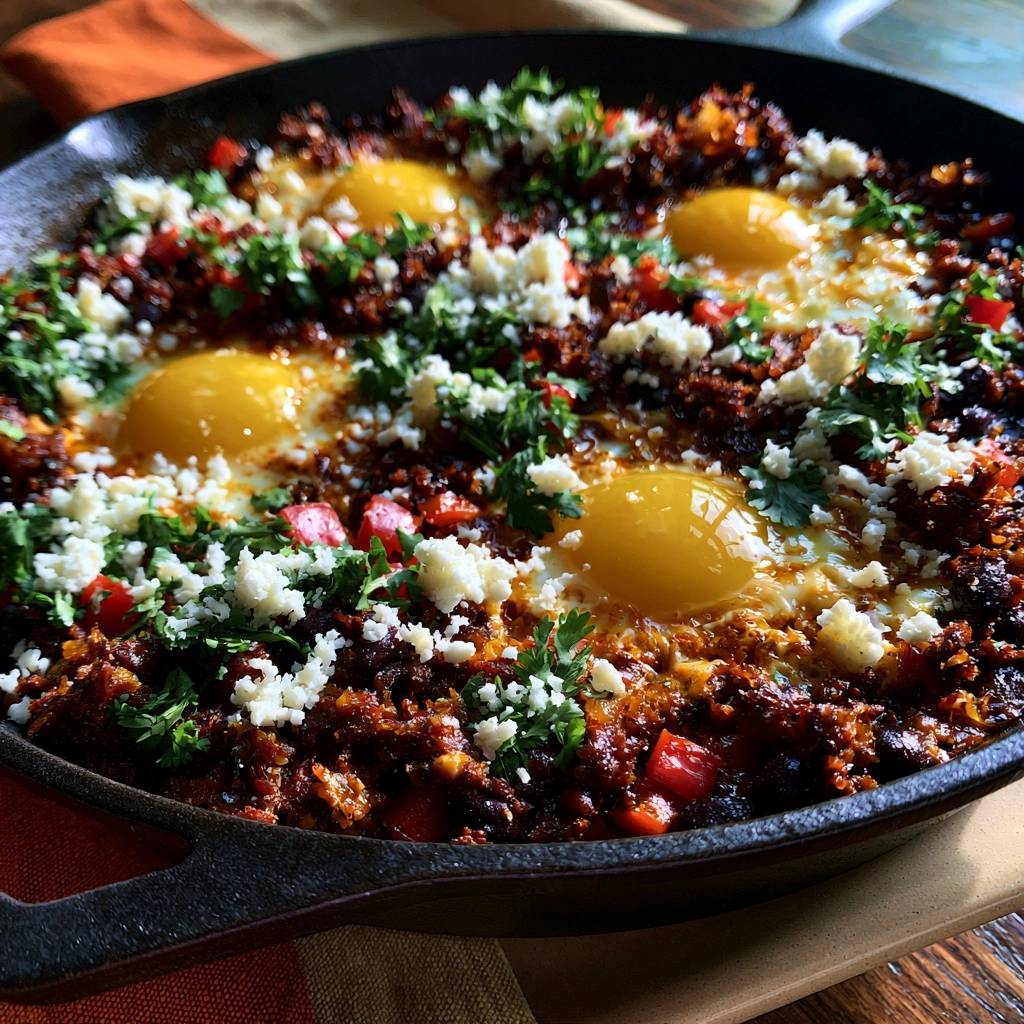
There is nothing quite like the sound of high-heat searing when cold beef chorizo hits a screaming hot cast iron surface. You can smell the smoked paprika and garlic immediately as the fat begins to render and bubble. However, most home cooks struggle with a common frustration: a greasy, mushy mess where the vegetables steam rather than crisp.
The “Anti-Soggy Bottom” philosophy is all about aggressive moisture management and fat control. By treating the beef chorizo like a steak rather than a ground meat scramble, you create a textured foundation that supports perfectly runny eggs. This 30-minute meal isn’t just about tossing ingredients in a pan; it’s a technical approach to heat retention that ensures every bite has a distinct crunch.
The secret to professional results lies in the “sear and wait” method. If you stir the meat too early, you release moisture before the pan can sear the proteins, resulting in boiled meat. I’ve found that letting the beef chorizo sit undisturbed for a full five minutes creates a dark, caramelized crust that acts as a flavor anchor for the entire dish.
The Anatomy of High-Quality Beef Chorizo and Produce
Success starts with understanding your primary protein. Mexican beef chorizo is a raw, heavily seasoned sausage that relies on vinegar and chili for its punchy profile. Unlike its Spanish cousin, which is cured and firm, Mexican beef chorizo is soft and requires thorough cooking to develop its signature texture.
Your choice of oil matters more than you might think. While butter is a breakfast staple, its water content and low smoke point make it a poor choice for this high-heat application. A neutral oil like avocado or vegetable oil allows the pan to reach the temperatures needed to blister the red bell peppers without burning.
Red bell peppers are the ideal partner here because of their high natural sugar content. As they cook in the rendered beef chorizo fat, those sugars undergo the Maillard reaction, turning the edges of the dice into sweet, charred morsels. This provides a necessary counterpoint to the salty, spicy meat.
Selecting the Right Mexican Beef Chorizo
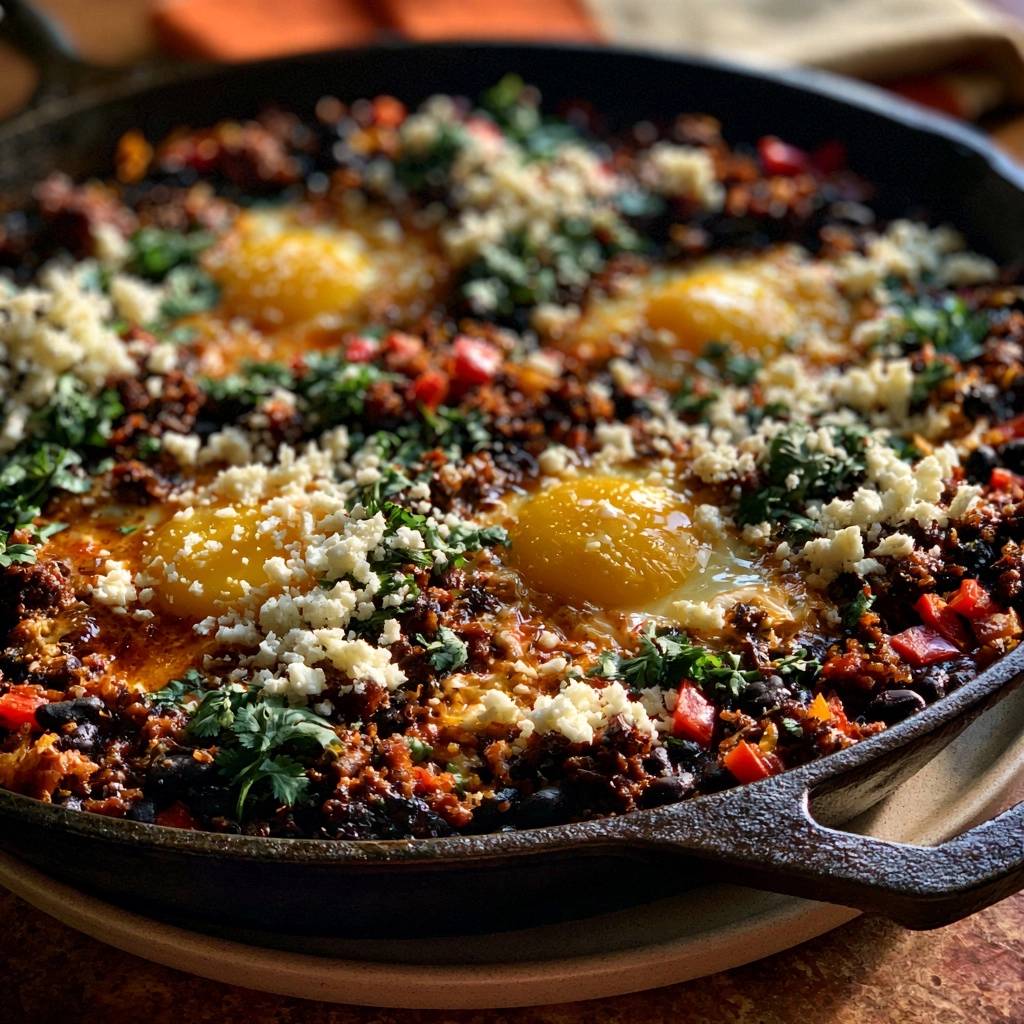
When you’re at the butcher counter, look for beef chorizo that has a deep, vibrant red hue rather than a pale orange. A high-quality blend usually features a base of guajillo or ancho chilies, which provides a complex earthiness rather than just raw heat. Avoid any brands that look overly “wet” in the package, as excess water will make achieving a crisp bottom nearly impossible.
The fat-to-lean ratio is also critical. You want enough fat to fry the vegetables, but not so much that the eggs drown. If the beef chorizo looks exceptionally fatty, you can always tilt the pan and spoon out a tablespoon of grease before adding your onions, though a little “liquid gold” is necessary for the best flavor.
Why Cotija is the Essential Finishing Salt
Cotija cheese is often called the “Parmesan of Mexico” for a reason. It is a dry, firm cheese that doesn’t actually melt when exposed to heat. This functional role is vital because it provides a salty, milky punch that stays distinct from the rich, runny egg yolks.
Using a melting cheese like Monterey Jack would turn this skillet into a gooey mass, losing the textural contrast we worked so hard to build. The crumbly nature of Cotija ensures that every forkful has a bit of “zip” to cut through the heavy fats of the beef chorizo and the richness of the eggs.
The Science of the Anti-Soggy Bottom
To master this dish, you have to understand moisture migration. Onions and peppers are mostly water; when they hit the pan, they want to release that liquid. If the pan is overcrowded or the heat is too low, that water turns to steam, which softens the beef chorizo you just spent time crisping.
By rendering the beef chorizo fat first, you create a high-temperature cooking medium. This fat acts as a heat conductor, essentially “deep-frying” the exterior of the vegetables the moment they touch the pan. This flash-evaporates the moisture, locking the structure of the vegetable in place while intensifying its flavor.
Essential Tools for Heat Retention
A heavy cast iron skillet is your best friend for this recipe. Non-stick pans are great for omelets, but they cannot handle the sustained high heat required to sear beef chorizo properly. Cast iron has high emissivity, meaning it radiates heat back into the food consistently, even when you add cold ingredients.
If you don’t have cast iron, a heavy-bottomed carbon steel pan is a great alternative. The goal is to prevent the pan’s temperature from crashing. A thin, cheap skillet will lose its heat the moment the meat hits the surface, leading to that dreaded gray, steamed texture instead of a dark brown sear.
Step-by-Step: Rendering and Searing the Beef Chorizo
Start by heating your oil until it shimmers. When you add the beef chorizo, don’t just dump it in a pile. Use your spatula to press it into a thin, flat disc that covers the bottom of the skillet. This maximizes the surface area in contact with the heat.
Now comes the hardest part: leave it alone. You want to see a dark, crispy crust forming around the edges. After about 4 or 5 minutes, you’ll notice the fat has turned a bright orange and is bubbling vigorously. This is the signal that the water has cooked out and the rendering process is complete.
Developing Texture with Aromatics and Peppers
Once the meat is crispy, break it up into small crumbles and toss in your onions and peppers. You’ll notice the vegetables immediately begin to take on the color of the beef chorizo oil. Keep the heat at medium-high to ensure the onions soften without becoming translucent and mushy.
Continue cooking until you see the edges of the peppers starting to blacken slightly. This “evaporation phase” is the final step in securing your anti-soggy bottom. If the mixture looks too dry, don’t add water; just turn the heat down slightly and let the natural fats do the work.
The Well Technique: Precision Egg Placement
Before you crack your eggs, you need to create a “home” for them. Use the back of a large spoon to push the beef chorizo mixture aside, creating five distinct wells. You want to see the bottom of the pan in the center of each well.
This geometry is important because it allows the egg whites to come into direct contact with the heat of the skillet. If you crack the eggs directly on top of the meat, the whites will take forever to set, and you’ll likely overcook the yolks in the process. The wells ensure the whites cook from the bottom and the sides simultaneously.
Achieving Set Whites and Liquid Gold Yolks
The biggest mistake people make is putting a lid on the skillet. While a lid cooks the whites faster, it also traps steam that creates a white, cloudy film over your yolks. For that “liquid gold” look, keep the pan open and let the ambient heat do the work.
If the whites are still clear near the yolk but the bottom is browning, use a small spoon to scoop up some of the hot orange fat from the edges of the pan. Drizzle it carefully over the whites. This “oil basting” technique cooks the top of the whites instantly without touching the delicate yolks.
Troubleshooting Common Skillet Issues
If you find that your meat is browning too fast but your peppers are still crunchy, your heat is likely too high. Move the skillet off the burner for sixty seconds to let the temperature drop, then return it to a medium setting. The residual heat in a cast iron pan is usually enough to finish the vegetables.
For eggs that stick to the bottom, it usually means the pan wasn’t properly seasoned or you didn’t use enough oil at the start. Next time, ensure the oil is shimmering before the meat goes in. If you have too much oil pooling in the center, fold a paper towel and carefully dab the center of the pan to wick away the excess before cracking the eggs.
Flavor Variations and Regional Swaps
If you want a heartier version, try “Beef Chorizo con Papas.” Simply toss in some parboiled, diced potatoes at the same time as the onions. The potatoes will soak up the beef chorizo fat and become incredibly crispy on the outside while staying fluffy inside.
For a brighter finish, a tiny splash of apple cider vinegar stirred into the meat right before adding the eggs can work wonders. The acidity cuts through the heavy beef chorizo fat and wakes up the spices in the beef chorizo. You can also swap the Cotija for Queso Fresco if you prefer a milder, slightly creamier cheese topping.
What to Serve with Skillet Beef Chorizo and Eggs
This dish is rich and savory, so you need something to balance the palate. Charred corn tortillas are the classic choice; their smoky, nutty flavor is the perfect vessel for scooping up the runny yolks. I also love serving this with a side of sliced avocado to add a cool, creamy element.
A bright radish slaw with plenty of lime juice and cilantro provides a necessary crunch and acidity. For a drink, skip the heavy juices and go for a cold sparkling water with a heavy squeeze of lime. The carbonation and citrus help cleanse the palate between bites of the spicy, fatty beef chorizo.
Make Ahead Strategies and Storage
Cooked eggs are notorious for having a rubbery texture when reheated, so I don’t recommend storing the completed dish. However, you can absolutely make the “Beef Chorizo Base” (the meat, onions, and peppers) up to three days in advance. Store it in an airtight container in the fridge.
When you’re ready for breakfast, just throw the base back into a hot skillet for three minutes until it’s sizzling and crispy again. Then, simply make your wells and drop in fresh eggs. This turns a 30-minute weekend brunch into a 5-minute weekday luxury without sacrificing any of the texture.
Expert Tips for Skillet Mastery
Take your eggs out of the fridge about 15 minutes before you plan to use them. Room temperature eggs won’t shock the pan, which helps the whites set more evenly and prevents the pan temperature from dipping. It’s a small step that makes a huge difference in the final cook time.
Wait to salt your eggs until the very second you serve them. Salting eggs too early can break down the proteins and lead to a tougher texture. A pinch of flaky sea salt on the yolks right at the table adds a beautiful crunch and pops the flavor of the “liquid gold.”
Always look for the “jiggle.” When you think the eggs are done, gently shake the skillet. The whites should be firm and opaque, but the yolks should still dance. Remember that carry-over cooking is real; the eggs will continue to firm up for about sixty seconds after you take the pan off the heat.
How do I store leftovers?
Store the beef chorizo and vegetable mixture in an airtight container in the refrigerator for up to 3 days. I highly recommend eating the eggs fresh, as they become rubbery when reheated. If you have leftover eggs in the mix, chop them up and use them as a filling for a breakfast burrito the next day.
Why is my beef chorizo so greasy?
Mexican beef chorizo has a high fat content by design, which is where the flavor lives. If it feels overwhelming, you can tilt the skillet after the rendering phase and use a spoon to remove the excess oil. However, leave at least a tablespoon in the pan to ensure the eggs don’t stick and the vegetables can crisp up properly.
Can I use a different type of meat?
Beef chorizo provides great fat for frying, or you can use a soy-based version. If using a leaner alternative, you may need to add an extra tablespoon of oil to the pan to prevent the vegetables from sticking and to achieve that “deep-fried” edge on the peppers.
What if I don’t have a cast iron skillet?
A heavy stainless steel or carbon steel pan will work. Avoid thin non-stick pans if possible, as they don’t hold enough heat to create the “Anti-Soggy” crust. If you must use non-stick, cook in smaller batches to keep the pan temperature as high as possible throughout the process.
How do I know when the eggs are perfectly cooked?
Watch the whites closely. They should change from translucent to a solid, bright white. Give the pan a gentle nudge; if the whites around the yolk are still wobbling like jelly, they need another minute. You want the yolk to move, but the whites to stay put. Using the oil-basting technique mentioned above is the best way to bridge this gap.
Skillet Beef Chorizo and Eggs
Course: BreakfastCuisine: Mexican AmericanDifficulty: easy4
servings10
minutes20
minutes30
Minutes440
kcalMexican American
Ingredients
1 pound Mexican beef chorizo (removed from casings)
1 large red bell pepper, diced
1 small onion, finely chopped
5 large eggs
1/2 cup crumbled cotija cheese
1/4 cup fresh cilantro, finely chopped
1 tablespoon neutral oil (like avocado or vegetable oil)
Salt and black pepper to taste
Directions
- Heat a large cast iron skillet over medium-high heat. Add the oil and swirl to coat.
- To solve the soggy texture issue, add the beef chorizo to the hot pan and spread it into a thin, flat layer using a spatula. Do not stir it immediately. Let it sear undisturbed for 4 to 5 minutes until a dark, crispy crust forms on the bottom and the fat renders out.
- Break up the meat into small crumbles and add the diced onions and red peppers. Continue cooking for another 6 to 8 minutes, stirring occasionally. The key to the Anti-Soggy Bottom is allowing the moisture from the vegetables to evaporate completely while the rendered beef chorizo fat “deep-fries” the edges of the peppers and meat.
- Once the mixture is deeply browned and highly textured, use a spoon to create five small wells in the hash.
- Carefully crack one egg into each well.
- To achieve the visual result of perfectly set whites without a cloudy film over the yolks, do not cover the pan with a lid. Instead, reduce the heat to medium and cook for 5 to 7 minutes. If the whites are taking too long to set, you can spoon a tiny bit of the hot beef chorizo oil over the whites (avoiding the yolks) to speed up the process.
- Remove from heat immediately once the whites are opaque and firm, but the yolks are still bright yellow and jiggly.
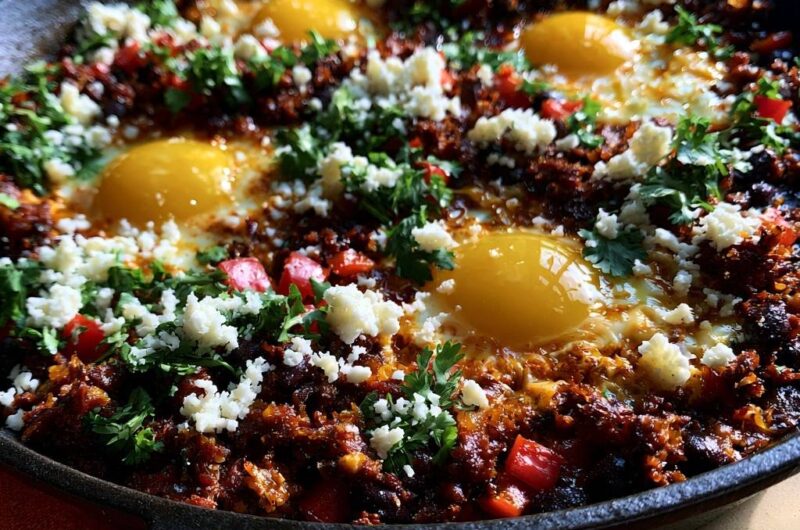
- Top generously with the crumbled cotija cheese and fresh cilantro, ensuring some cheese lands on the eggs as shown in the image. Serve immediately straight from the skillet.
Notes
- To ensure the whites set without clouding the yolks, avoid covering the pan with a lid. You can spoon a small amount of hot rendered fat over the whites to speed up cooking.