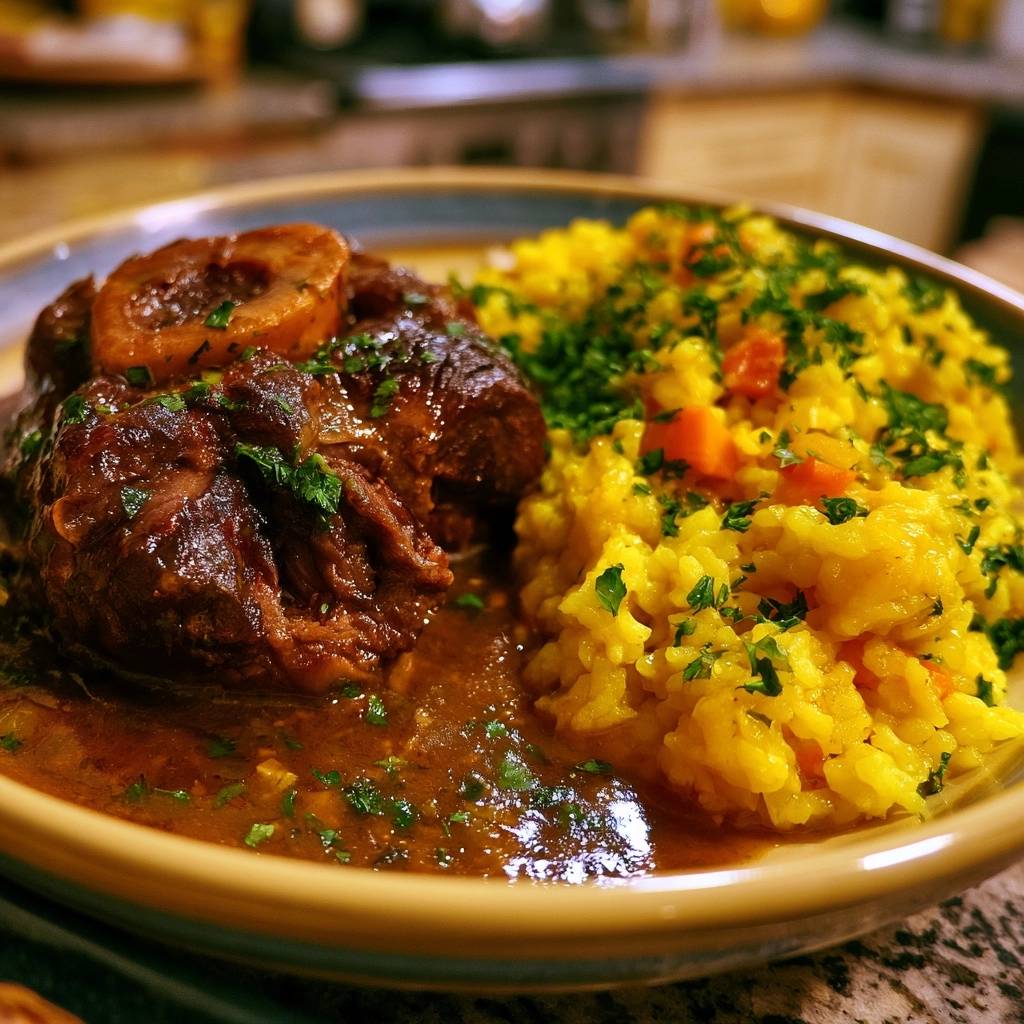
Imagine a kitchen filled with the scent of slow-simmering herbs, sweet onions, and rich beef. As you lift the lid of a heavy Dutch oven, you find beef shanks that have completely transformed. What started as a tough, humble cut of meat is now so tender it practically melts at the mere suggestion of a fork.
This is the beauty of Slow-Braised Beef Osso Buco. While the name sounds fancy, it simply translates to “bone with a hole,” referring to the marrow-filled center of the beef shank. Using beef shanks instead of traditional veal makes this dish more accessible and provides a deeper, more robust flavor that stands up beautifully to a long stay in the oven.
The secret to success isn’t a complicated gadget; it’s the mastery of the low-and-slow philosophy. By maintaining a gentle, steady heat, we allow the stubborn connective tissues to break down into a silky sauce. If you’ve ever had a pot roast turn out stringy or dry, it’s likely because the liquid boiled too hard. Today, we’re fixing that with precise temperature control.
Selecting the Best Beef Shanks for Braising
When you’re at the butcher counter, look for shanks that are roughly 1.5 inches thick. This is the “Goldilocks” zone for braising. If they’re too thin, they’ll overcook and fall apart before the sauce develops; if they’re too thick, the center might stay tough while the outside softens.
Pay close attention to the marrow bone in the center. That bone is a flavor powerhouse. As it cooks, the marrow renders out, adding a luxurious, velvety viscosity to your braising liquid that you just can’t get from a carton of broth. Look for meat with a bright red color and visible white marbling throughout the muscle.
The Role of Connective Tissue and Collagen
Beef shanks are naturally full of collagen, the protein that makes meat feel tough when cooked quickly. However, between 160°F and 180°F, a miracle happens. That tough collagen begins to melt into gelatin. This process takes time, which is why we can’t rush the 3.5-hour cook time.
If you try to cook this dish at a high temperature to save time, the muscle fibers will seize up and squeeze out their moisture. You’ll end up with meat that is technically “done” but feels like chewing on a rubber band. Patience is your most important ingredient here.
Essential Pantry Items and Fresh Aromatics
The foundation of our flavor is a classic mirepoix: a finely diced mix of onion, carrots, and celery. I like to use a ratio of two parts onion to one part each of carrot and celery. This creates a balanced sweetness that rounds out the savory beef.
For the searing fat, I always use a combination of olive oil and unsalted butter. The oil has a higher smoke point, which prevents the butter from burning, while the butter adds a rich, nutty flavor to the crust of the meat. Always reach for a high-quality beef stock; since the sauce reduces, any bitterness in a cheap stock will become concentrated.
Acid Balance
Beef broth with a tablespoon of white wine vinegar provides a crisp acidity that cuts through the heavy fats of the beef. It brightens the entire dish and adds that essential “zip” with a simple pantry staple.
Mix one cup of high-quality beef broth with one tablespoon of white wine vinegar. This provides the necessary pH level to balance the richness of the marrow and the sweetness of the caramelized vegetables. The goal is a sauce that feels balanced on the tongue, not cloyingly heavy.
Preparation: Securing the Meat and Dredging
Before the meat ever touches the pan, you need to grab some kitchen twine. Tie a snug loop around the circumference of each shank. As the meat cooks and the connective tissue softens, the muscle fibers want to pull away from the bone. The twine keeps everything in one beautiful piece for a professional presentation.
Next, use paper towels to pat the shanks completely dry. I mean bone-dry! If there is moisture on the surface of the meat, it will steam in the pan instead of searing. You want that direct contact between the protein and the hot fat to create a dark, flavorful crust.
Achieving the Perfect Flour Coating
Once the meat is dry and seasoned with salt and pepper, dredge it lightly in all-purpose flour. This isn’t just about creating a crust; the flour that sticks to the meat will eventually migrate into the braising liquid, acting as a natural thickener for your gravy.
Be sure to shake off every bit of excess flour. You only want a thin, translucent veil. If the coating is too thick, it will turn into a gummy, pasty mess in the Dutch oven, which can prevent the meat from browning properly and might even scorch the bottom of your pot.
Step-by-Step: Developing Deep Flavor Profiles
Heat your oil and butter until the foam subsides and the pan is shimmering. Lay the shanks in carefully. Now, here is the hard part: don’t touch them! Let them sit for at least 5 to 7 minutes. You are looking for a deep, mahogany-colored crust. This is the Maillard reaction in action, and it’s where the “meaty” flavor of the dish is born.
Once you’ve seared both sides, remove the meat and look at the bottom of the pot. You’ll see dark brown bits stuck to the surface. This is called the “fond.” It is pure gold. When you add your vegetables, they will release moisture that helps loosen these bits, incorporating all that concentrated flavor back into the sauce.
Deglazing and Building the Braising Liquid
After the vegetables have softened, stir in the tomato paste. Cook it for about two minutes until it turns from a bright red to a rusty brick color. This removes the “tinny” metallic taste and develops a sun-dried tomato sweetness. Then, pour in your deglazing liquid (the broth/vinegar mix).
Use a wooden spoon to scrape the bottom of the pot vigorously. You’ll see the liquid turn dark and rich as it picks up the fond. Let it bubble and reduce by half before adding the crushed tomatoes and stock. This layering of flavors ensures the final sauce has incredible depth rather than tasting like a thin soup.
The Oven Phase: Temperature Control Strategies
While you can cook this on the stovetop, the oven is far superior. A 300°F oven provides “surround-sound” heat, warming the Dutch oven from all sides. This is much gentler than the direct heat of a burner, which can cause the bottom of the stew to scorch while the top stays cool.
When you return the meat to the pot, the liquid should come about 3/4 of the way up the sides of the shanks. You don’t want to submerge them completely. Leaving the tops exposed allows the dry heat of the oven to keep the crust intact while the submerged portion simmers into tenderness. It’s the best of both worlds.
Troubleshooting Common Braising Obstacles
If you check your meat after three hours and it still feels a bit tough, don’t panic. Every cow is different, and some shanks simply have more connective tissue. Just put the lid back on and give it another 30 minutes. Braising is very forgiving; it’s hard to overcook it at such a low temperature.
If your sauce looks too thin at the end, simply remove the meat and turn the stovetop to medium-high. Let the liquid simmer uncovered for a few minutes. As the water evaporates, the flavors will intensify and the sauce will thicken into a glossy, rich gravy that coats the back of a spoon.
Preventing Dry Meat in a Liquid Environment
It sounds like a paradox, but meat can actually become “dry” while sitting in liquid. This happens if the braise boils. High heat causes the protein fibers to tighten like a wrung-out sponge, pushing all the juices out into the pot. If your meat feels stringy or straw-like, the temperature was likely too high.
The Gremolata: A Necessary Contrast
Osso Buco is a very rich, heavy dish. To make it truly sing, you need a “top note” of freshness. That’s where the Gremolata comes in. This simple mix of parsley, lemon zest, and grated garlic provides a sharp, citrusy punch that cuts right through the fat of the beef and the marrow.
Make sure to chop the parsley very finely and grate the garlic on a microplane. You want the Gremolata to be a delicate seasoning, not a chunky salad. Sprinkle it over the meat just seconds before serving so the heat of the beef releases the oils in the lemon zest without wilting the parsley.
Traditional and Modern Serving Suggestions
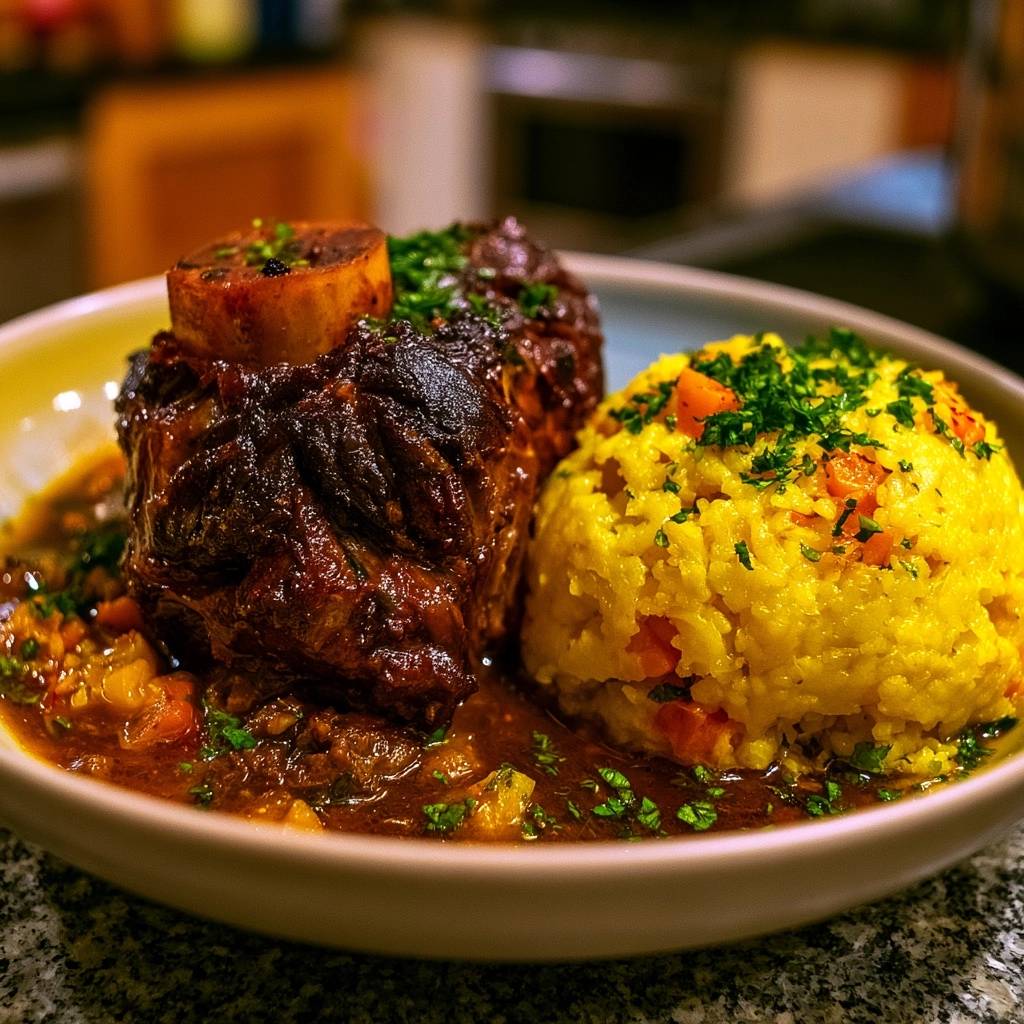
The classic partner for this dish is Risotto alla Milanese, a creamy saffron-infused rice. The starch in the risotto acts as a sponge for the vegetable-rich sauce. The golden color of the saffron also makes for a stunning visual contrast against the deep red of the beef.
If you aren’t in the mood for risotto, creamy polenta is a fantastic alternative. For a more modern twist, try serving the shanks over wide ribbons of pappardelle pasta. The goal is to have a base that can catch every single drop of that precious braising liquid.
Make-Ahead Instructions and Storage Logistics
Like most stews, Osso Buco actually tastes better the next day. As the dish cools, the flavors have time to meld and mature. If you make this ahead of time, let it cool completely in the pot before moving it to the fridge. This prevents the meat from drying out during the cooling process.
To reheat, place the pot back on the stove over low heat. Add a splash of beef stock or water to loosen the sauce, as the gelatin will have caused it to set into a jelly-like consistency overnight. Cover and simmer gently until the meat is warmed through to the center.
Expert Tips for Professional Results
For an even better braise, try using a “cartouche.” This is just a circle of parchment paper placed directly on the surface of the liquid before you put the lid on. It prevents excessive evaporation and keeps the top of the meat from drying out during those long hours in the oven.
Always let the meat rest for about 10 minutes before you snip the kitchen twine. This allows the juices to redistribute so the shank holds its shape on the plate. Finally, don’t forget a small spoon for the marrow! Spreading that buttery marrow onto a piece of crusty bread is the ultimate chef’s treat.
Freezing and Long-Term Preservation
This dish freezes exceptionally well. Place the cooled shanks in a freezer-safe container and pour the sauce over them until they are completely covered. This “sauce bath” protects the meat from freezer burn. It will stay delicious for up to three months.
When you’re ready to eat, thaw the container in the refrigerator overnight. Never try to reheat braised meat directly from frozen, as the outside will become tough and overcooked before the center even thaws. A slow thaw preserves that “fall-off-the-bone” texture we worked so hard to achieve.
Frequently Asked Questions
How do I store leftovers and can I freeze this?
Store leftovers in an airtight container in the refrigerator for up to 3 to 4 days. This dish freezes beautifully because the sauce protects the meat. Freeze in a sealed container for up to 3 months. For the best texture, thaw overnight in the fridge before gently reheating on the stovetop over low heat.
Why is my beef still tough after 3 hours of cooking?
If the meat is tough, it simply hasn’t finished the transformation process. Beef shanks vary in their amount of connective tissue. Put the lid back on and continue braising in the oven for another 30 to 45 minutes. It will eventually yield and become tender; you just have to wait for the collagen to fully melt into gelatin.
What can I use if I don’t have kitchen twine?
While kitchen twine is best for keeping the meat attached to the bone, you can skip it if necessary. The meat will still taste delicious, but it will likely fall away from the bone as you try to remove it from the pot. Use a wide spatula to carefully lift the shanks out to keep them as intact as possible for serving.
Can I make this in a slow cooker instead of an oven?
Yes, you can. Follow the searing and vegetable-sauteing steps in a pan first, then transfer everything to your slow cooker. Cook on the “Low” setting for 6 to 8 hours. Note that the sauce may be thinner in a slow cooker because there is zero evaporation, so you might need to thicken it in a saucepan before serving.
What is the best way to fix a sauce that is too salty?
If your sauce reduced too much and tastes salty, do not add more salt! Instead, stir in a splash of unsalted beef stock or a little bit of water. You can also add a small pinch of sugar or a tiny squeeze of lemon juice to help balance the saltiness on your palate.
Slow-Braised Beef Osso Buco
Course: Main CourseCuisine: ItalianDifficulty: easy4
servings25
minutes3
hours30
minutes180
Minutes620
kcalItalian
Ingredients
4 thick-cut beef shanks (approx. 1.5 inches thick)
Kitchen twine (for tying shanks)
1/2 cup all-purpose flour for dredging
3 tablespoons olive oil
2 tablespoons unsalted butter
1 large onion, finely diced
2 carrots, diced
2 stalks celery, diced
3 cloves garlic, minced
2 tablespoons tomato paste
1 cup beef broth with 1 tablespoon white wine vinegar
2 cups beef stock (high quality)
1 can (14.5 oz) crushed tomatoes or tomato purée
2 sprigs fresh rosemary
2 sprigs fresh thyme
1 bay leaf
1 teaspoon salt (plus more for seasoning)
1/2 teaspoon cracked black pepper
1/2 cup fresh parsley, finely chopped (for Gremolata garnish)
1 clove garlic, grated (for Gremolata garnish)
Zest of 1 lemon (for Gremolata garnish)
Saffron Risotto (Risotto alla Milanese) for serving
Directions
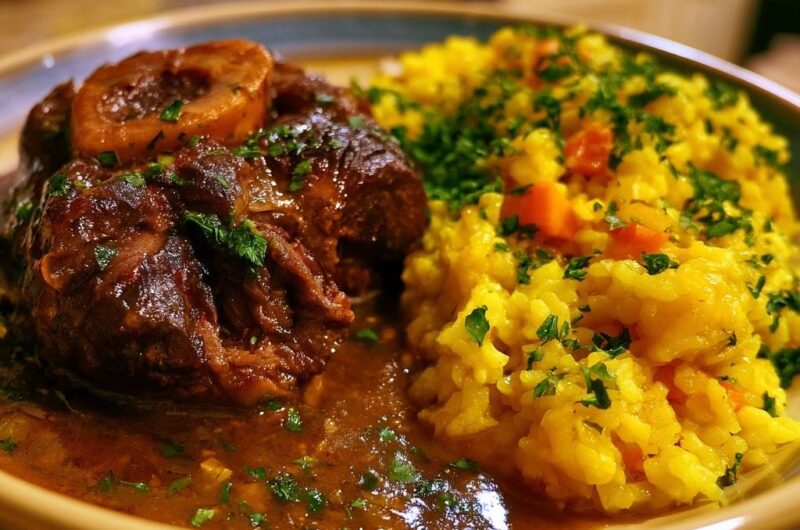
- Tie a piece of kitchen twine around the circumference of each beef shank. This prevents the meat from falling off the bone prematurely during the long braise, ensuring the visual presentation shown in the image.
- Pat the shanks completely dry with paper towels. Season aggressively with salt and pepper, then dredge lightly in flour, shaking off all excess.
- Heat olive oil and butter in a heavy Dutch oven over medium-high heat. Sear the shanks for 5-7 minutes per side until a deep, dark mahogany crust forms. Do not crowd the pan; work in batches if necessary. Remove meat and set aside.
- Reduce heat to medium. Add onions, carrots, and celery. Cook for 8 minutes until softened and slightly caramelized. Stir in the garlic and tomato paste, cooking for 2 minutes until the paste turns a deep brick red.
- Pour in the broth/vinegar mix to deglaze the pan, scraping the bottom vigorously to release the “fond” (brown bits). Let the liquid reduce by half.
- Stir in the crushed tomatoes, beef stock, rosemary, thyme, and bay leaf. Return the beef shanks to the pot. The liquid should come about 3/4 of the way up the sides of the meat.
- Cover the pot with a tight-fitting lid and transfer to a preheated 300°F (150°C) oven. Braise for 3 to 3.5 hours. Low heat is essential to prevent the proteins from seizing and becoming dry.
- While the meat cooks, mix the chopped parsley, grated garlic, and lemon zest in a small bowl to create the Gremolata.
- Check the meat at 3 hours; it should be fork-tender and yielding. Remove the shanks carefully. If the sauce is too thin, simmer it on the stovetop for 5-10 minutes to thicken to a rich gravy consistency.
- Remove the twine from the shanks. Serve over a bed of creamy saffron risotto. Spoon the vegetable-rich sauce over the meat and top with a generous sprinkle of the fresh Gremolata to cut through the richness.
Notes
- Tying the shanks with kitchen twine is essential to keep the meat attached to the bone during the long cooking process. For the best flavor, ensure the meat is patted dry before searing to achieve a deep mahogany crust.