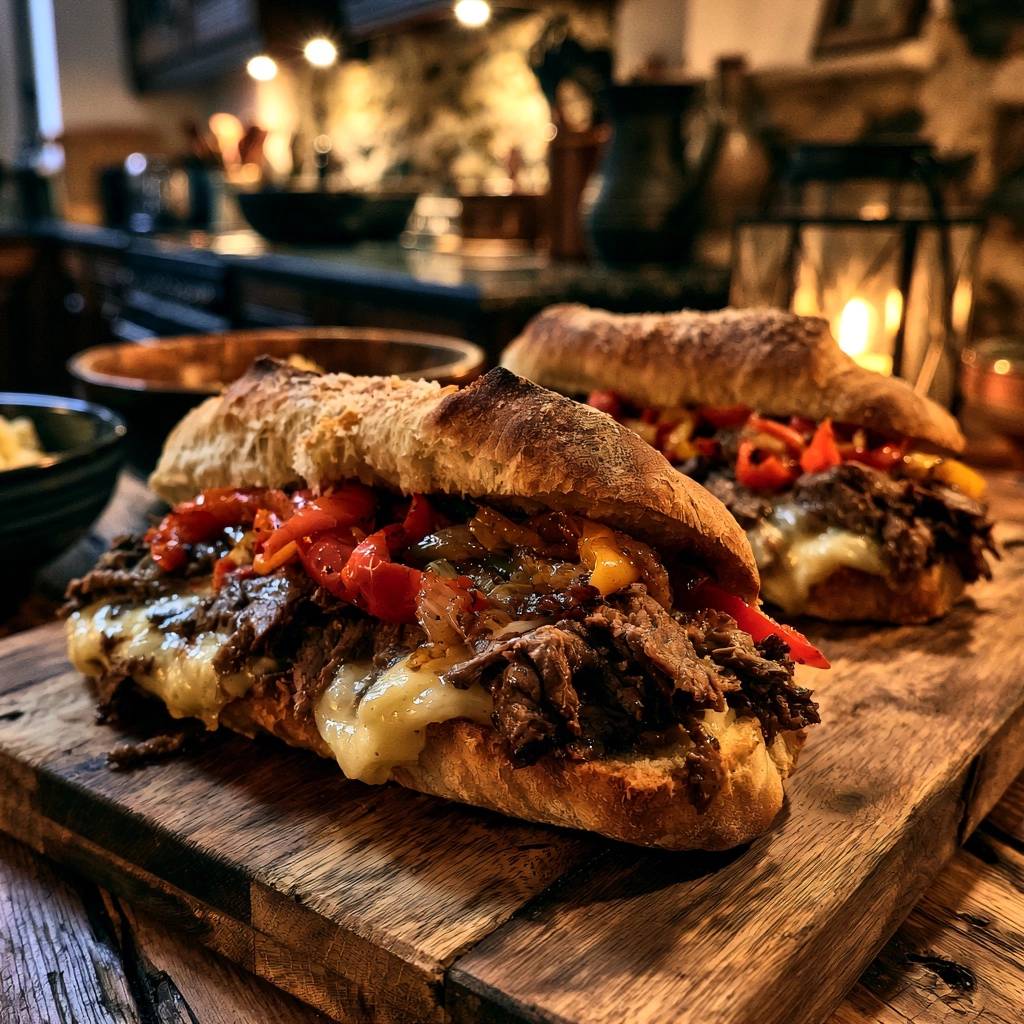
There is nothing quite as disappointing as a beef sandwich that falls apart before you even take the second bite. You know the one: the meat is flavorful, but the bottom bun has transformed into a soggy, gray sponge that sticks to your fingers. This “Soggy Sandwich Syndrome” happens because most recipes ignore the physics of moisture, allowing thin juices to migrate directly into the soft bread crumb.
The secret to a truly professional-grade shaved beef baguette lies in the structural integrity of the build. We aren’t just piling meat onto bread; we are engineering a multi-layered defense system. By using a specific high-heat sear and a strategic cheese barrier, you get that incredible contrast between tender, juicy beef and a crust that shatters when you bite into it.
Expertise in the kitchen often comes down to moisture control. To make this recipe work, you must treat the bread like a foundation and the cheese like waterproof insulation. If you follow the reduction and toasting steps precisely, your baguette will stay crunchy and structural from the first bite to the very last.
The Structural Integrity of Shaved Beef Sandwiches
When you place hot, juicy beef onto fresh bread, the steam and thin liquids immediately begin to break down the starches in the flour. This process happens in seconds, turning a beautiful artisan loaf into a mushy mess. Therefore, we have to change the state of the liquid before it ever touches the baguette.
The “Anti-Soggy Secret” involves two main phases: dehydration and coating. Firstly, we toast the bread to remove surface moisture, creating a hardened shell. Secondly, we reduce the cooking juices into a thick glaze. Because a thick glaze has less “free water” than a thin broth, it clings to the meat instead of leaking into the bread fibers.
Why Thinly Sliced Chuck Roast Works Best
Chuck roast is the undisputed king of slow-cooked beef because of its high fat-to-protein ratio. This intramuscular fat melts down during the four-hour braise, keeping the meat succulent even after it has been seared at high temperatures. However, the way you cut it is just as important as the cut itself.
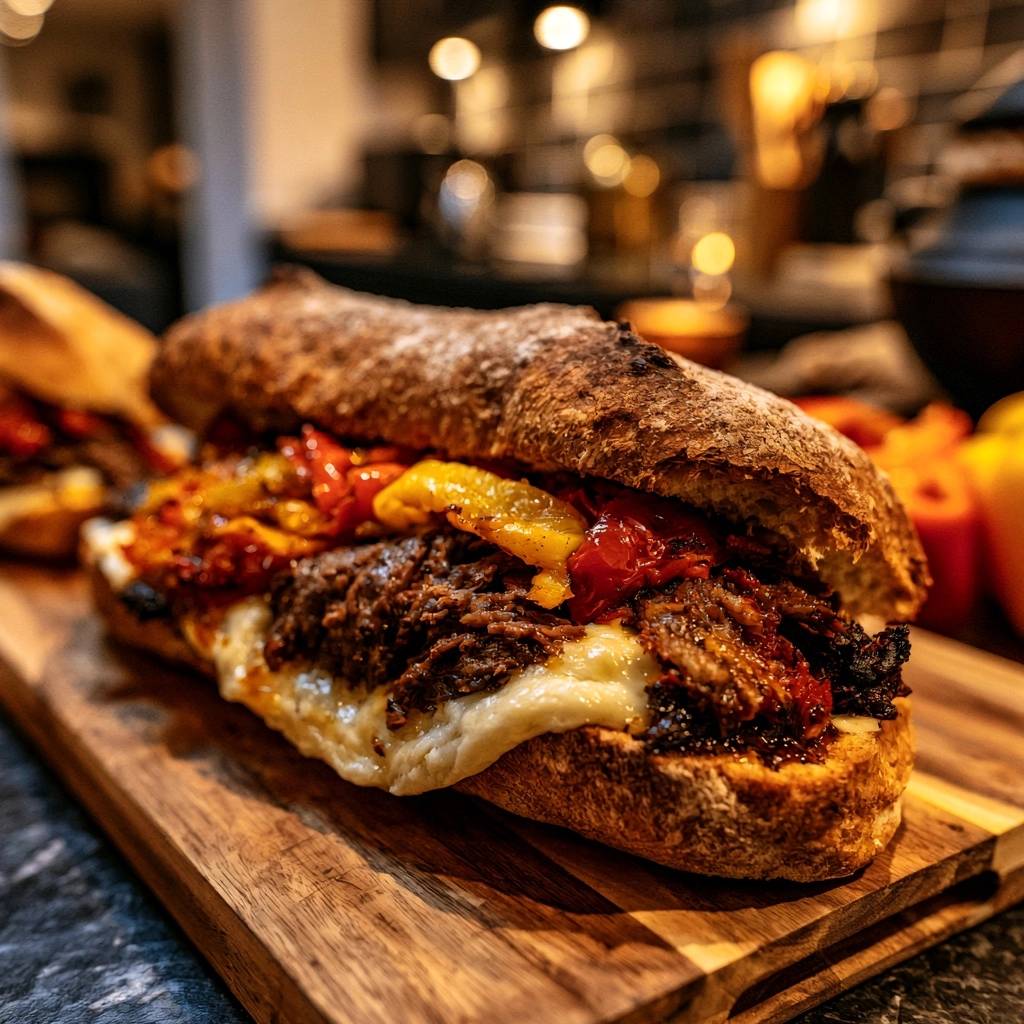
You must slice the beef very thinly against the grain while it is raw. This technique shortens the muscle fibers, ensuring the beef is “shaved” rather than shredded. While shredded beef can become a tangled, watery mash, shaved beef retains its individual shape and texture, providing a much better mouthfeel inside a baguette.
The Role of High-Heat Searing
Most home cooks make the mistake of crowding the pan, which drops the temperature and causes the meat to boil in its own gray juices. To achieve the Maillard reaction—that deep brown, caramelized crust—you must sear in small batches. This chemical reaction creates complex flavor compounds that a slow cooker simply cannot produce on its own.
When you sear the beef properly, you lock in the initial juices and create a textured surface that the glaze can later cling to. If the meat looks gray in the pan, stop and pour off the excess liquid. You want to hear a loud sizzle the entire time the beef is touching the metal.
Essential Components for Slow-Roasted Shaved Beef Baguettes
Success starts with the quality of your pantry. Since this recipe has relatively few ingredients, each one has a massive impact on the final result. You want ingredients that can stand up to heat and moisture without losing their identity.
Selecting the Right Artisan Baguette
A standard supermarket “French bread” is often too soft and airy for this application. Instead, look for a rustic, high-hydration baguette or a sourdough loaf with a thick, dark crust. These breads have a tighter crumb structure and a sturdier exterior that can support the weight of the beef and peppers.
Sourdough is particularly effective because its natural acidity complements the richness of the chuck roast. The thick crust acts as a natural container, ensuring the sandwich doesn’t compress into a flat pancake when you try to eat it. If the bread feels squishy when you squeeze it, it isn’t the right choice for this sandwich.
The Flavor Profile: Aromatics and Spices
We use a combination of yellow onions and bell peppers because they have a high natural sugar content. When sautéed over medium-high heat, these sugars caramelize, providing a sweet counterpoint to the salty beef. The charred edges of the peppers add a subtle smokiness that mimics a professional flat-top grill.
The spice blend of garlic powder, dried oregano, and Worcestershire sauce creates a savory “umami” base. Worcestershire sauce is the secret weapon here; its fermented anchovy and tamarind base adds a depth of flavor that salt alone cannot achieve. It bridges the gap between the beefy broth and the sweet vegetables.
Bone Broth vs. Standard Stock
If possible, always reach for beef bone broth over standard beef stock. Bone broth is simmered for longer periods, which extracts collagen from the bones and turns it into gelatin. This gelatin is the key to a perfect reduction.
When you boil the cooking liquid down at the end, the gelatin creates a natural viscosity. A standard stock will often just get saltier as it reduces, but bone broth will become syrupy and rich. This thick glaze is what prevents the “soggy bottom” by keeping the moisture bound to the meat.
Step-by-Step: Executing the Perfect Sear and Braise
The transition from raw ingredients to a gourmet sandwich requires patience and attention to visual cues. You aren’t just following a clock; you are watching for changes in color and texture.
Phase One: Batch Searing for Maximum Flavor
Start by heating your oil until it shimmers and just begins to wisps of smoke. Add your thinly sliced beef in a single layer, leaving space between the pieces. You should see a deep, mahogany brown crust form within about 60 to 90 seconds.
Remove the meat as soon as it is browned, even if it isn’t cooked through. Remember, the beef will spend four hours in the slow cooker, so the goal here is strictly flavor development, not doneness. If you see liquid pooling in the pan, your heat is too low or you’ve added too much meat at once.
Phase Two: Charring the Peppers and Onions
Don’t wash the pan after the beef! Those brown bits stuck to the bottom are pure flavor. Toss in your peppers and onions, using the moisture from the vegetables to scrape up the fond. You want the edges of the onions to turn dark brown and the peppers to soften slightly.
This step is critical because it evaporates the “natural water” inside the vegetables. If you put raw vegetables into the slow cooker, they will release all that water into your sauce, making it thin and runny. Pre-sautéing ensures your final sauce is concentrated and rich.
Phase Three: The Low and Slow Transformation
Combine everything in the slow cooker and set it to “Low.” While it might be tempting to use the “High” setting to save time, the beef needs the lower temperature to break down the tough connective tissues without drying out the muscle fibers. At the four-hour mark, the beef should be tender enough to bite through easily but still hold its sliced shape.
Check the meat around the three-and-a-half-hour mark. If the beef is already falling apart, it’s ready. You want to avoid a “mushy” texture where the beef and vegetables become one indistinguishable mass. The goal is distinct layers of flavor in every bite.
The Science of the Moisture Barrier
This is where the magic happens. We have cooked the beef, but now we must prepare the baguette to receive it. This three-step process is what separates a home-cooked sandwich from a high-end bistro offering.
Reducing the Jus to a Syrupy Glaze
After the slow cooking is done, strain the liquid into a saucepan. Boil it vigorously until it reduces by about half. You are looking for a consistency that coats the back of a spoon—if you run your finger through the glaze on the spoon, the line should stay clear.
Tossing the beef back into this concentrated glaze ensures that every morsel is packed with flavor. Because the glaze is thick, it won’t run off the meat and soak into the bread. It stays exactly where you put it, providing a burst of juice only when you actually chew.
The Double-Toast Method for Bread Dehydration
Slice your baguette and place it under the broiler. You aren’t just looking for a little color; you want the interior crumb to feel dry and slightly hard to the touch. This dehydration creates a “crust shield” that is much harder for liquid to penetrate than fresh, soft bread.
Keep a close eye on the broiler, as bread can go from golden to burnt in seconds. The goal is a deep, toasted gold across the entire surface. This toasted layer acts as the first line of defense against any stray moisture from the beef.
Creating the Fat-Based Cheese Shield
Immediately after toasting, lay your Provolone or Gruyère over the bottom half of the bread. Return it to the broiler just until the cheese is bubbling and has melted into every nook and cranny of the toasted bread. This creates a waterproof fat barrier.
Since oil and water don’t mix, the fat in the melted cheese prevents the water-based glaze from reaching the bread. Provolone is excellent for this because it melts smoothly and has a mild flavor that doesn’t overpower the beef. Gruyère offers a more sophisticated, nutty profile if you want a richer sandwich.
Troubleshooting Common Sandwich Failures
Even with a great recipe, things can go wrong. Most issues with this dish stem from temperature control or timing. However, almost every mistake is fixable if you catch it early enough.
Managing Excess Liquid in the Slow Cooker
If you find that your slow cooker is swimming in liquid after four hours, don’t panic. Simply use a slotted spoon to remove the beef and vegetables, then pour all the liquid into your saucepan. You may need to boil it for 10 to 12 minutes instead of the usual five to eight.
The key is to keep reducing until that syrupy consistency is reached. If the sauce is still too thin, you can whisk in a tiny teaspoon of cornstarch mixed with cold water, though a natural reduction always tastes better and has a cleaner mouthfeel.
Preventing Overcooked, Rubbery Beef
If your beef feels rubbery, it likely hasn’t cooked long enough for the collagen to melt. Give it another 30 minutes. However, if the beef is dry and stringy, it has been cooked too long or at too high a temperature. In this case, the thick glaze is your best friend—it will coat the fibers and add back the moisture you lost.
Achieving the Perfect Broil Without Burning
Always place your oven rack in the center position rather than the top position when broiling bread. This gives you a larger window of time to catch the bread at its perfect golden state. If the edges of the baguette are browning too fast, you can lightly shield them with small strips of foil while the center finishes toasting.
Optimal Pairings and Serving Suggestions
Because these baguettes are incredibly rich and savory, you want side dishes that offer a bright, acidic, or crunchy contrast. This balances the palate and prevents the meal from feeling too heavy.
Crispy Textural Contrasts
A vinegar-based coleslaw is the perfect companion for this sandwich. The crunch of the cabbage and the tang of the vinegar cut right through the fatty chuck roast and melted cheese. Alternatively, root vegetable chips or a simple arugula salad with a lemon vinaigrette work beautifully.
Dipping Sauces and Extra Jus
If you have extra reduction left over, serve it in small ramekins on the side. This allows people to dip their sandwich “French Dip” style. Since we have built a cheese barrier and toasted the bread, the baguette can handle a quick dip into the jus without immediately disintegrating.
Expert Tips for Storage and Reheating
If you have leftovers, the way you store them will determine if the second meal is just as good as the first. Never store the assembled sandwich, as the bread will inevitably soften overnight.
Maintaining Crunch During Reheating
Store the beef and vegetable mixture in an airtight container separately from the bread. When you are ready to eat, reheat the beef in a small skillet on the stove to keep the glaze thick. Re-toast a fresh baguette and apply the cheese barrier exactly as described in the original recipe.
Avoid the microwave at all costs for the bread, as it will make the baguette chewy and tough. If you must reheat an already assembled sandwich, wrap it loosely in foil and place it in a 350°F oven for 10 to 15 minutes until the center is hot and the crust is revived.
Make-Ahead Strategies for the Beef Base
You can easily prepare the beef and pepper mixture up to 24 hours in advance. In fact, the flavors often deepen after a night in the refrigerator. Simply store the reduced glaze and the beef together, then gently warm them through before assembling your fresh baguettes for a quick weeknight dinner.
How do I store leftovers without the bread getting soggy?
The best way to store leftovers is to keep the beef and vegetable mixture in a separate airtight container from the bread. Do not assemble the sandwiches until you are ready to eat. The beef mixture will stay fresh in the refrigerator for up to three days. When you are ready for a second round, reheat the beef on the stove and follow the toasting and cheese-barrier steps with fresh bread to ensure that signature crunch.
Why is my beef tough even after four hours in the slow cooker?
Tough beef usually means the connective tissue hasn’t had enough time to break down into gelatin. This can happen if your slow cooker runs a bit cool or if the beef slices were slightly too thick. Simply cook it for another 30 to 60 minutes on the Low setting. You’ll know it’s done when a fork easily slides into the meat with almost no resistance.
Can I use a different cut of meat if I can’t find chuck roast?
While chuck roast is ideal for its fat content, you can substitute it with top round or brisket. However, since these cuts are leaner, you must be extra careful not to overcook them. If using a leaner cut, ensure you slice it paper-thin against the grain to compensate for the lack of fat, and don’t skip the bone broth reduction, as the meat will rely on that glaze for moisture.
What is the best substitute for Provolone cheese?
If you don’t have Provolone, Gruyère is the top choice for its excellent melting properties and sophisticated flavor. Other great options include Havarti, Monterey Jack, or even a mild Swiss. The key is to choose a cheese that melts into a smooth, oily layer rather than a crumbly one, as the goal is to create a waterproof barrier for the bread.
Can I make this recipe in an oven if I don’t have a slow cooker?
Yes, you can easily adapt this for a Dutch oven. After searing the meat and vegetables, add the liquids and spices, cover the pot tightly, and bake in a 300°F oven for about 2.5 to 3 hours. Check the meat periodically to ensure the liquid hasn’t evaporated completely. The low, steady heat of the oven mimics the slow cooker environment perfectly.
My glaze didn’t thicken, what did I do wrong?
If your glaze is still watery, it simply hasn’t reduced enough. Continue boiling it over high heat. If you used a standard beef stock instead of bone broth, it may lack the natural gelatin needed to thicken. In this case, you can mix one teaspoon of cornstarch with a tablespoon of cold water and whisk it into the boiling liquid for 60 seconds to achieve that syrupy consistency.
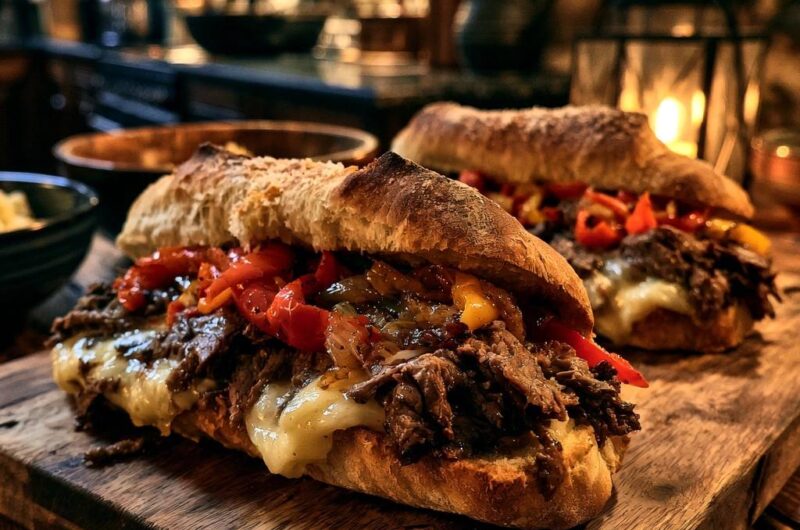
Slow-Roasted Shaved Beef Baguettes
Course: Main CourseCuisine: AmericanDifficulty: easy4
servings20
minutes4
hours240
Minutes720
kcalAmerican
Ingredients
2 lbs beef chuck roast, trimmed and very thinly sliced against the grain
2 large, rustic crusty French baguettes (sourdough or artisan style)
8-12 slices thick-cut Provolone or Gruyère cheese
2 red bell peppers, sliced into strips
1 yellow bell pepper, sliced into strips
1 large yellow onion, thinly sliced
4 tablespoons olive oil, divided
1 cup beef bone broth
1 tablespoon garlic powder
1 teaspoon dried oregano
1 tablespoon Worcestershire sauce
Salt and coarse black pepper to taste
Directions
- The Sear: To prevent soggy bread, you must first control the moisture in the meat. In a large heavy skillet or Dutch oven over high heat, add 2 tablespoons of olive oil. Sear the thinly sliced beef in small batches. Do not crowd the pan; you want a deep brown crust, not gray steamed meat. Remove the beef and set aside.
- The Aromatics: In the same pan, add the remaining oil and sauté the onions and peppers over medium-high heat until the edges are charred and the natural water has evaporated.
- The Slow Braise: Place the seared beef, onions, and peppers into a slow cooker. Add the beef broth, garlic powder, oregano, Worcestershire sauce, salt, and pepper. Cook on Low for 4 hours. The beef should be tender and infused with flavor, but still hold its “shaved” shape rather than disintegrating into a mash.
- The Reduction: 15 minutes before serving, use a slotted spoon to transfer the beef and vegetable mixture to a bowl. Pour the remaining liquid from the slow cooker into a small saucepan and boil over high heat for 5-8 minutes until it reduces to a thick, syrupy glaze. Toss the beef back into this glaze to coat it; this ensures the flavor stays on the meat instead of soaking into the bread.
- The Shield: Slice your baguettes lengthwise. Place them open-faced under a broiler for 2-3 minutes until the interior is deeply toasted and golden. This creates a dehydrated “crust” shield.
- The Barrier: Immediately layer the cheese slices onto the hot, toasted bottom half of the bread. Return to the broiler for 30 seconds until the cheese is bubbling and completely covers the bread surface. This melted fat layer acts as a waterproof barrier.
- Assembly: Pile the glazed beef and peppers onto the cheese-lined baguette. Close the sandwich and serve immediately. The combination of the toasted crumb and the cheese barrier ensures the baguette remains crunchy despite the juicy filling.
Notes
- The reduction of the cooking liquid is essential to keep the flavor on the meat rather than soaking into the bread. Using a high-quality artisan baguette provides the best structural integrity.