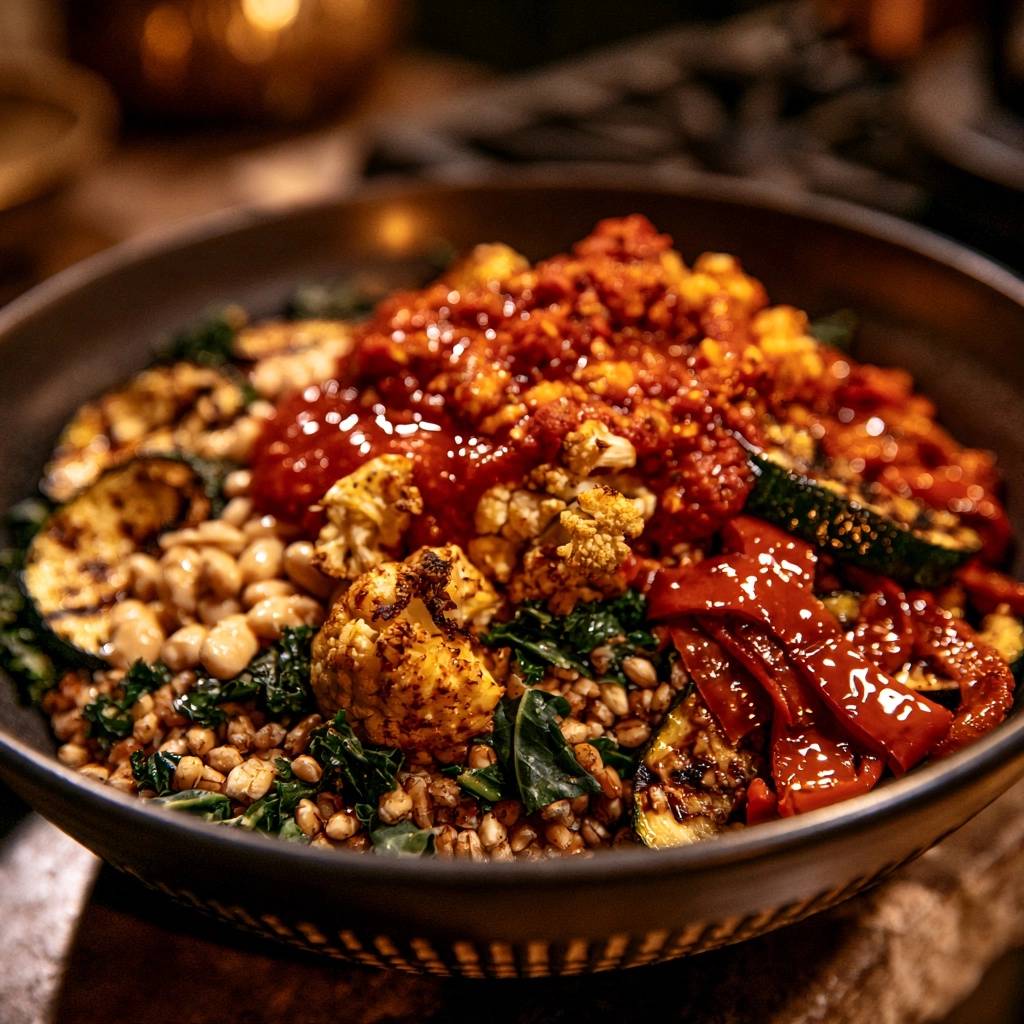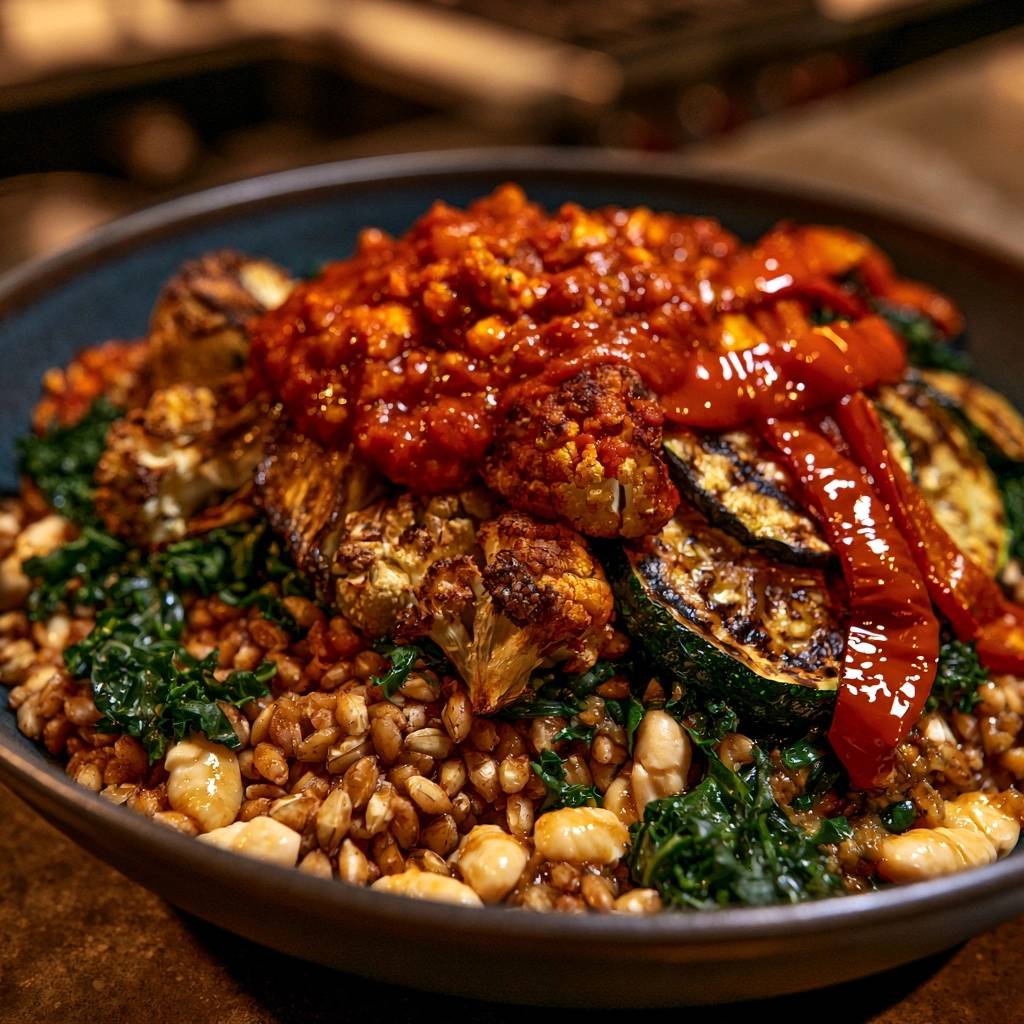
Most grain bowls suffer from a fatal flaw: the “mush factor.” You’ve likely experienced it before—a pile of soft, steamed vegetables sitting atop a gummy mound of grains that feels more like porridge than a meal. This Roasted Vegetable Farro Bowl solves that problem by focusing on moisture control and high-heat searing. We aren’t just cooking vegetables; we’re engineering a superior texture experience through specific roasting techniques that prioritize the crunch. The philosophy here is simple: moisture is the enemy of flavor. By using a high-heat roasting method and a strategic layering technique, you ensure the cauliflower develops deep, nutty char marks while the zucchini remains firm. This isn’t your standard meal-prep recipe where everything gets tossed in a container to soften. It’s a restaurant-quality dish that balances the chewy bite of pearled farro with the smoky, crisp edges of perfectly seared produce. The secret to this success lies in the “screaming hot pan” method. By preheating your baking sheets before the vegetables ever touch them, you initiate an immediate sear. This thermal shock locks in the vegetable’s internal structure and prevents them from leaking water. When you hear that initial sizzle as the zucchini hits the metal, you know you’ve already won the battle against sogginess.
The Science of Texture in Grain Bowls
Achieving the perfect roast requires an understanding of the Maillard reaction. This chemical reaction between amino acids and reducing sugars gives browned food its distinctive, savory flavor. However, this reaction cannot happen in the presence of excess water because the temperature won’t rise above the boiling point of 212°F. If your vegetables are wet or crowded, they will steam in their own juices rather than brown. Crowding the pan is the most common mistake home cooks make. When vegetables are packed too tightly, the moisture they release has nowhere to go, creating a humid microclimate on the baking sheet. By giving each floret and slice its own “personal space,” you allow that moisture to evaporate instantly. This evaporation concentrates the natural sugars in the peppers and cauliflower, leading to those prized charred edges that provide a smoky contrast to the earthy farro.Essential Components for the Roasted Vegetable Farro Bowl
The foundation of this bowl is pearled farro, which is the “pantry hero” of the ancient grain world. Unlike whole farro, which requires overnight soaking and an hour of simmering, pearled farro has the outer bran removed. This allows it to cook in about 20 minutes while maintaining a delightful, bouncy chew. Boiling it in vegetable broth instead of plain water is a non-negotiable step for infusing deep flavor directly into the grain’s core. The vegetable selection is intentional. Cauliflower acts as a sponge for spices and provides a hearty, “meaty” texture when charred. Zucchini and red bell peppers add sweetness and vibrant color, but they are high-moisture vegetables. This is why the high-heat method is so critical for them. To round out the nutrition, we include cannellini beans for creamy protein and kale for a bitter, crisp element that cuts through the richness of the olive oil.Selecting and Prepping the Pearled Farro
When shopping, look for “pearled” or “semi-pearled” labels to ensure the cooking times match this recipe. Before the farro hits the pot, give it a thorough rinse in a fine-mesh strainer. You’ll notice the water starts cloudy; that’s excess surface starch. Removing this starch is the key to preventing a gummy mass, ensuring every grain remains distinct and “al dente” once cooked.The Role of High-Smoke Point Fats
Olive oil is our primary fat here because it carries the flavors of smoked paprika and garlic powder beautifully. It also acts as a heat conductor. When you coat the flat edges of the cauliflower florets in oil, you create a bridge between the hot pan and the vegetable. This ensures the heat is distributed evenly, resulting in a deep, golden-brown crust rather than localized burning.The Anti-Soggy Method: Preheating and Preparation
The “Screaming Hot Pan” technique is a game-changer for home roasting. By placing your empty rimmed baking sheets in the oven while it preheats to 425°F, you turn the pans into searing surfaces. This mimics the intense heat of a commercial stone oven. When the oiled vegetables land on the hot metal, the exterior cells rupture and brown instantly, creating a barrier that keeps the interior from becoming mushy. This method is particularly vital for zucchini. Because zucchini is over 90% water, it often turns into a soft mess in the oven. The immediate sear from a preheated pan evaporates surface moisture before it can soak back into the vegetable. It’s the difference between a vibrant, firm vegetable and a limp, watery one.Surface Moisture Removal Techniques
Even the hottest pan can’t save a vegetable that is dripping wet. After washing your produce, you must pat it completely dry with paper towels or a clean kitchen towel. If you see droplets of water on the pepper strips or cauliflower, they will turn to steam the moment they hit the oven. Taking sixty seconds to dry your vegetables is the single most important step for achieving a professional-grade char.Step-by-Step: Executing the High-Heat Roast
The roasting process happens in three distinct phases. First is the Initial Sear, where the vegetables hit the preheated pans and begin to sizzle. During the Mid-Roast Wait, which lasts about 15 minutes, your biggest job is to do nothing. Resist the urge to flip or stir the vegetables too early. If you move them before the crust has formed, you’ll tear the delicate surfaces and lose that beautiful browning. The final phase is the Integration. This is when we add the quicker-cooking elements like the kale and beans. By the time the cauliflower is tender and the peppers are blistered, the farro should be fluffed and ready. The goal is to have all components reach their peak texture at the exact same moment, creating a harmony of chewy, crunchy, and creamy elements in every spoonful.Managing the Farro Simmer
Treat your farro like pasta. Boil it in plenty of broth until it is tender but still offers a slight resistance to the tooth. As soon as it reaches that “al dente” state, drain it immediately. Don’t let it sit in the hot liquid, or it will continue to absorb water and bloat. Tossing the warm grains with a tablespoon of olive oil right after draining creates a light coating that keeps the grains from sticking together.The Five-Minute Finish: Kale and Cannellini Beans
In the final five minutes of roasting, we introduce the kale and cannellini beans. You want the kale to wilt and develop “lacinato-style” crisp edges—almost like kale chips—without turning to ash. The beans only need enough time to warm through and absorb the residual spices on the pan. This quick blast of heat ensures the kale stays bright green and the beans don’t dry out.Flavor Variations and Grain Substitutions
While farro is the star here, you can easily adapt this bowl to what’s in your pantry. Pearled barley offers a similar chewy texture and works well with the same cooking times. If you want something even heartier, kamut or wheat berries are excellent, though they require a longer simmer. For a different flavor profile, try swapping the harissa-tomato sauce for a creamy tahini-lemon dressing or a zesty sun-dried tomato pesto. If you prefer different vegetables, broccoli florets can stand in for cauliflower, and eggplant cubes can replace zucchini. Just remember the golden rule: keep the pieces relatively uniform in size to ensure they roast at the same rate. Regardless of the vegetable, the preheated pan method remains the essential constant for success.Avoiding Common Grain Bowl Mistakes
If your farro ends up mushy, you likely overcooked it or failed to drain it promptly. Always start checking the texture five minutes before the timer goes off. If your vegetables look pale and sad, you probably crowded the pan or your oven temperature was too low. Don’t be afraid of the 425°F heat; it is necessary for that roasted flavor. Another common pitfall is a lack of seasoning. Grains are notoriously bland on their own. If the dish tastes flat, it’s usually because the farro wasn’t salted enough during the boiling process. Always taste your grains before assembling the bowl; a final pinch of sea salt or a squeeze of lemon juice can often wake up all the other flavors.Strategic Assembly for Maximum Visual Appeal
Presentation matters because we eat with our eyes first. Start by mixing the wilted kale and beans directly into the fluffed farro. This creates a textured, green-flecked base that looks much more appetizing than plain grains. Once the base is set, layer the charred cauliflower, zucchini, and peppers on top. By placing the roasted vegetables on top rather than mixing them in, you preserve their structural integrity. They won’t get crushed or lose their crispness under the weight of the grains. This layering also showcases the beautiful char marks you worked so hard to achieve, making the bowl look like it came straight from a high-end cafe.Make-Ahead Logistics and Storage
This Roasted Vegetable Farro Bowl is a meal-prep dream, but you have to be smart about storage. Keep the roasted vegetables and the farro in separate airtight containers in the fridge. If you mix them together while warm, the moisture from the grains will soften the vegetables overnight. They will stay fresh for up to four days. When it’s time to eat, avoid the microwave if possible. A microwave will make the vegetables rubbery. Instead, toss the vegetables into an air fryer or back onto a sheet pan in a 400°F oven for five minutes. This revives the crisp edges and warms the farro without turning the whole meal into a soggy mess.Expert Tips for Enhancing the Harissa-Tomato Finish
The final dollop of harissa-infused tomato sauce isn’t just a garnish; it’s the acidic bridge that ties the smoky vegetables to the earthy grains. The thickness of the sauce is important. You want something chunky and rich that stays where you put it, rather than a thin sauce that runs to the bottom of the bowl. If you find harissa too spicy, you can mellow the sauce by stirring in a spoonful of Greek yogurt or a drizzle of honey. The goal is to provide a bright, tangy contrast to the deep, roasted flavors of the charred produce. That hit of acidity cuts through the olive oil and makes every bite feel light and balanced.Frequently Asked Questions
Can I use frozen vegetables for this recipe?
I don’t recommend using frozen vegetables if you want the specific charred texture described here. Frozen vegetables have been blanched and then frozen, which breaks down their cell walls. When they thaw in the oven, they release a significant amount of water all at once, making it nearly impossible to get a firm, seared exterior. Stick to fresh produce for the best results.Is farro gluten-free?
No, farro is an ancient species of wheat. It contains gluten and is not suitable for those with celiac disease or gluten sensitivities. If you need a gluten-free alternative with a similar chewy texture, try using sorghum or brown rice, though you will need to adjust the cooking times according to the package directions.How do I scale this recipe for a large group without losing the char?
The biggest danger when scaling up is overcrowding the pans. If you are doubling the recipe, you must use more baking sheets. Do not try to cram more vegetables onto one tray. Use multiple oven racks and rotate the pans halfway through the cooking time to ensure even heat distribution. If your oven is too full, the moisture levels will rise, and you’ll lose that crispness.Can I substitute the cannellini beans?
Absolutely. Cannellini beans are great for their creamy texture, but chickpeas are a fantastic alternative if you want even more crunch. You can roast the chickpeas right along with the cauliflower. Cooked lentils also work well, though they should be folded into the farro at the end rather than roasted, as they can become quite hard in the oven.Why is my farro still crunchy after 25 minutes?
If your farro is still unpleasantly hard, you might be using “whole” farro instead of “pearled.” Whole farro still has the tough outer bran intact and takes much longer to cook. If you have whole farro, you may need to simmer it for 40 to 60 minutes. To fix it mid-recipe, just keep adding a little more broth and simmering until it reaches the desired chewiness.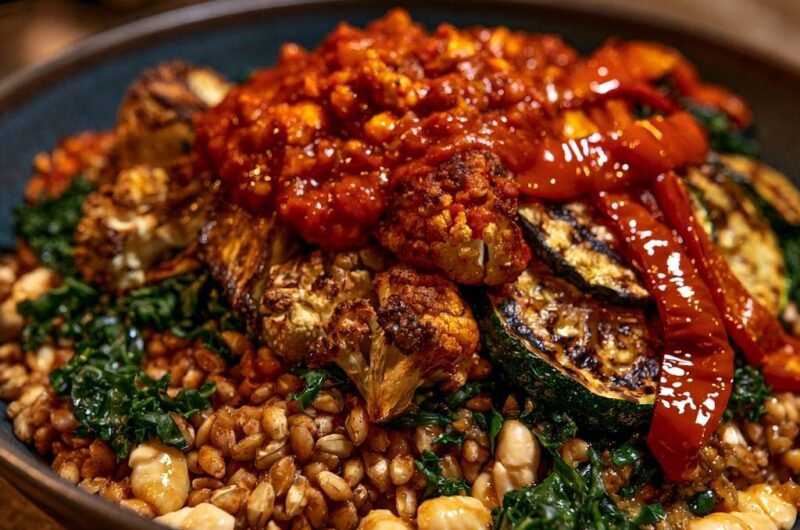
Roasted Vegetable Farro Bowl
Course: Main CourseCuisine: AmericanDifficulty: easyYields
4
servingsPrep Time
15
minutesCook Time
35
minutesTotal Time
50
MinutesCalories
420
kcalCuisine
American
Ingredients
1 cup pearled farro
2 cups vegetable broth
1 head cauliflower, cut into large, flat-edged florets
2 medium zucchini, sliced into thick rounds
1 red bell pepper, sliced into wide strips
2 cups chopped kale, stems removed
1 can (15 oz) cannellini beans, drained and rinsed
4 tablespoons olive oil, divided
1 teaspoon smoked paprika
1 teaspoon garlic powder
Salt and black pepper to taste
1/2 cup thick, chunky harissa-infused tomato sauce or sun-dried tomato pesto
Directions
- Preheat your oven to 425°F (220°C). Place two large rimmed baking sheets inside the oven while it preheats. Getting the pans screaming hot is the first step to preventing sogginess and achieving the char seen in the image.
- Rinse the farro and place it in a pot with the vegetable broth. Bring to a boil, then reduce heat and simmer for 20 to 25 minutes until tender but still chewy. Drain any excess liquid immediately and toss with 1 tablespoon of olive oil to keep the grains distinct and non-gummy.
- The Anti-Soggy Secret: Pat your cauliflower, zucchini, and peppers completely dry with paper towels. Any surface moisture will turn to steam.
- In a large bowl, toss the dried vegetables with 2 tablespoons of olive oil, paprika, garlic powder, salt, and pepper. Ensure the cauliflower florets have a flat side well-coated in oil to maximize contact with the pan.
- Carefully remove the hot baking sheets from the oven. Arrange the vegetables in a single layer. You should hear a sizzle. Do not crowd the pans; space allows moisture to evaporate rather than steam the vegetables.
- Roast for 20-25 minutes. For the deep char shown in the image, do not flip the vegetables until the final 5 minutes of cooking.
- While vegetables roast, toss the kale and white beans in the remaining 1 tablespoon of oil. During the last 5 minutes of roasting, clear a small space on the tray or use a third tray to wilt the kale and warm the beans until the kale edges are slightly crisp.
- To assemble, fluff the farro and divide into bowls. Mix a portion of the wilted kale and beans directly into the farro.
- Top with the charred cauliflower, zucchini rounds, and pepper strips.
- Finish with a heavy dollop of the thick, chunky tomato-harissa sauce directly over the center of the roasted vegetables to provide a rich, acidic contrast to the smoky charred edges.
Notes
- The key to preventing soggy vegetables is preheating the baking sheets and ensuring all vegetables are patted completely dry before roasting. Use a thick sauce like sun-dried tomato pesto or harissa-infused tomato sauce for the best flavor contrast.