
You’ve likely experienced the heartbreak of a pot roast that looks beautiful but eats like a bundle of dry rubber bands. It’s a common kitchen tragedy where the meat appears tender because it falls apart, yet every bite feels parched and stringy. This happens when the internal moisture is squeezed out before the tough connective tissues have a chance to melt.
The secret to avoiding this lies in a patient, 3.5-hour transformation that turns a humble chuck roast into something you can eat with a spoon. By controlling the temperature and using a specific braising liquid ratio, we ensure the beef stays succulent while the onions dissolve into a dark, mahogany gravy. It’s about working with the science of the meat rather than fighting against it.
For a similar slow-simmered experience, discover the rich flavors in savory beef stew.
The most important tip I can give you is to ignore the clock and watch the meat. True tenderness happens when collagen turns into gelatin, a process that only occurs with low, steady heat. If you try to rush this by boiling the liquid, you’ll end up with tough fibers every single time. Keep the heat at a bare simmer, and you’ll be rewarded with a texture that truly melts in your mouth.
The Science of Collagen and Tenderness
Beef chuck roast is packed with collagen, which is the structural protein that makes certain cuts feel “tough.” However, collagen is actually your best friend in a slow braise. When you keep the meat between 160°F and 180°F for several hours, that collagen physically breaks down into gelatin.
This gelatin coats the individual muscle fibers, providing that rich, silky mouthfeel we crave. If you cook the meat too fast at a high temperature, the muscle fibers contract and push out all their juices. You’re left with dry meat surrounded by a watery sauce. By going low and slow, you allow the transformation to happen without losing the moisture.
Why Chuck Roast is the Superior Choice
You might be tempted to use a leaner cut like sirloin or round, but those will fail you in a long braise. Chuck roast comes from the shoulder, an area that gets plenty of exercise and develops deep flavor and heavy marbling. That intramuscular fat is essential because it bastes the meat from the inside out as it renders.
For a similar experience with tender beef, explore this slow-braised beef and apricot stew.

Leaner cuts lack this internal fat and connective tissue. Without it, they simply become dry and chalky after an hour in the pot. The chuck roast provides the perfect balance of lean protein and fat to create a sauce that is naturally thick and incredibly savory.
Essential Components for Deep Flavor
Every ingredient in this pot serves a specific purpose beyond just adding bulk. We use beef bone broth instead of standard stock because it contains extra protein and minerals that give the sauce a “glossy” finish. It adds a body to the gravy that water or thin broth simply can’t match.
Acidity is the other secret weapon here. Whether you use a dry red wine or a splash of balsamic vinegar, that acid cuts through the heavy fat of the beef. It brightens the entire dish and helps tenderize the outer layers of the meat. A dash of Worcestershire sauce provides a final hit of umami that ties the onions and beef together.
Selecting and Prepping the Aromatics
We use three large yellow onions, which might seem like a lot, but they are the backbone of the sauce. Slice them into thick half-moons rather than a fine dice. These thick slices need to survive three hours of heat without completely disappearing into the liquid.
For the garlic, I prefer smashing the cloves rather than mincing them. Smashed garlic releases a mellow, sweet aroma during the long cook time. Mincing can sometimes lead to burnt bits during the initial sauté, which would turn the entire gravy bitter.
The Role of High-Quality Bone Broth
If you can find a high-quality bone broth that gels when cold, use it. That natural gelatin is what gives professional restaurant sauces their lip-smacking quality. As the liquid reduces in the Dutch oven, the proteins concentrate, creating a natural glaze that clings to the beef chunks.
Phase One: Achieving the Maillard Reaction
The foundation of this dish is the sear. You must pat the beef chunks completely dry with paper towels before they hit the pan. If the meat is damp, it will steam instead of brown, and you’ll miss out on the Maillard reaction. This chemical reaction between amino acids and sugars is what creates that deep, savory crust.
Don’t be afraid of a dark crust. You want the meat to look deeply browned, almost like a charred steak. This color isn’t just for looks; it’s the primary source of flavor for your final gravy. That brown “crust” will eventually dissolve into the liquid, seasoning everything in the pot.
Batch Searing for Maximum Surface Area
It’s tempting to throw all the meat in at once to save time, but you must work in batches. Crowding the pan drops the temperature of the oil and traps steam. If you see gray liquid pooling in the bottom of the pan, you’ve crowded it too much.
Give each piece of beef its own space so the edges can crisp up. Between batches, let the pan come back up to heat for a minute. This ensures every single chunk of beef contributes maximum flavor to the foundation of the braise.
Phase Two: Caramelizing Onions and Deglazing
Once the meat is out, the onions go in to soak up all those rendered beef fats. Cook them for at least 12 to 15 minutes. You aren’t just softening them; you’re looking for a deep golden color that signals the natural sugars have caramelized. This provides a sweetness that balances the salty broth.
When you add the tomato paste, keep stirring until it turns a rusty brick color. This “frying” of the paste removes the raw metallic taste and unlocks a sun-dried tomato depth. It’s a small step that makes a massive difference in the complexity of the sauce.
Capturing the Fond with Liquid
The “fond” is the collection of dark, caramelized bits stuck to the bottom of your pot. This is concentrated flavor gold. When you pour in your wine or broth to deglaze, use a wooden spoon to scrape every last bit of it into the liquid.
As the liquid bubbles, the fond will dissolve, instantly turning your pale broth into a rich, dark sauce. This step is non-negotiable. If you leave those bits on the bottom, they might burn, and you’ll lose the best part of the dish.
Phase Three: The Low and Slow Braise
Now comes the test of patience. You want a “bare simmer,” which means you should only see an occasional bubble breaking the surface. If the liquid is rolling or boiling, the meat will turn out tough. The gentle heat allows the fibers to relax while the collagen melts away.
While the stovetop works fine, I highly recommend using a 300°F oven. An oven provides consistent heat from all sides, whereas a stovetop only heats from the bottom. This surrounding warmth creates a more even cook and reduces the risk of the bottom of the pot scorching over three hours.
The Submergence Rule: Three-Quarters Full
Never fully submerge your meat in liquid. You want the beef chunks to be about three-quarters of the way covered. The exposed tops of the meat will brown and develop flavor in the moist heat of the pot, while the submerged parts tenderize.
If you drown the meat completely, you’re essentially boiling it. Braising is a combination of simmering and steaming. This balance is what creates that specific “braised” texture that is distinct from a standard soup or stew.
Troubleshooting Common Braising Obstacles
If your timer goes off and the meat still feels a bit “tight” or bouncy when you poke it with a fork, it simply isn’t done. Every cow is different, and some cuts need an extra 30 minutes to fully give up their resistance. Don’t panic; just put the lid back on and keep going.
If you find the sauce has become too salty, it’s usually because the broth reduced more than expected. You can fix this by adding a splash of water or a little more unsalted broth. Conversely, if the sauce is too thin, just simmer it without the lid for the last few minutes to concentrate the flavors.
Fixing a Thin or Greasy Sauce
Sometimes the chuck roast is particularly fatty, leaving a layer of oil on top. Use a wide spoon to gently skim that clear fat off the surface before serving. You want the sauce to be glossy, not greasy.
To check the thickness, dip a spoon into the sauce. It should coat the back of the spoon smoothly, a state chefs call “nappe.” If it runs off like water, keep reducing it. The onions should be so soft by now that they almost act as a thickener themselves.
Optimal Pairings for Braised Beef and Onions
This dish is incredibly rich, so you need a side that can handle the weight of the onion gravy. You want something that acts as a sponge. Avoid anything too delicate or light, as the beef will completely overwhelm it.
What to Pair with Your Braised Beef
To round out your meal with the slow-simmered braised beef and onions, consider these complementary dishes.
- For a comforting base that soaks up the rich braising liquid, try these creamy mashed potatoes with rich gravy.
- If you’re looking for another hearty, savory element, this thyme beef stuffing offers a wonderful texture to complement the tender beef.
The goal is to have a vessel for that sauce. Since the onions have basically become a jam-like consistency, you want a starch that provides a neutral, creamy base to let the beef shine.
The Case for Buttery Mashed Potatoes
Mashed potatoes are the classic choice for a reason. The creamy, buttery texture of the spuds is the perfect foil for the chunky, savory beef. I like to keep my mash fairly simple so it doesn’t compete with the complex flavors of the braise.
If you want to add a little kick, stir in some fresh horseradish or chopped chives. The sharp bite of horseradish is a traditional partner for beef and helps cut through the richness of the caramelized onions.
Alternative Grains and Crusty Breads
If you aren’t in the mood for potatoes, wide egg noodles are a fantastic alternative. They have a great “chew” that stands up well to the tender meat. Soft polenta is another excellent option, providing a velvety bed for the beef and gravy.
Never underestimate the power of a thick slice of toasted sourdough. Rub the toast with a raw garlic clove while it’s hot, then ladle the beef and onions right on top. The bread soaks up the juices while the crust stays just crunchy enough to provide contrast.
Make-Ahead Strategy and Storage
Braised beef is one of the few dishes that actually tastes better the next day. As the dish cools, the meat reabsorbs some of the flavorful liquid, and the spices have more time to meld. If you’re hosting a dinner party, making this a day in advance is a pro move.
When storing, let the pot cool down slightly before moving it to the fridge. Ensure the meat is completely covered by the sauce so it doesn’t dry out in the cold air. The fat will solidify on top, making it very easy to scrape off and discard the next day before reheating.
Freezing and Reheating Without Drying Out
This recipe freezes beautifully. Place the beef and plenty of sauce in an airtight container or a heavy-duty freezer bag. It will stay fresh for up to three months. Just be sure to leave a little headspace in the container as the liquid will expand when frozen.
To reheat, thaw the beef in the fridge overnight. Warm it up in a covered saucepan over low heat. Add a splash of broth or water to loosen the sauce. Avoid the microwave if possible, as it can heat the meat unevenly and make those tender fibers turn rubbery.
Expert Tips for Professional Results
For an even more intense flavor, try adding a piece of parmesan rind to the pot during the simmer. The rind won’t melt, but it releases a massive amount of savory depth into the broth. Just fish it out and discard it before you serve the meal.
Another trick is to use a “cartouche,” which is just a circle of parchment paper placed directly on the surface of the liquid under the lid. This prevents too much evaporation while still allowing the meat to brown slightly. It keeps the environment inside the pot perfectly moist.
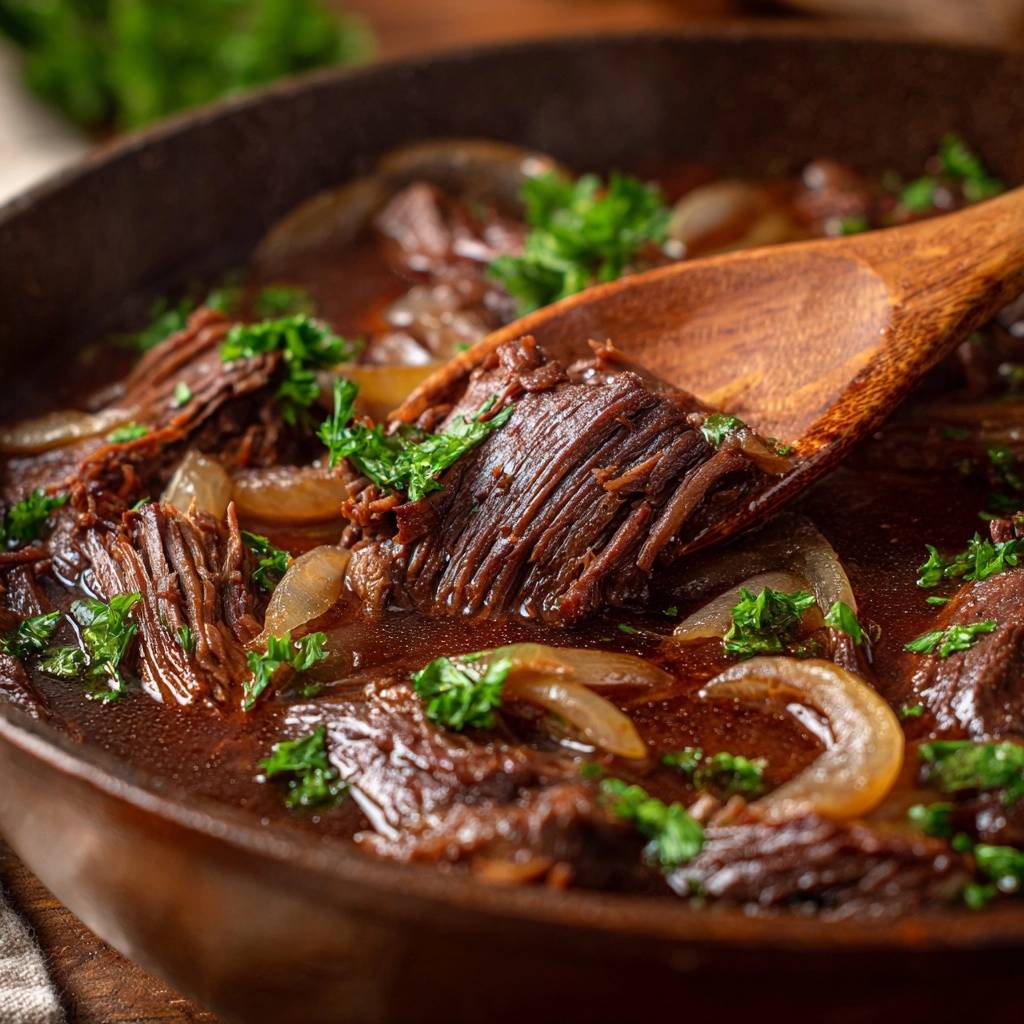
The Importance of the Fresh Parsley Garnish
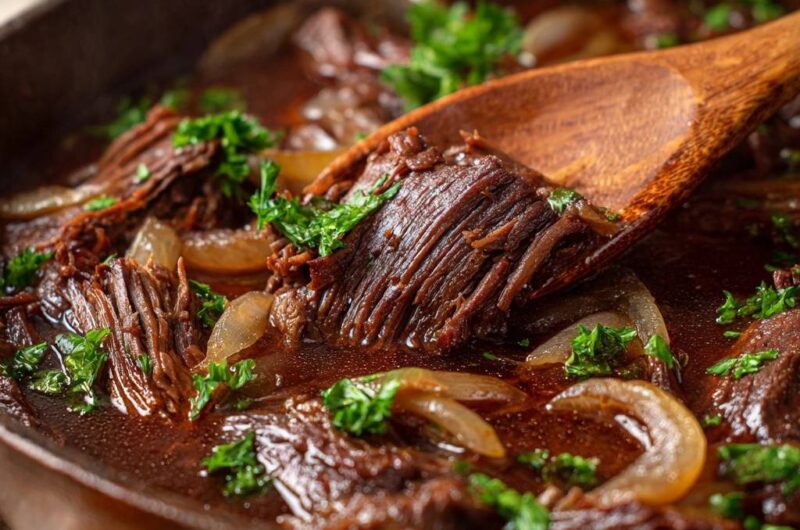
Don’t skip the fresh parsley at the end. After three hours of cooking, the flavors in the pot are very “heavy” and dark. The bright, slightly bitter taste of fresh parsley wakes up the palate and provides a necessary contrast to the sweet onions.
Chop it coarsely so you get actual leaves in each bite. It adds a pop of color that makes the dark brown dish look much more appetizing on the table. It’s the final touch that moves the dish from “home cooking” to “chef quality.”
Frequently Asked Questions
Can I use a Slow Cooker?
Yes, you can definitely use a slow cooker for this recipe. However, you must still sear the beef and caramelize the onions in a pan first. If you just throw raw meat and onions into a slow cooker, you’ll miss out on all the deep flavors created by the Maillard reaction. Once seared, cook on “Low” for 7 to 8 hours until the beef is tender.
What if I don’t want to use any alcohol?
You can easily replace the red wine with an equal amount of beef broth. To mimic the acidity that wine provides, add one tablespoon of balsamic vinegar or red wine vinegar to the broth. This ensures the sauce still has that necessary “tang” to balance the richness of the beef fat and caramelized onions.
Can I use a different cut of beef like brisket?
Brisket is a great alternative to chuck roast because it also has plenty of connective tissue. If you use brisket, make sure it is the “point” end (the fattier part) rather than the “flat” end, which can be a bit leaner. Keep in mind that brisket may take slightly longer to become tender, so plan for an extra 30 to 60 minutes of cook time.
Why is my beef “falling apart” but still feels dry?
This usually happens if the liquid was boiling too hard or if the meat was cooked for too long at a high temperature. When beef is boiled, the muscle fibers tighten and squeeze out their internal moisture. Even though the connective tissue has broken down (causing it to fall apart), the fibers themselves are parched. Always keep the heat at a very low simmer to prevent this.
How do I store leftovers?
Store any leftovers in an airtight container in the refrigerator for up to 4 days. Make sure the meat is submerged in the gravy to keep it from drying out. This dish actually freezes very well for up to 3 months. When reheating, do so slowly on the stovetop over low heat, adding a splash of broth if the sauce has thickened too much.
Braised Beef
Course: Main CourseCuisine: AmericanDifficulty: medium6
servings15
minutes3
hours30
minutes440
kcal180
MinutesA foolproof method for transforming tough beef chuck into succulent, fork-tender morsels. This recipe focuses on temperature control and collagen breakdown to ensure a moist result, paired with a deep mahogany onion gravy.
Ingredients
3 pounds beef chuck roast, cut into large 3-inch chunks
3 large yellow onions, sliced into thick half-moons
3 cups beef bone broth
1 cup dry red wine (or extra broth with 1 tablespoon balsamic vinegar)
3 tablespoons tomato paste
4 cloves garlic, smashed
2 tablespoons vegetable oil
2 tablespoons unsalted butter
1 tablespoon Worcestershire sauce
1 teaspoon kosher salt (plus more to taste)
1/2 teaspoon cracked black pepper
1/4 cup fresh parsley, roughly chopped for garnish
Directions
- Pat the beef chunks completely dry with paper towels. Season generously on all sides with salt and pepper.
- Heat the vegetable oil in a heavy Dutch oven or deep cast iron skillet over medium-high heat. Sear the beef in batches, ensuring a deep, dark brown crust forms on all sides. Do not crowd the pan. Remove the beef and set aside.
- Reduce heat to medium. Add the butter and the sliced onions to the rendered fat. Cook for 12-15 minutes, stirring occasionally, until the onions are deeply caramelized and softened.
- Stir in the tomato paste and garlic. Cook for 2 minutes, stirring constantly, until the paste turns a rusty brick color.
- Pour in the red wine (or vinegar/broth mix) to deglaze the pan, scraping the bottom vigorously with a wooden spoon to release all the browned bits (fond).
- Return the beef and any accumulated juices to the pan. Add the beef broth and Worcestershire sauce until the meat is about three-quarters submerged.
- Bring the liquid to a gentle simmer, then immediately reduce the heat to the lowest possible setting. Cover with a tight-fitting lid.
- Maintain a bare simmer (only occasional bubbles) for 3 to 3.5 hours. For the best results, you can also place the covered pot in a 300°F (150°C) oven. The meat is ready when it yields completely to a fork with no resistance.
- Once tender, remove the lid. If the sauce is too thin, simmer uncovered for 10 minutes to reduce and thicken into a glossy glaze.
- Taste and adjust seasoning. Garnish heavily with fresh parsley and serve directly from the pot over mashed potatoes or thick-cut toasted bread.
Notes
- The secret to avoiding dry meat is maintaining a very low temperature. Ensure the liquid only shows occasional bubbles to properly break down the connective tissue without toughening the muscle fibers.


