

There is a specific kind of heartbreak that happens when you spend hours in the kitchen only to serve beef that feels like chewing on a rubber band. We have all been there, staring at a plate of gray, tough cubes that didn’t quite live up to the cozy vision in our heads. The secret to truly legendary beef tips isn’t found in a fancy gadget, but in the beautiful contrast between a hard, caramelized sear and a long, gentle braise.
When you master this balance, the meat doesn’t just become soft; it transforms into something that yields to the slightest pressure of a fork. You get that deep, savory crust on the outside while the interior stays succulent and rich. It is the ultimate comfort food, filling your home with the scent of earthy rosemary and toasted garlic while it bubbles away on the stove.
For a heartier meal, consider this savory beef stew.
The real trick to success starts long before the timer goes off. I have found that the most common mistake is rushing the browning phase or using a pot that doesn’t hold heat well. By focusing on a heavy-bottomed vessel and patience during the initial sear, you create a foundation of flavor that no store-bought bouillon can ever replicate.
For a similar slow-cooked beef delight, explore this slow-braised beef and apricot stew.
The Anatomy of Tender Beef Chuck
If you want beef that melts in your mouth, you have to start with the right muscle group. Chuck roast is the undisputed king of the slow simmer because it is packed with intramuscular fat and connective tissue called collagen. While a lean sirloin might look tempting, it lacks the structural components needed to survive a two-hour cook without turning into dry string.
As the beef simmers, that tough collagen slowly breaks down into gelatin. This process doesn’t just tenderize the meat; it actually thickens the surrounding liquid, giving your gravy a silky, lip-smacking quality. Leaner cuts simply don’t have this “self-basting” mechanism, which is why they often end up tasting like cardboard after a long stint on the stove.
Selecting the Right Cut at the Butcher
When you are at the grocery store, skip the pre-packaged “stew meat” containers. Those packs are often a mix of various leftovers from different parts of the cow, meaning some pieces will be tender while others stay tough as nails. Instead, buy a whole chuck roast with plenty of white flecks of marbling running through the red meat.
Hand-cutting the roast yourself allows you to ensure every cube is exactly 1.5 inches. This uniformity is vital because it ensures every single bite reaches that perfect stage of tenderness at the exact same time. Plus, you can trim away any excessively large chunks of hard outer fat that won’t render down during the simmer.
Essential Components for a Rich Rosemary Gravy
A great gravy needs more than just salt; it needs layers of umami and acidity to keep the richness from feeling heavy. Balsamic vinegar and Worcestershire sauce are my secret weapons here. The vinegar provides a subtle brightness that cuts through the fat, while the Worcestershire adds a fermented, savory depth that makes the beef taste even “beefier.”
Fresh rosemary is absolutely non-negotiable for this specific dish. Dried rosemary needles tend to stay woody and sharp, which can be unpleasant when you are looking for a smooth sauce. Fresh sprigs release their essential oils into the broth, providing a piney, floral aroma that perfectly complements the earthy notes of the seared beef.
The Role of Aromatics and Acids
Tomato paste and balsamic vinegar do more than just add color. The natural acids in these ingredients work to gently weaken the protein fibers in the beef as it simmers. This chemical assist helps the heat do its job more efficiently, ensuring the meat is tender all the way to the center.
Always use a high-quality beef stock as your base. Since the liquid will reduce and concentrate over two hours, a cheap, overly salty broth will become overwhelming. Starting with a low-sodium, high-quality stock gives you total control over the final seasoning of your rosemary gravy.
The Science of the Maillard Reaction
That dark, flavorful crust on the outside of the beef is the result of the Maillard reaction. This is a chemical reaction between amino acids and reducing sugars that happens at high temperatures. It is what creates those complex, roasted flavors that define a world-class beef tip dish.
If you don’t get a good sear, you are leaving half the flavor on the table. The “fond,” or the brown bits stuck to the bottom of the pot after searing, is pure culinary gold. This is the primary source of the deep mahogany color that makes the final gravy look so appetizing.
Why Surface Moisture Prevents Browning
Moisture is the absolute enemy of a good sear. If your beef cubes are wet when they hit the hot oil, the energy from the stove will go toward evaporating that water instead of browning the meat. This results in “gray meat” that has essentially been steamed rather than fried.
Take the time to pat every single cube of beef dry with paper towels. It might feel like an extra step, but it is the most important thing you can do to ensure a professional result. Dry meat browns instantly, locking in flavor and creating that essential crust.
Step-by-Step: Searing for Maximum Flavor
Heat your oil until it is shimmering and just starting to show a tiny wisp of smoke. When you add the beef, you should hear a loud, aggressive sizzle immediately. If the sound is faint, your pan isn’t hot enough, and you should wait another minute before adding more meat.
Work in small batches to avoid crowding the pan. If you put too much meat in at once, the temperature of the oil will plummet, and the beef will start releasing juices. This leads to boiling rather than searing. Aim for a deep, dark brown color on at least two sides of every cube.
Deglazing and Building the Braising Liquid
Once the meat is out, the bottom of your pot will be covered in dark brown spots. This is the fond I mentioned earlier. When you pour in your beef broth and balsamic vinegar, use a wooden spoon to scrape every single bit of that residue into the liquid. It will dissolve instantly, turning your broth into a rich, dark base.
The onions and garlic should be softened in the leftover beef fat before you add the liquids. This creates a sweet, aromatic foundation. As the tomato paste darkens in the pan, it loses its raw metallic edge and takes on a mellow, savory sweetness that rounds out the entire sauce.
The Low and Slow Simmering Phase
Braising is a marathon, not a sprint. Once you return the beef to the pot, you want to see a “lazy bubble.” This means one or two bubbles breaking the surface every few seconds. A violent, rolling boil will cause the muscle fibers to tighten and seize, resulting in meat that is dry and stringy despite being submerged in liquid.
A heavy-bottomed pot, like a cast-iron Dutch oven, is perfect for this because it distributes heat evenly. It prevents “hot spots” on the bottom of the pan that could burn the gravy during the long cook time. Keep the lid on tight to trap the moisture and create a self-steaming environment.
Maintaining Temperature Consistency
Check your pot every 30 to 45 minutes to ensure the simmer hasn’t turned into a boil. If the liquid seems to be disappearing too quickly, add a splash more broth or water. You want the beef to be mostly submerged throughout the entire process to ensure even cooking.
If you find that your stove’s lowest setting is still too hot, you can move the covered Dutch oven into a 300°F oven. The ambient heat of the oven provides a more consistent temperature than the direct flame of a burner, which can be helpful for longer simmers.
Troubleshooting Tough or Dry Beef
If you hit the two-hour mark and the beef still feels a bit resistant, don’t panic. It simply means the collagen hasn’t finished melting yet. Every cow is different, and some cuts just need an extra 30 minutes of heat. Give it more time rather than turning up the flame.
The “fork-tender” test is your best indicator of doneness. Take a piece of beef out and press it with the back of a fork. It should give way easily without you having to apply much pressure. If it bounces back or feels “springy,” it needs to stay in the pot a little longer.
Achieving the Perfect Glossy Gravy Consistency
A great gravy should be thick enough to coat the back of a spoon, a stage chefs call “nappe.” To achieve this without lumps, always mix your cornstarch with cold water before adding it to the hot pot. This slurry ensures the starch granules are separated so they can thicken the sauce evenly.
Once you stir in the slurry, let the gravy simmer for at least two or three minutes. This “cooks out” the raw starch flavor and allows the sauce to reach its full thickening potential. You will see the liquid transform from a thin broth into a glossy, velvet-like sauce that clings to the beef.
Optimal Side Dishes for Beef and Gravy
While fluffy white rice is the classic choice for soaking up that rosemary-infused gravy, you have plenty of options. Buttery mashed potatoes are a natural fit, providing a creamy contrast to the savory beef. Wide egg noodles are another fantastic vehicle, as the ridges in the pasta hold onto the sauce beautifully.
To balance the richness of the dish, I always recommend something bright on the side. A crisp green salad with a sharp lemon vinaigrette can refresh your palate between bites of the heavy beef. The acidity in the salad acts as a perfect counterpoint to the deep, earthy flavors of the rosemary.
Complementary Dishes to Try
When serving your slow-simmered rosemary beef tips, consider these dishes that offer comforting flavors and textures.
- For a rich and savory addition, explore this Thyme Beef Stuffing, which complements the hearty beef with its herbaceous notes.
- Another satisfying option is the Honey-Glazed Meatball Cornbread Stuffing, offering a delightful contrast of sweet and savory with its tender meatballs and moist cornbread base.
Vegetable Pairings to Round Out the Meal
Roasted root vegetables, like carrots or parsnips, bring a natural sweetness that pairs wonderfully with beef. You can even roast them with a little honey to lean into that sweet-and-savory profile. The caramelized edges of roasted vegetables echo the seared crust of the beef tips.
Steamed green beans or roasted broccoli also work well. They provide a pop of color and a bit of “snap” to the plate, which is a nice textural change from the soft, tender beef and rice. Just keep the seasoning simple so they don’t compete with the rosemary.
Make-Ahead Strategies and Storage
This is one of those rare dishes that actually tastes better the next day. As the beef sits in the gravy overnight, the flavors of the rosemary, garlic, and balsamic vinegar penetrate deep into the meat. If you are hosting a dinner party, making this a day in advance can save you a lot of stress.
When storing, let the beef cool to room temperature before putting it in the fridge. This prevents condensation from forming inside the container, which can water down your beautiful gravy. Always store the beef and gravy together to keep the meat from drying out.
Freezing and Reheating Without Losing Texture
You can freeze these beef tips for up to three months in an airtight container. To reheat, it is best to let the container thaw in the fridge overnight. Avoid reheating from frozen in the microwave, as this can lead to uneven hot spots and rubbery meat.
For the best results, reheat the beef and gravy in a small saucepan over low heat on the stove. Add a tablespoon of water or broth if the gravy has thickened too much in the fridge. Stir gently until it is heated through, and it will taste just as fresh as the day you made it.
Expert Tips for Scaling the Recipe
If you are doubling this recipe for a crowd, make sure you use a very large pot. You still need enough surface area to sear the beef in batches without it taking all afternoon. Don’t try to sear more than one layer of meat at a time, or you will lose that essential crust.
When scaling up, be careful with the rosemary. While you can double the beef and broth, doubling the rosemary can sometimes make the dish taste medicinal. Start with four or five sprigs for a double batch and taste the gravy near the end to see if it needs more.
Frequently Asked Questions
Can I use a slow cooker for this recipe?
Yes, you can. However, you must still sear the beef and sauté the onions in a pan first. Once you have deglazed the pan, transfer everything to the slow cooker and cook on low for 6 to 8 hours. The searing step is what provides the flavor and color, so don’t skip it!
Can I substitute the balsamic vinegar?
If you don’t have balsamic, red wine vinegar or even a splash of apple cider vinegar will work. You are looking for that hit of acidity to balance the fat. If you use a sharper vinegar like apple cider, you might want to add a pinch of sugar to mimic the sweetness of balsamic.
What if I don’t have a Dutch oven?
Any heavy-bottomed pot with a tight-fitting lid will work. The key is the “heavy-bottomed” part, which prevents the sauce from burning. If your lid is a bit loose, you can place a piece of aluminum foil over the pot before putting the lid on to create a better seal.
How do I fix a salty gravy?
If the gravy ends up too salty, you can add a peeled, halved potato to the pot and simmer it for 15 minutes; the potato will absorb some of the salt. Alternatively, adding a little more water or a splash of cream at the end can help dilute the saltiness without ruining the texture.
Can I add mushrooms or carrots to the simmer?
Absolutely! Mushrooms are a fantastic addition and should be browned along with the onions. If you want to add carrots, put them in during the last hour of simmering so they become tender but don’t turn into mush. Both vegetables soak up the rosemary gravy beautifully.
Rosemary Beef Tips
Course: Main CourseCuisine: AmericanDifficulty: medium4
servings15
minutes2
hours485
kcal120
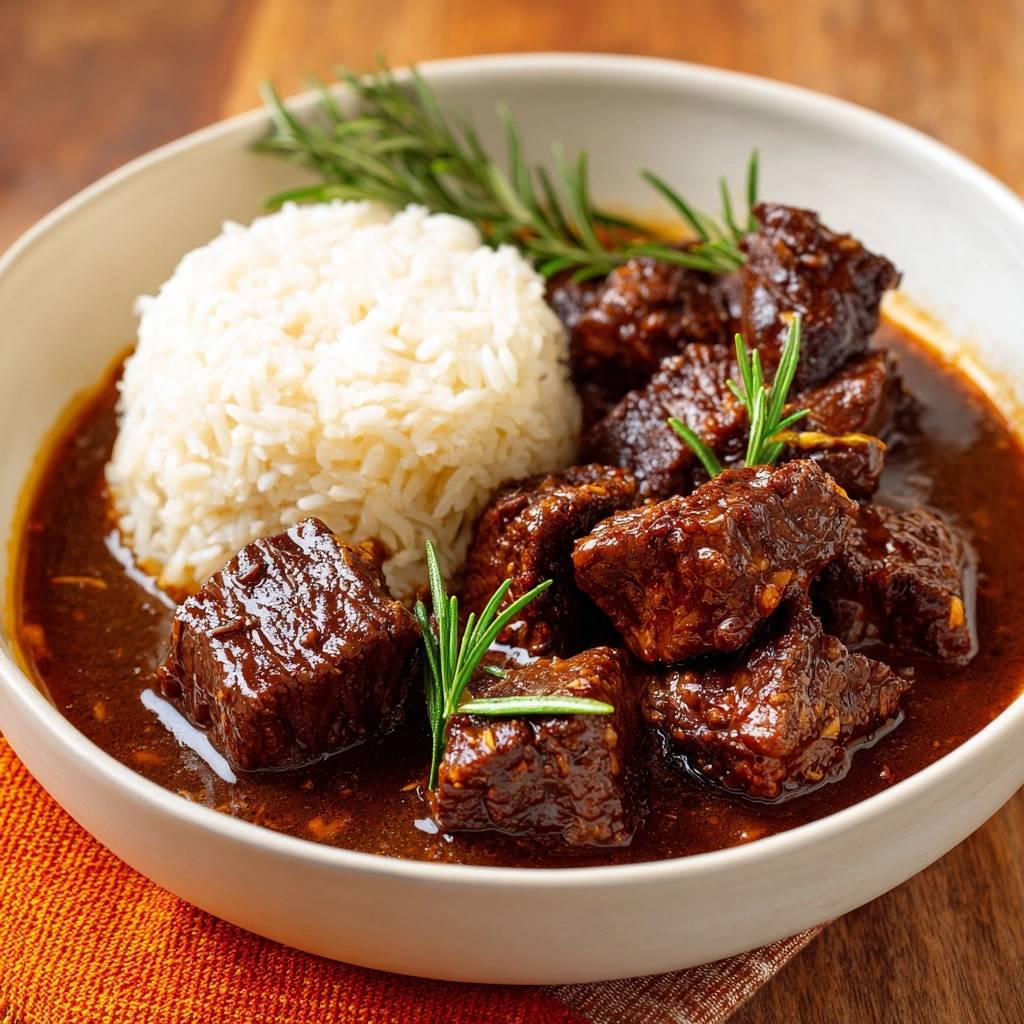
MinutesA comforting dish featuring beef chuck roast cubes seared to perfection and slow-simmered in a savory broth with fresh rosemary, garlic, and balsamic vinegar, served over fluffy white rice.
Ingredients
2 pounds beef chuck roast, cut into 1.5 inch cubes
2 tablespoons vegetable oil
1 large onion, finely diced
3 cloves garlic, minced
3 cups beef broth
2 tablespoons Worcestershire sauce
1 tablespoon tomato paste
1 tablespoon balsamic vinegar (for depth of color)
3 sprigs fresh rosemary, plus extra for garnish
2 tablespoons cornstarch mixed with 2 tablespoons water
Salt and black pepper to taste
4 cups cooked white rice for serving
Directions
- Pat the beef cubes completely dry with paper towels. This is the most important step for preventing steamed, tough meat. Season generously with salt and pepper.
- Heat the oil in a heavy pot or Dutch oven over medium-high heat until shimmering. Sear the beef in small batches. Do not crowd the pan or the temperature will drop, causing the meat to boil in its own juices rather than sear. Brown each side deeply for 3 to 4 minutes per batch until a dark, caramelized crust forms.
- Remove the beef and set aside. In the same pot, add the onion and cook until softened and slightly browned, about 5 minutes. Add the garlic and tomato paste, stirring for 1 minute until the paste darkens.
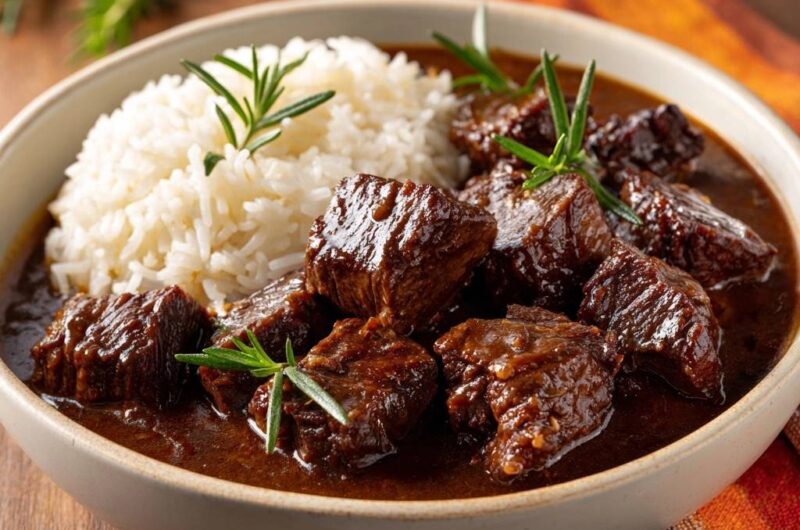
- Pour in the beef broth, Worcestershire sauce, and balsamic vinegar. Use a wooden spoon to scrape up all the brown bits (fond) from the bottom of the pan. These bits are essential for the deep, dark gravy seen in the image.
- Return the beef and any accumulated juices to the pot. Add the fresh rosemary sprigs.
- Bring to a gentle simmer, then reduce the heat to low. Cover with a tight-fitting lid. Simmer for 2 to 2.5 hours. Maintaining a low, steady bubble is the key to breaking down the fibers without drying out the protein.
- Once the beef is fork-tender, remove the rosemary stems. Stir in the cornstarch slurry and simmer for 2-3 minutes until the gravy is thick, glossy, and coats the back of a spoon.
- Serve the beef and rich gravy in a bowl alongside a mound of fluffy white rice. Garnish with fresh rosemary sprigs to match the visual presentation.
Notes
- Patting the beef completely dry before searing is the most important step to prevent tough meat. Do not crowd the pan during the searing process to ensure a dark, caramelized crust forms.


