
Most glazed chicken recipes promise a crispy exterior but deliver a soggy, rubbery mess. When you pour a watery sauce over chicken too early, you essentially steam the skin rather than searing it. This creates a texture that feels more like boiled poultry than the restaurant-quality crunch you crave.
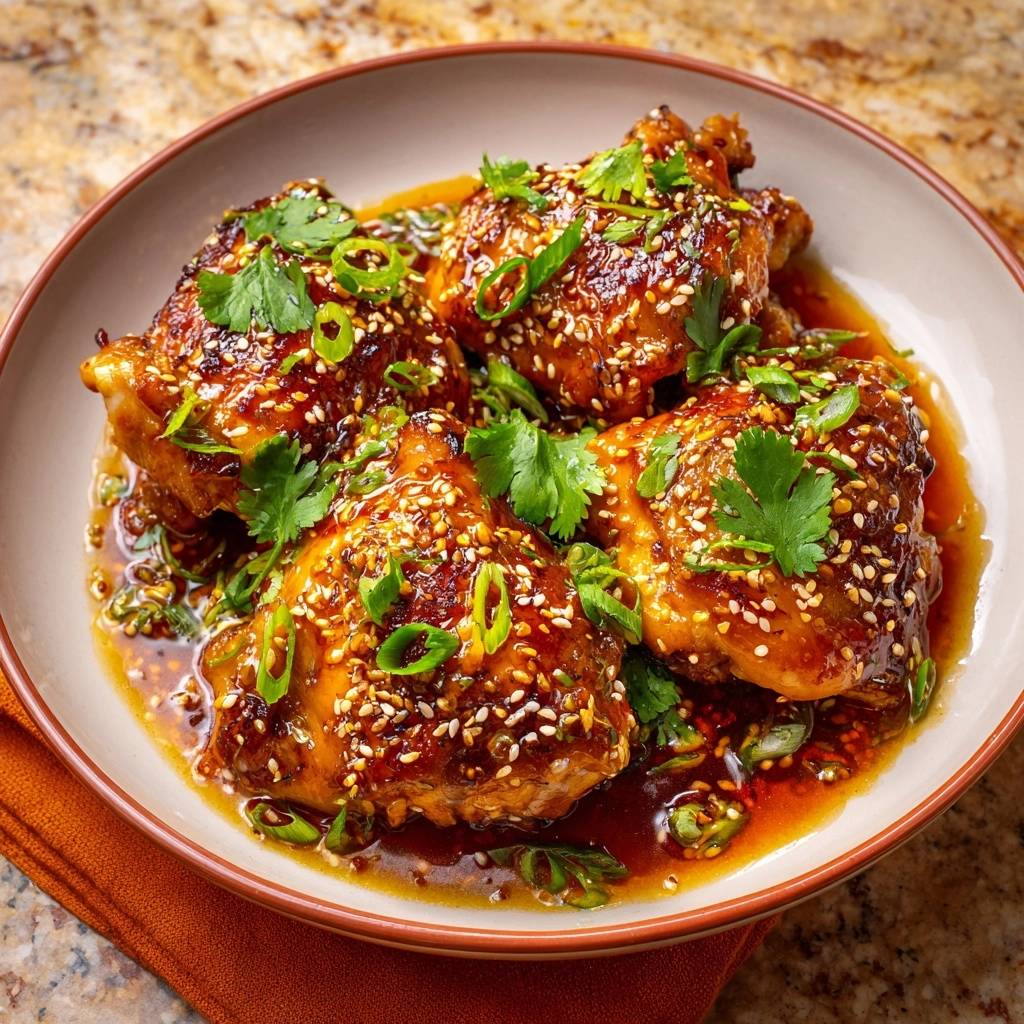
Sticky Sesame Glazed Chicken Thighs should offer a violent contrast between a shatteringly crisp skin and a viscous, honey-based reduction. By using bone-in, skin-on thighs, you provide a sturdy vessel that can handle high heat without drying out. The result is a piece of meat that stays succulent while the glaze clings to the surface like candy.
If you enjoy the glaze on these thighs, you’ll also appreciate the zesty kick of this Spicy Korean Cucumber Salad.
The secret to this recipe is the “flash-glaze” method. Instead of simmering the chicken in the sauce for twenty minutes, you reduce the glaze independently and coat the meat at the very last second. This ensures the moisture in the sauce doesn’t have time to penetrate and soften the crust you worked so hard to build.
The Physics of Shatteringly Crispy Chicken Skin
Achieving a perfect crunch is a matter of science, specifically moisture management. If there is any water on the surface of the skin when it hits the hot oil, it creates steam. Steam is the enemy of the Maillard reaction, which is the chemical process that creates those deep, savory flavors and golden-brown colors.
You must pat the chicken thighs extremely dry with paper towels before they ever touch the pan. This isn’t just a suggestion; it’s a requirement for structural integrity. Once the skin is dry, the heat can immediately begin rendering the subcutaneous fat. This fat acts as a natural frying medium, creating a rigid barrier that resists the liquid glaze later.
As the fat renders out, the skin thins and hardens. This transformation creates a “crunch barrier” that protects the tender meat underneath. By the time you add your sauce, the skin has become a dehydrated, crispy shell that won’t immediately turn to mush when it meets the honey and soy reduction.
Why Bone-In Thighs Outperform Boneless Cuts
Bone-in thighs are the superior choice because the bone acts as a thermal conductor. It helps distribute heat evenly throughout the thickest part of the meat, preventing the exterior from overcooking while the inside stays raw. Additionally, the bone and surrounding connective tissue release gelatin during the sear, which adds a rich mouthfeel that boneless breasts simply cannot replicate.
Essential Components for the Sesame Glaze
The glaze is a balance of salt, sugar, and aromatics. High-quality soy sauce provides the savory backbone, but the honey is the real workhorse here. Honey contains natural sugars that caramelize quickly, creating the “sticky” factor that allows the sauce to coat the back of a spoon and cling to the chicken.
Fresh ginger and garlic are non-negotiable in this dish. While powdered versions are convenient, they lack the volatile oils and pungent bite that cut through the richness of the chicken fat. Freshly grated ginger adds a subtle heat and brightness that balances the heavy sweetness of the honey, making the dish feel vibrant rather than cloying.
If you find yourself without honey, you can use brown sugar, though the texture will be slightly less syrupy. Always use a naturally brewed soy sauce if possible. Cheaper, chemically produced soy sauces often taste one-dimensional and overly salty, which can overwhelm the delicate aromatics of the garlic and ginger.
Selecting the Right Cooking Oil
You need an oil with a high smoke point for the initial 12-minute sear. Vegetable, canola, or grapeseed oils are perfect because they can withstand medium-high heat without breaking down or smoking. Avoid using olive oil or butter for the searing phase; their low smoke points mean they will burn and turn bitter long before the chicken skin reaches its peak crispness.
The Role of Acidity: Rice Vinegar vs. Citrus
A great glaze needs acidity to wake up the palate. Rice vinegar is the traditional choice because its mild, slightly sweet profile complements the Asian-inspired flavors without being too aggressive. It cuts right through the heavy sugars and the rendered chicken fat, ensuring that every bite tastes balanced and leaves you wanting more.
Step-by-Step: Achieving the Perfect Sear
The most important rule of the searing phase is the “no-touch” rule. Once you place those thighs skin-side down in the hot oil, leave them alone. You might be tempted to peek or move them around, but every time you lift the meat, you drop the surface temperature and interrupt the rendering process.
During the first 10 to 12 minutes, you will hear a consistent sizzle. This is the sound of water evaporating and fat melting away. You are looking for the skin to transition from a pale, flabby texture to a deep mahogany brown. If the skin sticks to the pan, it usually means it isn’t finished searing yet; it will naturally release once the crust has formed.
After the flip, the meat side only needs a few minutes to reach an internal temperature of 165°F. By this point, the kitchen should smell incredible—a mix of toasted chicken fat and savory browning. The skin should look like a piece of parchment paper: thin, dark, and incredibly stiff to the touch.
The Flash-Glaze Technique for Maximum Crunch
This is where most home cooks lose the battle. Instead of leaving the chicken in the pan while you make the sauce, remove it. Place the thighs on a wire rack set over a baking sheet. This allows air to circulate around the entire piece of meat, preventing the bottom from steaming and softening while you finish the glaze.
Pour off the excess fat, leaving just enough to sauté the aromatics. When you pour the sauce mixture into the hot skillet, it will bubble violently. This is good. You want to reduce the liquid until it reaches a “nappe” consistency, meaning it is thick enough to coat the back of a spoon. This usually takes about 3 to 5 minutes of vigorous simmering.
Once the sauce is thick and syrupy, return the chicken to the pan for only 30 seconds. Use a spoon to quickly drape the glaze over the top. This “flash” coating gives you all the flavor of the sesame glaze without giving the liquid enough time to soak into the skin. It’s a professional trick that makes a massive difference in the final texture.
Troubleshooting Common Glazing Obstacles
If your sauce reduces too quickly and starts to look like dark tar, pull it off the heat immediately. You can whisk in a tablespoon of water or extra rice vinegar to thin it back out. High-sugar sauces can go from perfect to burnt in a matter of seconds, so keep a close eye on the bubbles; as they get larger and slower, the sauce is nearly done.
If the chicken skin isn’t getting crispy, your heat might be too low. You want a medium-high flame that maintains a steady fry. Conversely, if the skin is burning before the meat is cooked, turn the heat down slightly and finish the chicken with a lid partially covering the pan, though this should be a last resort as it introduces steam.
Managing High-Sugar Sauces Without Burning
The key to managing the honey-based glaze is temperature control. Once the sauce starts to thicken, it becomes much more sensitive to heat. If you see wisps of acrid smoke, the sugar is scorching. Aim for a gentle, rolling boil rather than a violent one, and keep the sauce moving with a whisk or spoon to ensure even reduction.
Optimal Side Dishes for Sticky Poultry
Since this chicken is rich and savory, you want sides that can soak up the extra glaze or provide a refreshing contrast. Steamed jasmine rice is the classic choice, acting as a neutral sponge for the honey-soy sauce. For a vegetable, charred bok choy or roasted broccoli provides a nice bitterness that cuts through the sweetness.
If you want something brighter, a cold smashed cucumber salad with a splash of sesame oil and chili flakes is a game-changer. The temperature difference between the hot, crispy chicken and the cold, crunchy cucumbers creates a fantastic dining experience. It cleanses the palate between bites of the rich, glazed poultry.
Storage and Reheating Without Losing Texture
Leftover glazed chicken can be tricky. If you put it in an airtight container in the fridge, the skin will inevitably soften overnight. It will still taste delicious, but that “shatter” effect will be gone. You can store it for up to three days, but keep the extra sauce in a separate container if possible.
Never use a microwave to reheat this dish. The microwave will turn the chicken rubbery and the skin into a soggy mess. Instead, use an air fryer at 375°F for about 4 to 5 minutes, or place it under a broiler for 2 to 3 minutes. This high, dry heat will re-crystallize the sugars in the glaze and crisp the skin back up to its former glory.
Expert Tips for Sesame Glazed Chicken
How do I prevent the garlic from tasting bitter?
Timing is everything when it comes to garlic. If you toss minced garlic into a dry, scorching pan, it will burn in seconds and ruin the entire batch. Always add your garlic and ginger as part of the liquid sauce mixture. The moisture in the soy sauce and vinegar protects the garlic, allowing it to infuse the glaze with flavor without ever reaching the burning point.
Can I substitute honey with maple syrup?
You can use maple syrup, but keep in mind that it has a lower viscosity than honey. This means your glaze might take a few extra minutes to reduce to that thick, sticky consistency. Maple also has a distinct woody flavor that changes the profile of the dish. If you make this swap, ensure you are using real maple syrup rather than pancake syrup, which is mostly corn syrup.
What if I only have skinless thighs?
If you are using skinless thighs, you lose the natural “crunch barrier.” To compensate, toss the raw chicken in a light coating of cornstarch before searing. This technique, often called “velvetting,” creates a thin, protective crust that helps the sauce cling to the meat. You won’t get the same heavy crunch as skin-on thighs, but it will prevent the meat from becoming tough and dry.
Is it possible to make this in a slow cooker?
A slow cooker is the enemy of this specific recipe. Slow cookers rely on trapped steam to cook the meat, which is the exact opposite of what we want for crispy skin. If you try this in a crockpot, you will end up with “boiled” chicken and a very thin, watery sauce. This dish is designed for the high-heat environment of a skillet where moisture can evaporate freely.
Sticky Sesame Chicken Thighs
Course: Main CourseCuisine: Asian FusionDifficulty: easy4
servings10
minutes25
minutes410
kcal35
MinutesA specialized method for cooking bone-in, skin-on chicken thighs that prioritizes a shatteringly crisp skin. By using a flash-glaze technique at the very end, the chicken stays crunchy while being coated in a savory and sweet ginger-garlic sesame sauce.
Ingredients
4 bone-in, skin-on chicken thighs
1 tablespoon vegetable oil
1/2 cup soy sauce
1/4 cup honey
1 tablespoon rice vinegar
1 tablespoon fresh ginger, grated
3 cloves garlic, minced
1 teaspoon chili flakes
2 tablespoons toasted sesame seeds
2 green onions, sliced
1/4 cup fresh cilantro, chopped
Directions
- Pat the chicken thighs extremely dry with paper towels. This is the first step to preventing soggy skin. Season only the meat side with salt.
- Heat the oil in a large skillet over medium-high heat. Place the chicken skin-side down. Do not move them for 10 to 12 minutes. This rendered fat and constant contact is what creates the “crunch” barrier that resists the sauce later.
- While the chicken sears, whisk together the soy sauce, honey, rice vinegar, ginger, garlic, and chili flakes in a small bowl.
- Once the skin is deep golden brown and crispy, flip the thighs. Cook for another 6 to 8 minutes to ensure the meat is cooked through (internal temperature of 165°F).
- Remove the chicken from the pan and set it aside on a wire rack (to keep the bottom from steaming). Pour off all but one tablespoon of the rendered fat from the skillet.
- Pour the sauce mixture into the hot skillet. Let it bubble and reduce over medium-high heat for 3 to 5 minutes until it thickens into a syrupy consistency that coats the back of a spoon.
- Place the chicken back into the pan, but only for 30 seconds. Use a spoon to coat the tops quickly. This “flash-glaze” method prevents the moisture in the sauce from penetrating and softening the crispy skin you just worked hard to create.
- Remove from heat immediately. Garnish heavily with toasted sesame seeds, sliced green onions, and fresh cilantro. Serve any extra sauce on the bottom of the plate so the skin stays dry and crunchy on top.
Notes
- Patting the chicken extremely dry and using a wire rack after searing are essential steps to maintain the crunch barrier. Serve extra sauce on the bottom of the plate to keep the top skin dry.


