
Imagine the cozy, spiced warmth of a fresh cinnamon roll merged with the dense, velvety luxury of a New York-style cheesecake. This Cinnamon Swirl Cheesecake isn’t just a dessert; it’s a masterclass in texture, featuring a buttery graham cracker base and a deep, marbled spice core. While many bakers fear the dreaded “grand canyon” crack or a rubbery, overbaked center, this recipe eliminates those worries entirely.
The secret lies in moving away from high-stress baking techniques and embracing a gentle, controlled environment. You don’t need a messy, leaking water bath to achieve a professional finish. Instead, we focus on moisture-rich ingredients and a specific cooling technique that protects the delicate proteins in the cream cheese from sudden temperature shocks.
Expertise in cheesecake baking often comes down to one tiny detail: the “No-Crack Cooling Secret.” By propping the oven door open with a wooden spoon and letting the cake rest in the residual heat, you allow the structure to firm up slowly. This prevents the rapid contraction that causes the surface to split, ensuring your cinnamon swirls remain beautiful and intact from the oven to the table.
For more ideas on transforming dessert, explore these chocolate caramel cheesecake bars.
Essential Components for a Stable Cheesecake Base
To achieve that iconic height and creamy mouthfeel, you need exactly 24 ounces of full-fat cream cheese. This volume provides the structural integrity required for a 9-inch springform pan. Using low-fat versions will result in a watery consistency, so stick to the bricks for the best results. The addition of full-fat sour cream is equally vital, as it introduces a subtle tang that cuts through the sugar while adding essential moisture.
Stability is the name of the game when you’re adding a heavy cinnamon swirl. We include two tablespoons of all-purpose flour in the main batter. This small amount of starch acts as a stabilizer, binding the fats and liquids together. Without it, the dense cinnamon paste would likely sink straight to the bottom of the pan rather than staying suspended in beautiful, marbled ribbons.
Furthermore, your eggs must be at room temperature before they hit the mixing bowl. Cold eggs are the enemy of a smooth batter because they cause the softened fats in the cream cheese to seize up and form tiny, stubborn beads. When the eggs are warm, they emulsify perfectly, creating a glossy, uniform base that bakes evenly throughout.
Selecting the Right Graham Crackers and Fats
While store-bought crumbs are convenient, pulsing whole graham crackers in a food processor gives you more control over the texture. You want a fine, sandy consistency that holds together when pressed. If the crumbs are too coarse, the crust will crumble the moment you try to slide a fork through it.
Precision matters when adding the five tablespoons of melted butter. If you use too much, the crust becomes greasy and hardens into a rock-like layer in the fridge. If you use too little, it won’t bond to the sugar and crumbs. Aim for a “wet sand” feel that holds its shape when you press it firmly against the bottom and sides of the pan.
The Role of Temperature in Batter Consistency
The “Room Temperature Rule” is the single most important factor in your prep work. Cream cheese is a dense fat that only becomes truly pliable when it reaches about 65 to 70 degrees Fahrenheit. If you try to beat cold cheese, you’ll end up with a lumpy batter that no amount of mixing can fix. In fact, over-mixing to get rid of lumps is what usually ruins the cake’s texture.
When you incorporate cold eggs into a room-temperature cheese mixture, the temperature drop can cause the cheese to re-solidify in small chunks. This creates an uneven bake and a grainy mouthfeel. Take the ingredients out of the fridge at least two hours before you start. If you’re in a rush, place the sealed eggs in a bowl of warm water for ten minutes to take the chill off.
The Science of the Perfect Cinnamon Swirl
Creating a swirl that stays put requires an understanding of density physics. If you simply mixed cinnamon and sugar with butter, the mixture would be too heavy and drop to the crust. By mixing a half-cup of the actual cheesecake batter into your cinnamon and brown sugar, you create a “paste” with a similar specific gravity to the rest of the cake. This ensures the swirl stays exactly where you put it.
The quality of your cinnamon also dictates the final flavor profile. Most grocery stores sell Cassia cinnamon, which is bold, spicy, and perfect for this recipe. However, if you prefer a more delicate, floral aroma, you can use Ceylon cinnamon. The brown sugar in the swirl provides a molasses-like depth that mimics the gooey center of a cinnamon roll, creating a beautiful contrast against the white vanilla batter.
Step-by-Step: Constructing the Cinnamon Swirl Cheesecake
Start by par-baking your graham cracker crust for exactly 8 minutes. This step is non-negotiable because it toasts the crumbs and sets the butter, creating a moisture barrier. If you pour the batter onto a raw crust, the moisture from the cheese will soak into the crackers, leaving you with a soggy, unappealing bottom layer.
When you move to the filling, use the “Low and Slow” mixing method. Once the eggs are added, turn your mixer to its lowest setting. High speeds whip air into the batter, which causes the cheesecake to rise like a souffle in the oven. When that air escapes during cooling, the cake collapses and cracks. You want a dense, creamy batter with as few air bubbles as possible.
Achieving the Marbled Aesthetic
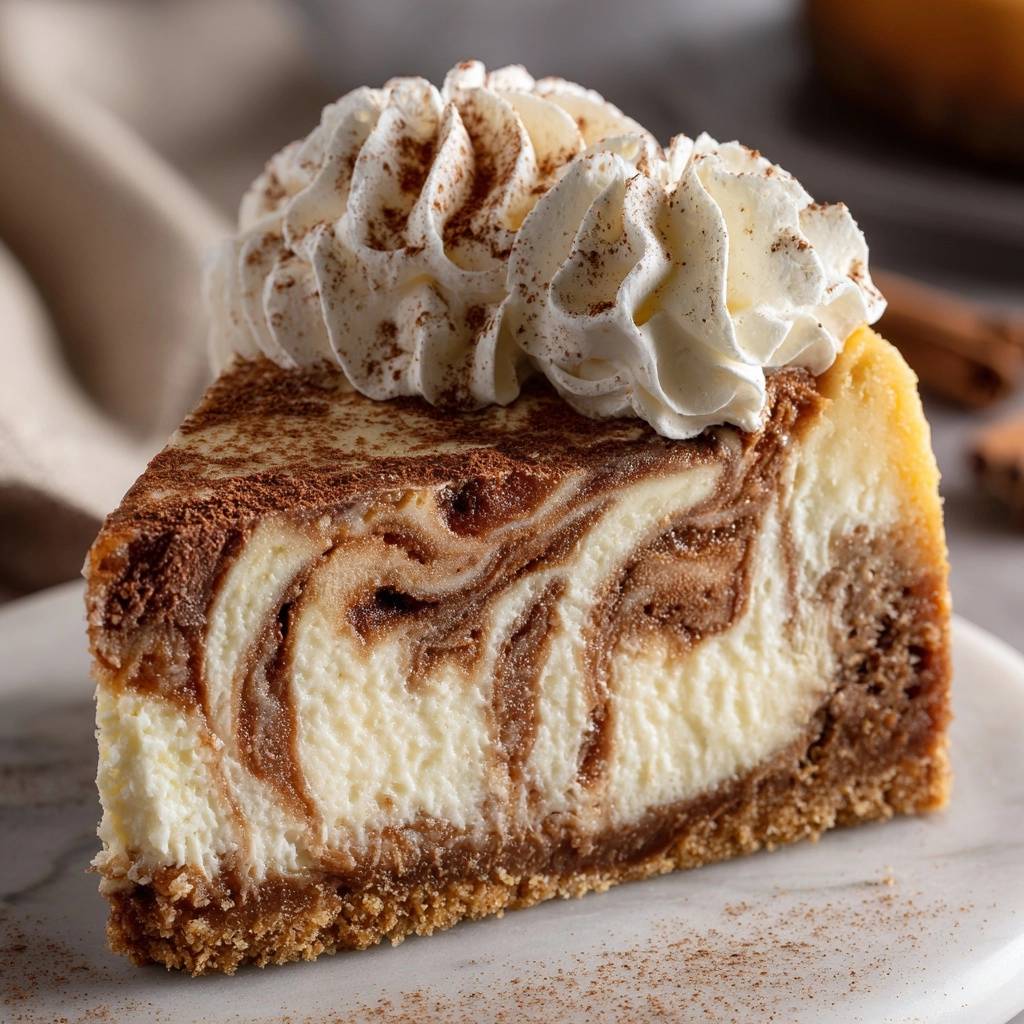
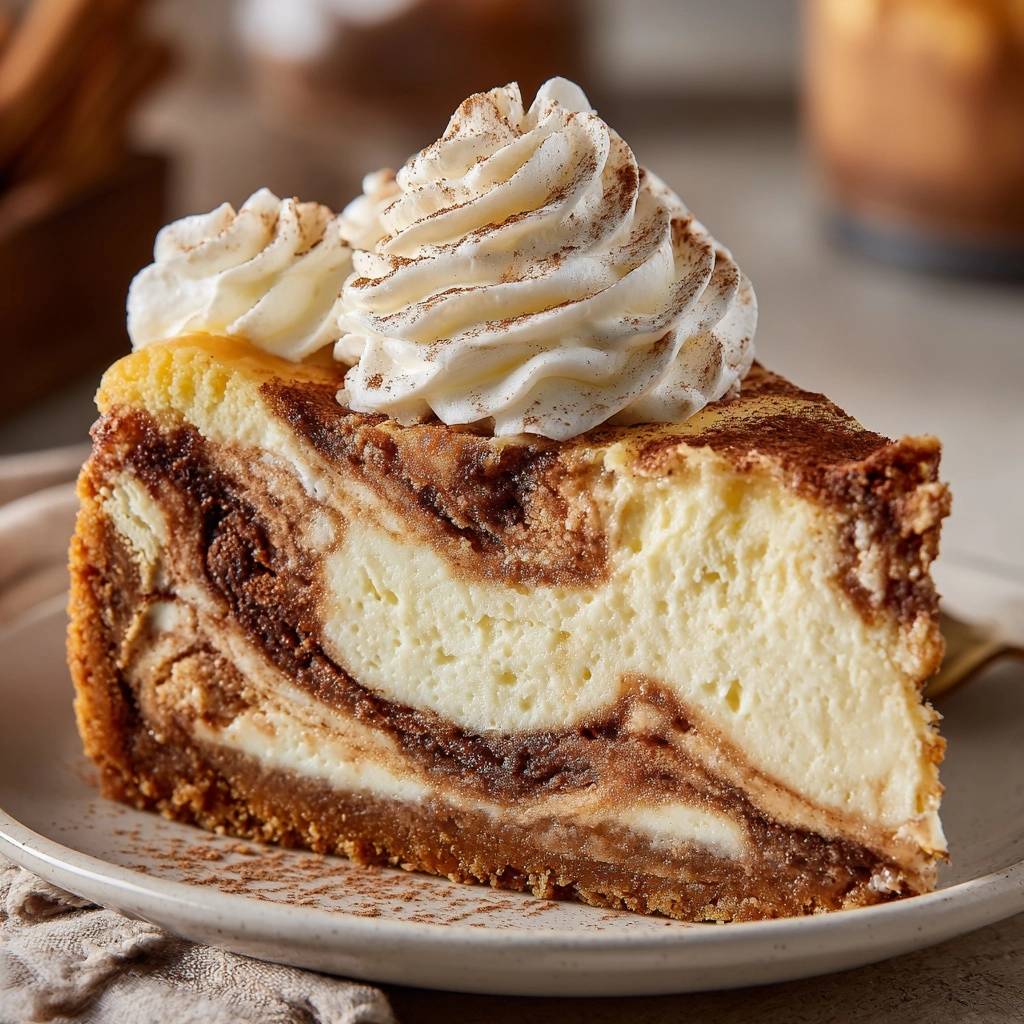
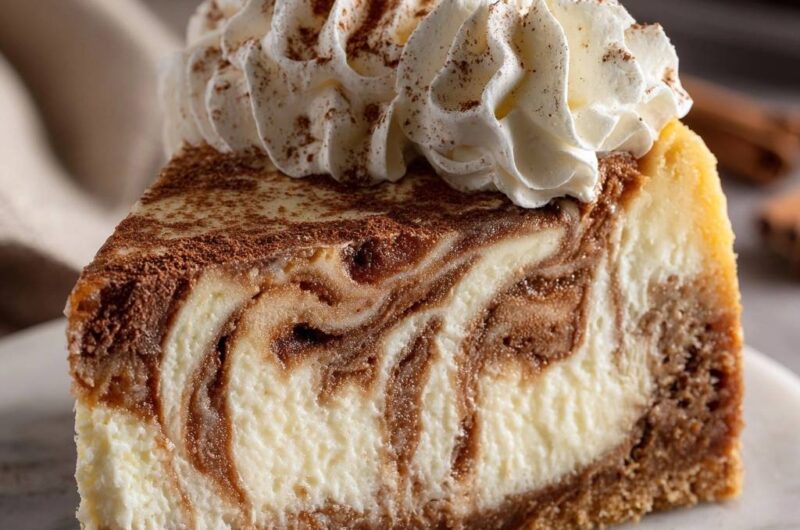
To get those professional-looking swirls, layer two-thirds of your plain batter into the pan first. Drop half of your cinnamon paste in small dollops across the surface. Cover this with the remaining plain batter, then add the rest of the cinnamon on top. This layering ensures that every single bite, from the top to the bottom, is infused with spice.
For a truly decadent experience, consider exploring a similar approach in this caramel pecan cheesecake.
Take a thin knife or a wooden skewer and insert it into the batter. Move it in a gentle figure-eight motion, swirling the dark paste into the light batter. Don’t overdo it! If you swirl too much, the colors will muddy together into a beige mess. Stop while you can still see distinct, sharp lines of dark cinnamon against the pale cream cheese.
The Jiggle Test: Knowing When to Stop
Knowing when to pull the cake is the hardest part of the process. You are looking for the “2-inch jiggle.” The edges of the cheesecake should be slightly puffed and look matte, but the very center should still wobble like firm gelatin when you gently shake the pan. If the center is stiff, you’ve already overbaked it.
Remember that carryover cooking is a real phenomenon. The residual heat inside the cake will continue to cook the center even after the oven is turned off. If you wait until the center is solid to stop the heat, the edges will become dry and rubbery by the time the cake cools completely. Trust the jiggle!
The No-Crack Secret: Controlled Thermal Reduction
The primary reason cheesecakes crack is thermal shock. When a hot cake is suddenly exposed to the 70-degree air of your kitchen, the proteins contract too quickly. Since the cake is often stuck to the sides of the pan, it can’t pull inward, so it pulls apart in the middle instead. This is where the “Wooden Spoon Method” becomes your best friend.
Once the timer goes off, turn the oven off immediately. Do not take the cake out. Instead, crack the oven door open about an inch or two and wedge a wooden spoon in the gap to keep it there. This allows the heat to escape slowly over the course of an hour. The temperature drops gradually, giving the cheesecake time to settle and firm up without the stress of a rapid environment change.
During this hour, the cheesecake will gently pull away from the sides of the springform pan on its own. This natural release is much safer than trying to cut it away while the cake is still piping hot. After the hour is up, you can move it to the counter to reach room temperature before the final chill in the refrigerator.
Equipment Essentials for Professional Results
A 9-inch springform pan is the standard for this recipe. If possible, choose a light-colored metal pan. Dark non-stick pans absorb heat more aggressively, which can cause the edges of your cheesecake to brown or overcook before the center is ready. A light-colored pan ensures a more even, gentle heat distribution.
While we use high-tech mixers for the batter, the most important tool for the cooling phase is a simple wooden spoon. It provides just the right amount of airflow when propping the oven door. Additionally, keep a thin offset spatula or a paring knife handy. Running this around the edge of the cake after it has cooled on the counter ensures it won’t stick to the pan as it chills and shrinks further in the fridge.
Troubleshooting Common Cheesecake Obstacles
If you notice your batter is lumpy despite your best efforts, don’t panic. You can pass the mixture through a fine-mesh sieve before adding the eggs. This will catch the bits of unblended cheese and ensure a silky finish. However, once the eggs are in, you must be careful not to over-work the batter, or you’ll introduce too much air.
Sometimes a cheesecake might “weep,” which is when small beads of moisture appear on the surface. This is usually caused by syneresis, where the protein structure squeezes out liquid due to overbaking or cooling too quickly. If this happens, simply blot the moisture gently with a paper towel before adding your toppings. The whipped cream and cinnamon dusting will hide any minor surface imperfections perfectly.
Preventing the “Soggy Bottom” Without a Water Bath
Many bakers insist on a water bath to keep the oven humid, but it’s a risky move that often leads to a soggy crust. By keeping the oven at a low 325°F and using a recipe high in fat and moisture (thanks to the sour cream), you create enough internal steam to keep the cake creamy. The par-baked crust acts as a final shield, ensuring the base stays crisp and buttery.
Make-Ahead Strategies and Storage Standards
Patience is the final ingredient in a perfect cheesecake. While it might be tempting to slice into it after a few hours, a 24-hour chill is truly the gold standard. This time allows the fats to fully set and the flavors of the cinnamon and vanilla to meld together. At an absolute minimum, give it 6 hours in the coldest part of your fridge.
If you want to make this well in advance, this cheesecake freezes beautifully. Flash-freeze the plain, chilled cake on a plate for an hour until the surface is firm. Then, wrap it tightly in two layers of plastic wrap followed by a layer of heavy-duty aluminum foil. It will stay fresh for up to a month. Just remember to thaw it in the fridge overnight and add the whipped cream and cinnamon dusting right before you serve it.
Expert Tips for a Clean Visual Presentation
To get those sharp, clean slices that show off the cinnamon marbling, use the “Hot Knife Technique.” Fill a tall glass with hot water and dip a long, thin knife into it. Wipe the blade completely dry, make one clean slice, and then repeat the process for every single cut. This prevents the creamy cheese from sticking to the blade and smearing across the dark cinnamon swirls.
Complementary Dishes
Round out your meal with these satisfying options.
- For a comforting and cheesy vegetable addition, try the Cheesy Broccoli Cauliflower Bake, featuring similar creamy textures.
- If you’re in the mood for something savory, consider the Savory Beef and Cream Cheese Puff Pastry Pie for a delightful contrast to your cheesecake.
For the final garnish, pipe large mounds of stabilized whipped cream around the perimeter. This adds a light, airy contrast to the dense cake. Finally, use a fine-mesh strainer to apply a heavy, even dusting of cinnamon over the entire top. It creates a beautiful, matte finish that hints at the spiced treasures hidden inside each slice.
Frequently Asked Questions
Can I substitute Greek yogurt for sour cream?
Yes, you can use full-fat Greek yogurt as a 1:1 replacement for sour cream. However, make sure it is the full-fat variety. Low-fat or non-fat yogurt has a higher water content and less protein stability, which can make the cheesecake texture slightly softer or more prone to weeping. The tang will be a bit sharper, but it complements the cinnamon beautifully.
Why did my cinnamon swirl sink to the bottom?
The swirl usually sinks if the cinnamon mixture is significantly denser than the main cheesecake batter. This happens if you skip the step of mixing a portion of the plain batter into the cinnamon and sugar. By combining them, you equalize the weight of the two mixtures, allowing the swirl to “float” and marble through the cake rather than dropping through it.
How do I fix a crack if one appears anyway?
Even the best bakers deal with cracks occasionally. If your cake splits, don’t worry! You can easily hide it with a “Sour Cream Mask.” Mix a little sour cream with powdered sugar and spread a thin layer over the top of the cooled cake, then chill for another hour. Alternatively, use the whipped cream topping to strategically cover the crack. Once you dust the whole thing with cinnamon, no one will ever know.
Is the flour necessary for a gluten-free version?
The flour is used as a stabilizer, but you can easily swap it out. For a gluten-free version, use a 1:1 gluten-free flour blend or substitute the two tablespoons of flour with one tablespoon of cornstarch. Both will provide the necessary binding power to keep the swirl in place and the batter stable during the bake.
How long does this cheesecake stay fresh?
This cheesecake will stay fresh and delicious for up to 5 days in the refrigerator. To prevent it from absorbing “fridge smells” like onions or leftovers, store it in a dedicated airtight cheesecake carrier or loosely tent it with foil. If you’ve already added the whipped cream, it’s best eaten within 2 days, as the cream will eventually begin to deflate and release moisture.
Cheesecake
Course: DessertCuisine: AmericanDifficulty: medium12
servings20
minutes1
hour440
kcal120
MinutesThis creamy cheesecake features a rich cinnamon and brown sugar marble swirl. It uses a low-temperature bake and a specific oven-cooling technique to achieve a professional, crack-free finish.
Ingredients
1.5 cups graham cracker crumbs
5 tablespoons melted butter
1 tablespoon sugar
24 ounces cream cheese, softened to room temperature
1 cup granulated sugar
3 large eggs, room temperature
1 teaspoon vanilla extract
1/2 cup sour cream
2 tablespoons all-purpose flour (to stabilize the swirl)
2 tablespoons ground cinnamon
3 tablespoons brown sugar
1 tablespoon melted butter (for the swirl)
Whipped cream for topping
Extra cinnamon for dusting
Directions
- Preheat your oven to 325°F (163°C). Mix graham cracker crumbs, 5 tablespoons melted butter, and 1 tablespoon of sugar. Press firmly into the bottom and slightly up the sides of a 9-inch springform pan. Bake for 8 minutes, then let cool completely.
- In a large bowl, beat the softened cream cheese and 1 cup sugar until completely smooth and creamy. It is vital that the cheese is room temperature to avoid lumps.
- Add eggs one at a time, mixing on the lowest speed just until combined. Overmixing at this stage incorporates air that causes the cake to puff up and then crack. Stir in vanilla, sour cream, and flour.
- In a small bowl, create the swirl paste by mixing the cinnamon, brown sugar, 1 tablespoon melted butter, and 1/2 cup of the prepared cheesecake batter.
- Pour two-thirds of the plain batter over the crust. Drop small spoonfuls of the cinnamon mixture across the surface. Pour the remaining plain batter over that, and drop the rest of the cinnamon mixture on top. Use a thin knife or skewer to swirl the layers in a figure-eight motion to achieve the deep marbling seen in the image.
- Bake for 55 to 60 minutes. The edges should be slightly puffed and set, but the center 2-inch circle should still have a slight jiggle.
- To solve the cracking problem, do not remove the cake from the oven. Turn the oven off and prop the door open about 1-2 inches with a wooden spoon. Let the cheesecake sit inside for 1 hour. This gradual temperature drop prevents the cake from shrinking too fast and splitting.
- After 1 hour, remove and let cool completely on the counter. Run a thin knife around the edge to loosen the cake from the sides. Refrigerate for at least 6 hours (preferably overnight).
- Before serving, pipe generous mounds of whipped cream around the top edge and apply a heavy dusting of cinnamon over the entire surface to match the visual finish.
Notes
- Ensure all ingredients are at room temperature to avoid lumps. Use the wooden spoon oven-propping method for a perfect, crack-free surface. Refrigerate for at least 6 hours or overnight for the best texture.


