

Few things are more disappointing than craving a thick, hearty bowl of chowder only to end up with a thin, watery soup that looks more like a sad broth. Even worse is the dreaded “break,” where the cream separates into grainy clumps the second it hits the heat. A true chowder should feel like a warm hug, offering a velvety, rich texture that coats the back of your spoon and stays perfectly smooth from the first bite to the last.
This Creamy Chicken and Potato Chowder isn’t just another soup recipe; it’s a lesson in structural integrity. We’re moving away from the “dump and simmer” method that often leads to lackluster results. Instead, we focus on building a stable emulsion that locks in moisture and flavor. The result is a bowl that feels professional-grade, boasting a sophisticated depth that balances savory chicken, earthy potatoes, and a bright, tangy finish.
If you’re enjoying the creamy aspects of this chowder, you might also appreciate a different take on creamy chicken noodle soup.
The secret to this foolproof texture lies in the starch-coating method. By dusting your sautéed aromatics with flour before any liquid enters the pot, you create a protective barrier. This ensures the flour hydrates evenly, preventing those annoying lumps and creating a thick, stable base that won’t thin out as it simmers. It’s a simple technique, but it makes all the difference between a mediocre soup and a world-class chowder.
The Science of a Stable Chowder Emulsion
Understanding why cream soups curdle is the first step to becoming a better home cook. When cold dairy hits a boiling liquid, the proteins in the cream undergo “thermal shock,” causing them to tighten and separate from the fats. This results in a broken, grainy mess. To prevent this, we use a multi-layered approach to stabilization, starting with a foundational roux built directly onto the vegetables.
When you stir flour into the butter-coated onions and carrots, you’re creating a roux that acts as a suspension bridge for the chicken broth. The fat molecules from the butter coat the starch granules in the flour, allowing them to swell and thicken the liquid without clumping. This creates a viscous environment that is much more welcoming to heavy cream later in the process.
Furthermore, the starch from the potatoes themselves contributes to the emulsion. As the Yukon Golds simmer, they release just enough natural starch to add body to the liquid. This combination of a flour-based roux and natural potato starch creates a “double-thickened” base that is incredibly resilient. It provides a smooth mouthfeel that remains consistent even as the soup cools slightly in your bowl.
Why Yukon Gold Potatoes Outperform Russets
Choosing the right potato is a make-or-break decision for chowder. Yukon Golds are the gold standard here because they are “all-purpose” potatoes with a medium starch content. They have a naturally buttery flavor and a waxy skin that helps them hold their shape during a 20 minutes simmer. You want distinct cubes of potato in every bite, not a grainy mash.
Russet potatoes, on the other hand, are very high in starch and have a mealy texture. While they’re great for baking, they tend to disintegrate in soups. If you use Russets, your chowder might end up feeling gritty or overly thick as the potatoes break down and dissolve into the liquid. Yukon Golds provide that perfect balance of a creamy interior and a firm exterior.
The Role of Whole Grain Mustard
You might be surprised to see whole grain mustard in a creamy soup, but it’s the “secret weapon” that elevates this dish. Heavy cream and potatoes are naturally very rich and can sometimes feel “one-note” or heavy on the palate. The vinegar in the mustard provides a necessary hit of acidity that cuts through the fat, brightening the entire flavor profile.
Beyond the taste, the mustard seeds add a beautiful visual “pop” to the chowder. Those tiny dark specks break up the creamy white landscape of the soup, giving it a more rustic and sophisticated look. It adds a subtle tang and a tiny bit of texture that makes people stop and ask, “What is that delicious flavor I can’t quite put my finger on?”
Essential Components for This Chicken Potato Base
Quality ingredients are the backbone of a great chowder. I always recommend using low-sodium chicken broth. This gives you total control over the seasoning. Standard broths can be salt bombs, and since the liquid reduces slightly as it simmers, the saltiness only intensifies. By starting with a low-sodium base, you can salt to your specific preference at the very end.
The chicken itself deserves a little extra care. This recipe calls for poached and shredded chicken breasts. Poaching the chicken separately ensures it stays tender and juicy. If you boil raw chicken directly in the soup for too long, it can become rubbery and tough. Shredding the chicken rather than cubing it also allows the meat to soak up more of the creamy base, ensuring every forkful is moist.
Don’t overlook the herbs. Dried thyme is used during the simmer because it’s hardy and its flavor deepens with heat. It provides a woody, earthy backbone that pairs perfectly with poultry. However, we finish with fresh parsley. The fresh herb adds a hit of “green” freshness and a pop of color that dried herbs simply can’t provide after being cooked for 30 minutes.
Selecting and Prepping Your Aromatics
The foundation of our flavor is a classic mirepoix: onions, celery, and carrots. When prepping, pay close attention to the carrots. You want to slice them into thick rounds, about a quarter-inch thick. Since they’ll be simmering for nearly 20 minutes with the potatoes, thin slices would turn to mush. Thick rounds maintain a slight “snap,” providing a nice textural contrast to the soft potatoes and tender chicken.
Step-by-Step: Building the Velvety Base
The magic starts in the Dutch oven. When you sauté your aromatics in butter, you’re looking for them to become fragrant and translucent, not browned. Once they’re soft, you’ll sprinkle the flour over the top. This is a critical moment. You must stir and cook that flour for at least two full minutes. You’ll notice the smell change from a “raw flour” scent to something slightly nutty.
This cooking time is essential because it removes the pasty, metallic taste of raw flour. The flour will coat the vegetables, forming a thick paste. Don’t worry if it looks a bit messy at this stage; that’s exactly what you want. This “veggie-roux” is what will eventually transform your broth into a thick, luxurious chowder base without a single lump in sight.
The Gradual Broth Integration Technique
Patience is your best friend when adding the broth. If you dump all four cups in at once, the flour-coated vegetables will clump together, and you’ll spend the next ten minutes chasing flour balls with a whisk. Instead, pour in just one cup. Stir vigorously until it forms a thick, smooth slurry. Repeat this with the second cup.
By the time you get to the third and fourth cups, the base will be stable enough to handle the rest of the liquid. This gradual integration ensures that the starch is perfectly distributed throughout the pot. It’s the difference between a soup that feels “thickened” and a soup that feels truly “creamy.”
Simmering for Optimal Potato Texture
Once your broth is in and your potatoes are added, bring the pot to a gentle boil, then immediately drop the heat to low. You want to see small, lazy bubbles breaking the surface. A violent, rolling boil is the enemy of a good chowder. High heat can cause the potatoes to knock against each other and break apart, making the soup cloudy and messy.
Cover the pot to trap the steam, which helps the potatoes cook evenly all the way through. Start checking them at the 15-minute mark. You’re looking for “fork-tender,” meaning a fork slides in easily but the potato doesn’t crumble. This usually takes about 18 minutes depending on the exact size of your cubes.
The Tempering Method: Preventing Curdled Cream
This is the most important technique in the entire recipe. Never, ever pour cold heavy cream directly into a hot pot of soup. The massive temperature difference is what causes the dairy to break. Instead, we use tempering. Pour your cup of cream into a small bowl or measuring cup. Take a ladle of the hot soup liquid and slowly whisk it into the cold cream.
By doing this, you are gradually raising the temperature of the cream in a controlled environment. You’re “introducing” the dairy to the heat. Once the cream mixture feels warm to the touch, you can safely pour it into the large pot. This extra 30 seconds of work guarantees a perfectly smooth, silk-like finish every single time.
Final Thickening and Heat Management
After the cream is added, your job is mostly done, but you must stay vigilant. Keep the heat on low. You want the soup to stay hot enough to thicken slightly, but you must not let it reach a boil again. If the soup boils after the cream is added, you risk breaking that beautiful emulsion you just worked so hard to build.
To check if it’s ready, use the “spoon test.” Dip a metal spoon into the chowder and pull it out. Run your finger through the coating on the back of the spoon. If the line stays clear and the soup doesn’t run back into the gap, it’s perfectly thickened. It should feel rich and substantial, ready to be ladled into bowls.
Troubleshooting Common Chowder Obstacles
If your chowder feels too thick, don’t panic. This can happen if the potatoes release more starch than expected or if the simmer went a little long. Simply stir in an extra splash of chicken broth or a little whole milk until you reach your desired consistency. Do this a tablespoon at a time so you don’t over-correct and end up with a thin soup.
If the soup feels too thin, you can use the “potato-mash trick.” Take a few of the cooked potato cubes out of the pot, mash them into a paste with a fork, and stir them back in. The extra starch will act as a natural thickener. If the soup accidentally boils and looks slightly grainy, you can sometimes save it by whisking in a small amount of warm cream very quickly, but prevention is always better than the cure.
Flavor Variations and Dairy-Free Swaps
While this recipe is a classic, you can easily adapt it. For a smoky twist, add a teaspoon of smoked paprika or some roasted corn kernels during the final simmer. If you want more heat, double the red pepper flakes. You can also swap the chicken for firm white fish or shrimp, though you should add seafood at the very end as it cooks much faster than shredded chicken.
For a dairy-free version, use a high-quality, full-fat coconut milk instead of heavy cream. Be aware that this will add a slight coconut flavor, which actually pairs beautifully with the thyme and mustard. For the flour, a 1:1 gluten-free flour blend works perfectly well for the roux. Just ensure the blend contains xanthan gum to help with the thickening process.
Storage, Reheating, and Meal Prep Strategy
Cream-based soups require a bit of care when it comes to leftovers. This chowder will stay fresh in an airtight container in the refrigerator for up to three days. I do not recommend freezing this soup. Potatoes tend to become grainy and “spongy” when frozen and thawed, and the cream emulsion will almost certainly break during the defrosting process.
When reheating, the stovetop is your best bet. Place the chowder in a small saucepan over low heat. Stir it frequently to keep the emulsion stable. If you must use a microwave, heat it in 30-second intervals, stirring well between each one. You may need to add a tiny splash of water or milk to loosen it up, as the starch will continue to thicken the soup as it sits in the fridge.
Optimal Side Dish Pairings
Because this chowder is so rich and creamy, it pairs best with sides that offer a bit of crunch or acidity. A thick slice of toasted sourdough is perfect for mopping up the bottom of the bowl. The slight sourness of the bread complements the tang of the whole grain mustard beautifully.
A bright, crisp salad is another excellent choice. Try an arugula salad with a simple lemon vinaigrette. The peppery greens and citrus dressing provide a sharp contrast to the velvety soup. If you want more vegetables, roasted broccoli with a squeeze of lemon and some garlic provides a nice charred flavor that stands up well to the hearty chicken and potatoes.
Expert Tips for Visual Presentation
We eat with our eyes first! Don’t skip the final garnish. A generous handful of fresh parsley adds a vibrant green that makes the bowl look alive. I also like to save a tiny pinch of red pepper flakes to sprinkle right on top. It signals to your guests that there’s a hint of warmth inside and makes the dish look like it came straight out of a high-end bistro.
Frequently Asked Questions
Can I use chicken thighs instead of breasts?
Absolutely! Chicken thighs are actually more forgiving than breasts because they have a higher fat content. They stay incredibly moist and tender even if they simmer a little longer. Just make sure they are boneless and skinless, and trim off any excess fat before poaching and shredding them for the soup.
Why is my chowder grainy?
Graininess usually happens for two reasons. First, the flour might not have been cooked long enough in the butter, leaving raw starch granules that feel gritty. Second, the heat might have been too high after the cream was added, causing the dairy proteins to clump. Always cook your roux for 2 minutes and keep the final simmer very low.
Can I make this in a slow cooker?
You can, but you need to modify the steps. Sauté the veggies and make the flour roux on the stovetop first, then add that mixture to the slow cooker with the broth and potatoes. Cook on low for 6 hours. Stir in the shredded chicken and tempered cream at the very end, just before serving, to ensure the dairy doesn’t break during the long cook time.
How do I make it even thicker without more flour?
The best way to increase thickness naturally is to use the potato-mash method. Ladle out about a half-cup of the cooked potatoes and a little liquid. Mash them into a smooth paste using a fork or immersion blender, then stir that paste back into the pot. This adds incredible body without changing the flavor profile or adding more gluten.
Is there a substitute for heavy cream?
If you want something slightly lighter, you can use half-and-half. However, because half-and-half has less fat, it is more prone to curdling, so you must be even more careful with the tempering process. You can also use whole milk, but I recommend whisking a tablespoon of melted butter into the milk first to give it the necessary richness to be called a “chowder.”

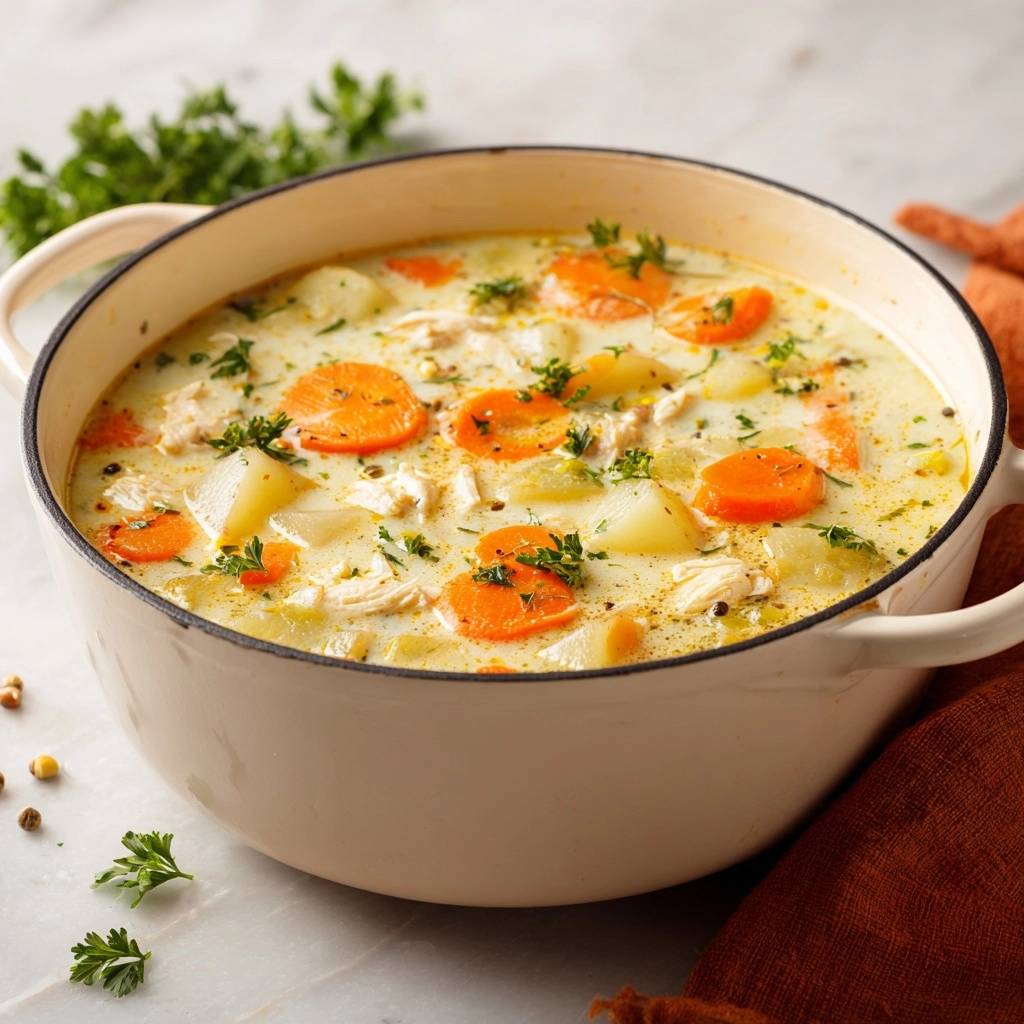
Chicken Potato Chowder
Course: Main CourseCuisine: AmericanDifficulty: medium6
servings15
minutes35
minutes410
kcal50
MinutesThis hearty chowder features shredded chicken, Yukon Gold potatoes, and a rich, stable base. By coating vegetables in flour and tempering the cream, this recipe achieves a perfect emulsion that stays smooth and thick.
Ingredients
1.5 lbs boneless skinless chicken breasts, poached and shredded
3 large carrots, peeled and sliced into thick rounds
3 large Yukon Gold potatoes, peeled and cubed into 1-inch pieces
2 stalks celery, diced
1 yellow onion, finely chopped
4 cups low-sodium chicken broth
1 cup heavy cream
3 tablespoons all-purpose flour
4 tablespoons unsalted butter
1 tablespoon whole grain mustard (for visual texture and tang)
1 teaspoon dried thyme
1/2 teaspoon red pepper flakes
Salt and black pepper to taste
1/2 cup fresh parsley, roughly chopped for garnish
Directions
- Melt the butter in a large Dutch oven over medium heat. Add the onions, carrots, and celery. Sauté for 6 to 8 minutes until the onions are translucent and the carrots begin to soften.
- Sprinkle the flour directly over the sautéed vegetables. Stir constantly for 2 minutes. This step is crucial as it cooks out the raw flour taste and creates a roux-like coating on the veggies that prevents the soup from thinning out later.
- Slowly pour in the chicken broth one cup at a time, whisking or stirring vigorously after each addition. This gradual process ensures a perfectly smooth base with no flour clumps.
- Add the cubed potatoes, dried thyme, red pepper flakes, whole grain mustard, salt, and pepper. Bring the mixture to a gentle boil, then reduce heat to low. Cover and simmer for 15 to 20 minutes until the potatoes are fork-tender but still hold their shape.
- Stir in the shredded chicken and allow it to heat through for 2 minutes.
- To prevent curdling, do not pour cold cream into the hot pot. Instead, take a ladle of the hot soup base and whisk it into your cup of heavy cream to warm it up. Once tempered, slowly pour the cream mixture into the pot while stirring.
- Let the soup sit on low heat for 2 more minutes to thicken. Do not let it reach a rolling boil once the cream is added, as high heat can break the emulsion.
- Stir in half of the fresh parsley. Ladle into bowls and garnish generously with the remaining fresh parsley and an extra pinch of red pepper flakes to match the visual presentation. Serve immediately.
Notes
- To prevent curdling, always temper the heavy cream with a ladle of hot broth before adding it to the pot, and avoid bringing the soup to a rolling boil once the dairy is incorporated.


