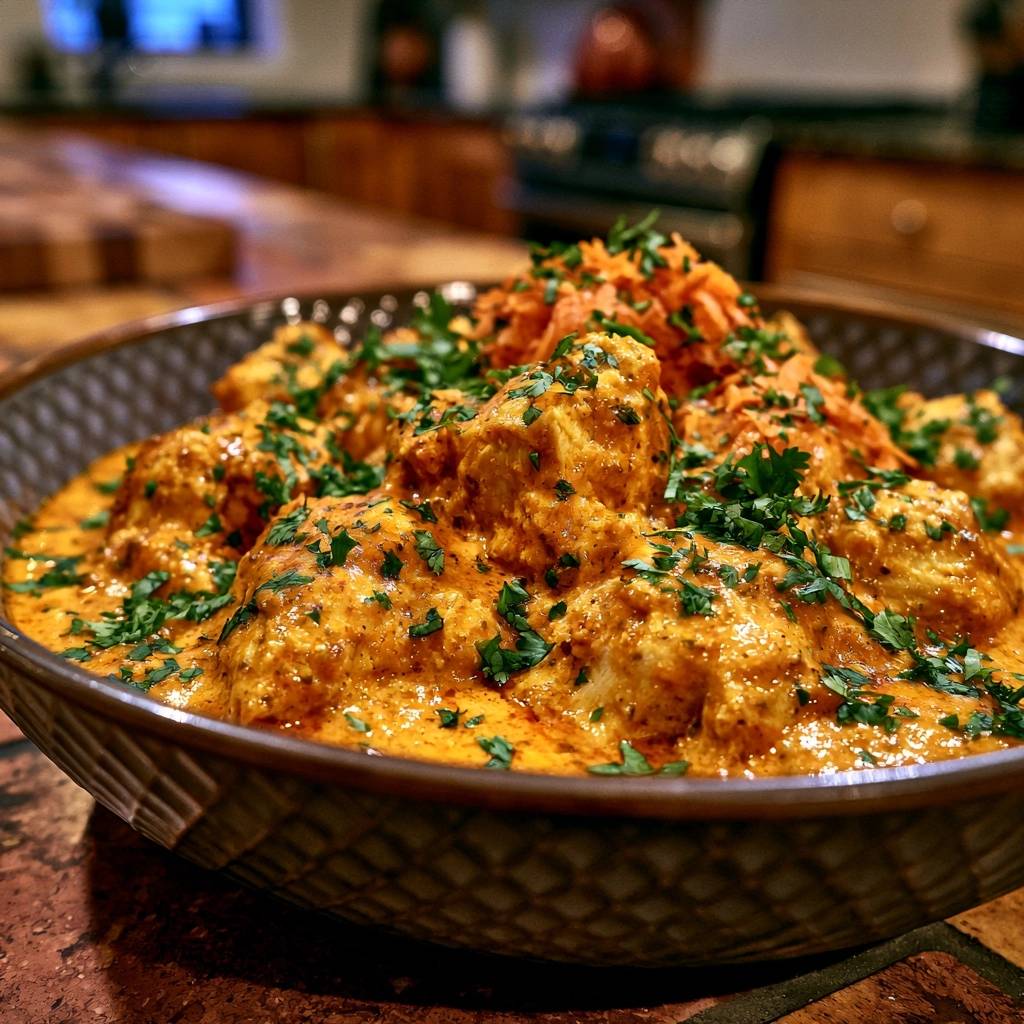
There is nothing more disappointing than a home-cooked curry that looks like a puddle of flavored water on your plate. You spend time chopping and sautéing, only to have the sauce separate into a thin, broken mess that refuses to cling to the meat. This Creamy Golden Chicken Curry is the definitive answer to that frustration, offering a sauce so thick and velvety it feels like silk.
The “Golden” in this recipe refers to more than just the vibrant, sun-drenched hue provided by high-quality turmeric. It represents a specific standard of richness and depth that you usually only find in high-end restaurants. By focusing on the science of the base, we can achieve a vibrant, glowing sauce that stays perfectly emulsified from the first bite to the last.
The secret to this success isn’t a hidden ingredient, but rather a specific technique involving the aromatics. Most people toss in diced onions and hope for the best, but we are going to transform those onions into a structural paste. This creates a thick foundation that holds the heavy cream in place, ensuring your dinner is never watery or thin.
The Anatomy of a Non-Watery Curry Sauce
Achieving a restaurant-quality emulsion requires understanding how fat and liquid play together in the pan. In many home recipes, the water content from the onions and chicken stock never fully evaporates, leading to a “broken” sauce where the oil floats on top. However, by using a high-fat dairy base like heavy cream, we create a much more stable environment for the spices to live in.
Heavy cream is non-negotiable here because its high fat content prevents it from curdling when it hits the acidic tomato puree. If you try to use milk or half-and-half, the proteins will likely clump together, leaving you with a grainy texture. Therefore, sticking to the heavy stuff ensures that the sauce remains smooth and glossy throughout the simmering process.
You can test the viscosity of your sauce using the “spoon-coating” method. Simply dip a metal spoon into the curry and draw your finger across the back of it. If the line stays sharp and the sauce doesn’t run into the cleared space, you have achieved the perfect thickness. This level of body is what allows the curry to coat every nook and cranny of the chicken chunks.
Why Grated Onions Outperform Diced Onions
When you dice an onion, you create small cubes that soften but often retain their individual shape, leading to a chunky texture. Grating the onion, however, changes the game entirely by breaking down the cellular structure before it even hits the heat. This releases all the natural sugars and sulfur compounds simultaneously, allowing them to meld into the oil.
As you sauté this onion pulp, the moisture evaporates much faster than it would with diced pieces. Instead of floating chunks, you end up with a concentrated “masala” paste that acts as a natural thickener. This paste provides the structural integrity the sauce needs to stay thick and luscious without the need for flour or cornstarch.
Essential Components for Creamy Golden Chicken Curry
The foundation of this dish starts with 1.5 pounds of chicken breast cut into uniform, large chunks. While some prefer thighs, the breast is actually ideal for this specific creamy application because it acts like a sponge. It soaks up the golden cream sauce without releasing excess rendered fat that might cause the delicate emulsion to break.
Freshness is your best friend when it comes to the aromatics. Using fresh ginger and garlic rather than the jarred versions provides a sharp, bright punch that cuts through the richness of the cream. In addition, the moisture in fresh ginger helps to deglaze the pan as you stir, pulling up all those flavorful browned bits from the chicken.
Quality vegetable oil is the preferred cooking medium here because of its high smoke point. You want to be able to sear the chicken at a high temperature to lock in juices without the oil burning or smoking. This clean-tasting fat allows the complex flavors of the yellow curry powder and turmeric to shine through without interference.
The Spice Profile: Turmeric and Yellow Curry Powder
The specific ratio of turmeric to yellow curry powder is what creates that iconic golden glow. Turmeric provides the earthy base and the intense yellow pigment, while the curry powder brings in the warmth of cumin, coriander, and fenugreek. Together, they create a flavor profile that is deeply aromatic but not overly spicy.
If you want a bit of visual flair, adding a half-teaspoon of chili flakes provides beautiful red specks against the gold background. These flakes don’t just add heat; they provide a pop of color that makes the dish look professionally plated. However, the primary goal remains that deep, sun-kissed yellow that defines a true golden curry.
The Role of Tomato Puree and Chicken Stock
Tomato puree, or passata, is the secret weapon for balancing the heavy cream. The natural acidity of the tomatoes cuts through the fat, preventing the dish from feeling too heavy or cloying on the palate. It also adds a subtle umami undertone that rounds out the earthiness of the dry spices.
We use a very small amount of chicken stock primarily to deglaze the pan and provide a bit of liquid for the reduction phase. This stock carries the flavors into the center of the chicken chunks as they simmer. By the time the dish is finished, most of this added liquid has evaporated, leaving behind only concentrated flavor and a thick, stable sauce.
Phase One: Searing for Flavor and Texture
Start by heating your oil until it shimmers, then add the chicken chunks in a single layer. You are looking for the Maillard reaction here, which is the chemical reaction that creates that savory, browned crust on the outside of the meat. Don’t worry about cooking the chicken all the way through at this stage; we just want color and flavor.
Once the chicken is golden, remove it from the pan and set it aside on a plate. You will notice brown bits stuck to the bottom of the skillet, which chefs call “fond.” Do not wash the pan! This fond is concentrated chicken flavor that will eventually dissolve into your sauce, adding an incredible depth that you can’t get from spices alone.
Phase Two: Building the Concentrated Masala Base
Now comes the most important part of the process: the onion paste. Add your grated onion and its juices directly into the hot pan. At first, it will look like a watery mess, but keep stirring over medium-high heat. After about 5 to 8 minutes, the water will vanish, and the onion will transform into a thick, golden-brown paste.
This transformation is the key to a non-watery sauce. You are essentially removing the water before you add the cream, ensuring the final product is pure flavor. The smell will change from a sharp, raw onion scent to something deeply sweet and savory, signaling that the sugars have caramelized perfectly.
Toasting Aromatics and Dry Spices
Once the onion paste is ready, stir in the garlic, ginger, and dry spices. This process is called “blooming” the spices. Many of the flavor compounds in curry powder and turmeric are fat-soluble, meaning they need to be heated in oil to reach their full potential. You will notice the oil in the pan turning a bright, vivid orange-yellow.
Be careful not to burn the garlic during this 60-second window. You want it to become fragrant and soft, not bitter and black. As the spices toast, they will bind to the onion paste, creating a thick, aromatic “masala” that smells absolutely incredible. This is the soul of your curry.
Phase Three: Achieving the Perfect Emulsion
Pour in the tomato puree and chicken stock, stirring to scrape up every bit of that flavorful fond from the bottom of the pan. Let this mixture simmer and reduce for a few minutes. You are looking for a specific visual cue: tiny beads of oil starting to separate and shimmer at the edges of the tomato base.
This separation is actually a good thing! It means the water has evaporated, and you are left with a concentrated base ready to accept the cream. If you add the cream while there is still too much water in the pan, the sauce will never reach that desired “spoon-coating” thickness.
The Low-Heat Cream Integration Technique
Before you even touch the heavy cream, turn your heat down to medium-low. High heat is the enemy of a smooth dairy sauce, as it can cause the proteins to tighten and separate from the fat. By lowering the temperature, you ensure a gentle marriage between the cream and the spice base.
Slowly pour in the heavy cream while whisking constantly. You will see the dark red-orange base transform into a brilliant, creamy gold. The whisking helps to emulsify the fats, creating a stable, velvety liquid that won’t break or turn oily as it continues to cook.
Phase Four: The Final Simmer and Reduction
Slide the seared chicken and any juices that collected on the plate back into the skillet. These juices are pure gold, so don’t leave them behind! The chicken will finish cooking in the sauce, which keeps the meat incredibly tender and juicy while allowing it to absorb the flavors of the curry.
Simmer the mixture gently for about 8 to 10 minutes. During this time, the sauce will continue to thicken as the proteins from the chicken interact with the cream. You want the sauce to be heavy enough that it doesn’t run across the plate, but stays exactly where you put it, hugging the chicken chunks tightly.
Troubleshooting Your Golden Chicken Curry
If you find that your sauce has become too thick during the final simmer, don’t panic. Simply stir in a tablespoon of warm chicken stock or water at a time until you reach your desired consistency. However, avoid adding cold liquid, as this can shock the emulsion and cause it to look grainy.
In the rare event that the sauce looks oily or “broken,” you can usually save it with a bit of vigorous whisking. Remove the pan from the heat and add a teaspoon of warm water, then whisk rapidly. The water helps the fats and solids bind back together, restoring that glossy, smooth finish you worked so hard for.
Presentation: The Signature Carrot and Parsley Garnish
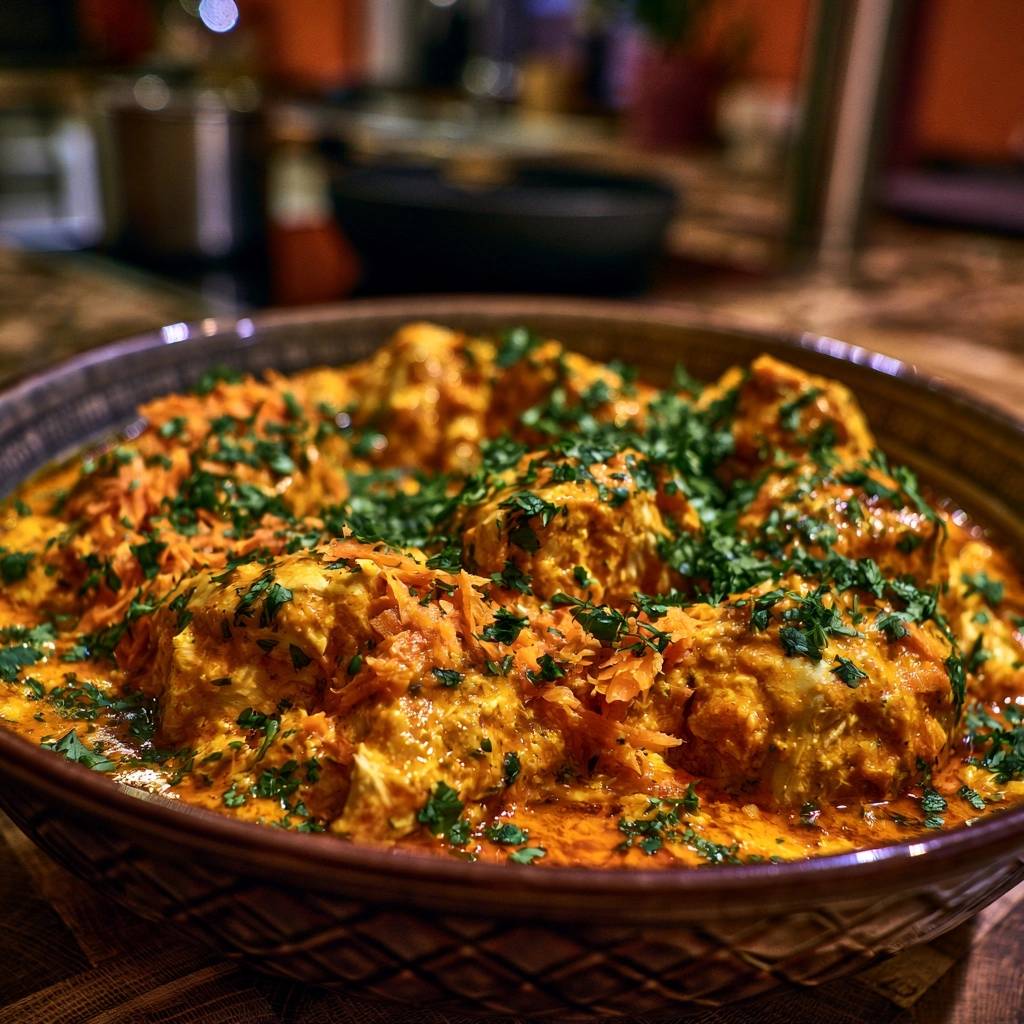
Presentation is a huge part of the experience with this dish. To create a striking visual contrast, pile a “mountain” of shredded raw carrots right in the center of the serving bowl. The bright orange of the carrots against the golden sauce is stunning, and the raw crunch provides a necessary texture break from the soft chicken.
Finally, cover the entire dish with a generous layer of finely chopped fresh parsley. The vibrant green creates a beautiful “forest and sun” effect against the gold sauce. Beyond looks, the parsley adds a hit of freshness that brightens the entire meal, making the heavy cream sauce feel much lighter and more balanced.
Optimal Side Dishes for Heavy Cream Sauces
Because this sauce is so rich and thick, you need a side dish that can stand up to it. Fluffy Basmati rice is the classic choice, as the long grains stay separate and provide the perfect vessel for soaking up the cream. For an even more indulgent experience, serve it with warm garlic naan to scoop up every last drop of sauce.
If you are looking for a lower-carb option, roasted cauliflower florets work beautifully. The charred edges of the cauliflower pair perfectly with the earthy turmeric. Additionally, a simple side of sliced cucumbers with a splash of vinegar provides a crisp, acidic crunch that cleanses the palate between rich, creamy bites.
Storage, Reheating, and Meal Prep Strategies
This curry keeps remarkably well in the fridge for up to 3 days, and many people find the flavors actually improve overnight. Store it in an airtight container to keep the aromatics fresh. However, because of the high dairy content, this specific recipe does not freeze well; the cream tends to separate and become grainy once thawed.
When it comes to reheating, avoid the microwave if possible. The uneven heat of a microwave can cause the cream to break, leaving you with an oily mess. Instead, place the curry in a small saucepan over low heat. Add a tiny splash of water or milk and stir constantly until it is warmed through and the sauce is creamy again.
Expert Tips for Curry Success
Firstly, always use a heavy-bottomed skillet or a cast-iron pan. These pans distribute heat more evenly, which prevents the onion paste from scorching in one spot while remaining raw in another. Even heat is the secret to a perfectly caramelized masala base.
Secondly, do not skip the step of grating the onion. It might seem like extra work compared to chopping, but it is the single most important factor in achieving that thick, non-watery texture. That onion paste provides the “body” that makes the sauce feel professional.
Thirdly, try to use room-temperature heavy cream. If you pour ice-cold cream into a hot pan, the thermal shock can sometimes cause the sauce to break. Taking the cream out of the fridge 15 minutes before you need it makes for a much smoother integration.
Lastly, always wait until the very end to do your final salt tasting. As the sauce reduces, the saltiness concentrates. If you salt it perfectly at the beginning, it might end up too salty by the time the sauce has thickened to its final state.
How do I store leftovers?
Store any leftover curry in an airtight container in the refrigerator for up to 3 days. The sauce will thicken significantly as it cools, so you may need to add a splash of water when reheating. It is not recommended to freeze this dish, as the heavy cream base will likely separate and lose its smooth texture upon thawing.
Why is my curry sauce watery?
A watery sauce usually happens because the onions weren’t cooked down long enough or too much liquid was added without enough reduction. To fix this, ensure you sauté the grated onions until they form a thick paste and the moisture has completely evaporated. Also, make sure to use heavy cream rather than milk, as the higher fat content is essential for a thick, stable emulsion.
Can I use chicken thighs instead of breast?
Yes, you can certainly use boneless, skinless chicken thighs if you prefer dark meat. Thighs are more forgiving and stay very moist, but they do release more fat into the sauce as they cook. If you use thighs, you may need to skim a little excess oil off the top of the sauce before serving to maintain that perfect golden look.
What can I use if I don’t have tomato puree?
If you don’t have tomato puree (passata), you can use a tablespoon of tomato paste mixed with a little water, or even finely blended canned tomatoes. The goal is to provide acidity and a bit of thickness. Avoid using chunky diced tomatoes, as they will ruin the smooth, velvety texture that defines this specific golden curry.
How do I reheat the curry without it getting oily?
The best way to reheat a cream-based curry is on the stovetop over low heat. Add a tablespoon of water or chicken stock to the pan to help loosen the sauce. Stir frequently and gently until the chicken is heated through. Avoid boiling the sauce during reheating, as high heat can cause the cream to break and turn oily.
Is this curry very spicy?
This specific recipe is mild to medium, depending on the brand of curry powder you use. The heavy cream does a great job of mellowing out the heat from the spices. If you prefer a very mild dish, simply omit the optional chili flakes. If you want more heat, you can increase the chili flakes or add a finely minced serrano pepper to the onion paste.
Creamy Golden Chicken Curry
Course: Main CourseCuisine: Indian InspiredDifficulty: easy4
servings15
minutes25
minutes40
Minutes440
kcalIndian Inspired
Ingredients
1.5 lbs chicken breast, cut into large, uniform chunks
2 tablespoons vegetable oil
1 large yellow onion, finely grated (including juices)
3 cloves garlic, minced
1 tablespoon fresh ginger, grated
1.5 tablespoons yellow curry powder
1 teaspoon turmeric
1/2 teaspoon chili flakes (optional, for the visible red specks)
1/2 cup tomato puree (passata)
1/4 cup chicken stock
1 cup heavy cream (do not use milk or half-and-half)
1 teaspoon salt
1/2 cup fresh parsley, finely chopped for garnish
1 cup shredded carrots, for garnish
Directions
- Heat the oil in a large skillet over medium-high heat. Sear the chicken chunks until golden brown on all sides. Remove the chicken from the pan and set aside. The chicken should be browned but not fully cooked through.
- To solve the watery sauce problem, add the grated onion to the same pan. Sauté for 5 to 8 minutes, stirring constantly, until the moisture has completely evaporated and the onion turns into a thick, golden paste. This “masala” base is what prevents the sauce from being thin or watery.
- Stir in the garlic, ginger, curry powder, turmeric, and chili flakes. Toast the spices in the onion paste for 60 seconds until highly fragrant.
- Pour in the tomato puree and chicken stock. Bring to a simmer and let it reduce for 3-4 minutes until the mixture is thick and the oil begins to slightly separate from the tomato base.
- Lower the heat to medium-low. Slowly pour in the heavy cream while whisking. By using heavy cream and lower heat, you ensure a stable emulsion that won’t break.
- Add the chicken and any accumulated juices back into the sauce. Simmer gently for 8-10 minutes. The sauce will thicken significantly as it reduces and the chicken finishes cooking.
- Once the sauce is thick enough to heavily coat the back of a spoon and the chicken is tender, remove from heat.
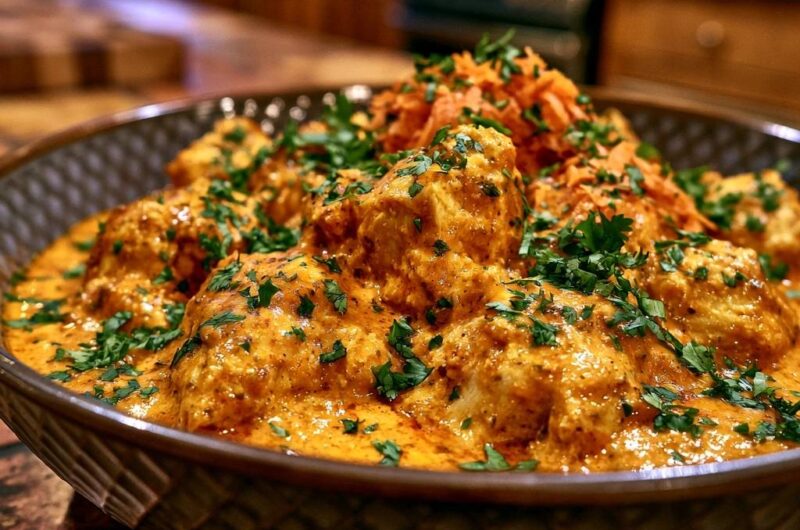
- Transfer to a deep serving bowl. Top with a large “mountain” of shredded carrots in the center and cover the entire dish with a generous layer of finely chopped fresh parsley to match the visual presentation.
Notes
- Do not use milk or half and half as a substitute for heavy cream to prevent the sauce from breaking or becoming watery.