
Most vegetable gratins promise a decadent experience but deliver a soggy, watery mess. You’ve likely encountered that pool of liquid at the bottom of the baking dish that turns a beautiful crust into a limp, mushy layer. This Crispy Parmesan Cauliflower Gratin solves that problem by treating the vegetable with the respect it deserves, focusing on a specific moisture-reduction technique.
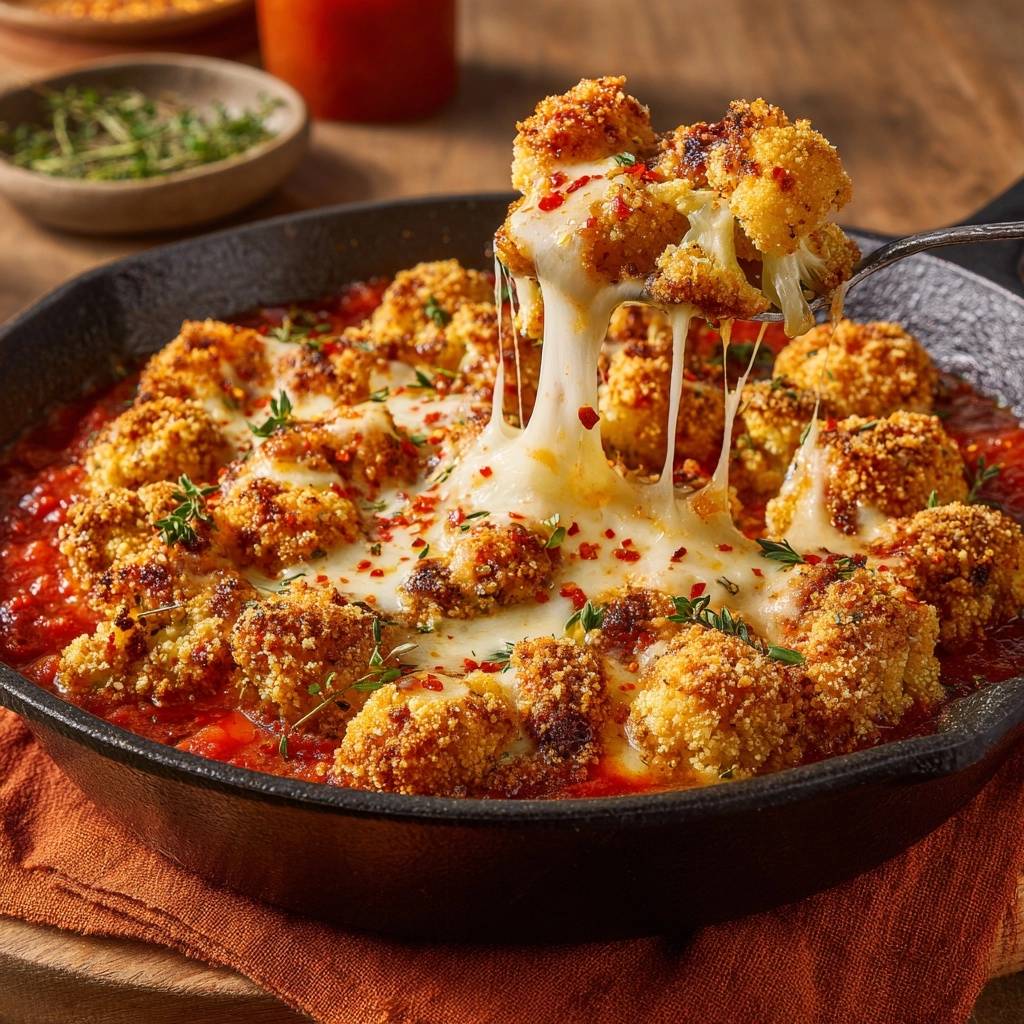
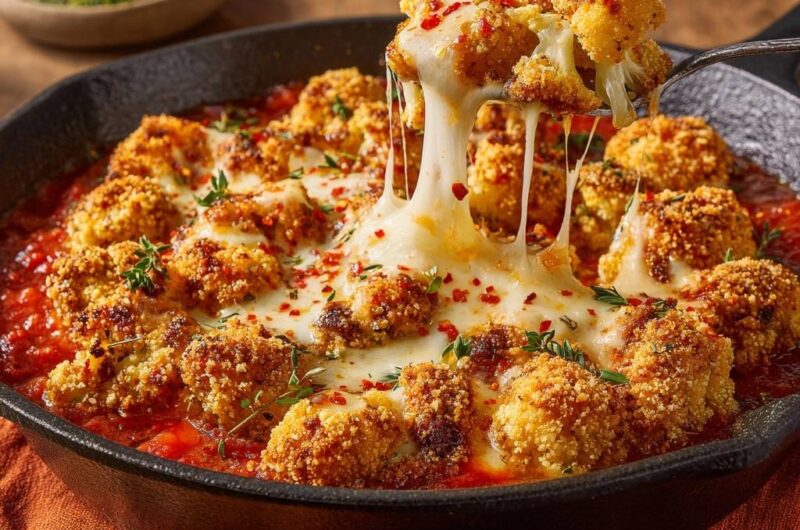
The goal here is a dramatic textural contrast. You want a base of molten, bubbling cheese and savory marinara topped with a crust that literally shatters when your fork hits it. By changing how we handle the cauliflower before it ever touches the sauce, we can guarantee a result that stays crunchy from the first bite to the last.
The secret to this success is the “Anti-Soggy” dry roast. Most people toss raw cauliflower straight into a sauce, which is a recipe for disaster because the vegetable releases all its internal water during the bake. Roasting the florets at a high temperature first ensures that the steam escapes into the oven air, not into your breading. This simple shift in workflow is what separates a mediocre casserole from a restaurant-quality gratin.
For more casserole ideas, check out this cheesy baked meatball casserole.
The Science of Moisture in Cauliflower
To master this dish, you have to understand that cauliflower is roughly 92% water. It looks sturdy and dense when raw, but its cellular structure is essentially a series of tiny water balloons. When you apply heat, those cell walls collapse and release a massive amount of liquid. If that liquid is trapped under a layer of cheese or submerged in sauce, it has nowhere to go but into your breadcrumbs.
Dry roasting is a non-negotiable chemical necessity for a crispy result. When we blast the florets at 425°F, we are initiating the evaporation process before the “wet” ingredients are introduced. This high heat also triggers the Maillard reaction on the edges of the cauliflower, creating complex, nutty flavors that raw-dogging the vegetable in a sauce simply cannot produce.
Think of this first roast as a dehydration phase. We are concentrated the flavor of the cauliflower while creating a porous surface that will better grab onto the egg wash and breading. Without this step, the steam from the vegetable would push the breading away, leaving you with a “skin” of soggy dough rather than a fused, crunchy crust.
Why Traditional Gratin Methods Fail
Standard “dump and bake” recipes are the enemy of texture. When you submerge raw vegetables in a heavy cream or tomato sauce, you aren’t making a gratin; you’re essentially making a thick vegetable soup. The sauce prevents the vegetable from reaching the temperatures needed to brown, and the vegetable dilutes the sauce as it leaks water.
This recipe rejects the “casserole” mentality. Instead of a heavy, submerged bake, we use a layered approach. By par-roasting and then nestling the florets, we ensure the sauce stays thick and the tops stay dry. This structural integrity is what allows the Parmesan and Panko to reach their full, crispy potential.
If you enjoy building layers into your dishes, you’ll appreciate the similar approach in this creamy chicken and carrot penne bake.
Essential Components for the Perfect Gratin
Success starts with your ingredients. Since this dish has a relatively short list, the quality of each item carries more weight. You aren’t just looking for bulk; you’re looking for specific properties that contribute to the final “crunch factor.”
More Dishes to Enjoy
Here are some ideas for similar vegetable preparations to complement your cauliflower gratin.
- For a familiar, cheesy vegetable bake, try this cheesy broccoli cauliflower bake, featuring similar creamy textures.
- If you enjoy oven-baked vegetables with a crisp finish, consider these crispy parmesan asparagus spears for a delightful crunch.
High-quality marinara is your flavor foundation. Look for a brand that lists extra virgin olive oil and whole peeled tomatoes as the primary ingredients. Avoid sauces with added sugar, as they can caramelize too quickly and burn under the broiler. The acidity of a good tomato sauce is vital to cut through the richness of the mozzarella and Parmesan.
Don’t skip the red pepper flakes or the fresh thyme. The flakes provide a subtle back-end heat that wakes up the palate, while the thyme adds an earthy, floral aroma that bridges the gap between the sweet roasted cauliflower and the salty cheese. These small additions transform the dish from a simple side into a complex centerpiece.
Selecting the Right Cauliflower Head
When you’re at the store, look for a head of cauliflower that feels heavy for its size. The curds should be tight, creamy white, and free of any brown spots or “fuzz.” If the florets are starting to spread apart, the cauliflower is past its prime and will likely have a bitter taste and a grainy texture.
Uniformity is your best friend in the kitchen. When you break the head down, try to keep the florets roughly the same size. If you have giant chunks mixed with tiny crumbs, the small pieces will burn during the par-roast while the large ones stay raw. Aim for “two-bite” sized pieces for the best surface-area-to-crunch ratio.
The Role of Low-Moisture Mozzarella
It might be tempting to grab a ball of fresh, water-packed mozzarella, but that would be a mistake here. Fresh mozzarella is beautiful on a salad, but in a hot oven, it releases even more water. This would completely undo all the hard work we did during the par-roasting phase.
Instead, use a block of low-moisture mozzarella and grate it yourself. The pre-shredded stuff in bags is coated in potato starch to prevent clumping, which can interfere with that perfect, stretchy cheese pull. Grating it fresh ensures it melts into a smooth, gooey blanket that binds the florets together without making them soggy.
Panko vs. Traditional Breadcrumbs
Traditional breadcrumbs are often too fine and sandy for a dish like this. They tend to absorb moisture quickly and turn into a paste. Panko, which are Japanese-style breadcrumbs, are flaky and jagged. These uneven edges create more surface area, which means more places for the heat to crisp things up.
The jagged structure of Panko also allows it to “trap” the grated Parmesan and olive oil. When these three ingredients meet heat, they fuse into a lattice-like crust. This structure is much more resistant to the steam rising from the sauce below, ensuring that the “shatter” effect lasts even as the dish sits on the table.
The Anti-Soggy Pre-Roasting Technique
The first phase of cooking is all about transformation. You’ll want your oven at a steady 425°F. This high heat is essential because we want to shock the moisture out of the cauliflower quickly. If the oven is too cool, the vegetable will just sit there and soften without losing its water content.
Spread the florets out on your parchment-lined sheet so they aren’t touching. If you crowd the pan, they will steam each other. You’re looking for specific visual cues: the edges should start to turn a light golden brown, and the stems should be tender enough to pierce with a fork but still have some “snap.” This usually takes about 12 to 15 minutes.
Step-by-Step: Constructing the Crispy Parmesan Cauliflower Gratin
Once your cauliflower is par-roasted, it’s time to build the layers. This is where the “Virtual Cooking Coach” comes in. You want to work efficiently so the cauliflower doesn’t cool down too much before it goes back into the oven. Set up your station with the egg wash on the left and the Panko-Parmesan mix on the right.
The breading mixture itself needs a little boost. Don’t just mix the dry crumbs and cheese; drizzle in those two tablespoons of olive oil and work them in with your fingers. This coats the crumbs in fat, which guarantees they will turn a deep, golden brown. Without this, the crumbs might just stay pale and dry-looking.
Phase 1: The Breading Station Workflow
To keep things clean, use the “Wet Hand/Dry Hand” technique. Use your left hand to dip the floret into the egg wash and your right hand to press it into the Panko mixture. This prevents your fingers from becoming breaded “clubs” halfway through the process.
For a similar approach to prevent any mushiness, consider our stacked eggplant parmesan.
Make sure you press the breading firmly into the florets. You want a thick, even coating. The egg acts as the glue, but the physical pressure ensures the Panko sticks to every nook and cranny of the cauliflower curd. This creates that rugged, craggy surface that looks so appetizing after it’s baked.
Phase 2: Nestling vs. Submerging
This is the most critical technical step. Pour your marinara into the skillet, then place the breaded florets into the sauce. Do not push them all the way to the bottom. You want the bottom third of the floret to be in the sauce so it absorbs that tomato flavor, but the top two-thirds must remain exposed to the air.
Think of the florets as little islands in a sea of sauce. By keeping the tops high and dry, the oven’s heat can continue to crisp the breading. If you submerge them, the breading will just dissolve into the sauce, and you’ll lose that essential texture. Tuck the mozzarella into the gaps between the islands to create a “lava” effect.
Phase 3: The Broiler Finish
The final bake takes about 12 minutes, but the real magic happens during the last two minutes under the broiler. Stay in the kitchen for this! Broilers are notoriously unpredictable and can go from “perfectly toasted” to “burnt” in seconds. You are looking for a deep mahogany color on the Parmesan.
As the Parmesan browns, it undergoes a flavor transformation, becoming intensely savory and slightly nutty. This is the Maillard reaction in full effect. Once you see the cheese bubbling and the Panko turning a dark gold, pull it out immediately. The residual heat in the cast iron will continue to cook the sauce for a few minutes.
Optimizing Your Kitchen Equipment
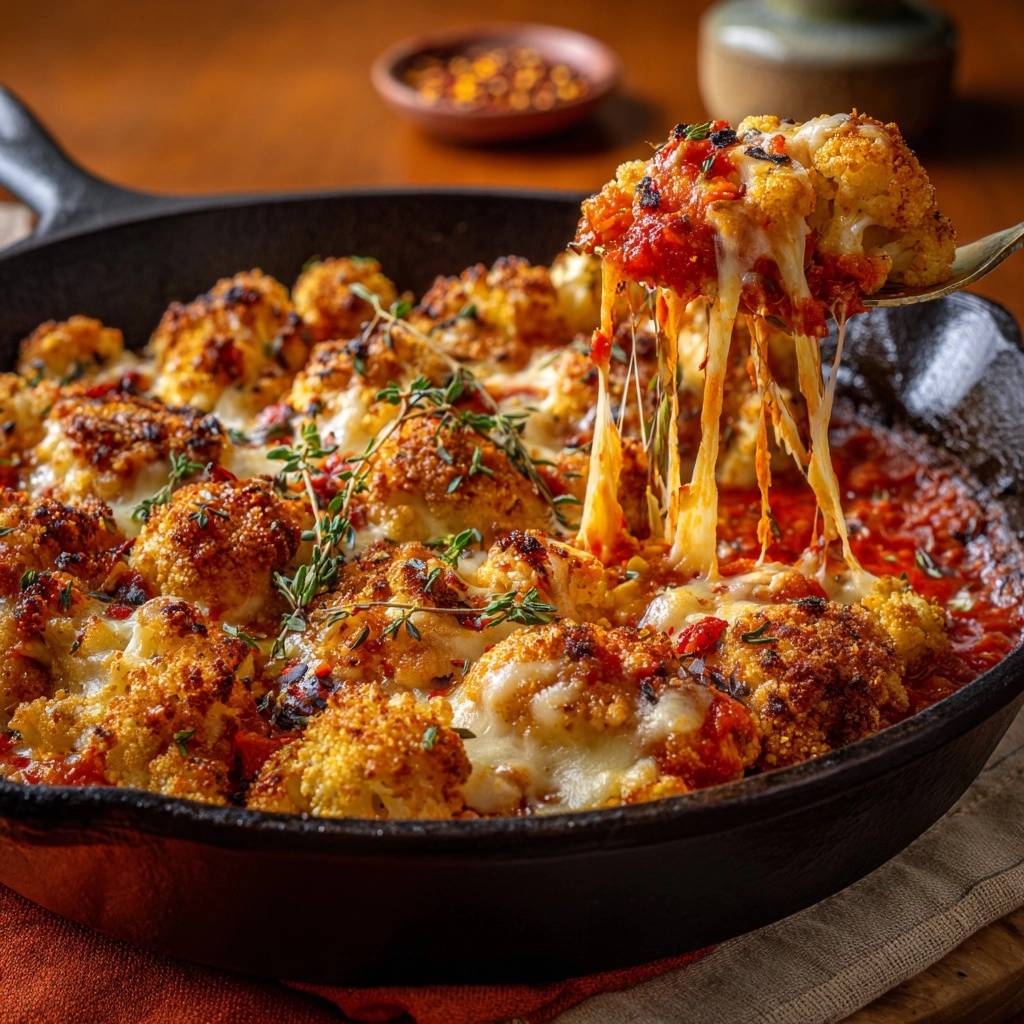
While you can make this in a glass baking dish, a 10-inch cast iron skillet is the superior tool. Cast iron has incredible heat retention, which means the sauce will stay bubbling hot even after you bring it to the table. This keeps the cheese in its molten state for much longer.
Furthermore, the dark surface of the cast iron helps the bottom of the cauliflower and the sauce develop a deeper flavor. Serving directly from the skillet also adds a rustic, “home-cooked” charm to the meal. Just remember to warn your guests that the handle is extremely hot!
Troubleshooting Common Gratin Obstacles
Even with the best techniques, things can sometimes go sideways. If you notice your sauce looks a bit thin or watery after the final bake, it usually means the cauliflower wasn’t roasted long enough in the first step. Don’t panic; you can fix this by letting the dish sit for five minutes before serving. The sauce will naturally thicken as it cools slightly.
Another common issue is the breading browning too fast while the cauliflower stems are still a bit too firm. This happens if your oven has a “hot spot.” If you see the crust getting dark but the vegetable isn’t tender, simply tent the skillet loosely with a piece of aluminum foil. This reflects the direct heat while allowing the internal temperature to continue softening the cauliflower.
What to Do if the Sauce Thins Out
If the sauce is truly too liquid, you can carefully use a spoon to remove a few tablespoons of the excess water from the edges of the skillet. Next time, try cutting the florets slightly smaller or increasing the par-roasting time by three minutes. Every head of cauliflower has a different water content, so a little intuition goes a long way.
Preventing the Parmesan from Burning
Parmesan has a high protein and fat content, which makes it prone to burning if it’s too close to the broiler element. If your oven’s broiler is particularly aggressive, move the oven rack down one level. You’ll still get the browning you want, but it will happen more gradually, giving you a larger window of perfection.
Flavor Variations and Ingredient Swaps
Once you’ve mastered the base recipe, feel free to experiment. If you want a deeper, “woody” flavor, add a teaspoon of smoked paprika to the Panko mixture. It gives the dish a beautiful reddish hue and a hint of campfire smoke that pairs perfectly with the roasted vegetable.
For those who need a gluten-free option, you can swap the Panko for gluten-free breadcrumbs or even crushed gluten-free crackers. If you want to change the herb profile, rosemary or oregano work beautifully in place of thyme. Just be sure to chop rosemary very finely, as the needles can be tough if left whole.
Pairing Suggestions for a Complete Meal
This gratin is rich and savory, so you’ll want to pair it with something that offers a bit of acidity and lightness. A simple arugula salad dressed with nothing but fresh lemon juice and a drizzle of olive oil is the perfect companion. The peppery greens and sharp citrus cut right through the heavy cheese.
If you want to add a protein, a simple roasted chicken breast or a piece of seared white fish works well. You don’t want anything too complex that will compete with the flavors of the gratin. The cauliflower is the star here, so keep the sides humble and bright.
Storage and Reheating for Maximum Crunch
If you have leftovers, store them in an airtight container in the fridge for up to three days. However, be warned: the microwave is the enemy of this dish. Microwaving will steam the cauliflower all over again, turning that beautiful crust into a soggy mess. It will still taste good, but the texture will be gone.
To bring back the crunch, use an air fryer or a toaster oven. Reheat at 375°F for about 5 to 8 minutes. This dry heat will re-crisp the Parmesan crust and warm the sauce through without overcooking the cauliflower. It’s the only way to do justice to the “Anti-Soggy” method you worked so hard to achieve!
How do I prevent the cauliflower from getting watery?
The most important step is the initial dry roast. By roasting the raw florets at 425°F for 12-15 minutes before adding any sauce or cheese, you allow the internal moisture to evaporate. This ensures the cauliflower browns instead of steaming, which is the primary cause of a watery gratin.
Can I use frozen cauliflower for this recipe?
It is not recommended. Frozen cauliflower is blanched before freezing, which breaks down the cell walls and traps a significant amount of extra moisture. Even with par-roasting, frozen cauliflower will likely turn out much softer and more watery than fresh. For the signature “shatter” crunch, stick to a fresh head of cauliflower.
What is the best way to reheat leftovers?
Avoid the microwave at all costs, as it will make the breading soggy. Instead, place the leftovers in an air fryer or oven at 375°F for 5-8 minutes. This dry heat will reactivate the fats in the cheese and Panko, restoring the crispy texture of the crust while heating the sauce through.
Can I make this dish ahead of time?
You can par-roast the cauliflower and prepare the breading mixture up to a day in advance. However, do not assemble the dish (putting the breaded cauliflower into the sauce) until you are ready to bake. If the breaded florets sit in the sauce for too long before hitting the oven, the Panko will absorb moisture and lose its ability to get truly crispy.
Why did my breading fall off the cauliflower?
This usually happens if the cauliflower wasn’t dried properly after washing or if the egg wash was too thick. Make sure the par-roasted florets are relatively dry, and ensure you are pressing the Panko mixture firmly into the egg-dipped surface. The “Wet Hand/Dry Hand” technique also helps ensure an even, secure coating.
Can I substitute the Panko with regular breadcrumbs?
You can, but the texture will be significantly different. Regular breadcrumbs are much finer and tend to create a denser, softer topping. Panko has a larger, flakier surface area that is specifically designed for crunch. If you must use regular crumbs, try mixing in some extra grated Parmesan to help create more structural “crisp.”
Crispy Parmesan Cauliflower
Course: Main CourseCuisine: AmericanDifficulty: medium4
servings20
minutes30
minutes310
kcal50
MinutesThis dish solves the common problem of watery cauliflower bakes by dry-roasting the florets before breading them. Nestled in a rich marinara sauce and topped with melted mozzarella and Parmesan, this gratin offers a perfect contrast between molten cheese and a crunchy exterior.
Ingredients
1 large head cauliflower, cut into large, uniform florets
1.5 cups high-quality marinara sauce
2 cups shredded low-moisture mozzarella cheese
1/2 cup finely grated Parmesan cheese
1 cup Panko breadcrumbs
3 tablespoons olive oil, divided
1 teaspoon garlic powder
1/2 teaspoon onion powder
1/2 teaspoon red pepper flakes
2 eggs, beaten (for dredging)
Fresh thyme for garnish
Salt and black pepper to taste
Directions
- Preheat your oven to 425°F (220°C). Line a large baking sheet with parchment paper.
- In a large bowl, toss the raw cauliflower florets with 1 tablespoon of olive oil, salt, and pepper. Spread them in a single layer and roast for 12-15 minutes. This “Anti-Soggy” step evaporates internal water so the cauliflower browns instead of steaming in the sauce later.
- While the cauliflower roasts, prepare your breading station. In one shallow bowl, whisk the eggs. In a second bowl, combine the Panko, Parmesan cheese, garlic powder, onion powder, and the remaining 2 tablespoons of olive oil (mixing oil into the crumbs ensures a deep golden color).
- Remove the cauliflower from the oven. Dip each par-roasted floret into the egg wash, then press firmly into the Panko-Parmesan mixture until heavily coated.
- Pour the marinara sauce into the bottom of a 10-inch cast iron skillet.
- Carefully nestle the breaded florets into the sauce, keeping the top 2/3 of the florets exposed to the air to maintain crispness.
- Distribute the shredded mozzarella in the gaps between the cauliflower florets, allowing some to drape over the sides while leaving the seasoned breadcrumb tops visible.
- Return the skillet to the oven and bake for 12-15 minutes. For the final 2 minutes, switch to the broiler setting to achieve the deep, toasted brown crust shown in the image.
- Remove from the oven and garnish immediately with red pepper flakes and fresh thyme sprigs. Serve straight from the skillet to preserve the cheese pull and the crunch.
Notes
- The secret to the ‘Anti-Soggy’ result is the initial dry roast and ensuring the breaded tops remain above the sauce line.


