Nothing ruins a family dinner faster than a mushy, watery pasta bake. Most recipes fail because the pasta continues to absorb liquid in the oven, turning your meal into a soft mess. You want that perfect contrast between a creamy, cheesy interior and a top layer that offers a satisfying, audible crunch.
The secret to this dish lies in a specific par-boiling time and a dual-layer topping technique. We aren’t just throwing cheese on top and hoping for the best. We are engineering a shatteringly crisp crust that stays crunchy until the last bite, locking the moisture inside the noodles where it belongs.
I’ve found that the biggest mistake home cooks make is following the pasta box instructions. If you cook the ziti until it’s edible, it’s already too late. The pasta must be significantly undercooked before it hits the sauce to ensure it reaches the perfect texture after its stint in the hot oven.
The Science of Texture in Pasta Bakes
When you put pasta in the oven, a process called carry-over cooking takes place. The starch in the noodles acts like a sponge, pulling moisture from the marinara and ricotta. If the pasta is already fully hydrated from boiling, it loses its structural integrity and turns into mush.
By using a 400°F oven, we trigger the Maillard reaction on the surface while the interior steams. This high heat evaporates excess water from the sauce quickly, thickening it into a rich glaze rather than a watery soup. It’s all about managing the thermodynamics of the baking dish.
Osmosis is the enemy here. If your sauce is too thin, the salt and water will migrate into the pasta fibers, bloating them. Our method uses a thick ricotta binder and a specific boiling window to halt this process, keeping the noodles distinct and firm.
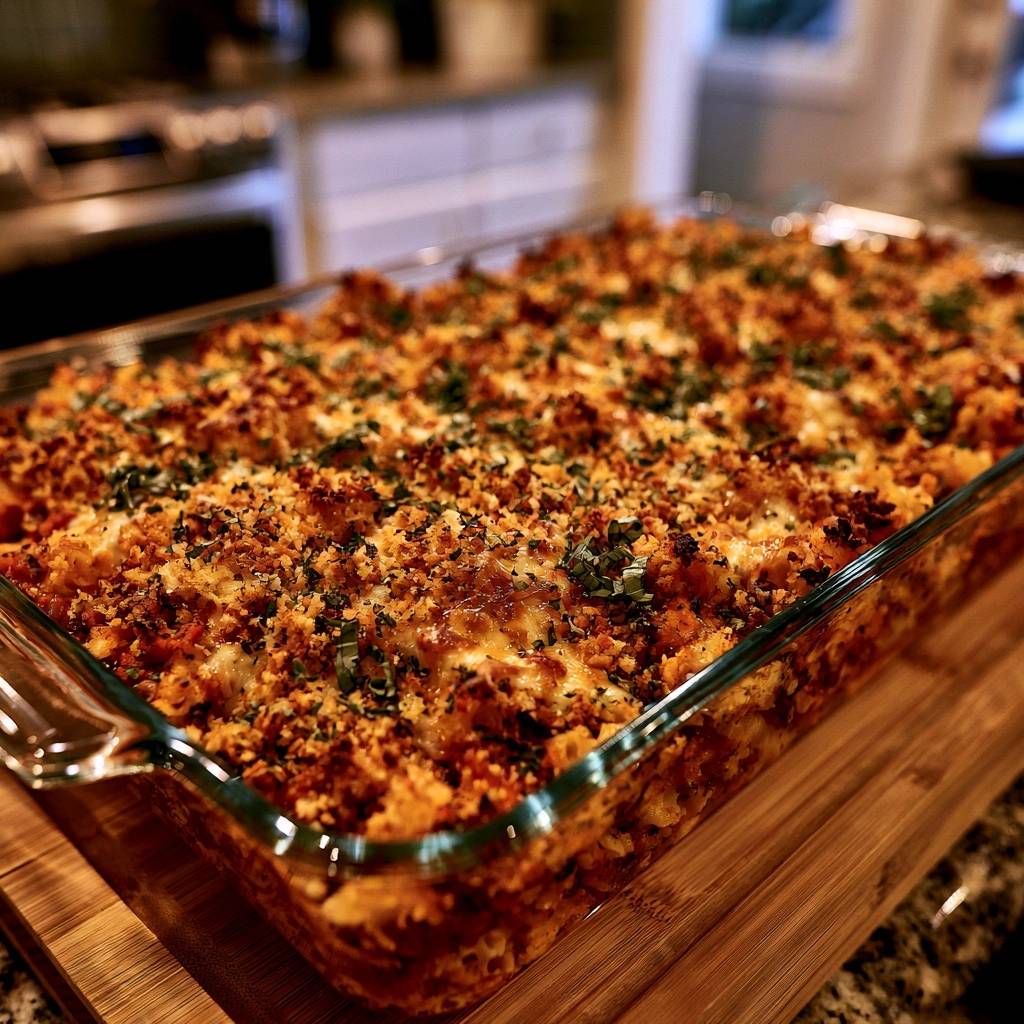
Essential Components for the Perfect Crunch
Quality ingredients are the foundation of this texture-focused dish. You need a high-quality marinara that isn’t loaded with excess water or corn syrup. A thick, tomato-heavy sauce provides the necessary body to coat the ziti without soaking through the crust.
Panko breadcrumbs are the undisputed hero of the topping. Unlike traditional Italian breadcrumbs, which are fine and sandy, Panko consists of large, airy flakes. These flakes have more surface area, which allows them to catch the olive oil and “fry” in the oven heat.
Don’t skip the egg in the ricotta mixture. While it might seem like a small addition, the egg acts as a structural binder. It transforms the cheese into a stable custard that clings to the pasta, preventing that dreaded “weeping” where water pools at the bottom of the dish.
Selecting the Right Pasta Shape
Ziti is the classic choice for a reason. Its smooth, tubular walls allow the sauce to flow through the center while providing a sleek mouthfeel. However, if you prefer more grip, Penne Rigate is a fantastic alternative because the ridges help the cheese stick to the exterior.
Rigatoni is another heavy hitter you might consider. It’s wider and sturdier, making it ideal if you like a very chunky meat sauce. Whichever you choose, ensure it’s a sturdy, thick-walled pasta that can stand up to the weight of the sausage and cheese.
The Role of High-Fat Cheeses
Always reach for whole milk ricotta. Part-skim versions often contain stabilizers and gums that can turn grainy or watery when exposed to high heat. The higher fat content in whole milk ricotta ensures a silky, melt-in-your-mouth experience that balances the crunchy topping.
When it comes to mozzarella, grab a block and grate it yourself. Pre-shredded cheese is coated in potato starch or cellulose to prevent clumping in the bag. That coating prevents the cheese from melting into a cohesive, stretchy layer, which is vital for sealing in the pasta’s moisture.
Step-by-Step: Engineering the Anti-Soggy Base
Start by boiling a large pot of heavily salted water. You want the water to taste like the sea, as this is your only chance to season the pasta itself. Drop the noodles and set a timer for exactly three minutes less than the “al dente” package directions.
When you drain the pasta, it should look opaque and feel quite firm, almost hard in the center. Don’t worry; it will finish cooking in the oven. This firm core is your insurance policy against sogginess, as it will absorb the flavorful juices from the sauce during the bake.
Immediately toss the hot pasta with the sauce and meat. The heat from the noodles helps the sauce penetrate the outer layer of the starch, creating a cohesive bond. If the pasta cools too much before mixing, the sauce will just slide off the surface.
Preparing the Ricotta Structural Matrix
In a medium bowl, whisk the ricotta, egg, and garlic powder until the mixture is completely smooth. You’re looking for a creamy, pale yellow consistency. This mixture shouldn’t be runny; it should hold its shape when dropped from a spoon.
Folding this into the pasta creates pockets of creaminess. Instead of a uniform orange mess, you’ll get beautiful white streaks of cheese throughout the bake. This variety in texture and flavor makes every bite a little different, which keeps the palate engaged.
Layering for Maximum Flavor Distribution
When you add the fresh basil, resist the urge to sprinkle it on top. The high heat of the oven will char the delicate leaves, making them bitter. Instead, tuck the torn leaves deep into the pasta mixture so they infuse the sauce with their peppery aroma.
Transfer the mixture to your greased 9×13 dish, but don’t pack it down too tightly. You want small air pockets where the cheese can bubble and the steam can circulate. A light touch ensures the heat reaches the center of the dish evenly.
The Dual-Layer Topping Technique
This is where the magic happens. We use a two-stage approach to protect the pasta. First, a layer of shredded mozzarella creates a moisture barrier. This melted cheese shield keeps the steam inside the pasta while providing a sticky surface for the crumbs.
The second layer is the seasoned Panko. By separating the breadcrumbs from the wet sauce with a layer of cheese, we ensure the crumbs stay dry and crisp. It’s a simple architectural trick that makes a massive difference in the final result.
Achieving the Golden Panko Crust
In a small bowl, toss the Panko with olive oil, parmesan, and oregano. You must ensure every single crumb is glistening with oil. This oil acts as a heat conductor, essentially frying the breadcrumbs as they bake in the oven.
Spread the mixture in a thick, even layer. If you see any “bald” spots of mozzarella, cover them up. The parmesan in the mix will caramelize, adding a salty, umami punch that complements the sweetness of the tomato sauce perfectly.
Thermal Management and Oven Positioning
We bake at 400°F because a lower temperature would take too long to brown the top, resulting in overcooked pasta. The high heat hits the Panko immediately, setting the crust. Place your rack in the center of the oven for the first 20 minutes to ensure the middle is hot.
If the top isn’t a deep, mahogany brown by the 20-minute mark, don’t be afraid to move the dish to the top rack. The proximity to the upper heating element will give you that final blast of heat needed for a professional, golden-brown finish.
Watch it closely during those last few minutes! The difference between perfectly toasted and burnt is about sixty seconds. You’re looking for a uniform golden color with the cheese bubbling vigorously around the edges of the dish.
Make Ahead and Freezing Strategies
You can absolutely prep this dish 24 hours in advance, but you must follow the “Cold Sauce” rule. Let your browned sausage and boiled pasta cool completely before mixing them with the sauce and ricotta. If you mix them while hot and refrigerate, the pasta will turn mushy.
Store the unbaked ziti in the fridge covered tightly with foil, but keep the Panko topping in a separate container. Only add the breadcrumb layer right before you put the dish in the oven. This prevents the crumbs from absorbing moisture from the cheese overnight.
When baking straight from the fridge, you’ll need to add about 10 to 15 minutes to the cook time. Keep the dish covered with foil for the first 20 minutes to let the center warm up, then remove the foil and add the topping for the final stretch of browning.
Troubleshooting Common Pasta Bake Failures
If you end up with a watery bottom, it’s usually because the pasta wasn’t drained well enough or the ricotta was low-fat. Next time, let the pasta sit in the colander for a full minute and give it a few good shakes to remove trapped water inside the tubes.
If the top is browning too fast but the center is still cold, simply tent a piece of aluminum foil over the dish. This reflects the direct heat away from the crust while allowing the ambient oven temperature to continue heating the interior of the pasta bake.
For a dry bake, the culprit is usually not enough sauce or over-boiling the pasta. Remember, the noodles will drink up the sauce. If your marinara seems particularly thick, don’t be afraid to add a splash of the starchy pasta water to the mix before baking.
Expert Tips for Professional Results
The most important tip I can give you is to let the dish rest for 10 minutes after it comes out of the oven. I know it smells incredible and you want to dive in, but resting allows the starches to settle and the cheese to firm up slightly.
If you cut into it immediately, the sauce will run to the bottom and the layers will collapse. After 10 minutes, you’ll be able to lift out clean, distinct portions that hold their shape on the plate. It also prevents you from burning your mouth on the molten cheese!
Use a glass baking dish if you have one. Glass distributes heat more evenly and slowly than thin metal pans, which helps prevent the bottom from scorching before the top is crispy. Plus, you can see the beautiful layers of sauce and cheese through the sides.
Optimal Side Dish Pairings
Since this ziti is rich, cheesy, and savory, you want a side dish that offers some acidity to cleanse the palate. A simple arugula salad tossed with fresh lemon juice and a bit of olive oil is the perfect companion. The peppery greens cut right through the fat.
Charred broccolini with a pinch of red pepper flakes is another excellent choice. The slight bitterness of the charred brassica balances the sweetness of the marinara. Avoid heavy, buttery garlic bread unless you’re looking for a serious carb-fest; the crispy Panko topping already provides plenty of crunch.
Frequently Asked Questions
Can I use gluten-free pasta for this recipe?
Yes, but you must be extremely careful. Gluten-free pasta has a very narrow window between “hard” and “mushy.” I recommend boiling it for only 1 or 2 minutes until it just starts to soften, then immediately rinsing with cold water to stop the cooking before mixing with the sauce. Use gluten-free Panko for the topping to maintain the crunch.
How do I reheat leftovers without losing the crunch?
Avoid the microwave if you want to keep the crispy top! The best way to reheat a slice is in an air fryer at 350°F for about 5 minutes. If you don’t have an air fryer, a toaster oven or a standard oven at 375°F works well. This re-toasts the Panko while melting the cheese inside without making the pasta rubbery.
Can I substitute the Italian sausage for a leaner protein?
You can use ground turkey or chicken, but you’ll lose some of the fat that contributes to the silky mouthfeel. If you use a leaner meat, I suggest adding an extra tablespoon of olive oil to the sauce and ensuring you season the meat heavily with fennel seeds and garlic to mimic the traditional Italian sausage flavor profile.
Why did my ricotta turn grainy?
Grainy ricotta is usually the result of using part-skim cheese or overcooking the dish. When the proteins in low-fat ricotta get too hot, they tighten up and squeeze out moisture, creating a gritty texture. Stick to whole milk ricotta and ensure you don’t leave the dish in the oven significantly longer than the recommended 25 minutes.
Can I freeze this baked ziti?
You can freeze it, but for the best results, freeze it before baking. Assemble the dish (without the Panko topping), wrap it tightly in plastic wrap and then foil. It will stay fresh for up to three months. Thaw it in the fridge overnight before adding the fresh Panko topping and baking as directed. Do not freeze the cooked leftovers if you want to maintain the texture, as the pasta will soften significantly upon thawing.
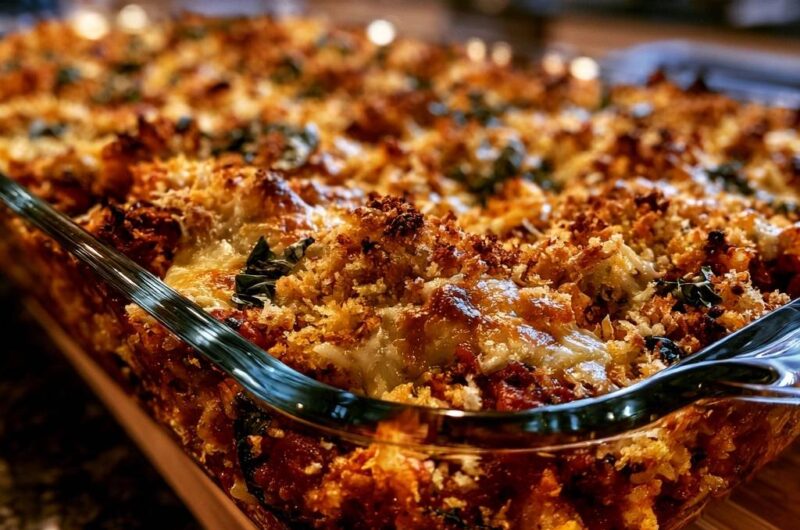
Crispy Topped Baked Ziti
Course: Main CourseCuisine: Italian-AmericanDifficulty: easy8
servings15
minutes30
minutes45
Minutes460
kcalItalian-American
Ingredients
1 pound ziti or penne pasta
24 ounces high-quality marinara sauce
1 pound ground Italian sausage (browned and drained)
15 ounces ricotta cheese
1 large egg (to bind the ricotta)
2 cups shredded mozzarella cheese
1/2 cup grated parmesan cheese
1.5 cups Panko breadcrumbs
3 tablespoons extra virgin olive oil
1 tablespoon dried oregano
1/2 cup fresh basil leaves, torn
1 teaspoon garlic powder
1/2 teaspoon red pepper flakes (optional)
Directions
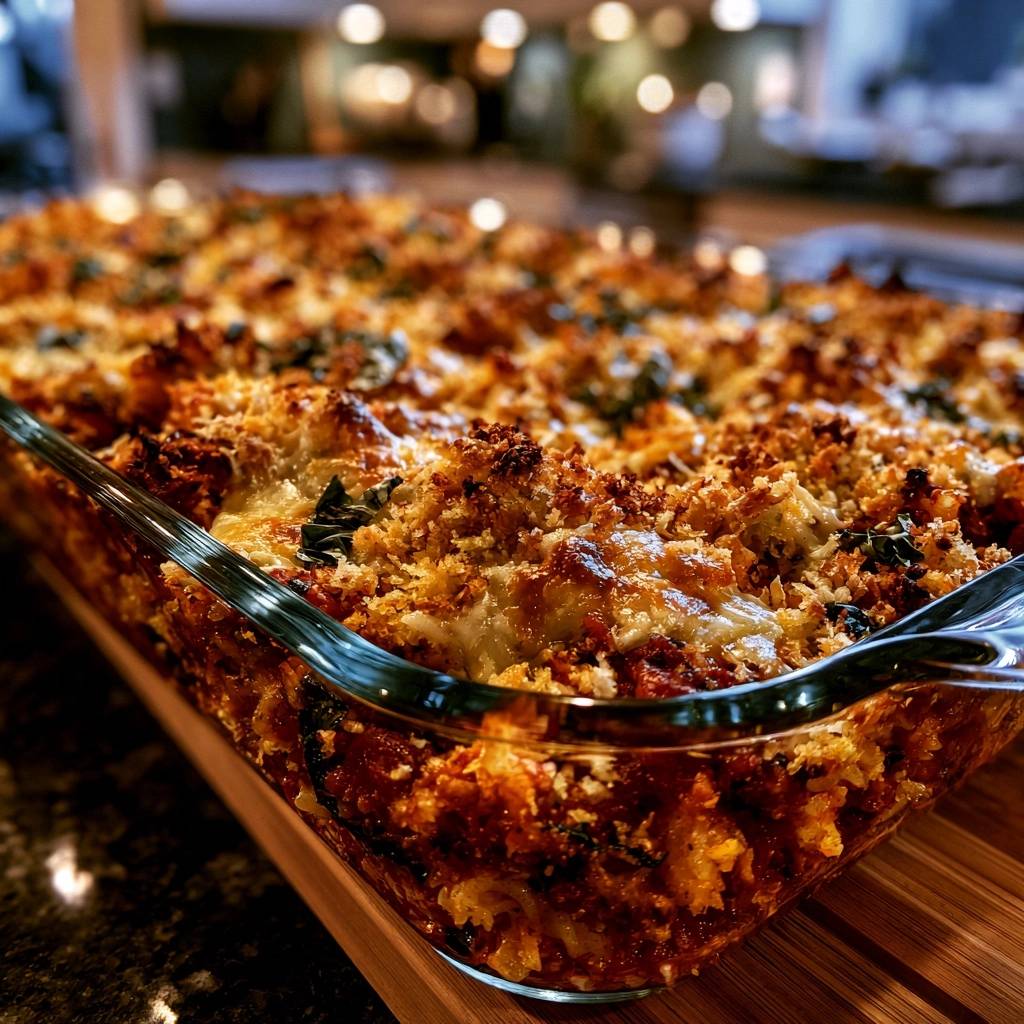
- Preheat your oven to 400°F (200°C). A higher temperature is essential for the deep golden-brown crust shown in the image. Grease a 9×13 inch glass baking dish.
- The Anti-Soggy Secret: Boil a large pot of heavily salted water. Cook the pasta for exactly 3 minutes less than the “al dente” time on the package. The pasta must be quite firm; it will finish cooking using the steam from the sauce.
- In a medium bowl, whisk the ricotta cheese with the egg and garlic powder. This prevents the cheese from becoming watery or “weeping” into the pasta.
- Drain the pasta and return it to the pot. Fold in the marinara sauce, browned Italian sausage, the ricotta mixture, and half of the mozzarella. The sausage adds the necessary texture and fat seen in the rich, chunky layers of the image.
- Transfer the mixture to the baking dish. Tuck the torn basil leaves into the pasta rather than leaving them on top to prevent burning, then sprinkle the remaining mozzarella over the surface.
- In a separate bowl, combine the Panko breadcrumbs, parmesan cheese, oregano, and olive oil. Toss until the crumbs are thoroughly and evenly coated in oil-this is the key to the “fried” golden texture of the topping.
- Spread the breadcrumb mixture in a thick, even layer over the cheese.
- Bake for 20-25 minutes. If the top isn’t deeply browned like the image, move the rack to the top position for the final 3 minutes.
- Let the dish rest for 10 minutes. This allows the internal structure to set, ensuring the pasta remains distinct and the sauce stays thick rather than pooling at the bottom.
Notes
- To ensure the best texture, cook the pasta exactly 3 minutes less than the al dente instructions. Let the dish rest for 10 minutes after baking to allow the sauce to thicken and the structure to set.