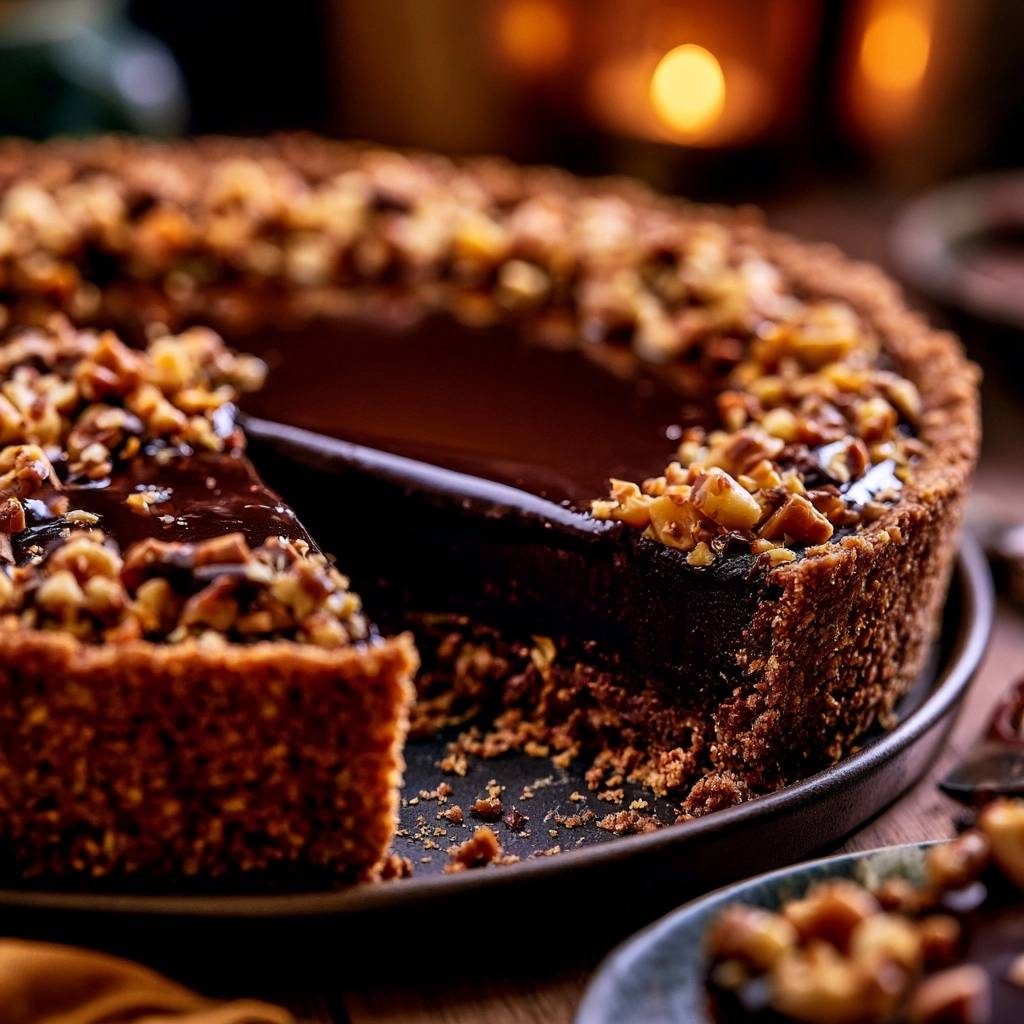
Imagine the sharp, satisfying snap of a buttery graham cracker crust giving way to a center so velvety it practically melts on your tongue. A truly great Dark Chocolate Walnut Tart relies on this high-contrast texture, but most home versions fall short because the crust turns into a soggy, crumbly mess. We’ve all been there, serving a slice that requires a spoon rather than a fork because the filling has seeped into the base.
This recipe introduces the “Anti-Soggy Bottom” philosophy, a professional technique that ensures your tart remains crisp for days. By creating a structural moisture barrier, you protect the integrity of the crumb against the heavy cream in the ganache. It’s the difference between a dessert that looks like it came from a high-end patisserie and one that looks like a kitchen accident.
The secret to this success lies in the immediate post-bake seal. While the crust is still radiating heat from the oven, you’ll apply a thin layer of chocolate that hardens into a waterproof shield. This tiny extra step is what allows the crust to maintain its toasted, nutty crunch even after a long chill in the refrigerator. You’re going to love how professional this feels when you pull that first clean slice away from the pan.
The Science of the Moisture Barrier
Graham cracker crusts are notoriously porous, acting like a sponge when they come into contact with liquid. When you pour warm ganache directly onto a standard crust, the fats and moisture in the cream migrate into the crumbs. This process, known as moisture migration, softens the butter bonds and turns your crisp base into a damp paste. It’s the primary reason tarts lose their structural integrity within hours of assembly.
The “Chocolate Seal” method works at a molecular level to halt this process. By sprinkling chocolate shavings onto the hot crust, you utilize the residual heat to melt the cocoa butter and solids. As you brush this liquid chocolate over the surface, it fills the microscopic gaps between the crumbs. Once cooled, this layer solidifies into a hydrophobic barrier that the ganache simply cannot penetrate.
Temperature differentials are critical during this phase. If the crust is too cool, the chocolate won’t melt enough to spread into a thin, even layer. If you try to pour the ganache while the seal is still warm, the two layers will mix and ruin the barrier. Patience during the cooling stage is your best friend for achieving that perfect, audible snap when you bite into the edge.
Why High-Pressure Packing Prevents Crumbles
Structural integrity for a 9-inch tart starts with how you handle the crumbs. Many people make the mistake of lightly pressing the mixture with their fingers, which leaves large air pockets. These pockets are weak points where the crust will inevitably fracture. You need a dense, compacted wall to hold the weight of the rich chocolate filling.
Using a flat-bottomed tool, like a metal measuring cup or a straight-sided glass, is far superior to using your hands. The flat surface applies even, vertical pressure that forces the butter-coated crumbs to lock together. You want to pack the sides first, pushing the mixture firmly against the fluted edges of the pan, then work your way across the bottom until the surface is smooth and hard.
The melted butter acts as a liquid adhesive while you’re packing, but its real job happens in the oven and the fridge. During the bake, the sugar melts slightly to help bind the crumbs. As the tart cools later, the butter solidifies completely, creating a rigid structure. If you skip the high-pressure packing, your tart will likely fall apart the moment you try to remove the outer ring of the pan.
Essential Components for the Perfect Tart
When a recipe has so few ingredients, the quality of each one becomes magnified. For the ganache, the fat content of your heavy cream is non-negotiable. You must use heavy whipping cream with at least 36% milk fat. Lower fat options, like half-and-half or whole milk, won’t provide the necessary stability, leaving you with a runny sauce rather than a set tart.
The crust relies on the interplay between the graham cracker crumbs and granulated sugar. While some might be tempted to use brown sugar for a deeper flavor, the moisture in brown sugar can actually make the crust too soft. Granulated sugar provides a clean sweetness and helps the crust crisp up during the short bake time. If you need a substitution for graham crackers, digestive biscuits work beautifully, though they are slightly less sweet.
Always use unsalted butter so you can control the seasoning yourself. The pinch of sea salt flakes added at the end is meant to pop against the chocolate, not be hidden inside the crust. If you use salted butter in the base, you risk a dessert that tastes one-dimensionally salty rather than balanced and sophisticated.
Selecting High-Quality Dark Chocolate Cacao Percentages
The cacao percentage determines both the flavor profile and the final texture of your ganache. A 60% cacao chocolate offers a sweeter, mellower experience that appeals to most palates. However, a 70% cacao chocolate provides a sophisticated bitterness and a firmer set because it contains more cocoa butter and fewer solids. I find that a blend of the two often hits the sweet spot for most dinner parties.
Avoid using standard chocolate chips found in the baking aisle. These chips are formulated with stabilizers and waxes designed to help them hold their shape under heat. While great for cookies, these stabilizers prevent the chocolate from emulsifying smoothly with the cream. You’ll end up with a grainy, dull texture. Instead, buy high-quality chocolate bars and chop them finely with a serrated knife for the best melt.
Toasting Walnuts for Maximum Oil Release
Raw walnuts are often tannic and slightly bitter, which can clash unpleasantly with dark chocolate. Toasting the nuts triggers the Maillard reaction, transforming their flavor profile into something deeply savory and aromatic. This process also releases the natural oils within the nut, making them crunchier and more flavorful. You’ll know they’re ready when the kitchen smells like a bakery and the interiors of the nuts are a pale golden brown.
For the best results, toast your walnuts in a 350°F oven for about 8 to 10 minutes. Spread them in a single layer on a sheet pan and shake the pan halfway through to ensure even coloring. If you’re in a rush, you can use a dry skillet over medium heat, but you must stay vigilant. Stovetop toasting happens fast, and walnuts can go from perfectly toasted to burnt in a matter of seconds. Always let them cool before chopping so they don’t turn into a paste.
Step-by-Step: Constructing the Dark Chocolate Walnut Tart
Building this tart is a three-phase process that requires attention to detail. You aren’t just mixing ingredients; you’re managing temperatures and emulsions. If you follow these technical cues, you’ll avoid the common pitfalls that plague most homemade tarts. Let’s walk through the foundation, the seal, and the final glossy pour.
Phase One: Baking the Graham Cracker Base
Start by mixing your crumbs, sugar, and melted butter until the texture looks like wet beach sand. When you squeeze a handful, it should hold its shape perfectly. If it feels too dry, add another tablespoon of melted butter. Press this into your tart pan using the high-pressure method we discussed. You want the edges to be thick enough to support the weight of the ganache.
Slide the pan into your preheated 350°F oven. You’re looking for two specific cues: a deep, toasted fragrance and a slight darkening of the edges. This usually takes about 10 to 12 minutes. Don’t overbake, as the sugar can become bitter if it burns. The crust will still feel slightly soft when it first comes out, but it will firm up significantly as it cools.
Phase Two: Applying the Waterproof Chocolate Seal
This is the most critical step for the “Anti-Soggy Bottom” effect. As soon as the pan hits the counter, sprinkle two tablespoons of your finely chopped chocolate over the bottom. Wait about 60 seconds. You’ll see the chocolate start to glisten and slump as it melts. Use a soft pastry brush to gently paint this chocolate over every inch of the interior, including the fluted sides.
Once the crust is coated, you must let it cool completely to room temperature. If you’re in a hurry, you can pop it in the fridge for 15 minutes once the pan is no longer scorching. The goal is a hard, matte chocolate shell. If the seal is still wet when you pour the ganache, the layers will bleed together and the crust will lose its protection.
Phase Three: Achieving a Glossy Ganache Emulsion
Heat your heavy cream until it just begins to simmer. You’re looking for small bubbles around the edges of the pan, not a violent, rolling boil. If the cream is too hot, it can scorch the chocolate and cause the fats to separate, leading to an oily mess. Pour the hot cream over your remaining chopped chocolate and let it sit, untouched, for five full minutes. This allows the heat to penetrate the chocolate evenly.
After five minutes, add your room-temperature butter. Start whisking in the very center of the bowl using tiny, circular motions. As the center turns dark and glossy, gradually widen your circles until all the cream is incorporated. This “center-out” technique prevents you from whipping air into the mixture. You want a dense, bubble-free liquid that looks like polished silk. Pour it slowly into the center of your cooled crust and let it flow naturally to the edges.
Troubleshooting Common Ganache and Crust Issues
If your ganache looks curdled or oily, the emulsion has “broken.” This usually happens if the cream was too hot or if you whisked too vigorously. You can often fix this by adding a teaspoon of room-temperature heavy cream and whisking gently until it comes back together. If the ganache refuses to set after four hours in the fridge, it likely means the cream-to-chocolate ratio was off or the chocolate had too low a cacao percentage. In this case, another two hours of chilling usually does the trick.
For the crust, if you find it sticking to the pan, you might not have used enough butter or pressed it firmly enough. To ensure a clean release, always use a tart pan with a removable bottom. When you’re ready to serve, place the tart on a sturdy jar or can and gently slide the outer ring down. To get those professional, sharp edges, dip a long, thin knife in hot water, wipe it completely dry, and make one decisive cut. Repeat the cleaning and heating process for every single slice.
Make-Ahead Strategies and Storage Requirements
This tart is the ultimate make-ahead dessert because it actually improves with a long rest. An overnight chill allows the flavors of the dark chocolate to deepen and ensures the ganache is fully stabilized. If you’re hosting a party, I highly recommend making this the evening before. Just be sure to wait until the ganache is mostly set before covering it loosely with plastic wrap to avoid condensation drips on the surface.
Store any leftovers in an airtight container in the refrigerator for up to five days. The chocolate seal will keep the crust crisp for the first three days, though it may eventually soften slightly after that. I do not recommend freezing this tart. The freezing and thawing process can cause the ganache to lose its creamy emulsion, resulting in a grainy texture and a “sweaty” appearance on the surface. The walnuts may also lose their toasted crunch in the freezer.
Expert Tips for Professional Presentation
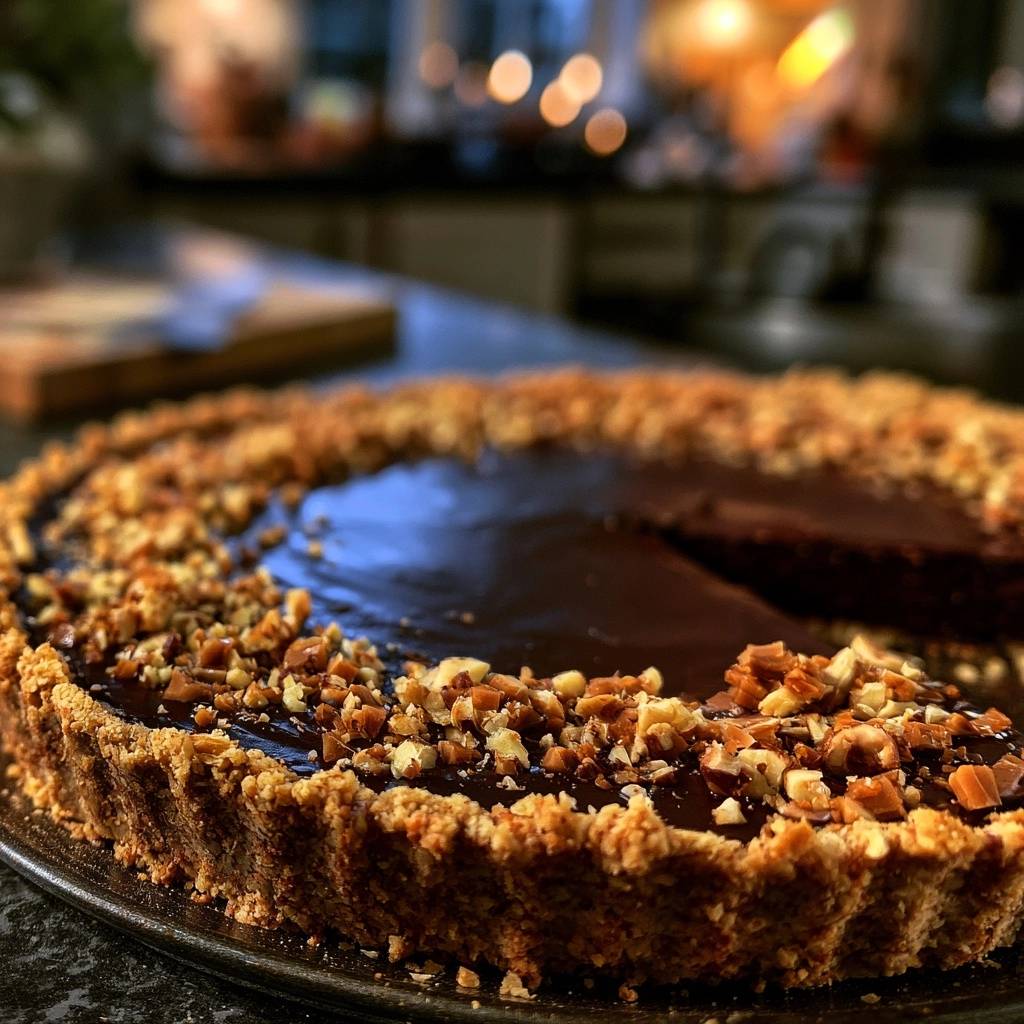
To achieve the look of a high-end bakery, focus on the walnut placement. Instead of scattering them randomly, create a dense, overlapping border around the edge of the tart while the chocolate is still wet. This creates a beautiful frame for the dark, glossy center. The contrast between the rugged texture of the nuts and the smooth chocolate is visually stunning and tells your guests exactly what flavors to expect.
Don’t underestimate the power of sea salt flakes. A light sprinkle over the center of the tart provides a necessary hit of acidity and crunch that cuts through the richness of the fats. It makes the chocolate taste “more like chocolate.” Finally, always serve this tart slightly chilled but not ice-cold. Taking it out of the fridge about 15 minutes before serving allows the ganache to soften just enough to achieve that signature velvet mouthfeel.
Frequently Asked Questions
Can I use milk chocolate instead of dark chocolate for the filling?
You can, but you will need to adjust the recipe. Milk chocolate has a much higher sugar and milk solid content and a lower cocoa butter content, which means it stays softer at room temperature. If you switch to milk chocolate, you should reduce the heavy cream by about 1/4 cup to ensure the tart sets firmly enough to slice. Keep in mind the final result will be significantly sweeter.
Why is my graham cracker crust too hard to cut through?
This usually happens if the crust was overbaked or if too much sugar was used. When sugar melts and then cools, it turns into a hard candy-like substance. If you find the crust is like rock, try letting the tart sit at room temperature for 20 minutes before slicing. The slight softening of the butter and chocolate seal should make it easier for your knife to pass through.
Can I substitute the walnuts for other types of nuts?
Absolutely. Pecans are a fantastic alternative and pair naturally with dark chocolate. Hazelnuts are also a sophisticated choice, though you should peel the skins off after toasting to avoid a bitter aftertaste. Regardless of the nut you choose, the toasting step remains mandatory to ensure they don’t get soggy once they are placed on the wet ganache.
How do I fix a grainy or dull-looking ganache?
A grainy ganache is usually the result of using low-quality chocolate chips or overheating the cream. If it looks dull, it might be because it wasn’t whisked enough to create a proper emulsion. To prevent this, always use bar chocolate and ensure your butter is at room temperature before adding it. The butter is what provides that final professional sheen.
How long does the tart stay fresh in the refrigerator?
The tart will stay fresh and delicious for up to five days when stored in an airtight container. However, for the absolute best texture, try to consume it within the first 48 hours. After two days, the walnuts may begin to lose their toasted snap as they absorb a small amount of moisture from the surrounding chocolate and the air in the fridge.
Dark Chocolate Walnut Tart
Course: DessertCuisine: AmericanDifficulty: easy10
servings20
minutes15
minutes35
Minutes440
kcalAmerican
Ingredients
2 1/2 cups graham cracker crumbs (finely ground)
3/4 cup unsalted butter, melted
1/3 cup granulated sugar
12 ounces high-quality dark chocolate (60-70% cacao), finely chopped
1 cup heavy cream
2 tablespoons unsalted butter, room temperature (for the ganache)
1 cup walnuts, toasted and roughly chopped
1/2 teaspoon sea salt flakes
Directions
- To prevent a soggy bottom, preheat your oven to 350°F (175°C). In a large bowl, combine the graham cracker crumbs, sugar, and melted butter. Stir until the mixture is well-coated and resembles wet sand.
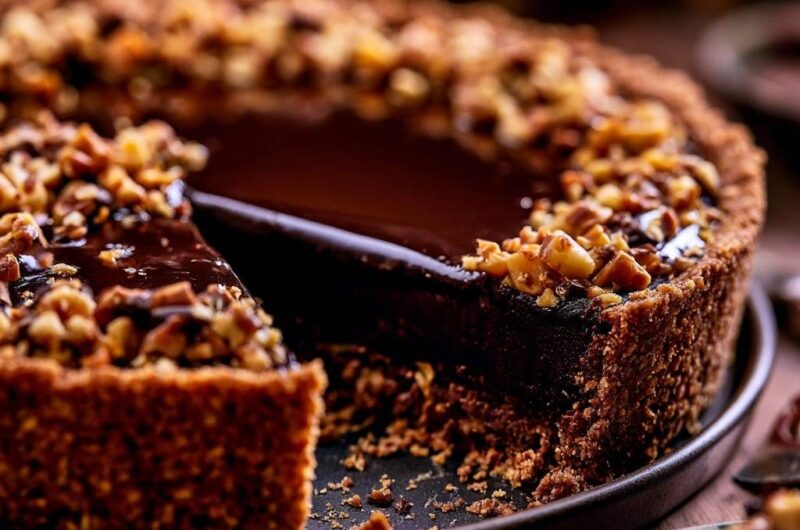
- Press the mixture firmly into the bottom and high up the sides of a 9-inch tart pan with a removable bottom. Use the flat bottom of a measuring cup to pack the crumbs tightly against the sides and base. This high-pressure packing is essential for the structural integrity shown in the image.
- Bake the crust for 10-12 minutes until fragrant and slightly darkened.
- The Moisture Barrier: As soon as the crust comes out of the oven, sprinkle 2 tablespoons of the finely chopped chocolate over the hot base. Let it sit for 1 minute to melt, then use a pastry brush to spread it into a thin, even layer over the entire interior of the crust. This creates a waterproof seal. Let the crust cool completely.
- Place the remaining chopped dark chocolate in a heat-proof glass or metal bowl.
- Heat the heavy cream in a small saucepan over medium heat until it reaches a gentle simmer (do not let it reach a rolling boil). Pour the hot cream immediately over the chocolate.
- Let the mixture sit undisturbed for 5 minutes. Add the 2 tablespoons of room-temperature butter. Starting from the center, gently whisk in small circles, gradually widening to the edges until the ganache is glossy and perfectly smooth.
- Pour the ganache into the sealed, cooled crust.
- While the chocolate is still wet, generously arrange the toasted walnuts in a thick border around the perimeter of the tart, as seen in the image. Sprinkle the sea salt flakes over the walnuts and the center of the ganache.
- Refrigerate for at least 4 hours, or ideally overnight, until the filling is firm. To serve, remove the tart from the outer ring and slice with a sharp knife dipped in hot water and wiped dry between each cut for clean, professional edges.
Notes
- To achieve clean edges when slicing, dip your knife in hot water and wipe it dry between each cut. Ensure the chocolate seal is completely cooled before adding the ganache.