Stop settling for tough, rubbery pork that needs a gallon of water to swallow. Most home cooks treat pork tenderloin like a chore, resulting in a dry, gray piece of meat that lacks any real character. The secret to a melt-in-your-mouth tenderloin isn’t just the glaze; it is the high-heat sear followed by a mandatory resting period.
This recipe uses a technique-driven approach to ensure you get restaurant-quality results every single time. We are balancing the deep sweetness of honey with the sharp acidity of balsamic vinegar and the earthy punch of fresh herbs. By mastering the transition from stovetop to oven, you lock in every drop of juice before the meat even begins to roast.
I’ve found that the biggest mistake people make is skipping the paper towel step. You must pat the meat bone-dry before it hits the pan. If there is moisture on the surface, the pork will steam instead of sear, and you’ll miss out on that gorgeous, dark crust that defines this dish.
The Anatomy of a Perfect Pork Tenderloin
Pork tenderloin is the “filet mignon” of the pig. It is a long, thin muscle that runs along the spine, and because it doesn’t do much heavy lifting, it stays incredibly lean and tender. You shouldn’t confuse this with a pork loin, which is much larger, wider, and requires a completely different cooking time.
Because this cut is so lean, it has very little fat to protect it from high heat. This makes it a superior choice for a quick, 30-minute gourmet meal, but it also means it is susceptible to drying out in a heartbeat. You’re getting a high-protein, low-fat main dish that feels indulgent without being heavy.
Selecting High-Quality Meat at the Butcher
When you’re at the grocery store, look for meat that has a vibrant pinkish-red color. Avoid any pork that looks pale or sits in a lot of liquid in the package. You want to see a tiny bit of white marbling throughout the muscle, as that fat will melt and baste the meat from the inside.
Steer clear of “enhanced” pork. If the label says it has been injected with a sodium solution or “flavoring,” put it back. These additives mess with the texture and make the meat taste salty rather than savory. Starting with a clean, natural protein is the only way to achieve that buttery final texture.
Essential Components for the Garlic Herb Glaze
The glaze is where the magic happens, but every ingredient has a specific job to do. Honey is our primary sweetener, providing the natural sugars needed for that sticky caramelization. However, honey alone would be cloying, so we cut it with balsamic vinegar to add a sophisticated tang and a deep, dark color.
Soy sauce might seem like a surprise here, but it is my secret weapon for umami. It provides a depth of flavor that standard table salt just can’t touch. When these three liquids hit the hot pan, they reduce into a thick lacquer that clings to the meat rather than sliding off into the bottom of the skillet.
Fresh garlic and smoked paprika round out the profile. The garlic becomes mellow and sweet as it roasts, while the smoked paprika adds a hint of “off the grill” flavor without needing a barbecue. It’s a balanced, three-dimensional sauce that hits every part of your palate.
Fresh vs. Dried Herbs: Finding the Balance
I use a hybrid approach for the herbs because they behave differently under heat. Dried oregano is sturdy; it can handle the intense 400-degree oven temperature without turning bitter or burning. It provides a consistent, earthy base layer of flavor that permeates the meat as it roasts.
Fresh thyme, on the other hand, is all about the aromatics. The chopped leaves in the glaze release their oils during the final minutes of cooking, providing those bright “top notes” you smell the moment the pan comes out of the oven. Using both ensures the flavor is baked in and freshly finished.
The Science of the High-Heat Sear
The Maillard Reaction is your best friend in the kitchen. This is the chemical reaction between amino acids and reducing sugars that gives browned food its distinctive flavor. To get this, your pan must be shimmering and slightly smoking before the pork touches the surface.
If the pan isn’t hot enough, the meat will stick and tear. When the heat is correct, the pork will naturally release from the skillet once a proper crust has formed. Remember, moisture is the enemy of the sear. If the meat is damp, the energy of the pan goes into evaporating water instead of browning the protein.
Why Cast Iron is the Superior Vessel
Cast iron is the king of heat retention. Unlike stainless steel or non-stick pans, cast iron doesn’t lose its temperature when you drop a cold piece of meat onto it. It holds onto that thermal energy, ensuring a consistent sear across the entire surface of the tenderloin.
Furthermore, it transitions perfectly from the stovetop to the oven. You don’t want to lose the flavorful browned bits (the fond) stuck to the bottom of the pan by switching dishes. A cast iron skillet keeps everything in one place, allowing the glaze to mingle with the meat juices as it roasts.
Step-by-Step: Achieving the Perfect Lacquered Crust
Once your pork is seasoned and your oil is shimmering, lay the tenderloins in the pan. You should hear a loud, aggressive sizzle immediately. Let them sit undisturbed for about 2 to 3 minutes. You’re looking for a deep golden-brown color that looks almost like a crusty bread.
After searing all sides, pour half of your honey-balsamic mixture over the meat. Use a brush to coat every inch. As it goes into the oven, the sugars will begin to bubble and thicken. About halfway through the roasting time, open the oven and spoon those hot juices back over the top.
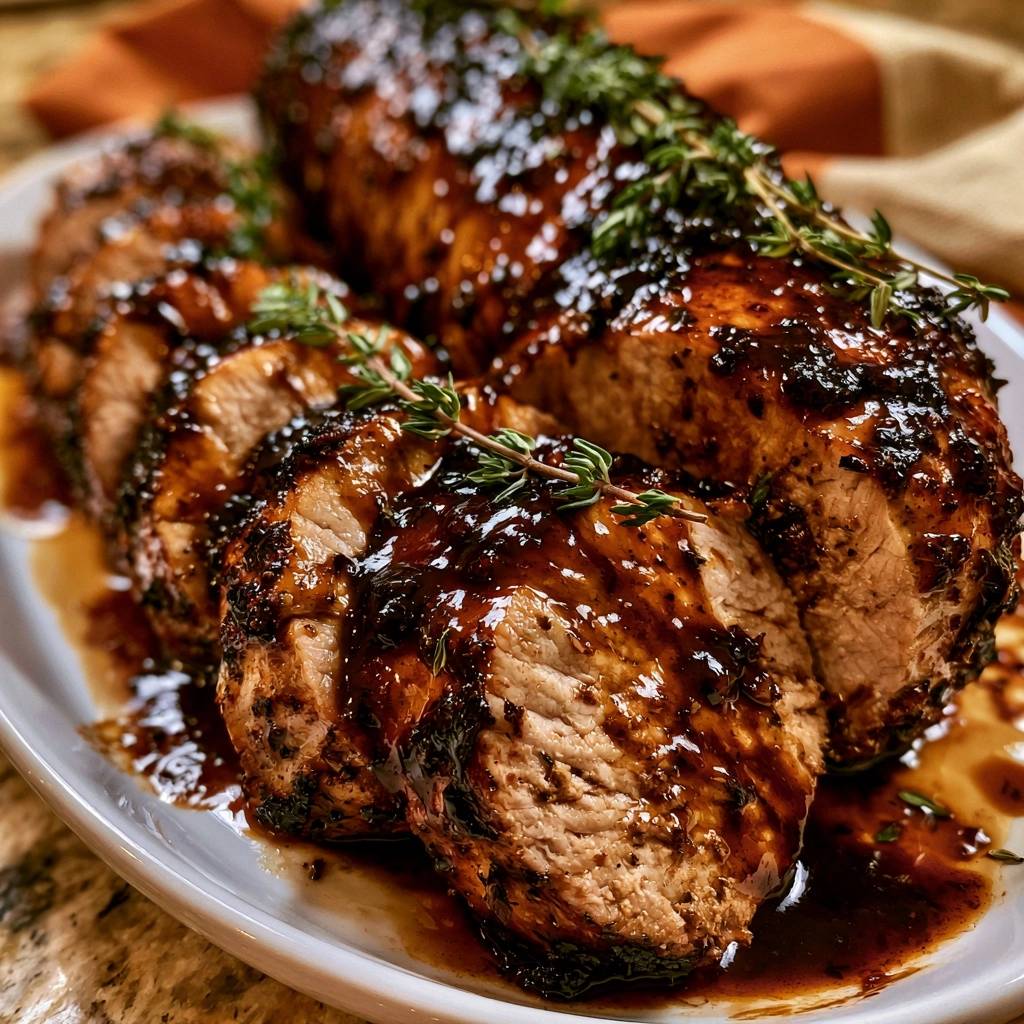
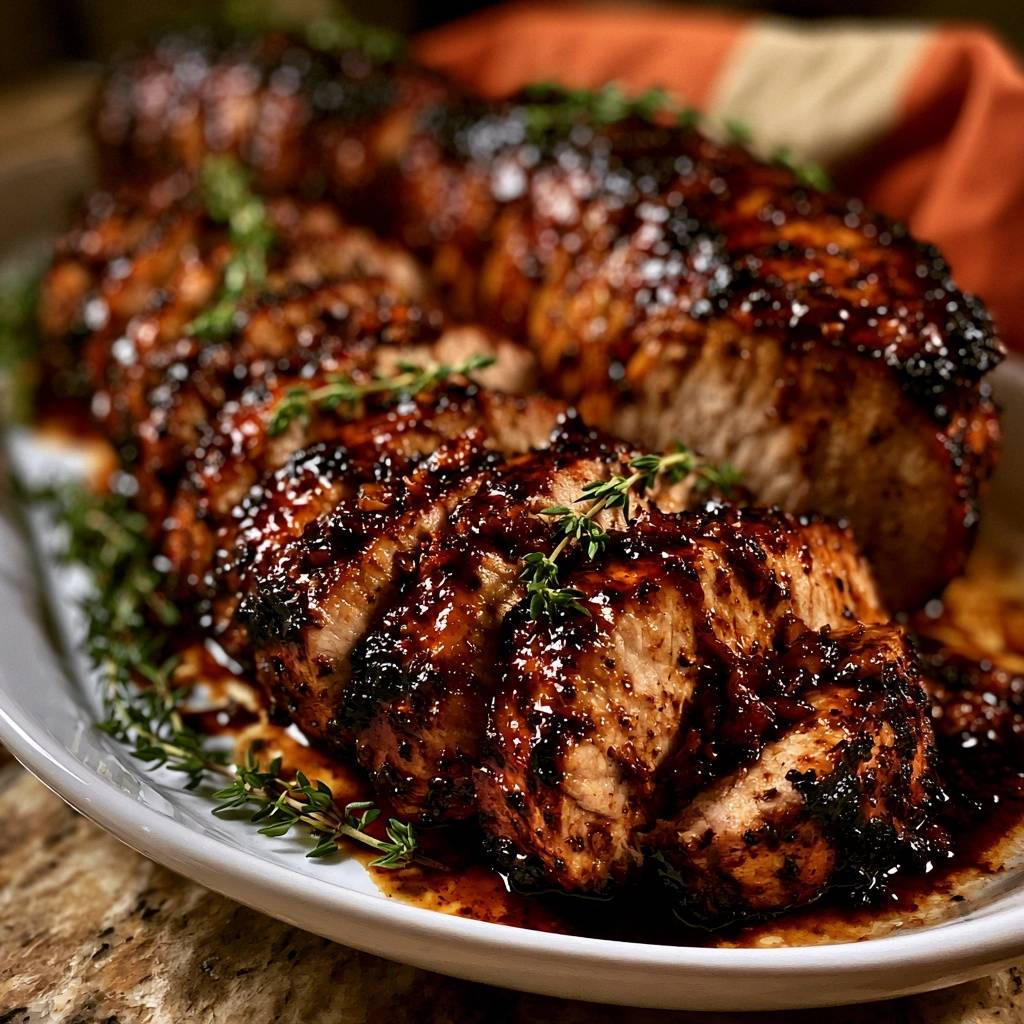
This basting technique is vital. It builds layers of flavor, creating a thick, dark lacquer that looks like it came from a high-end steakhouse. You’ll see the glaze transform from a thin liquid into a syrupy, glossy coating that smells absolutely incredible.
Monitoring Internal Temperature for Safety and Texture
Forget the old rules about cooking pork until it’s white all the way through. The USDA updated their guidelines years ago, and 145°F is the magic number. At this temperature, the meat will have a very slight blush of pink in the center and will be at its peak juiciness.
Use a digital meat thermometer to check the thickest part of the tenderloin. If you wait until 160°F, you’ve gone too far, and the meat will turn gray and tough. Pull it at 145°F, and I promise you’ll never go back to the overcooked version again.
The Critical Importance of the Resting Period
I cannot stress this enough: do not touch that meat for at least 10 minutes after it leaves the oven. When meat cooks, the muscle fibers contract and push all the moisture toward the center. If you slice it immediately, all that delicious juice will run out onto your cutting board.
During the rest, those fibers relax and reabsorb the juices. This is also when the carry-over cooking finishes the job. While the meat rests, you can simmer the remaining glaze in the skillet to create a thick reduction. This ensures every bite is drenched in flavor rather than being left dry.
Troubleshooting Common Pork Preparation Errors
If you find your glaze is burning before the meat is done, your oven might be running hot. You can add a tablespoon of water to the pan to loosen the sugars, or tent the pork loosely with foil. The goal is a dark lacquer, not a blackened char.
If the meat sticks to the pan during the sear, you’re likely trying to flip it too early. Patience is key here. The meat will “tell” you when it’s ready by releasing itself from the cast iron. If it’s still clinging, give it another 30 seconds and try again.
Lastly, if your sauce feels too thin at the end, don’t panic. Just keep it on the stovetop over medium heat for an extra minute or two. Balsamic and honey reduce quickly, so stay close. You want it to be thick enough to coat the back of a spoon.
Flavor Variations and Ingredient Substitutions
If you don’t have honey on hand, maple syrup is a fantastic substitute that adds a woody, autumnal sweetness. You can also swap the balsamic vinegar for apple cider vinegar if you want a brighter, fruitier profile that cuts through the richness of the pork.
For those without a cast iron skillet, you can sear the meat in a regular frying pan and then transfer it to a preheated baking dish. You’ll lose a little bit of that concentrated flavor from the pan drippings, but the final result will still be much better than a standard roast.
Side Dish Pairings for Garlic Herb Glazed Pork
To soak up that incredible balsamic reduction, I always recommend a starchy side. Garlic mashed potatoes or a creamy polenta work beautifully. The smoothness of the potatoes provides a perfect canvas for the bold, punchy flavors of the garlic and thyme.
For something green, try roasted asparagus or charred broccolini. The slight bitterness of these vegetables balances the sweetness of the honey glaze. If you want something lighter, a simple arugula salad with a lemon vinaigrette provides a sharp, acidic contrast that cleanses the palate between bites.
Storage, Reheating, and Meal Prep Strategies
Leftover pork tenderloin can be tricky because it dries out so easily when reheated. Store your leftovers in an airtight container with any remaining sauce. It will stay fresh in the fridge for up to three days, making it a great option for fancy weekday lunches.
When you’re ready to eat it again, avoid the microwave if possible. Instead, place the slices in a baking dish with a splash of broth or water, cover tightly with foil, and warm it in a 300-degree oven. This “low and slow” method gently steams the meat back to life without turning it into rubber.
Expert Tips for Professional Presentation
To get that professional look, slice the tenderloin into thick medallions, about one inch wide. Use a very sharp carving knife to ensure clean cuts without tearing the crust. I like to “fan” the slices out on a platter, overlapping them slightly to show off the juicy interior.
Drizzle the thickened balsamic reduction generously over the center of the slices, letting it drip down the sides. Finish the dish with a few fresh thyme sprigs and a crack of fresh black pepper. It looks elegant, tastes expensive, and takes very little effort to plate.
Frequently Asked Questions
Can I use pork loin instead of tenderloin?
You can, but you’ll need to adjust your cooking time significantly. A pork loin is much thicker and will take 45 to 60 minutes to reach the proper internal temperature. You should also lower the oven temperature to 350°F so the outside doesn’t burn before the inside is cooked through.
How do I prevent the garlic from burning in the pan?
The trick is to add the garlic as part of the glaze mixture rather than tossing it into the hot oil alone. By mixing the minced garlic with the honey and vinegar, the liquids protect the garlic from the direct heat of the pan, allowing it to soften and infuse the sauce without scorching.
Is it safe to eat pork that is slightly pink in the middle?
Yes, it is perfectly safe. The USDA standard for pork is 145°F followed by a three-minute rest. At this temperature, the meat is safe to consume and will often retain a light pink hue. This is the ideal state for tenderloin; if it’s white or gray, it’s likely overcooked and dry.
Can I make the glaze ahead of time?
Absolutely. You can whisk the honey, balsamic, soy sauce, garlic, and herbs together up to three days in advance. Store it in a jar in the fridge. Just give it a good shake or stir before you pour it over the meat, as the honey may settle at the bottom.
What if I don’t have an oven-safe skillet?
If your pans have plastic handles, do not put them in the oven. Sear the meat in your regular skillet, then carefully move the tenderloins to a rimmed baking sheet or a glass 9×13 baking dish that has been preheating in the oven. Pour the glaze over them once they are in the baking dish and proceed with the recipe.
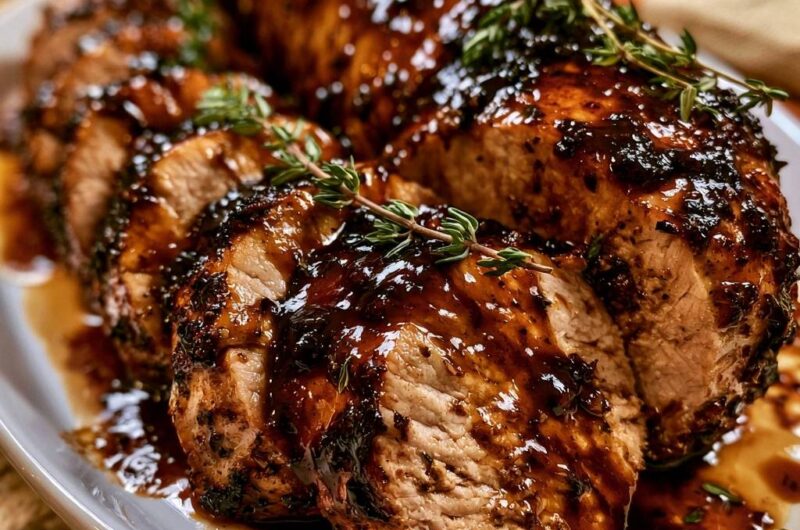
Garlic Herb Glazed Pork Tenderloin
Course: Main CourseCuisine: AmericanDifficulty: easy4
servings10
minutes20
minutes30
Minutes325
kcalAmerican
Ingredients
2 pork tenderloins (about 1 pound each)
2 tablespoons olive oil
1 teaspoon kosher salt
1/2 teaspoon cracked black pepper
1/4 cup honey
2 tablespoons balsamic vinegar (for the deep dark color shown)
1 tablespoon soy sauce
4 cloves garlic, minced
1 tablespoon fresh thyme leaves, chopped
1 teaspoon dried oregano
1/2 teaspoon smoked paprika
Fresh thyme sprigs for garnish
Directions
- Preheat your oven to 400 degrees F. Pat the pork tenderloins completely dry with paper towels. This is crucial for a proper sear. Season all sides generously with salt, pepper, and smoked paprika.
- Heat the olive oil in a large, oven-ready cast-iron skillet over medium-high heat. Once the oil is shimmering and slightly smoking, add the pork. Sear for 2 to 3 minutes per side until a deep golden-brown crust forms on all sides.
- While the meat sears, whisk together the honey, balsamic vinegar, soy sauce, minced garlic, chopped thyme, and oregano in a small bowl.
- Pour half of the glaze over the pork in the skillet, using a brush or spoon to coat the top of the meat thoroughly.
- Transfer the skillet to the oven. Roast for 10 to 12 minutes. Halfway through the roasting time, spoon the hot glaze from the bottom of the pan back over the meat to build that thick, dark lacquer seen in the image.
- Remove the skillet from the oven when a meat thermometer reaches 145 degrees F. Transfer the pork to a cutting board.
- Place the skillet back on the stovetop over medium heat for 1-2 minutes, adding the remaining glaze. Simmer until the sauce thickens into a syrupy consistency.
- The most important step: Let the meat rest for at least 10 minutes before slicing. This allows the fibers to relax and reabsorb the juices.
- Slice into thick medallions. Drizzle the thickened balsamic-honey reduction generously over the slices, garnish with fresh thyme sprigs, and serve immediately.
Notes
- The mandatory 10 minute resting period is the most important step to prevent the meat from becoming dry. Use a meat thermometer to ensure the pork reaches exactly 145 degrees F for optimal tenderness.