Most people think the worst part of a bad cornbread is the dryness, but I’d argue the “soggy bottom” is the real culprit. You know the type—a slice that looks beautiful on top but feels greasy and limp the moment you lift it from the pan. It happens because the batter sits in cold oil, soaking up fat like a sponge instead of searing against the heat.
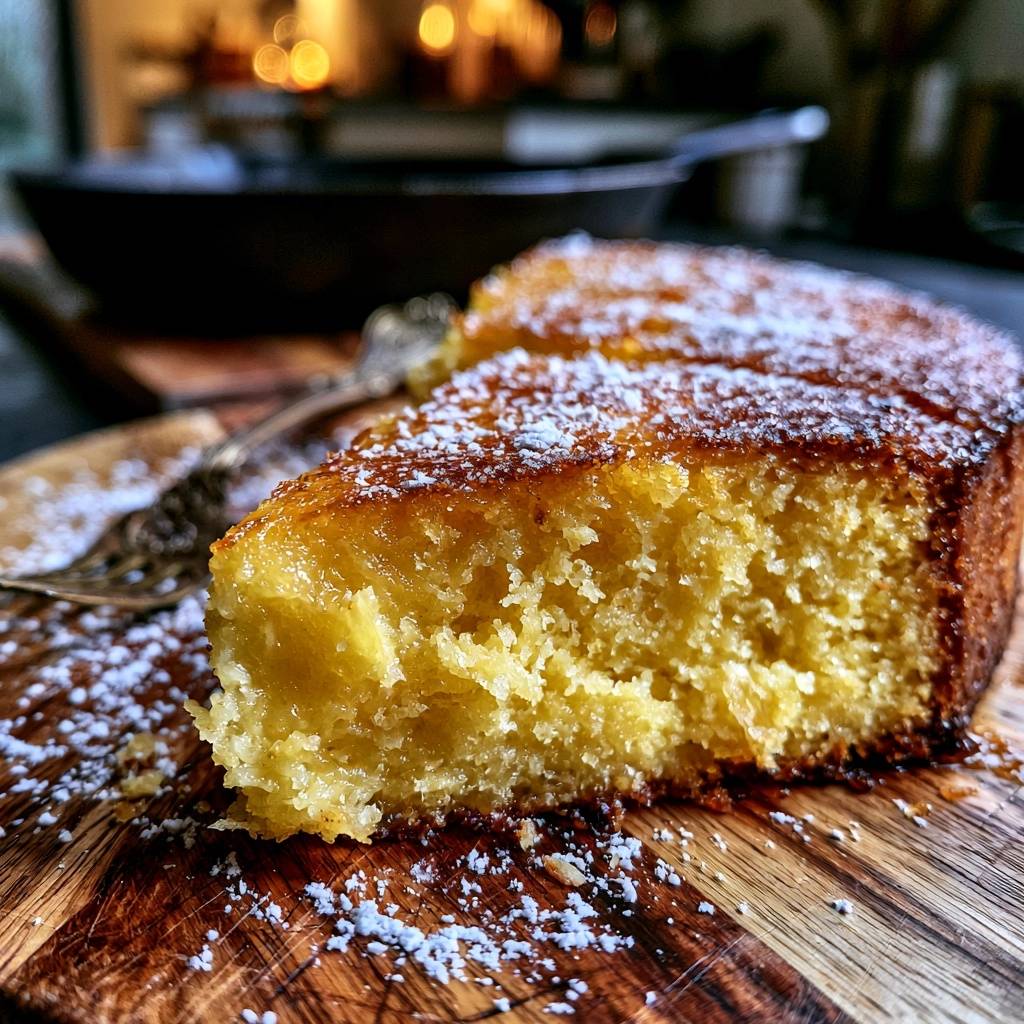
The secret to a truly legendary Golden Skillet Cornbread lies in the physics of the sizzle. When that thick, honey-sweetened batter hits a screaming-hot cast iron surface, it creates an immediate structural barrier. This isn’t just about flavor; it’s about creating a crust so crisp it practically shatters when you bite into it, protecting the tender, cake-like crumb inside.
I’ve found that the absolute key to success is preheating your skillet for at least ten minutes inside the oven before the oil ever touches it. You want that pan so hot that the oil shimmers and dances the second it hits the iron. This high-heat contact is what gives you that deep, mahogany-colored base that makes every other recipe feel like a pale imitation.
The Anatomy of a Non-Greasy Golden Skillet Cornbread
To achieve that perfect Golden Skillet Cornbread, you have to treat your cast iron skillet like a specialized piece of baking equipment. It isn’t just a vessel; it’s a heat conductor that mimics the intense, dry heat of a professional stone oven. By preheating the pan to 400°F, you’re ensuring that the cooking process begins the millisecond the batter is poured.
This “Anti-Soggy” method relies on a simple chemical reaction. When the cold batter meets the hot oil, the moisture on the outer layer of the batter evaporates instantly. This creates a steam barrier that prevents the oil from penetrating the bread. Instead of a greasy mess, you get a fried, savory crust that holds its shape even under a heavy pour of honey.
Why Cast Iron is Non-Negotiable
You might be tempted to reach for a glass baking dish or a stainless steel pan, but I’m telling you right now, it won’t be the same. Cast iron has an incredible thermal mass, meaning it holds onto heat much better than thinner materials. Once it gets hot, it stays hot, providing a consistent, radiating warmth that pushes deep into the center of the cornbread.
Furthermore, a well-seasoned cast iron skillet is naturally non-stick but slightly porous. Those tiny pores allow the oil to settle into the pan, creating a micro-thin layer of “fried” texture on the edges of your bread. This gives you those coveted crunchy corners that everyone fights over at the dinner table.
Essential Components for a Tender Crumb
The texture of your cornbread depends heavily on the ratio of cornmeal to flour. I use a strict 1:1 ratio because it provides the perfect balance. You get enough cornmeal to provide that signature grit and earthy flavor, but enough all-purpose flour to keep the crumb soft and cohesive so it doesn’t fall apart in your hands.
When choosing your cornmeal, look for a fine or medium grind. Coarse “stone-ground” cornmeal can be delicious, but for this specific golden profile, it can feel a bit like eating sand. A medium grind ensures you still get that rustic feel without sacrificing the “melt-in-your-mouth” quality of the interior.
The Science of Full-Fat Buttermilk and Leavening
Buttermilk is the unsung hero of this recipe. The lactic acid in the buttermilk reacts with the baking soda to create tiny bubbles of carbon dioxide. This reaction is what gives the cornbread its lift, preventing it from becoming a dense, heavy brick. It also adds a subtle tang that cuts through the richness of the butter.
Always make sure your buttermilk and eggs are at room temperature before you start mixing. If you pour melted butter into cold buttermilk, the butter will seize up into little waxy clumps. Room temperature ingredients emulsify much better, leading to a smoother batter and a more even bake.
Honey vs. Granulated Sugar: Achieving Balanced Sweetness
I use both granulated sugar and honey because they serve two different purposes. The granulated sugar is essential for the Maillard reaction, which is the fancy term for the browning of the crust. It helps create those caramelized edges that taste almost like toasted marshmallows.
Honey, on the other hand, is a humectant, which means it attracts and holds onto moisture. By adding honey to the batter, you’re ensuring the cornbread stays moist for days. It also provides a floral depth of flavor that sugar alone just can’t match, especially when paired with the salty butter.
Phase One: Preparing the Dry and Wet Bases
Start by whisking your dry ingredients together in a large bowl. You want to be thorough here to ensure the baking powder and soda are evenly distributed. If you see any large clumps in your flour or leavening agents, don’t be afraid to run them through a sifter; a clump of baking soda is a bitter surprise nobody wants.
In a separate bowl, beat your eggs into the buttermilk before adding the melted butter and honey. This ensures the eggs are fully incorporated without overworking the flour later. I like to create a “well” in the center of my dry ingredients, pouring the liquid right into the middle to make the folding process easier.
The Danger of Overmixing the Batter
If there is one rule you must follow, it’s this: do not overmix. The moment the wet ingredients hit the dry, gluten starts to develop. If you stir too much, your cornbread will turn out tough and bread-like instead of tender and crumbly. Use a large spatula and stop the second you see no more streaks of dry flour.
Lumps are actually your friend in this scenario. A few small, pea-sized lumps in the batter are perfectly fine and will disappear during the baking process. The final batter should look thick, slightly aerated, and heavy—not smooth like a pancake mix.
Phase Two: The High-Heat Skillet Technique
This is where the magic happens. While you’re mixing your batter, your skillet should be getting incredibly hot in that 400°F oven. When you’re ready, use a heavy-duty oven mitt to pull it out. Be careful, because that iron will stay hot for a long time and can easily burn through thin kitchen towels.
Add your oil or bacon drippings to the pan and swirl it around. You want the oil to coat the bottom and go at least halfway up the sides. If the oil doesn’t shimmer immediately, your pan isn’t hot enough. Put it back in for a few more minutes if you have to; the heat is the most important factor here.
Creating the Structural Barrier with Sizzling Oil
As soon as the oil is swirled, pour the batter into the center of the pan. You should hear a loud, distinct sear—a sizzle that sounds like a steak hitting a grill. This is the sound of the crust forming instantly. That heat creates a “floor” for the bread, ensuring the bottom stays crisp and golden-brown.
Don’t worry if the oil bubbles up around the edges of the batter. That’s exactly what you want. Those bubbling edges will fry the sides of the cornbread, giving you a crunchy perimeter that contrasts beautifully with the soft, honey-glazed top.
Phase Three: Precision Baking and The Honey Glaze
Slide the skillet back into the oven and bake for about 20 to 25 minutes. You’re looking for the top to turn a beautiful golden hue and the edges to start pulling away slightly from the sides of the pan. Use a toothpick to check the center; it should come out clean or with just a few moist crumbs.
Avoid opening the oven door too often during the first 15 minutes. Every time you open the door, the temperature drops, which can cause the cornbread to fall or bake unevenly. Trust the timer and only check when you start to smell that sweet, corn-forward aroma filling your kitchen.
The Hot-Brush Method for a Glossy Finish
As soon as the cornbread comes out of the oven, it’s time for the glaze. While the bread is still radiating heat, brush the remaining honey over the entire surface. The heat will thin the honey, allowing it to soak into the top millimeter of the crust while leaving a sticky, glossy finish on top.
This step adds a final layer of sweetness that balances the saltiness of the crust. It also creates a beautiful visual contrast. The top will look like a shimmering amber jewel, making it the centerpiece of any table. Let it sit for at least ten minutes before you even think about cutting into it.
Troubleshooting the Perfect Rise and Texture
If your cornbread turned out crumbly to the point of falling apart, you likely overbaked it or used too much cornmeal. Cornmeal doesn’t have the binding power of flour, so the ratio is delicate. Next time, try pulling it out a minute earlier or ensuring your measurements are level and not heaped.
A flat cornbread usually points to expired baking powder. Leavening agents lose their potency over time, especially in humid kitchens. To test yours, drop a teaspoon into some hot water; if it doesn’t fizz vigorously, it’s time to buy a new tin. Also, ensure you aren’t overmixing, which can deflate the air bubbles created by the buttermilk reaction.
If the bottom of your bread is still soft or pale, your skillet simply wasn’t hot enough. The pan needs to be “screaming hot.” If you’re worried about the oil smoking, use a high-smoke point oil like vegetable or grapeseed oil. The goal is that immediate sear; without it, the oil just becomes an ingredient in the bread rather than a cooking medium for the crust.
Flavor Variations and Savory Swaps
Once you’ve mastered the base recipe, you can start playing with the flavors. If you want a bit of heat, fold in some finely diced jalapeños. Just make sure to remove the seeds if you don’t want it too spicy. You can also add a cup of sharp cheddar cheese for a savory, gooey twist that pairs perfectly with the honey.
For a more rustic texture, try adding half a cup of charred corn kernels. I like to sear them in a pan until they have little black spots before folding them into the batter. If you add extras, just make sure they aren’t too wet. Pat your corn or peppers dry with a paper towel so you don’t mess with the moisture balance of the batter.
Optimal Pairings for Golden Skillet Cornbread
This cornbread is substantial enough to be a meal on its own, but it really shines when paired with something hearty. A big bowl of vegetarian chili or a slow-cooked bean stew provides the perfect savory backdrop for the sweet, honey-glazed bread. The crust is sturdy enough to hold up to dipping without disintegrating.
If you’re serving this for breakfast or brunch, try it alongside some roasted root vegetables or even just a simple plate of eggs. In the South, it’s common to crumble a piece of cornbread into a glass of cold buttermilk and eat it with a spoon. It might sound strange, but the contrast of the sweet bread and tart milk is surprisingly refreshing.
Storage, Reheating, and Make-Ahead Instructions
Cornbread is always best the day it’s made, but you can store leftovers in an airtight container at room temperature for up to three days. Avoid wrapping it in plastic wrap while it’s still warm, as the trapped steam will turn that beautiful crispy crust into a soggy mess. Use foil or a loose-fitting lid instead.
To reheat, stay away from the microwave! A microwave will make the bread rubbery and soft. Instead, pop a slice into the oven or an air fryer at 350°F for about five minutes. This will revive the “crunch” of the crust and warm the center through. You can even toast a slice in a buttered skillet for the ultimate leftover experience.
Expert Tips for Cornbread Mastery
Can I use a cake pan instead of a cast iron skillet?
You can, but you will lose the signature caramelized crust. A cake pan doesn’t hold heat as well as cast iron, so you won’t get that immediate sear when the batter hits the pan. If you must use a cake pan, still preheat it, but be aware the texture will be much softer and more like a standard muffin.
How do I make this dairy-free?
You can substitute the buttermilk by mixing one cup of soy or almond milk with a tablespoon of lemon juice or white vinegar. Let it sit for ten minutes until it curdles slightly. For the butter, use a high-quality vegan butter stick. Avoid using oil as a direct 1:1 replacement for the butter in the batter, as you’ll lose that creamy flavor.
Why is my cornbread dry even though I followed the recipe?
Dryness is often caused by altitude or oven calibration. If you live at a high altitude, you may need to add an extra tablespoon of buttermilk. Also, many home ovens run hot. Use an oven thermometer to make sure your “400°F” is actually 400°F. Even five minutes of overbaking can turn a moist cornbread into a dry one.
Can I reduce the sugar in this recipe?
You can reduce the sugar to 1/4 cup if you prefer a more savory bread, but keep in mind that sugar helps with the browning and the moisture. If you cut the sugar, your cornbread might be a bit paler and will dry out faster. I wouldn’t recommend skipping the honey glaze, as it provides the essential flavor contrast that makes this recipe special.
The Final Presentation: Dusting and Slicing
Presentation is the final step in the Golden Skillet Cornbread experience. After the bread has cooled for ten minutes, the internal steam has settled, and the structure is set. This waiting period is crucial; if you cut it too early, the steam escapes, and the remaining bread will dry out instantly.
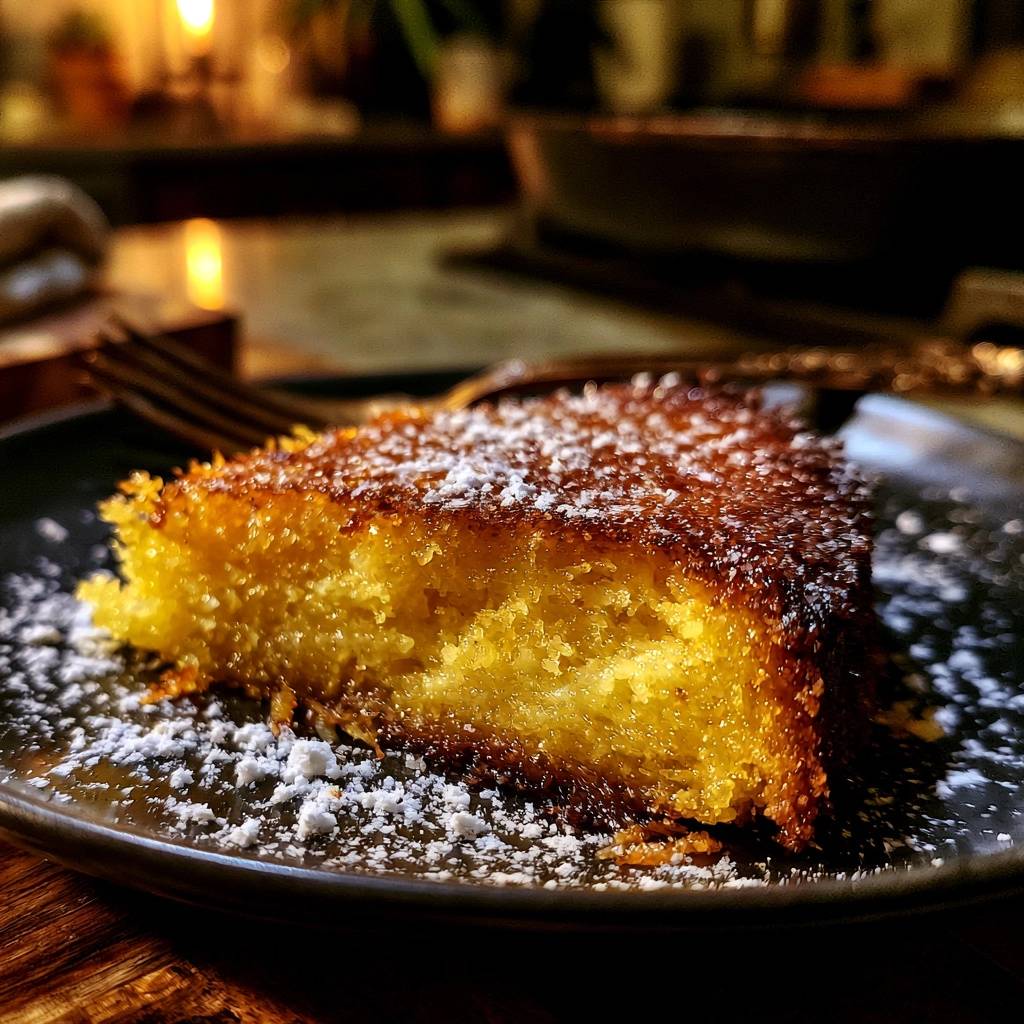
Slice the cornbread into traditional wedges directly in the skillet. Just before serving, give it a generous dusting of powdered sugar. The white sugar against the dark, honey-glazed crust looks stunning and adds a tiny hit of sweetness that hits your tongue first. It’s the signature finish that turns a simple side dish into a showstopper.
How should I store leftovers?
Store any remaining cornbread in an airtight container at room temperature for up to 3 days. If you want to keep it longer, you can freeze individual wedges wrapped tightly in foil and placed in a freezer bag for up to 2 months. To eat, thaw at room temperature and reheat in a 350°F oven for 5-10 minutes to restore the crust’s crispness.
Why did my cornbread crumble when I sliced it?
Crumbling usually happens for two reasons: slicing while too hot or overbaking. If the bread is still steaming, the structure hasn’t fully bonded yet. Give it the full 10-minute rest. If it’s still crumbly after cooling, it might be overbaked, which dries out the “glue” of the flour and eggs. Try reducing your bake time by 2-3 minutes next time.
Can I use a different type of flour?
You can use a 1:1 gluten-free all-purpose flour blend if needed, though the texture may be slightly grittier. I do not recommend using bread flour, as the higher protein content will make the cornbread tough. Stick to all-purpose for that perfect balance of structure and tenderness.
What if I don’t have buttermilk?
If you’re out of buttermilk, you can make a quick substitute. Measure 1 tablespoon of white vinegar or lemon juice into a measuring cup, then fill the rest of the way to the 1-cup mark with whole milk. Let it sit for 5 to 10 minutes until it looks slightly thickened or curdled. It won’t be quite as rich as full-fat buttermilk, but it will provide the necessary acid for the rise.
Is the preheating step really necessary?
Yes, it is the most important part of the recipe! Without a preheated skillet, the batter will soak up the oil as it slowly warms up in the oven, leading to a greasy, heavy bottom. The preheated pan creates an instant sear that locks out the oil and creates the caramelized crust that defines this dish.
Golden Skillet Cornbread
Course: Side DishCuisine: AmericanDifficulty: easy8
servings10
minutes25
minutes35
Minutes310
kcalAmerican
Ingredients
1 cup yellow cornmeal (fine or medium grind)
1 cup all-purpose flour
1/2 cup granulated sugar
1 tablespoon baking powder
1/2 teaspoon baking soda
1 teaspoon salt
1 cup full-fat buttermilk, room temperature
2 large eggs
1/2 cup unsalted butter, melted and slightly cooled
1/4 cup honey (for the batter and for glazing)
2 tablespoons vegetable oil or bacon drippings (for the pan)
Powdered sugar for dusting
Directions
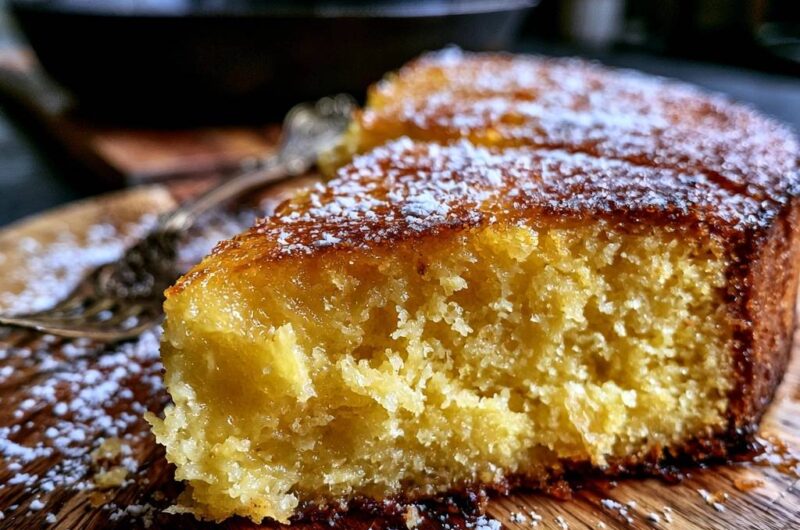
- Place a 10-inch cast iron skillet into the oven and preheat to 400 degrees F (200 degrees C). Heating the skillet is the mandatory step to prevent a soggy bottom and create the dark, caramelized crust seen in the image.
- In a large bowl, whisk together the cornmeal, flour, sugar, baking powder, baking soda, and salt.
- In a separate bowl, beat the eggs into the buttermilk. Stir in the melted butter and 2 tablespoons of the honey.
- Pour the wet ingredients into the dry ingredients and stir until just combined. Do not overmix; a few small lumps are fine and ensure a tender crumb.
- Carefully remove the screaming-hot skillet from the oven using a heavy-duty oven mitt. Add the 2 tablespoons of vegetable oil (or bacon drippings) and swirl to coat the bottom and all the way up the sides.
- Immediately pour the batter into the sizzling hot skillet. You should hear a distinct sear. This instant heat creates a structural barrier that prevents the oil from soaking into the bread, ensuring a perfect golden-brown crust.
- Bake for 20 to 25 minutes until the top is golden and a toothpick inserted into the center comes out clean.
- While still hot, brush the remaining 2 tablespoons of honey over the top of the cornbread to create a sticky, glossy finish.
- Let it cool in the pan for 10 minutes to allow the crust to set. Slice into wedges and dust generously with powdered sugar just before serving to match the visual finish.
Notes
- The mandatory step for success is preheating the skillet to 400 degrees F. This creates a structural barrier that prevents oil absorption and ensures a perfect golden-brown crust. Use room temperature buttermilk to prevent the melted butter from seizing.