
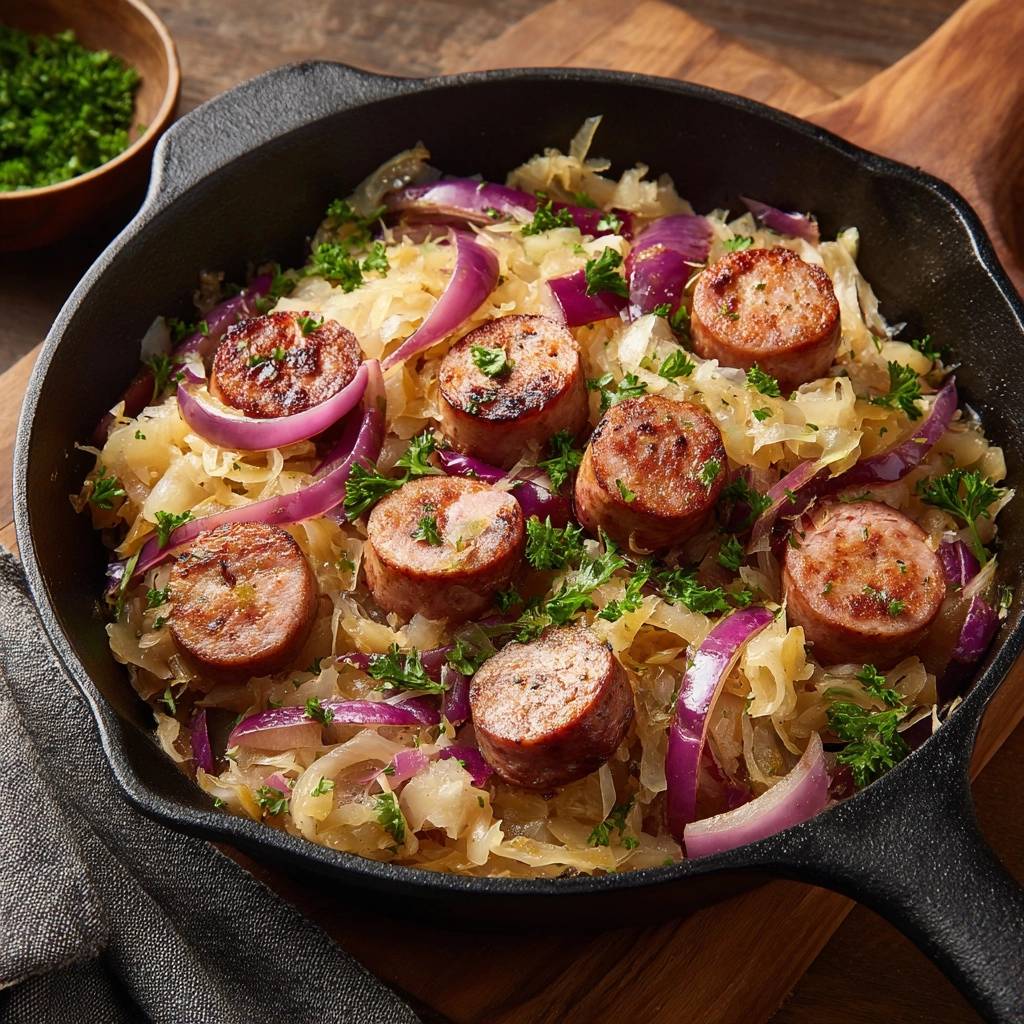
Imagine biting into a thick slice of smoked sausage that actually snaps, its salty juices mingling with cabbage that has been seared until the edges are golden and sweet. Most people expect sauerkraut to be a soggy, pale pile of mush that swims in a pool of thin brine. However, when you treat this humble fermented vegetable with the respect of a high-heat sear, it transforms into something entirely different.
The secret to a truly great Skillet Sausage and Sauerkraut lies in moisture management and the Maillard reaction. By controlling the liquid, you move away from a “boiled” texture and toward a rich, caramelized profile. This guide will walk you through the technical steps to ensure your dinner is a high-texture, flavor-dense experience rather than a watery mess.
I’ve found that the biggest mistake home cooks make is fearing the heat. You need that sizzling contact between the pan and the ingredients to build layers of flavor. One specific tip to remember: don’t crowd the pan. If the sausage rounds are touching, they’ll steam each other, and you’ll lose that beautiful, dark crust that makes this dish so satisfying.
The Science of Squeezing: Why Dry Sauerkraut Matters
Physics plays a massive role in your kitchen, especially when dealing with fermented foods packed in brine. Sauerkraut is essentially a sponge for liquid. If you dump that jar directly into a hot skillet, the temperature of the pan will immediately plummet to 212°F, the boiling point of water. At this temperature, caramelization is impossible because the energy is spent evaporating the brine rather than browning the cabbage.
To achieve a deep, nutty flavor, you must use the “Kitchen Towel Method.” Place your drained sauerkraut in the center of a clean, lint-free kitchen towel, gather the corners, and twist with all your might. You’ll be shocked at how much hidden liquid remains even after using a colander. By removing this excess moisture, you allow the cabbage shreds to make direct contact with the hot oil and fat.
This concentrated acidity actually improves the final flavor profile. When you remove the watery brine, you’re left with the pure, tangy essence of the cabbage. This allows the brown sugar and chicken broth we add later to build a balanced sauce that coats the ingredients rather than diluting them. It’s the difference between a dish that tastes “sour” and one that tastes “complex.”
Essential Components for the Perfect Skillet
Success starts with the right building blocks. For the protein, look for a high-quality smoked bratwurst or kielbasa. Since we aren’t using pork, beef or poultry-based sausages are fantastic options. These varieties provide the structural integrity needed to withstand a hard sear without falling apart. The smoky notes act as a perfect foil to the sharp tang of the fermented cabbage.
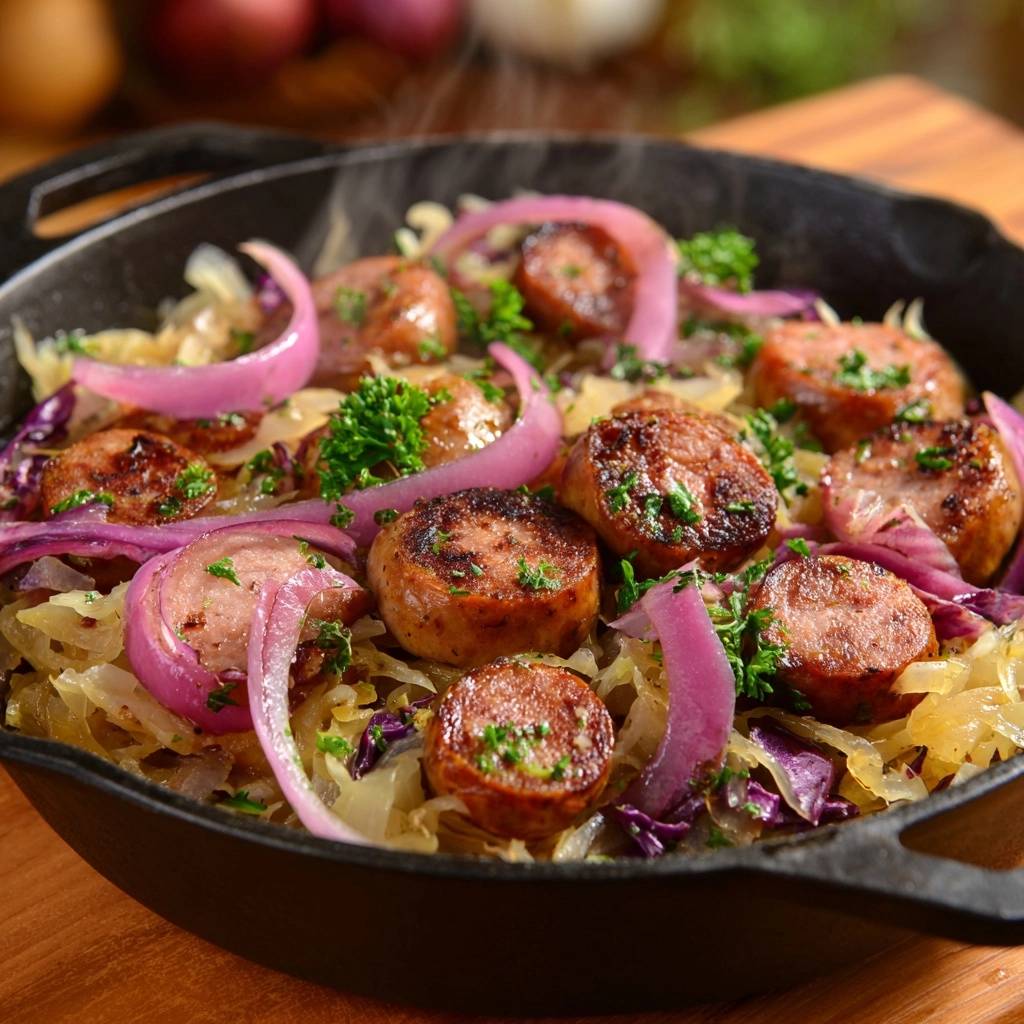
Red onion wedges are another non-negotiable for me. While many recipes call for diced yellow onions, thick red wedges provide a stunning visual contrast and a more substantial mouthfeel. They hold up against the heat, softening just enough to become sweet while retaining a slight char on the edges. This adds a layer of “tender-crisp” texture that keeps the dish interesting.
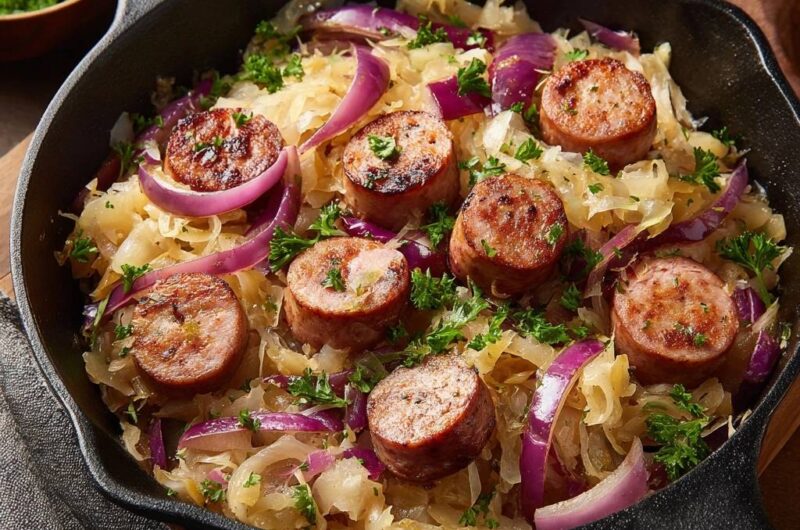
Finally, don’t underestimate the power of fresh curly parsley. While flat-leaf parsley is great for sauces, the ruffled texture of curly parsley adds a much-needed “lift” to this heavy, rustic meal. It provides a burst of herbaceous freshness that cuts through the richness of the seared meat and the deep, caramelized notes of the cabbage.
Selecting the Right Sausage Variety
When you’re at the butcher counter, pay attention to the casing. A natural casing will give you that iconic “snap” when you bite into it, which is the hallmark of a well-cooked sausage. If you prefer a softer bite, skinless varieties work too, though they won’t brown quite as dramatically.
I always recommend using pre-cooked smoked varieties for this specific high-heat method. Because the meat is already cooked through, your only job is to develop that gorgeous exterior crust and heat the center. This ensures the interior stays juicy and plump while the outside gets that deep, savory sear we’re after.
The Role of Brown Sugar and Aromatics
Brown sugar isn’t just there for sweetness; it’s a chemical necessity. The lactic acid in sauerkraut can be quite aggressive. A tablespoon of brown sugar acts as a buffer, mellowing the sharp edges of the acid and helping the cabbage brown more quickly in the pan. It creates a glaze that binds the flavors together.
As for spices, keep it simple. The sausage and the sauerkraut brine already provide a massive amount of salt and spice. A generous crack of fresh black pepper is usually all you need. If you start adding extra salt before tasting, you risk making the dish inedible. Always season at the very end after the flavors have concentrated.
Step-by-Step: Achieving the Perfect Sear and Deglaze
This 20-minute process is all about heat management. You want the pan hot enough to sear but not so hot that the sugar burns before the onions soften. It’s a rhythmic dance of adding ingredients, letting them sit, and then deglazing to pull all that flavor back into the mix.
For more skillet perfection, explore this bratwurst with sauerkraut recipe.
Phase 1: Developing the Sausage Crust
Start by heating your olive oil until it shimmers. When you add the sausage rounds, follow the “Single Layer Rule.” If you pile them on top of each other, they will steam. You want every single piece of meat to have its own real estate on the bottom of the skillet.
Let them sit undisturbed for at least 3 minutes. Resist the urge to stir! You are looking for a deep, golden-brown crust. Once you see that dark ring forming around the bottom edge, flip them over. Once both sides are seared, remove them from the pan. This keeps the centers from drying out while you work on the vegetables.
Phase 2: Charring Onions and Caramelizing Cabbage
In the same pan, toss in your red onion wedges. The goal here isn’t to turn them into mush; you want them to char slightly on the outside while remaining vibrant and intact. This takes about 2-3 minutes. The onions will pick up the leftover fats from the sausage, adding even more depth.
Now, add that squeezed-dry sauerkraut. Spread it out in an even layer and, again, let it sit undisturbed for about 3 minutes. This is where the magic happens. The natural sugars in the cabbage will begin to caramelize against the hot surface of the skillet, turning the pale shreds into a rich, golden brown.
Phase 3: Deglazing with Broth and Finishing
By now, you should see a layer of dark brown bits stuck to the bottom of your pan. This is called the “fond,” and it is pure flavor gold. Pour in your chicken broth and use a wooden spoon to scrape those bits up. The broth acts as a solvent, incorporating all that roasted meat flavor back into the cabbage.
Return the sausage to the skillet, but here is the pro tip: place them on top of the cabbage mixture. This “top-loading” technique allows the sausage to heat through in the steam without submerging the seared crusts in the liquid. Simmer until the broth has mostly evaporated, leaving everything glossy and tender.
Troubleshooting Common Texture Issues
If you notice your skillet is looking a bit watery despite your best efforts, don’t panic. Simply turn the heat up to high and move the ingredients around constantly. This will accelerate evaporation. Next time, remember to squeeze that kitchen towel even harder!
On the flip side, if the pan looks too dry and the onions are starting to burn before they soften, add an extra splash of broth or even a tablespoon of water. Every stove runs at a different temperature, so you have to be the judge of when the pan needs a little moisture to keep things moving.
Flavor Variations and Regional Swaps
Once you master the base technique, you can start playing with regional flavors. For a North German profile, try adding thinly sliced Granny Smith apples during the onion phase. The tartness of the apple complements the sauerkraut beautifully and adds a soft, fruity texture.
If you want an Austrian lean, toss in a teaspoon of caraway seeds. They provide a distinct, earthy anise flavor that is traditional in many European cabbage dishes. You can also substitute the chicken broth with apple cider for a sweeter, autumnal variation that pairs perfectly with a sharp mustard on the side.
Optimal Equipment: The Case for Cast Iron
While you can make this in a stainless steel pan, a heavy-bottomed cast-iron skillet is the superior tool. Cast iron has incredible heat retention. Once it gets hot, it stays hot, which is vital for getting that quick sear on the sausage and the cabbage without the pan cooling down.
The wide surface area of a 12-inch skillet also facilitates better evaporation. In a deep pot, steam gets trapped, leading to the very sogginess we are trying to avoid. The seasoned surface of a cast-iron pan also contributes to the Maillard reaction, helping you achieve those crispy, caramelized edges much faster.
What to Serve with Sausage and Sauerkraut
This dish is quite acidic and salty, so it needs starchy companions to balance the palate. Roasted root vegetables, like potatoes or carrots, are a classic choice. The earthy sweetness of a roasted potato soaks up the extra juices from the skillet perfectly.
A thick slice of crusty rye bread is also a must-have. Use it to mop up any remaining glaze on your plate. I also love serving this with a “mustard flight”—a small selection of spicy brown, Dijon, and whole-grain mustards. The different heat levels of the mustards interact beautifully with the smoky sausage.
Storage, Reheating, and Meal Prep Strategy
One of the best things about this recipe is that the flavors actually develop and deepen overnight. As the dish sits in the fridge, the cabbage continues to absorb the smoky essence of the sausage. It makes for a fantastic lunch the next day.
When reheating, avoid the microwave if possible. The microwave will make the sausage rubbery and the cabbage limp. Instead, toss everything back into a hot skillet with a tiny splash of water. Cover it for a minute to steam, then uncover and sauté for another minute to bring back that snap and sizzle.
I don’t recommend freezing this dish. Cabbage has a high water content, and the freezing and thawing process breaks down its cell walls. When you reheat it from frozen, it will inevitably turn into the watery mush we worked so hard to avoid. It’s best enjoyed within three days of cooking.
Expert Tips for Scaling the Recipe
If you’re cooking for a crowd and need to double the recipe, do not try to cram it all into one skillet. You will lose the ability to sear, and you’ll end up with a steamed mess. Instead, use two separate skillets simultaneously.
Maintaining proper surface area contact is the only way to ensure the “Anti-Soggy” results. If you only have one pan, cook in batches. Sear all the sausage first, then all the onions and cabbage, and finally combine them at the very end to heat through. This extra effort ensures every guest gets those perfect, caramelized bites.
How do I store leftovers?
Store any leftovers in an airtight container in the refrigerator for up to 3 days. The flavors actually meld together beautifully after a night in the fridge. To maintain the best texture, reheat the mixture in a skillet over medium heat with a tiny splash of broth or water rather than using a microwave.
Why did my sauerkraut turn out mushy?
Mushy sauerkraut usually happens for two reasons: you didn’t squeeze enough liquid out before cooking, or you crowded the pan. If there is too much moisture, the cabbage boils in its own juices instead of searing. Make sure to use a kitchen towel to wring it out until it feels almost dry to the touch before it hits the hot oil.
Can I use a different type of sausage?
Absolutely. While smoked bratwurst or kielbasa are traditional, you can use any pre-cooked smoked sausage. Beef, turkey, or chicken sausages all work well. Just ensure they are the “smoked” or “precooked” variety so they can handle the high-heat searing method without drying out or requiring a long simmer.
What can I use if I don’t have chicken broth?
If you’re out of chicken broth, you can use vegetable broth or even a splash of apple cider. In a pinch, plain water will work to deglaze the pan, though you’ll lose a bit of the savory depth that broth provides. If using water, you might want to add an extra pinch of black pepper or a dash of mustard to the pan to boost the flavor.
Is there a way to make this less salty?
Sauerkraut and smoked sausages are naturally high in sodium. To reduce the saltiness, you can rinse the sauerkraut under cold water before squeezing it dry. This removes some of the excess salt from the fermentation process. Also, be sure to use a low-sodium chicken broth and avoid adding any extra salt until you’ve tasted the finished dish.
Can I add other vegetables to the skillet?
Yes, sliced bell peppers or thinly sliced apples are great additions. If adding peppers, toss them in with the red onions. If using apples, add them during the last 5 minutes of cooking so they soften but don’t turn into applesauce. These additions provide a nice sweetness that balances the tang of the sauerkraut.
Sausage and Sauerkraut
Course: Main CourseCuisine: AmericanDifficulty: easy4
servings10
minutes20
minutes385
kcal30
MinutesA one-pan meal featuring smoked bratwurst and sauerkraut. This recipe uses a specific draining and searing technique to ensure the cabbage is caramelized and tender-crisp rather than watery.
Ingredients
1 pound smoked bratwurst or kielbasa, sliced into 1.5-inch thick rounds
1 jar (24 ounces) sauerkraut, thoroughly drained and squeezed dry
1 large red onion, sliced into thick wedges
2 tablespoons olive oil
1 tablespoon brown sugar
1/2 cup chicken broth
1/2 cup fresh curly parsley, roughly chopped
Black pepper to taste
Directions
- The secret to avoiding a soggy skillet is to place your drained sauerkraut in a clean kitchen towel and squeeze out every drop of excess brine before cooking.
- Heat olive oil in a large cast-iron skillet over medium-high heat. Add the thick sausage rounds in a single layer. Sear for 3 to 4 minutes per side until a deep golden-brown crust forms on the cut sides. Remove sausage from the pan and set aside.
- In the same skillet, add the red onion wedges. Sauté for 2-3 minutes until the edges are slightly charred but the wedges remain intact and vibrant.
- Add the squeezed-dry sauerkraut to the pan. Spread it out and let it sit undisturbed for 3 minutes to allow the natural sugars to caramelize against the hot surface.
- Stir in the brown sugar and black pepper. Pour in the chicken broth to deglaze the pan, scraping up all the flavorful brown bits (fond) from the bottom.
- Return the sausage to the skillet, placing them on top of the cabbage mixture to keep the seared crusts out of the liquid. Simmer for 5 minutes until the broth has evaporated, leaving the cabbage glossy and the onions tender.
- Garnish heavily with the fresh curly parsley and serve immediately directly from the skillet.
Notes
- The secret to avoiding a soggy skillet is to squeeze every drop of excess brine from the sauerkraut before it hits the pan.


