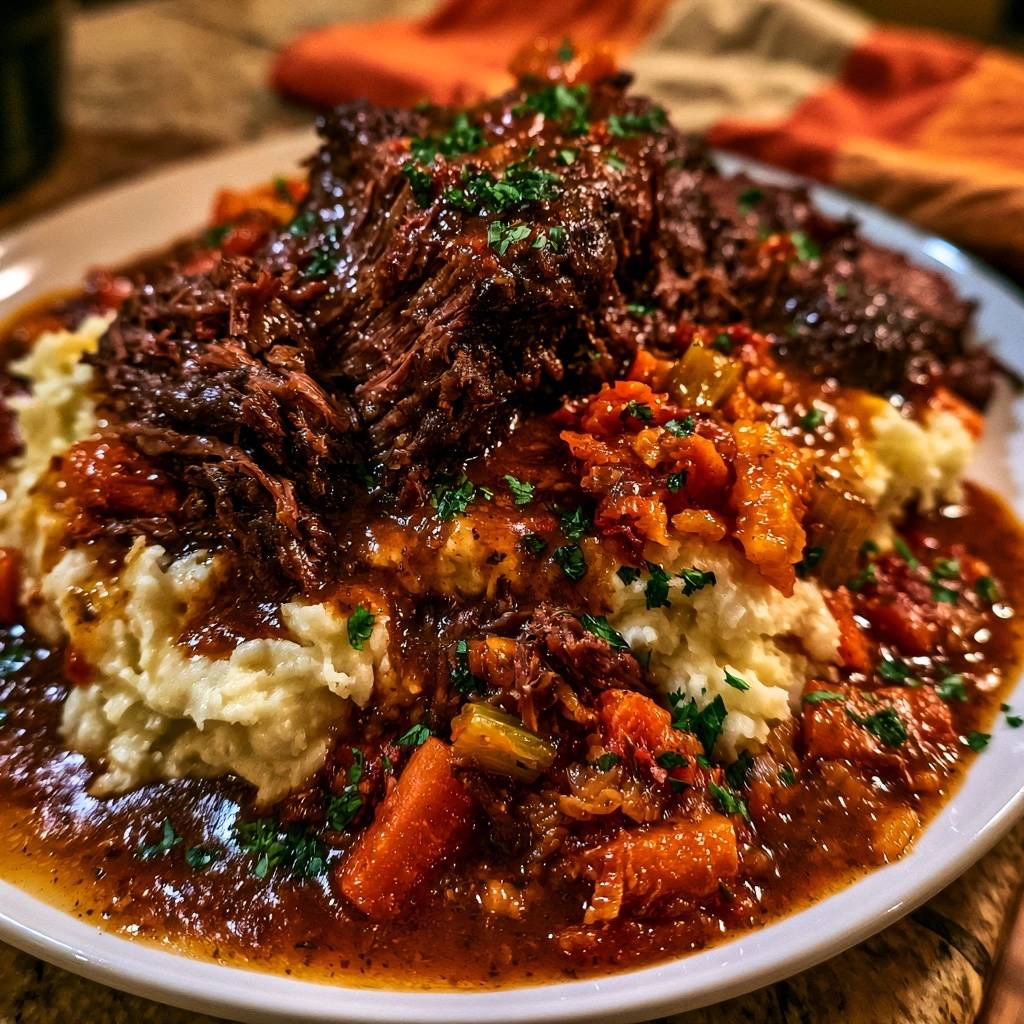
Imagine pulling a heavy pot from the oven and lifting the lid to reveal beef that looks dark, glossy, and impossibly tender. As you touch it with a fork, the meat doesn’t just break; it yields, sliding apart into succulent ribbons that have soaked up hours of savory aromatics. This isn’t the dry, stringy pot roast that haunted Sunday dinners of the past. Instead, it is a masterclass in texture, where tough connective tissue transforms into a rich, silky sauce that coats every bite.
Most home cooks struggle with pot roast because they treat it like a quick boil rather than a gentle transformation. When you rush the process or use too much liquid, the muscle fibers tighten and squeeze out their moisture, leaving you with something resembling shoe leather. We’re going to fix that by focusing on thermal control and the science of collagen breakdown. By the time we’re done, you’ll understand how to turn a humble, affordable cut of beef into a centerpiece that rivals any high-end steakhouse.
The real secret to success lies in the sear, but not for the reasons you might think. While many believe searing “locks in juices,” its true purpose is the creation of complex flavor compounds through the Maillard reaction. I’ve found that patting the meat bone-dry with paper towels before it hits the oil is the only way to ensure a deep, mahogany crust rather than a grey, steamed exterior. That crust eventually dissolves into your braising liquid, providing the foundation for a gravy with incredible depth.
Selecting the Ideal Cut for Braising
You cannot make a world-class pot roast with a lean cut of meat. If you try to use a bottom round or a sirloin tip, you’ll end up with a dry, crumbly mess regardless of how long you cook it. The non-negotiable choice for this recipe is the beef chuck roast. This cut comes from the shoulder of the cow, a hard-working muscle group packed with intramuscular fat and, more importantly, heavy deposits of collagen.
Collagen is the magic ingredient in braising. During a long, slow cook, this tough connective tissue physically melts and turns into gelatin. This gelatin coats the individual meat fibers, providing that luxurious, lip-smacking mouthfeel that defines a perfect roast. Leaner cuts lack this structural makeup, meaning they simply dry out as their proteins coagulate. Stick with the chuck; its high fat-to-lean ratio ensures the meat stays lubricated throughout the four-hour journey in the oven.
Identifying Quality Marbling in Beef
When you’re at the butcher counter, look for a roast that features thin, white flecks of fat running through the red muscle—this is marbling. You want to avoid pieces that only have a thick “fat cap” on the outside but look lean in the center. Those internal streaks of fat will render down during the braise, basting the meat from the inside out. A good chuck roast should feel firm and heavy for its size, indicating a dense concentration of flavor-giving tissues.
Essential Components for a Rich Braising Base
A great braise requires a liquid that is more than just wet; it needs to be a concentrated essence of umami. While water or thin store-bought stock might technically cook the meat, they won’t contribute to the final texture. I always recommend using a high-quality beef bone broth. Bone broth contains natural gelatin, which works in tandem with the beef’s own collagen to create a gravy that is naturally thick and glossy without the need for heavy flour thickeners.
Acidity is the other crucial pillar of this dish. A tablespoon of balsamic vinegar in the deglazing broth provides the necessary acid to cut through the richness of the beef fat, along with a unique fruitiness that balances the savory herbs. The tomato paste acts as a bridge, adding a subtle sweetness and a deep “cooked-all-day” color to the sauce.
Aromatic Foundations: The Mirepoix Ratio
We use a classic mirepoix—a mix of onions, carrots, and celery—to build the aromatic base. For a three-pound roast, a large yellow onion, three thick carrots, and two celery stalks provide the perfect balance. These vegetables don’t just add flavor; they release natural sugars as they caramelize, which eventually rounds out the saltiness of the broth. Cut your carrots into thick rounds so they don’t disintegrate during the long cook; you want them to hold their shape for the final presentation.
The Role of Acid and Umami
Worcestershire sauce is my secret weapon for adding instant depth. It contains fermented ingredients that provide a punch of umami that salt alone cannot achieve. When combined with the balsamic vinegar, these acids help to gently penetrate the meat fibers during the four-hour simmer. This ensures that the beef is seasoned all the way to the center, rather than just on the surface. It’s the difference between a roast that tastes like “beef” and one that tastes like a complex, layered masterpiece.
The Science of the Maillard Reaction
The first step of this recipe—the sear—is where most people lose their way. If you drop a cold, damp piece of meat into a lukewarm pan, it will release moisture, and you’ll end up boiling the exterior in its own juices. To achieve the Maillard reaction, you need high heat and a dry surface. This chemical reaction between amino acids and reducing sugars creates hundreds of different flavor compounds that simply don’t exist in raw or boiled meat.
A heavy-bottomed Dutch oven is essential here because it retains heat better than thin stainless steel. When the beef hits the hot oil, it should sizzle loudly. Don’t crowd the pan, and don’t be tempted to move the meat too soon. The beef will actually “stick” to the pan initially, but as the crust forms, the proteins will naturally release. If you have to tug at the meat, it isn’t ready to be flipped yet. Patience in this stage pays off in the final gravy.
Achieving the Perfect Dark Crust
You are looking for a deep, dark brown color—almost the color of a coffee bean—on all sides of the roast. This isn’t just for looks; those browned bits are the “fond” that will flavor your entire pot. As the meat sears, you’ll notice a rich, nutty aroma filling the kitchen. This is your cue that the flavor is developing. Once every side is crusty and dark, remove the meat to a plate. The oil left behind is now liquid gold, infused with the essence of the beef.
Step-by-Step: Building the Braising Liquid
After the meat is removed, the bottom of your pot will be covered in dark, stuck-on bits. This is the fond, and it is the most important part of the sauce. Deglazing is the process of adding liquid—in this case, the broth and balsamic vinegar—to the hot pan to loosen those bits. As the liquid hits the surface, it will steam and bubble violently. Use a wooden spoon to scrape the bottom vigorously, incorporating every speck of that flavor back into the liquid.
Once the fond is incorporated, you must let the liquid reduce by at least half. This is a critical step. If you add the rest of the broth too early, the sauce will taste thin and sharp. By reducing first, you concentrate the sugars and fruit notes, leaving behind a syrupy base that smells sweet and complex. Only after it has thickened should you introduce the bone broth and Worcestershire sauce.
Integrating Tomato Paste and Garlic
Before the deglazing liquid goes in, I like to use a technique called “pincé.” After the vegetables have softened, stir in the tomato paste and cook it for about two minutes. You want the paste to turn from a bright red to a dark, brick-red color. This toasts the sugars in the tomato and removes the metallic “tinny” taste often found in canned products. Add the garlic during the last 30 seconds of this process so it becomes fragrant without burning, which would make the sauce bitter.
Thermal Control: Low and Slow Mechanics
Braising is a moist-heat cooking method that relies on a very specific temperature range. If the liquid boils, the muscle fibers in the beef will contract violently, resulting in meat that is tough and dry even if it’s sitting in liquid. We want a gentle simmer, where only a few bubbles break the surface occasionally. This is why a 300°F oven is superior to the stovetop; the oven provides consistent, radiant heat from all sides, whereas a burner only heats from the bottom.
The amount of liquid in the pot is just as important as the temperature. The beef should never be fully submerged. You want the liquid to come about halfway up the side of the roast. This allows the bottom half of the meat to simmer in the flavorful broth while the top half steams in the aromatic vapors trapped by the lid. This dual-action cooking ensures the meat stays moist while the connective tissues slowly dissolve into gelatin over the course of four hours.
Oven vs. Stovetop: Consistency Factors
While you can technically finish this on the stove, I strongly advise using the oven. Stovetop burners often have “hot spots” that can cause the bottom of the roast to scorch or the vegetables to stick and burn. The oven acts like a climate-controlled chamber, maintaining a steady environment that allows you to walk away and forget about the pot. If you must use the stove, use the lowest possible setting and check the liquid levels every hour to ensure nothing is sticking.
Transforming Pan Drippings into Mahogany Gravy
Once the meat is tender enough to be pierced with a fork with zero resistance, the cooking is done, but the sauce isn’t ready yet. Remove the beef and the large vegetable chunks to a warm platter. You’ll likely see a layer of fat floating on top of the liquid; use a wide spoon to skim off as much as possible. Now, turn the heat to medium-high and bring the remaining liquid to a rolling boil.
As the liquid reduces, the water evaporates, concentrating the flavors and the natural gelatin. You’ll see the sauce transform from a thin broth into a thick, glossy, mahogany-colored gravy. It should be thick enough to coat the back of a spoon. Because we used bone broth and a proper sear, you won’t need to add flour or cornstarch, which can sometimes dull the vibrant flavors of the sauce and beef. This reduction is the pure, unadulterated essence of the roast.
Troubleshooting Tough or Dry Meat
If you pull your roast out after four hours and it still feels tough or “bouncy” when you poke it, don’t panic. It simply hasn’t cooked long enough. Every piece of meat is different, and some older cuts have more stubborn collagen that needs an extra 30 to 45 minutes to break down. Put the lid back on and return it to the oven. However, if the meat is falling apart but feels dry and “woody” in your mouth, it likely boiled at too high a temperature. In that case, the best fix is to shred it finely and let it soak in the finished gravy for 20 minutes before serving.
How to Rescue an Over-Salted Braise
Because we reduce the sauce at the end, it’s easy for the salt levels to become too intense. If your gravy tastes too salty, do not add water, as this will ruin the texture. Instead, add a small splash of red wine vinegar or a squeeze of lemon juice. The acid will trick your palate and balance the saltiness. A tiny pinch of sugar can also help mellow out the flavors. If it’s truly salty, serving it over completely unseasoned mashed potatoes can help balance the overall bite.
Serving Suggestions and Texture Contrasts
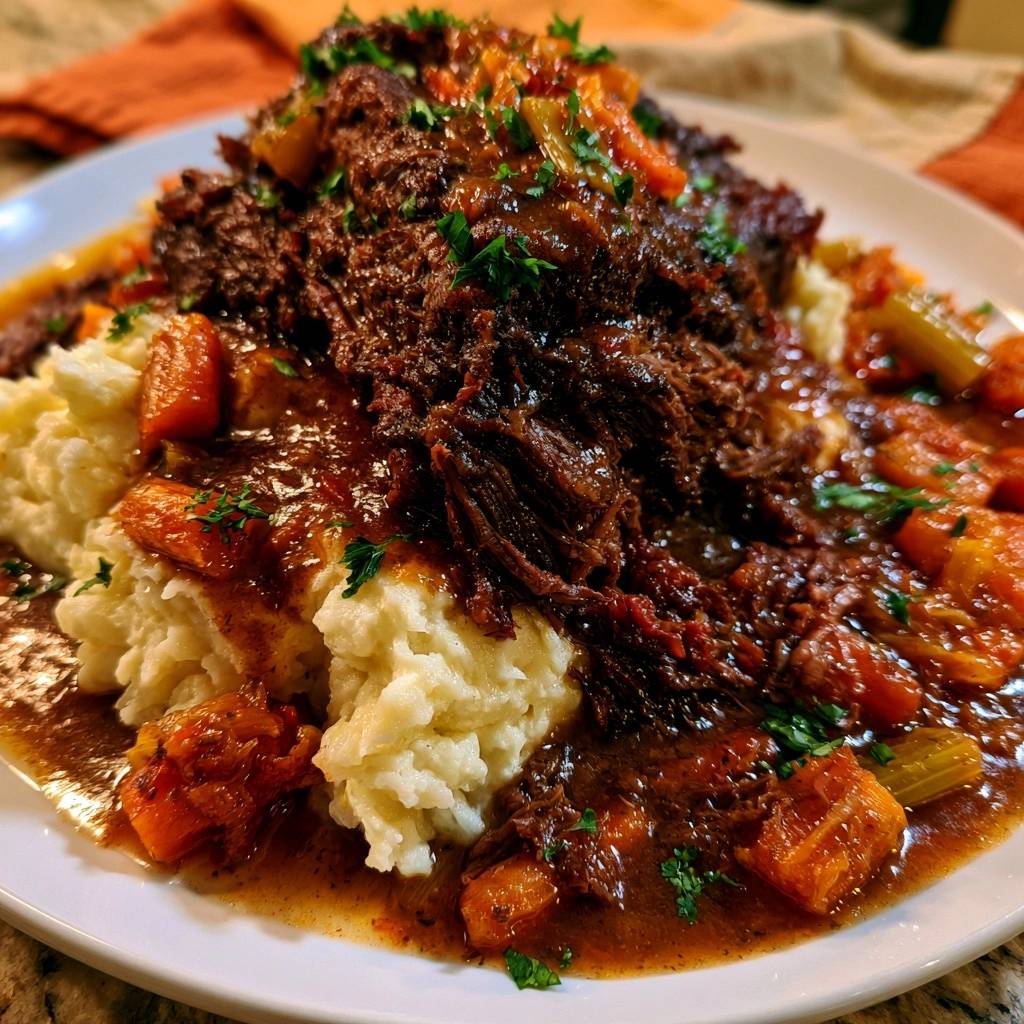
Presentation is key for a rustic dish like this. Start with a wide, shallow bowl and add a massive scoop of buttery, creamy mashed potatoes. Use the back of your spoon to create a well in the center. Place a large, succulent chunk of the shredded beef into the well, and nestle the tender carrots and celery around the sides. The contrast between the velvet-smooth potatoes and the chunky, rustic meat is what makes this dish so satisfying.
Ladle a generous amount of the mahogany reduction over the top, letting it pool into the potatoes. Finally, don’t skip the fresh parsley. A heavy garnish of finely chopped parsley adds a necessary pop of color and a fresh, grassy note that cuts through the intense richness of the beef and gravy. It wakes up the palate and makes the whole dish feel balanced rather than heavy.
Make-Ahead Strategies and Storage
Pot roast is one of those rare dishes that actually tastes better the next day. As the meat sits in the sauce overnight, the flavors continue to meld and mature. If you’re making this for a dinner party, feel free to cook it a day in advance. Store the meat and the sauce together in the fridge. When you’re ready to serve, reheat it gently in a covered pot over low heat. This prevents the beef from drying out and ensures every fiber is saturated with gravy.
Freezing and Thawing Guidelines
This dish freezes beautifully, making it a perfect meal-prep option. Place the shredded beef and the gravy into an airtight container or a heavy-duty freezer bag. Make sure the meat is completely covered by the sauce to prevent freezer burn. It will stay fresh for up to three months. To serve, thaw it in the refrigerator overnight and reheat it slowly on the stove. I don’t recommend freezing the mashed potatoes, as they can become grainy; it’s best to whip up a fresh batch of mash when you’re ready to eat.
Frequently Asked Questions
How do I store leftovers and how long will they last?
Store any leftover pot roast and gravy in an airtight container in the refrigerator for up to 4 days. It is important to keep the meat submerged in the sauce so it doesn’t dry out. For the mashed potatoes, store them in a separate container for up to 3 days. When reheating, add a splash of water or broth to the potatoes to bring back their creamy texture.
Why is my pot roast still tough after 4 hours of cooking?
If the meat is tough, it almost always means the collagen hasn’t finished breaking down into gelatin. This can happen if the cut of meat was particularly lean or if the oven temperature was slightly too low. The solution is simple: put the lid back on and cook it for another 30 to 60 minutes. Check it every 20 minutes until it yields easily to a fork.
Can I use red wine vinegar instead of balsamic?
Yes, one tablespoon of red wine vinegar in the broth works well. This provides the necessary “zip” to balance the heavy fats in the beef chuck roast.
Can I use a slow cooker instead of an oven?
You can, but you must still sear the meat and sauté the vegetables in a pan first. Transfer everything to the slow cooker and cook on “Low” for 8 to 10 hours. Note that the sauce will not reduce in a slow cooker, so you will need to pour the liquid into a saucepan at the end and boil it on the stove to achieve that thick, glossy gravy consistency.
What is the best way to reheat the roast without drying it out?
Avoid the microwave if possible, as it heats unevenly and can turn the beef rubbery. The best method is to place the meat and sauce in a covered skillet or pot over medium-low heat. Add a tablespoon of water if the sauce looks too thick. Heat gently until the sauce is bubbling and the meat is warmed through, which usually takes about 10 minutes.
My gravy is too thin, how can I fix it?
If you’ve reduced the liquid and it’s still not thick enough, it’s likely because there wasn’t enough natural gelatin in the broth. You can continue to boil it down further to concentrate it, or you can whisk together a teaspoon of cornstarch with a tablespoon of cold water and stir that into the boiling sauce. It will thicken almost instantly.
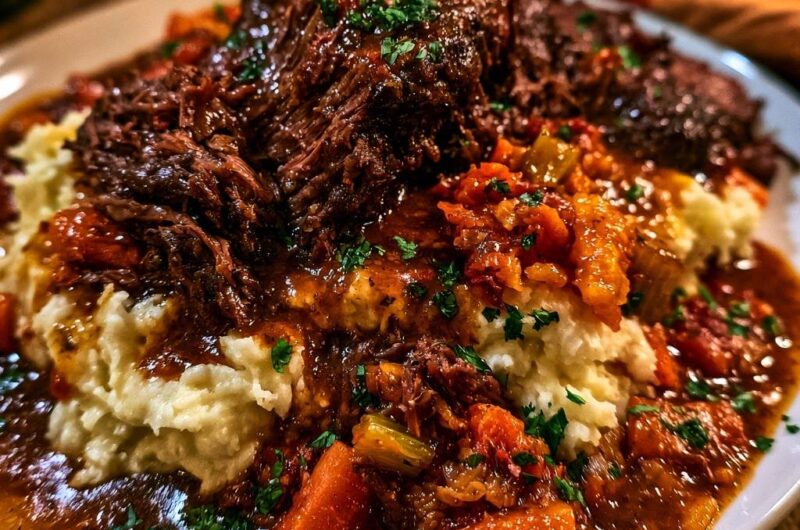
Slow-Braised Pot Roast over Creamy Mash
Course: Main CourseCuisine: AmericanDifficulty: easy6
servings20
minutes4
hours240
Minutes620
kcalAmerican
Ingredients
3 pounds beef chuck roast, patted dry
2 tablespoons vegetable oil
1 large yellow onion, diced
3 large carrots, chopped into thick rounds
2 stalks celery, sliced
4 cloves garlic, minced
2 tablespoons tomato paste
1 cup beef broth plus 1 tablespoon balsamic vinegar
2 cups beef bone broth
1 tablespoon Worcestershire sauce
2 teaspoons dried thyme
1 teaspoon salt
1 teaspoon black pepper
4 cups prepared creamy mashed potatoes
Fresh parsley, finely chopped for garnish
Directions
- The secret to preventing tough meat starts with the sear. Generously season the beef with salt and pepper. Heat oil in a large heavy-bottomed Dutch oven over medium-high heat. Sear the meat for 5 to 6 minutes per side until a deep, dark brown crust forms. This crust is essential for flavor depth and moisture retention.
- Remove the meat and set it aside on a plate. Lower the heat to medium and add the onions, carrots, and celery. Cook for 5-7 minutes until the vegetables begin to caramelize. Stir in the garlic and tomato paste, cooking for 2 minutes until the paste turns a deep brick red and smells toasted.
- Pour in the beef broth and balsamic vinegar to deglaze the pot. Use a wooden spoon to scrape up every bit of the browned flavor bits (fond) from the bottom. Let the liquid reduce by half to concentrate the flavor.
- Add the beef broth, Worcestershire sauce, and thyme. Return the beef and any accumulated juices to the pot. The liquid should come about halfway up the side of the meat. If the meat is fully submerged, it will boil and become tough; braising requires that the top portion steams while the bottom simmers.
- Cover with a tight-fitting lid. For the most consistent results, place the pot in a 300°F (150°C) oven, or reduce stovetop heat to the lowest possible setting to maintain a very faint simmer. Cook for 3.5 to 4 hours. The low temperature is what allows the collagen to transform into gelatin, ensuring the meat is succulent rather than chewy.
- Once the meat is fork-tender and falling apart, remove it and the large vegetable chunks from the pot. Increase the stovetop heat to medium-high and boil the remaining liquid for 10-15 minutes until it reduces into a thick, glossy, dark mahogany gravy.
- Shred the beef into large, succulent chunks. Serve over a generous bed of creamy mashed potatoes. Arrange the carrots and celery around the meat, then ladle the rich reduction over everything. Garnish heavily with fresh parsley to match the visual brightness of the dish.
Notes
- To prevent tough meat, ensure the liquid only comes halfway up the side of the beef and maintain a low temperature to allow collagen to transform into gelatin.