
The Dutch oven is the undisputed heavyweight champion of the kitchen for a reason. Its thick cast-iron walls and heavy lid create a unique cooking environment where heat doesn’t just hit the bottom of the pan; it radiates from every angle. This consistent, gentle heat is exactly what you need to transform a humble, tough cut of meat into something that feels like a luxury. When we talk about “melt-in-your-mouth” beef, we aren’t just using a catchy phrase. We’re describing a specific culinary transformation where the meat loses its resistance and yields to the slightest pressure of a fork.
There’s a deep, emotional comfort in a long braise that fills the house with a savory aroma for hours. It’s the ultimate slow-food experience that rewards patience with a richness you simply can’t get from a quick sauté. The secret to this specific recipe lies in the size of your beef chunks. While most grocery stores sell “stew meat” in tiny one-inch cubes, you want to cut your roast into large 2.5-inch pieces. These larger chunks stay much juicier during the long simmer, preventing the dry, stringy texture that plagues so many home-cooked stews.
For a similarly satisfying savory experience, explore this slow-simmered savory beef stew recipe.
The Science of Breaking Down Tough Beef
To understand why this stew works, you have to understand the anatomy of the chuck roast. This cut comes from the shoulder of the cow, a muscle that does a lot of heavy lifting. Consequently, it’s packed with collagen and tough connective tissue. If you were to grill a chuck steak like a ribeye, it would be nearly impossible to chew. However, when you subject that collagen to low, moist heat over several hours, something beautiful happens.
Between 160°F and 180°F, collagen begins to physically melt and convert into gelatin. This isn’t just a change in texture; it’s a change in chemistry. The gelatin coats the individual muscle fibers, providing that silky, rich mouthfeel that defines a premium Slow-Simmered Dutch Oven Beef Stew. If you rush the process or use a higher temperature, the muscle fibers will squeeze out all their moisture before the collagen has a chance to melt, leaving you with meat that is both tough and dry. Patience is your most important ingredient here.
Why the Dutch Oven is Non-Negotiable
You might be tempted to use a standard stockpot, but the physics of heavy cast iron are superior for braising. A Dutch oven provides radiant heat, meaning the pot itself becomes the heat source, surrounding the beef from all sides. This is much more effective than conductive heat, which only travels from the burner through the bottom of a thin pan.
Furthermore, the heavy lid is essential for moisture management. It creates a pressurized environment that traps steam, which then condenses and drips back down onto the meat. This self-basting cycle ensures that your braising liquid doesn’t evaporate away during the 3.5-hour cook time, keeping the environment perfectly humid for the collagen-to-gelatin conversion.
Essential Components for a Rich Stew Base
Quality ingredients are the foundation of a great stew. By using 2.5-inch chunks of beef, you ensure that the center of the meat stays moist even as the exterior develops a deep flavor. If the pieces are too small, they overcook long before the vegetables are ready. It’s also vital to use a low-sodium beef broth. This gives you total control over the salt levels, allowing the liquid to reduce and intensify without becoming an undrinkable salt bomb by the end of the third hour.
Selecting the Right Cut: Beyond Chuck Roast
While chuck roast is the gold standard for stew, you could technically use brisket or short ribs. These cuts share the high fat and connective tissue content necessary for a long braise. However, you must avoid lean cuts like round, sirloin, or “lean stew meat.” Without intramuscular fat and collagen, these cuts will become incredibly dry and rubbery when simmered. If there’s no white marbling in the raw meat, it won’t work for this recipe.
For a different take on slow-cooked beef, explore our slow-braised beef and apricot stew.
The Role of Aromatics and Umami Boosters
We build the flavor profile using a combination of tomato paste, Worcestershire sauce, and garlic. These aren’t just random additions; they are umami powerhouses. The tomato paste provides a concentrated acidity and sweetness that deepens as it browns. Worcestershire sauce adds a fermented, savory complexity that mimics the depth of a long-aged stock. Together, they create a “base note” that supports the beef, making the gravy taste incredibly robust without needing excessive salt.
Phase One: Developing the Maillard Reaction
The most common mistake people make is throwing raw meat directly into the liquid. To get real flavor, you must trigger the Maillard reaction. This is the chemical reaction between amino acids and reducing sugars that gives browned food its distinctive flavor. Before the beef ever touches the pot, you must pat it completely dry with paper towels. If the meat is damp, it will steam instead of sear, and you’ll end up with grey, flavorless chunks.
Once the meat is dry and seasoned, you need a screaming hot pot with a thin layer of oil. You’re looking for a dark, mahogany crust on all sides. This crust isn’t just for looks; it’s the primary source of flavor for the entire stew. Don’t be afraid of a little smoke in the kitchen—that deep brown color is exactly what you want.
Batch Searing for Maximum Crust Formation
Thermodynamics play a huge role here. If you crowd the pot with too much meat at once, the temperature of the cast iron will plummet. Instead of searing, the meat will release its juices and begin to boil in its own liquid. Work in batches, giving each piece of beef plenty of “breathing room.” This ensures the pot stays hot enough to create that vital crust on every single piece.
Phase Two: Deglazing and Building the Braise
After searing the meat and softening your aromatics, you’ll notice a layer of dark, stuck-on bits at the bottom of the pot. This is called “fond,” and it is culinary gold. Deglazing is the process of adding liquid—either red wine or a bit of broth—to loosen those bits. Use a wooden spoon to scrape the bottom thoroughly. Those caramelized particles will dissolve into the liquid, providing the foundation for a world-class gravy.
Managing the Heat for a Gentle Simmer
Once the liquid is in, you must manage the temperature with precision. You are looking for a “lazy bubble.” This means a single bubble should break the surface every few seconds. If the stew is at a rolling boil, the intense heat will cause the muscle fibers to seize up and become stringy. A gentle simmer is the only way to ensure the beef stays tender while it cooks through.
Phase Three: Timing the Vegetable Additions
Vegetables have different cooking times than beef. If you add the carrots and potatoes at the beginning, they will turn into mush by the time the beef is tender. We add the carrots early to help flavor the broth, but the potatoes wait until the final hour. Using whole peeled baby yellow potatoes is a pro move. Because they are whole, they maintain their structural integrity and don’t release too much starch, which keeps the gravy smooth rather than grainy.
The Mint Garnish: A Study in Contrast
Adding fresh mint to a beef stew might sound unconventional, but it’s a game-changer. A long-simmered stew is incredibly rich, heavy, and full of gelatin. The menthol in fresh mint acts as a palate cleanser, cutting through the heavy fats and brightening the entire dish. It provides a sharp, aromatic contrast that makes the savory flavors of the beef pop. Just tear the leaves by hand right before serving to keep the oils fresh and vibrant.
Troubleshooting Common Braising Obstacles
If you find your liquid is reducing too quickly, your heat is likely too high, or your lid isn’t fitting tightly enough. Simply add a splash of water or broth to keep the meat submerged. If your gravy feels too thin at the end, don’t reach for a flour slurry. Instead, take one of the cooked potatoes and mash it against the side of the pot. Stir it back into the liquid, and the natural starches will thicken the gravy beautifully without changing the flavor.
Correcting Overly Salty or Acidic Gravy
Sometimes the flavors can become too concentrated. If the stew tastes too salty, a tiny pinch of sugar can help balance the palate. If it feels too heavy or “flat,” a teaspoon of balsamic vinegar or a squeeze of lemon can provide the acidity needed to wake up the flavors. Always taste your gravy in the final ten minutes of cooking to make these small but vital adjustments.
Make-Ahead Strategies and Storage Logistics
This stew is actually better on the second day. As it cools, the beef continues to absorb the seasoned liquid, and the flavors have more time to meld. If you’re making this ahead of time, let it cool completely at room temperature before putting it in the fridge. This prevents condensation from thinning out your gravy. When reheating, do it slowly on the stovetop over low heat. Adding a tiny splash of water will help loosen the gelatin as it warms up.
Freezing and Thawing for Long-Term Quality
You can freeze this stew for up to three months, but there is one caveat: potatoes. Potatoes often become mealy and grainy after being frozen and thawed. If you plan on freezing a large batch, consider cooking the stew without the potatoes. When you’re ready to eat your frozen portion, simply simmer some fresh potatoes in the stew as you reheat it. This keeps the texture perfect.
Optimal Pairings for a Hearty Beef Dinner
A dish this rich needs something to soak up the gravy. A thick slice of crusty sourdough bread is the traditional choice, providing a nice tang to contrast the savory beef. If you want something lighter, a simple bitter green salad—like arugula or radicchio—with a sharp lemon vinaigrette works wonders. The acidity of the salad cuts through the richness of the braise, making each bite of stew feel as fresh as the first.
Complementary Dishes
Round out your Dutch oven beef stew with these comforting recipes.
- For a savory addition that complements the richness of the beef, consider making this thyme beef stuffing, offering a moist texture.
- To create a complete meal experience, pair your stew with these creamy mashed potatoes with rich gravy, providing a smooth counterpoint.
Expert Technical FAQ
Can I cook this in a slow cooker instead?
You can, but you will lose some depth of flavor. Slow cookers don’t allow for much evaporation, so the gravy won’t be as concentrated or thick. If you use a slow cooker, you must still sear the meat in a separate pan first. Use about 25% less broth than the recipe calls for to account for the lack of evaporation.
Why is my beef still tough after three hours?
If the beef is still tough, it almost always means it needs more time. People often panic and think they’ve overcooked it, but with chuck roast, toughness usually indicates the collagen hasn’t finished melting. Give it another 30 minutes at a very low simmer, and you’ll likely find it suddenly becomes tender.
What is the best substitute for red wine?
If you prefer not to use wine, simply replace it with an equal amount of beef broth. To mimic the acidity and complexity that wine provides, add one tablespoon of balsamic vinegar or a splash of pomegranate juice to the pot when you add the broth. This provides the necessary “high notes” to the flavor profile.
Do I have to peel the baby potatoes?
Yes, for this specific recipe, peeling is recommended. While potato skins are nutritious, they act as a waterproof barrier. Peeling the baby potatoes allows them to act like little sponges, soaking up the beef fat and savory broth. This results in a much more flavorful potato that integrates perfectly into the stew.
Beef Stew
Course: Main CourseCuisine: AmericanDifficulty: medium6
servings20
minutes3
hours485
kcal180
MinutesThis recipe focuses on breaking down connective tissue through a specific slow-simmering process. Featuring large chunks of beef chuck, whole baby potatoes, and a unique fresh mint garnish, it delivers a rich and savory gravy with a bright finish.
Ingredients
3 pounds beef chuck roast, cut into large 2.5-inch chunks
2 tablespoons vegetable oil
1 pound small baby yellow potatoes, peeled
3 large carrots, cut into 2-inch thick batons
1 large yellow onion, diced
4 cloves garlic, minced
4 cups low-sodium beef broth
1 cup dry red wine (optional, or substitute with more broth)
2 tablespoons tomato paste
1 tablespoon Worcestershire sauce
2 bay leaves
1 teaspoon dried thyme
Salt and black pepper to taste
1/2 cup fresh mint leaves, torn, for garnish
Directions
- The Sear: Pat the beef chunks completely dry with paper towels. Season generously with salt and pepper. Heat oil in a large heavy-bottomed Dutch oven over medium-high heat. Sear the meat in batches to avoid crowding. Brown each side deeply (about 4 minutes per side) until a dark crust forms. Remove meat and set aside.
- The Aromatics: Lower the heat to medium. Add the onions and carrots to the pot. Cook for 5 minutes, using a wooden spoon to scrape up the brown bits (fond) from the bottom. Add garlic and tomato paste, stirring constantly for 2 minutes until the paste darkens.
- The Deglaze: Pour in the red wine (if using) or 1 cup of the broth. Scrape the bottom of the pot thoroughly to release all flavor. Add the remaining broth and Worcestershire sauce.
- The Braise: Return the beef and any accumulated juices to the pot. Add bay leaves and thyme. Bring the liquid to a very gentle simmer, then immediately turn the heat to the lowest setting. Cover with a tight-fitting lid.
- Slow Cook: Simmer on low for 2.5 hours. Maintaining a low temperature is critical; the liquid should barely bubble. This prevents the muscle fibers from seizing and becoming rubbery.
- The Vegetables: After 2.5 hours, add the whole peeled baby potatoes. Ensure they are submerged in the liquid. Cover and continue to simmer for another 45 to 60 minutes.
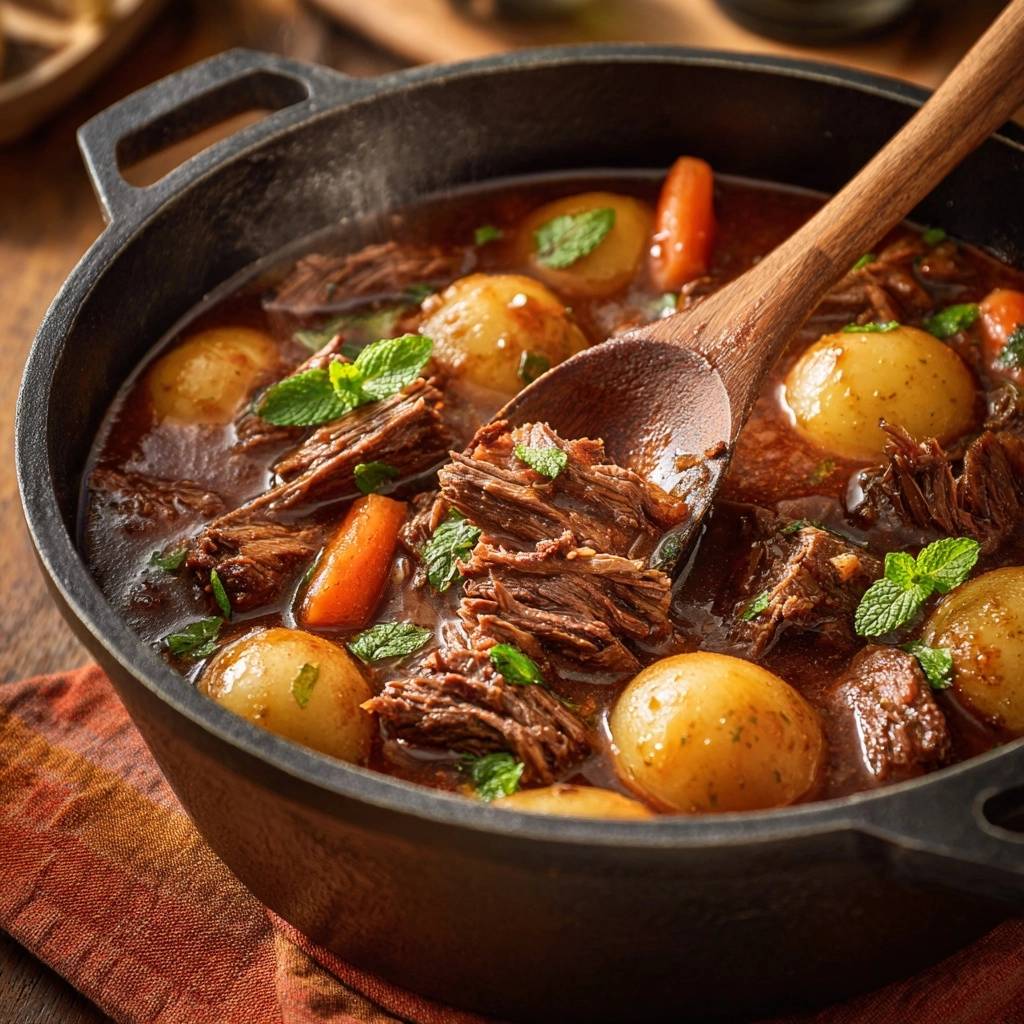
- The Finish: The stew is ready when the beef can be easily shredded with a spoon (as seen in the image) and the potatoes are fork-tender. Remove the bay leaves.
- Garnish: Just before serving, top the pot generously with fresh torn mint leaves. The mint provides a bright, aromatic contrast to the deep, slow-cooked flavors of the beef.
Notes
- Maintaining a very low temperature is critical to prevent muscle fibers from becoming rubbery. The fresh mint garnish is essential for cutting through the richness of the gravy.


