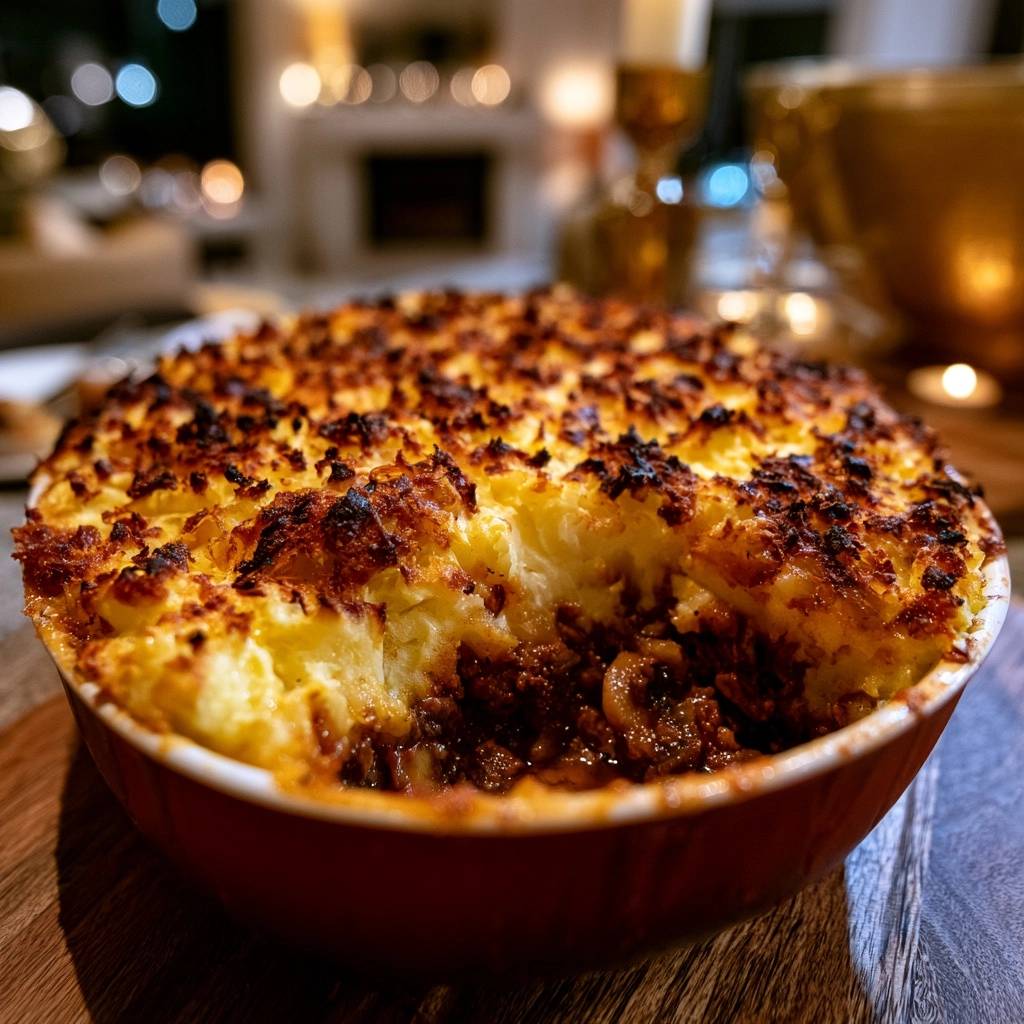
There is a specific kind of heartbreak that happens when you scoop into a Shepherd’s Pie only to find a watery, gray puddle at the bottom. Instead of a cohesive meal, you get mashed potatoes swimming in a thin soup. It’s a common tragedy in home kitchens, but it’s entirely avoidable with the right structural approach.
The secret to a world-class pie lies in moisture control and starch stability. By treating the meat base like a thick ragu and the potato topping like a savory meringue, you create distinct layers that hold their shape. This recipe focuses on a “seal and char” method that ensures every bite is rich, thick, and structurally sound.
Expertise in this dish comes down to one counter-intuitive step: drying your potatoes twice. Most cooks just drain them and mash, but letting them steam-dry in a hot pot removes the hidden water that usually thins out your topping. This simple trick ensures your potato peaks stay high and crispy rather than sinking into the meat.
The Anatomy of a Non-Soggy Meat Base
The “Anti-Soggy” philosophy starts with the Maillard reaction. When you brown your ground lamb or beef, you aren’t just looking for a color change; you want a deep, dark caramelization on the meat. This creates a crust that locks in flavor and provides a textured foundation for the gravy to cling to.
Furthermore, you must be ruthless about draining excess fat. While fat carries flavor, too much of it will emulsify with the beef broth and create a greasy, broken sauce. Leaving exactly one tablespoon of fat in the pan provides just enough richness to toast the flour without making the base feel heavy or slick.
Selecting the Right Protein for Depth
Traditional Shepherd’s Pie uses ground lamb, which offers a gamey, earthy depth that stands up well to heavy herbs like thyme. However, if you prefer a milder flavor, ground beef is a perfectly acceptable substitute, technically turning the dish into a “Cottage Pie.”
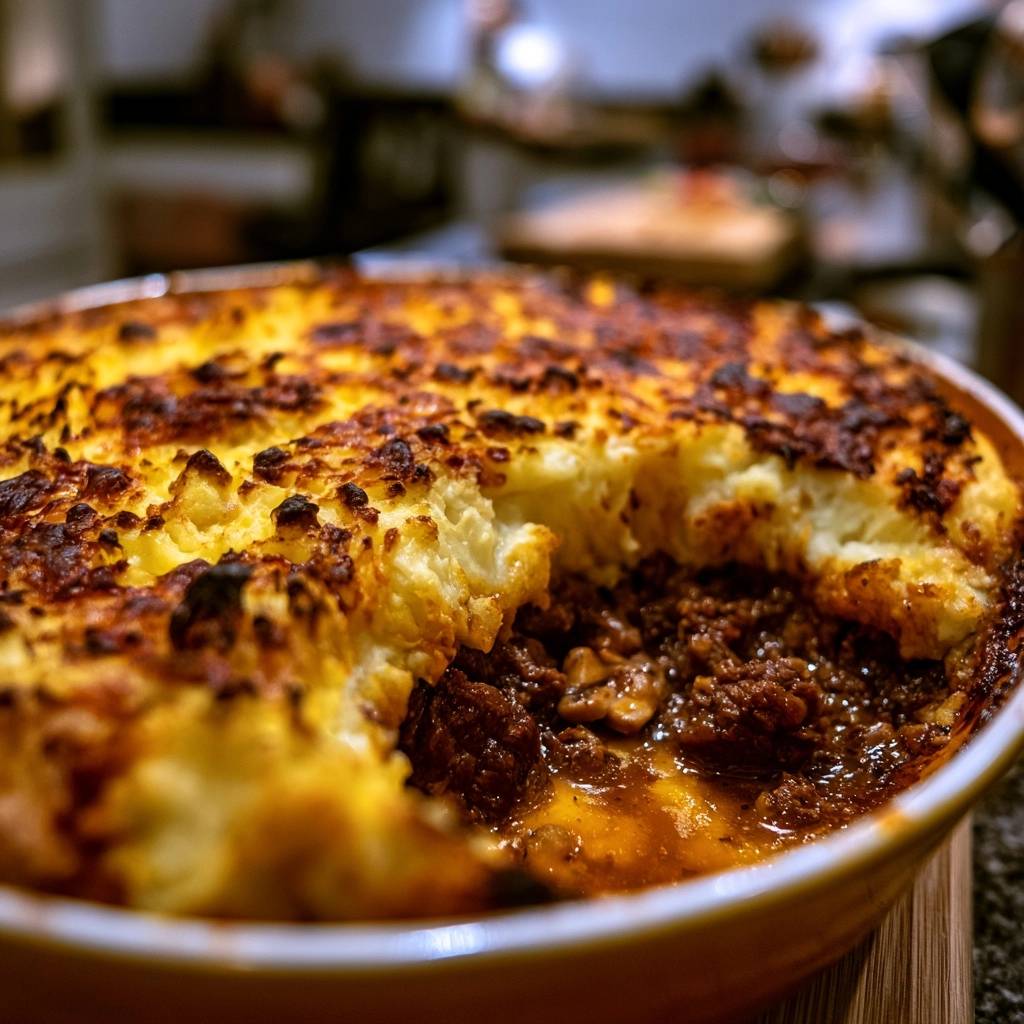
Regardless of the animal, aim for an 80/20 or 85/15 lean-to-fat ratio. If the meat is too lean, the base becomes crumbly and dry; if it’s too fatty, the gravy will struggle to thicken. The goal is a succulent, moist meat layer that stays together on the fork.
The Role of Aromatics and Tomato Paste
To build a complex flavor profile, you need to master the “Pincé” technique. This involves stirring the tomato paste into the browned meat and aromatics and cooking it until it shifts from bright red to a dark brick hue. This process removes the raw metallic acidity and replaces it with a concentrated, savory umami.
In addition to the paste, finely diced carrots and onions act as the backbone of the dish. As they sauté, their natural sugars release, providing a subtle sweetness that balances the salty broth and earthy thyme. These vegetables should be soft enough to melt into the sauce, adding body without being chunky.
Essential Components for the Ultimate Savory Shepherd’s Pie
Every ingredient in this pie serves a functional purpose beyond just flavor. For instance, we use smoked paprika not for heat, but to add a “charred” aromatic quality that mimics a wood-fired oven. This small addition makes the entire dish taste more rustic and deeply developed.
When it comes to the liquid, Worcestershire sauce is your secret weapon. It provides a fermented, salty kick that brightens the heavy meat. Always use a high-quality beef broth rather than water to ensure the gravy has enough protein and minerals to feel “silky” rather than just wet.
Starch Selection: Why Yukon Golds Win
While many recipes call for Russet potatoes, Yukon Golds are the superior choice for a stable Shepherd’s Pie. Their naturally waxy yet creamy texture means they require less added liquid to become smooth. This inherent “buttery” quality allows the mash to remain stiff enough to support its own weight.
When you mix these potatoes with heavy cream and egg yolks, they create a rich, custard-like consistency. Unlike Russets, which can become grainy or mealy when reheated, Yukon Golds stay velvety and hold their shape even after a second trip through the oven.
The Thickening Power of Flour and Broth
Instead of using a cornstarch slurry at the end, we sprinkle flour directly over the meat and vegetables. This creates a roux-like thickening agent using the residual meat fats. As the beef broth hits the pan, the flour hydrates and creates a glossy, stable gravy that won’t separate during the baking process.
Therefore, the slow reduction of the broth is vital. You want the liquid to simmer down until it looks like a thick coat on the back of a spoon. If the sauce is too thin before it goes into the oven, the weight of the potatoes will force the liquid to the surface, creating that dreaded soggy bottom.
Step-by-Step: Building the Savory Foundation
Start by browning your meat in a hot skillet until it’s deeply seared. Once you’ve drained the fat and softened your vegetables, the 12-15 minute simmer time is where the magic happens. This isn’t just about cooking the carrots; it’s about reducing the volume of the liquid to concentrate the flavors.
Watch the pan closely as the broth bubbles away. You are looking for the moment the sauce stops looking like “soup” and starts looking like “gravy.” When you can drag a spoon across the bottom of the pan and see a clear trail for a second, the foundation is ready for the oven.
Techniques for the Perfect Potato Crust
The potato topping isn’t just a lid; it’s a structural component that needs to be light yet firm. If the potatoes are too heavy, they will sink into the meat. If they are too wet, they will weep moisture into the gravy. Achieving the perfect crust requires a balance of temperature and technique.
By focusing on the “dry-mash” method, you ensure that the fats from the butter and cream are absorbed by the starch rather than sitting on top. This creates a cohesive topping that browns evenly and develops a beautiful, crackly exterior while remaining fluffy underneath.
The Steam-Dry Method for Fluffy Mash
After boiling your Yukon Golds, drain them thoroughly in a colander. However, don’t mash them yet. Return the empty, hot pot to the stove over low heat and dump the potatoes back in. Shake the pan for about two minutes to let the residual heat evaporate any clinging water.
You will see a white, starchy film start to form on the bottom of the pot. This is a good sign! It means the potatoes are truly dry. Removing this excess moisture is the single most important step in preventing a “weeping” pie where water separates from the mash during the final bake.
Egg Yolks and Sharp Cheddar Chemistry
Stirring egg yolks into the slightly cooled mash is a professional chef’s trick for stability. The yolks act as a binder, helping the potatoes “set” in the oven like a savory custard. They also provide the fats necessary to achieve a deep, golden-brown color that butter alone can’t produce.
In addition to the yolks, sharp cheddar cheese adds a punch of acidity and salt. As the cheese melts, the proteins create a structural “lift” within the mash. This allows you to create those iconic high peaks that won’t collapse under the heat of the broiler.
Achieving the Iconic Charred Peak Texture
Once you’ve spread the potatoes over the meat, put down the spatula and grab a fork. Use the tines to aggressively “rough up” the surface. You want to create as many ridges, valleys, and jagged edges as possible. This increases the surface area significantly, leading to more points for the Maillard reaction to occur.
Bake the pie at 400°F to heat everything through, but the real transformation happens during the last five minutes. Switch your oven to the broiler setting and watch like a hawk. Those thin, jagged potato ridges will catch the heat and turn dark brown and crispy, providing a crunchy contrast to the soft meat below.
Troubleshooting Common Casserole Failures
If your pie turns out greasy, it’s almost always because the meat wasn’t drained well enough after browning. You can fix this next time by using a slotted spoon to transfer the meat to a paper-towel-lined plate before starting the vegetables. If the pie is bland, remember that potatoes absorb a massive amount of salt; always season your mash more than you think you need to.
For a runny base, the culprit is usually impatience during the simmering stage. If you find your meat layer is too liquidy before topping, simply simmer it for another five minutes uncovered. The goal is a thick, jammy consistency that can support the weight of the potato layer without shifting.
Make-Ahead Strategies and Storage Logistics
Shepherd’s Pie is a fantastic candidate for meal prep. You can assemble the entire dish up to 24 hours in advance and keep it covered in the refrigerator. When you’re ready to eat, just add about 10 minutes to the baking time to ensure the cold center reaches a safe and delicious temperature.
To reheat leftovers, avoid the microwave if possible, as it can make the potatoes rubbery. Instead, place a portion in a small oven-safe dish, cover with foil, and bake at 350°F until hot. This preserves the texture of the meat and keeps the potato topping from becoming soggy.
Freezing for Long-Term Meal Prep
If you want to freeze the pie, let the meat and potato layers cool completely to room temperature first. This prevents steam from being trapped under the plastic wrap, which causes freezer burn. Use a double-wrap method with plastic wrap followed by a heavy layer of aluminum foil.
You can bake this dish directly from the freezer, which is a lifesaver on busy weeknights. Simply remove the plastic wrap, replace the foil, and bake at 375°F for about 60 minutes. Remove the foil for the last 15 minutes to let the cheese and potato peaks crisp up and brown.
Side Dishes to Balance the Richness
Because this pie is incredibly rich and savory, you want side dishes that offer a bright, acidic contrast. A simple arugula salad tossed with a sharp lemon vinaigrette is the perfect partner. The peppery greens and citrus cut right through the heavy cream and lamb fat.
Alternatively, honey-glazed roasted root vegetables like parsnips or beets can complement the sweetness of the carrots in the pie. If you want something green, steamed broccoli with a squeeze of fresh lime juice provides a clean, crunchy element that keeps the meal from feeling too heavy.
The Importance of the Resting Period
The hardest part of this recipe is waiting 15 minutes after it comes out of the oven. However, this resting period is non-negotiable for the thermodynamics of the dish. During this time, the starches in the potatoes and the gelatin in the meat sauce begin to “set” as the temperature drops slightly.
If you cut into the pie immediately, the layers will slide apart and the gravy will run. By waiting, you allow the flavors to meld and the structure to solidify. This results in a clean, professional-looking slice where the meat and potatoes remain distinct and beautiful on the plate.
How do I store leftovers and can I freeze this pie?
Store any leftovers in an airtight container in the refrigerator for up to 3 to 4 days. For longer storage, Shepherd’s Pie freezes beautifully. Ensure the pie is completely cool before wrapping it tightly in plastic wrap and then foil. It will stay fresh in the freezer for up to 3 months. To reheat, bake from frozen at 375°F for about an hour, or thaw overnight in the fridge and bake for 30 minutes.
Why is my Shepherd’s Pie runny at the bottom?
A runny base usually happens for two reasons: not reducing the broth enough or not draining the meat fat. To fix this, ensure you simmer the meat mixture uncovered until the liquid has thickened into a heavy gravy that coats the meat. Additionally, always use the “steam-dry” method for your potatoes to prevent them from releasing excess water into the meat layer during baking.
Can I use a different type of potato or a different thickener?
While Yukon Golds are recommended for their creamy texture, you can use Russets if you prefer a fluffier, more “mashed” topping. If you need a gluten-free thickener, substitute the all-purpose flour with a 1:1 gluten-free flour blend or use a tablespoon of tomato paste extra to help bind the sauce. Avoid cornstarch if possible, as it can give the gravy a translucent, jelly-like appearance that doesn’t suit this rustic dish.
What is the best way to get a crispy top without burning the meat?
The secret is the “Fork Method” combined with a high-heat finish. By creating deep ridges with a fork, you increase the surface area of the potatoes. Baking at 400°F heats the center, while a quick 3-5 minute blast under the broiler at the very end chars the thin potato peaks. This gives you a crunchy texture while the meat layer stays moist and protected underneath the potato blanket.
Can I substitute the beef broth or Worcestershire sauce?
If you don’t have beef broth, a rich vegetable broth or even a bouillon cube dissolved in water will work. If you are out of Worcestershire sauce, you can use a teaspoon of soy sauce mixed with a drop of lemon juice to mimic that salty, fermented tang. These substitutions will maintain the savory “umami” profile that makes the pie so satisfying.
Ultimate Savory Shepherd’s Pie
Course: Main CourseCuisine: BritishDifficulty: easy6
servings20
minutes45
minutes65
Minutes510
kcalBritish
Ingredients
1.5 lbs ground lamb (traditional) or beef
2 lbs Yukon Gold potatoes, peeled and cubed
1 large onion, finely diced
2 carrots, small diced
2 cloves garlic, minced
2 tablespoons tomato paste
1 tablespoon all-purpose flour
1 cup beef broth
1 tablespoon Worcestershire sauce
1 teaspoon dried thyme
1/2 teaspoon smoked paprika
4 tablespoons butter
1/2 cup heavy cream
2 egg yolks (for the golden crust and stability)
1 cup shredded sharp cheddar cheese
Salt and black pepper to taste
Directions
- Boil the potatoes in salted water until tender, about 15 minutes. Drain thoroughly and return to the hot pot over low heat for 2 minutes, shaking the pan to steam off all excess moisture. This ensures the topping stays fluffy and doesn’t sink.
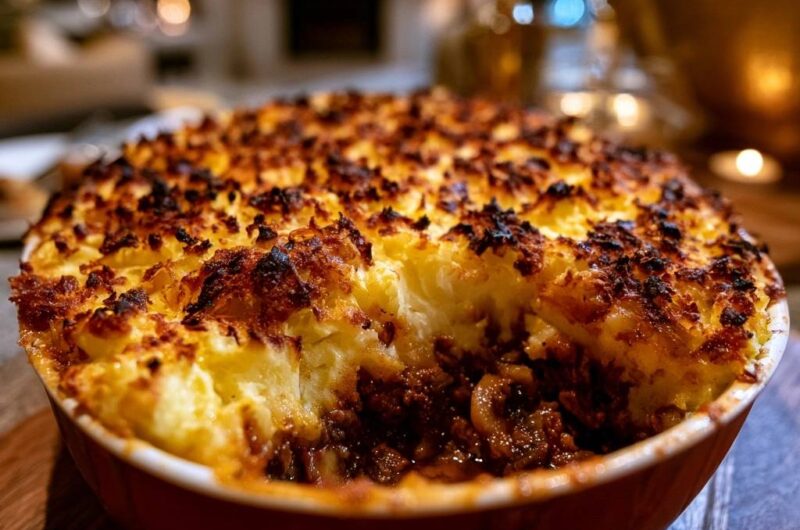
- Mash the potatoes with butter and heavy cream until smooth. Once slightly cooled, stir in the egg yolks and shredded cheese. The egg yolks are the secret to the deep golden-brown peaks shown in the image.
- In a large skillet, brown the meat over medium-high heat until deeply caramelized. Drain off all but one tablespoon of fat.
- Add onions and carrots to the meat. Sauté until softened. Stir in garlic and tomato paste, cooking for 2 minutes until the paste turns a dark brick red.
- Sprinkle the flour over the meat and stir for 1 minute to cook out the raw taste. Gradually pour in the beef broth, Worcestershire sauce, thyme, and smoked paprika.
- Simmer the mixture uncovered for 12 to 15 minutes. The flour and reduction time will transform the liquid into a thick, dark gravy that coats the meat. It should not be runny.
- Pour the thickened meat mixture into a deep baking dish. Press it down firmly with a spoon to create a flat, even surface.
- Spread the mashed potatoes over the top. Use a fork to aggressively “rough up” the surface, creating high peaks and deep ridges. These thin edges are what create the dark, crispy charred bits seen in the photo.
- Bake at 400°F (200°C) for 25 minutes. Switch to the broiler for the final 3-5 minutes, watching closely until the peaks are dark brown and crispy. Cook until no pink remains and it reaches 160°F (71°C).
- Let the pie rest for 15 minutes before serving. This allows the gravy to set so the layers remain distinct when scooped.
Notes
- The secret to the golden peaks is the addition of egg yolks to the potatoes. Letting the pie rest for 15 minutes after baking is crucial for the layers to set properly.