
We have all been there. You are craving a bowl of rich, creamy pasta, but the homemade sauce turns into a gritty, oily mess the second it hits the pan. It is frustrating to waste good ingredients on a dish that looks nothing like the velvety photos you see online. This Cheesy Ground Beef Macaroni is the solution to those kitchen heartbreaks.
The secret to that professional-grade finish is not a fancy gadget or a secret chemical. It is all about the science of emulsification. By mastering a simple roux and controlling your heat, you can create a sauce that stays smooth and glossy from the first bite to the last. This guide is your technical masterclass in achieving that perfect, stretchy cheese pull every single time.
I’m telling you, once you see how the sauce coats every single noodle without breaking, you will never go back to the boxed stuff. The savory beef adds a hearty texture that makes this the ultimate comfort meal. Let’s dive into the techniques that will make you the hero of the dinner table tonight.
The Science of a Smooth Cheese Sauce
A perfect cheese sauce relies on a stable roux, which is just a cooked mixture of flour and fat. When you whisk flour into melted butter, the starch molecules swell and create a protective barrier. This barrier is crucial because it prevents the proteins in the cheese from clumping together when they meet the heat.
Every cheese has a “breaking point,” which is the temperature where the fats separate from the solids. If you boil your sauce after adding the cheese, you will end up with a grainy texture and a pool of oil. Keeping the heat low is a non-negotiable requirement for this recipe to ensure the emulsion stays intact.
Why Hand-Shredded Cheese Beats Pre-Packaged Blends
If you want a smooth melt, you have to ditch the bags of pre-shredded cheese. Those convenient pouches are coated in cellulose, an anti-caking agent that prevents the shreds from sticking together in the bag. Unfortunately, that same coating prevents the cheese from melting into a cohesive sauce, often resulting in a “gritty” mouthfeel.
Buying a block of sharp cheddar and shredding it yourself takes about three minutes but makes a world of difference. High-quality sharp cheddar provides the best flavor-to-melt ratio. It gives you that punchy, classic taste while still behaving beautifully in a warm sauce.
The Role of Moisture in the Perfect Cheese Pull
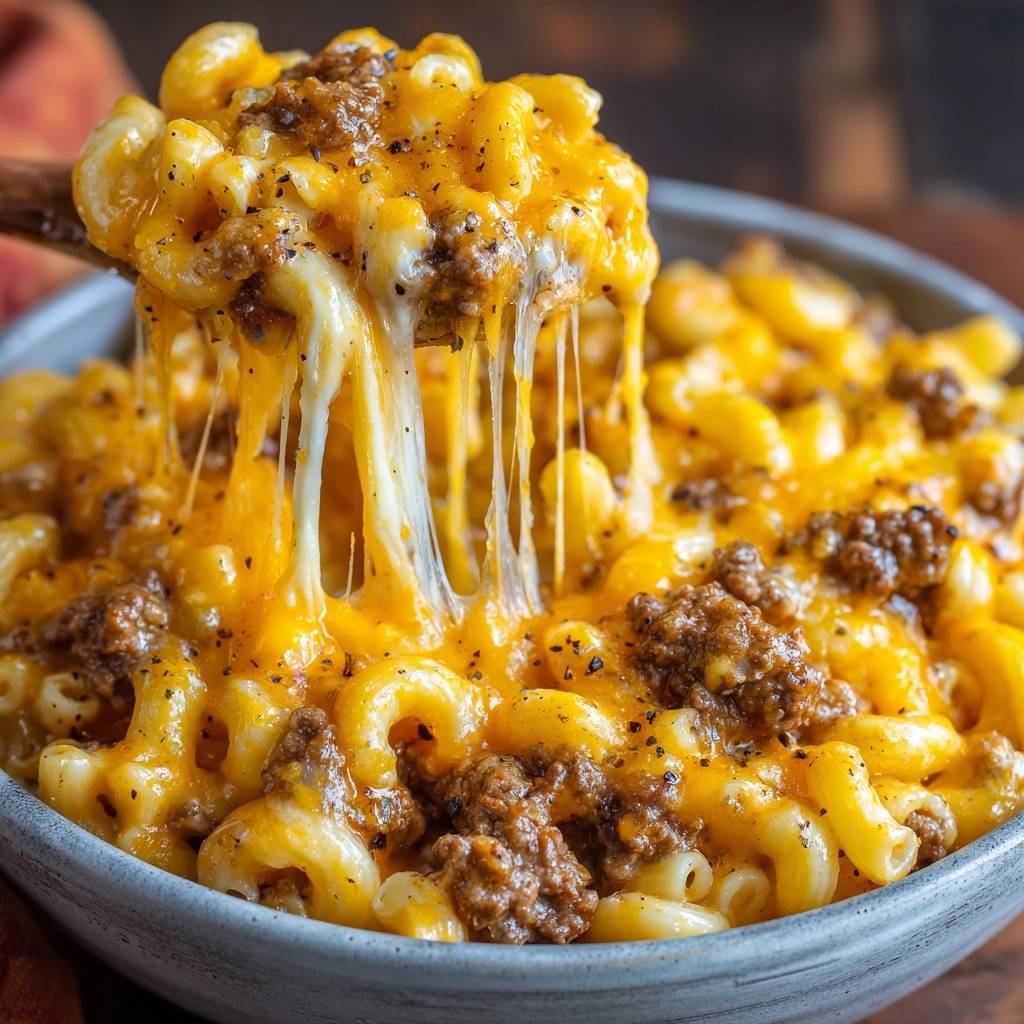
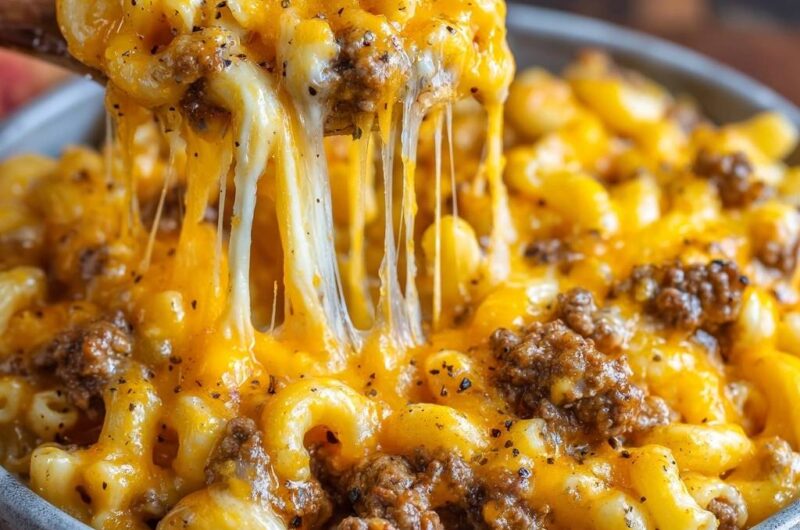
While cheddar provides the flavor, mozzarella provides the drama. Mozzarella has a much higher moisture content and a different protein structure than aged cheddar. This is why it creates those long, stretchy strings we all love.
By using a 2:1 ratio of cheddar to mozzarella, you get the best of both worlds. You maintain the sharp, savory profile of the beef while achieving the visual “stretch” that makes the dish look so appetizing. It is a balance of flavor and physics that works every time.
Essential Components for Cheesy Ground Beef Macaroni
The ingredients you choose will dictate the final texture of your meal. For the beef, I recommend using a lean ground beef, like 90/10. It provides plenty of savory flavor without leaving your pasta swimming in excess grease after browning.
Whole milk is another essential player here. The fat content in whole milk helps stabilize the sauce and provides a much richer mouthfeel than skim or 1% milk. If you use a lower-fat milk, the sauce may feel thin or lack that “velvet” quality that defines a great macaroni and cheese.
Don’t forget to use room temperature milk if possible. Adding ice-cold milk to a hot roux can cause the butter to seize, leading to a lumpy sauce. If you’re in a rush, just add the milk very slowly, whisking vigorously between each addition to keep things smooth.
Selecting the Right Pasta Shape for Maximum Sauce Adhesion
While elbow macaroni is the classic choice, the shape of your pasta actually matters for the sauce. Ridged shapes like cavatappi or pipe rigate are excellent alternatives because they have more surface area. These ridges act like “sauce pockets” that trap the cheese and beef.
The goal is to have a bit of beef and a lot of sauce in every single bite. If you use a smooth pasta like penne, the sauce might slide right off. Stick to shapes with holes or textures to ensure maximum adhesion.
The Flavor Profile: Beyond Salt and Pepper
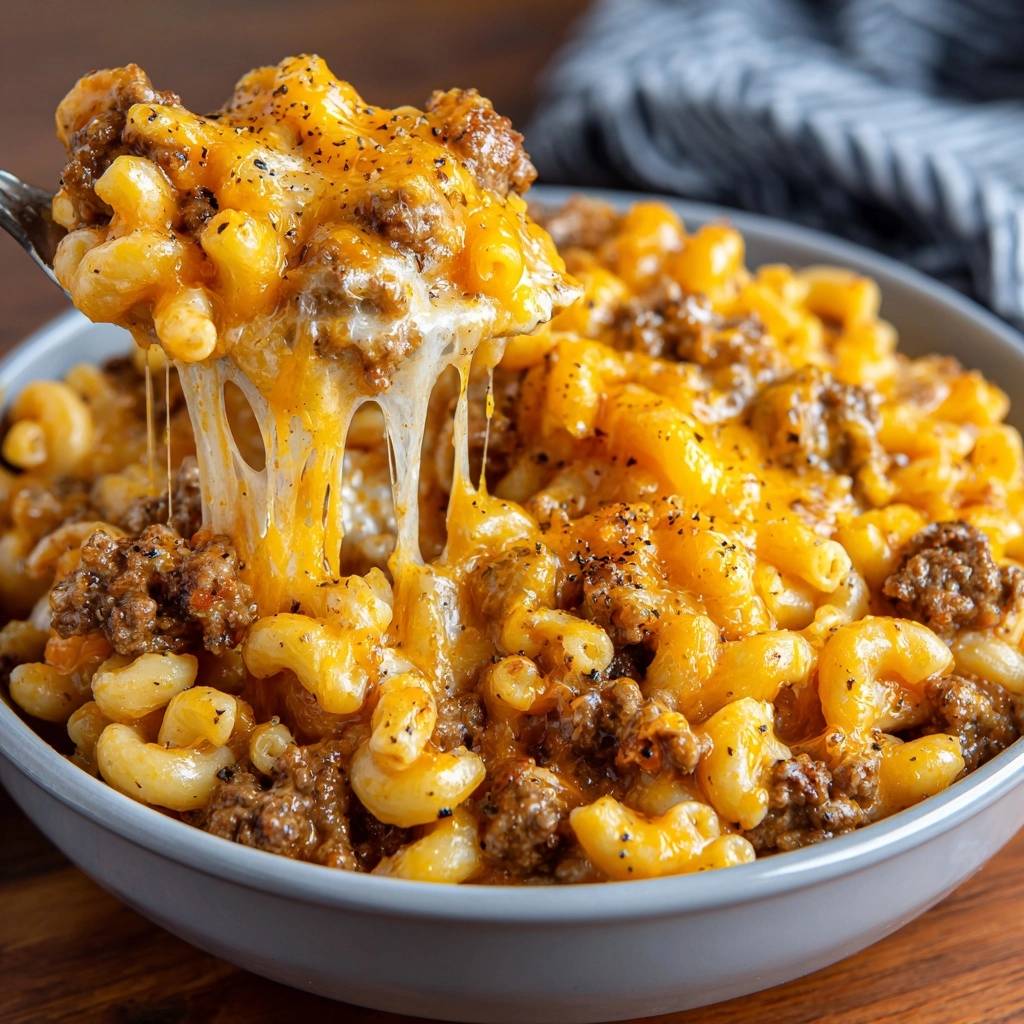
We use a “Golden Trio” of spices to elevate this dish: smoked paprika, garlic powder, and onion powder. Smoked paprika is the real MVP here. It provides a deep, golden-orange hue that mimics the look of processed cheese without any artificial dyes.
Beyond the color, the paprika adds a subtle earthiness that complements the Maillard reaction of the browned beef. Garlic and onion powders provide a consistent, savory base that permeates the entire sauce more evenly than fresh aromatics would in this specific preparation.
Step-by-Step: Building the Beef and Macaroni Base
Start by browning your beef in a large skillet. You want to let it sit for a minute before stirring so it develops a nice crust. This creates “fond,” those little brown bits on the bottom of the pan that are packed with concentrated flavor.
While the beef browns, boil your pasta in heavily salted water. Here is a pro tip: cook the noodles for exactly 2 minutes less than the package says. They will finish cooking in the cheese sauce, absorbing the flavors without becoming mushy or falling apart.
The Emulsification Phase: Crafting the Velvet Sauce
Once you melt your butter and whisk in the flour, let it cook for about two minutes. You are looking for a nutty aroma and a pale golden color. This step is vital because it cooks out the “raw” flour taste that can ruin a sauce.
Slowly stream in your milk while whisking constantly. At first, it will look like a thick paste, but keep going. Eventually, it will transform into a smooth, creamy liquid that is thick enough to coat the back of a spoon. This is your béchamel base.
If you’re enjoying how this sauce thickens, you’ll also appreciate the clingy sauce in our cheesy beef elbow mac.
The Off-Heat Method for a Silk Texture
This is the “Aha!” moment for most home cooks. Before you add a single shred of cheese, turn the heat to the lowest setting or off completely. The residual heat in the pan is more than enough to melt the cheese without shocking the proteins.
Fold the cheese in gradually, stirring in one direction. This gentle movement helps maintain the emulsion. If you dump all the cheese in at once over high heat, the sauce will break, and you will lose that silky texture we worked so hard to build.
Troubleshooting Your Cheesy Ground Beef Macaroni
If your sauce feels too thick after adding the pasta, don’t panic. Simply add a splash of milk or a tablespoon of the reserved pasta water. The starch in the pasta water can actually help bring a slightly broken sauce back together.
If the sauce looks oily, it likely got too hot. You can try to rescue it by adding a teaspoon of very cold milk and whisking rapidly off the heat. To avoid a salty disaster, always taste your sauce before adding the final teaspoon of salt, as different cheese brands have varying sodium levels.
Flavor Variations and Protein Swaps
You can easily customize this base to suit your mood. For a “Spicy Kick,” swap the mozzarella for pepper jack cheese and add a small can of diced green chiles. It adds a wonderful tang that cuts through the richness of the beef.
If you want a “Vegetable Boost,” stir in some fresh spinach or riced cauliflower at the very end. The residual heat will wilt the spinach perfectly. For a “Lean Version,” ground turkey or chicken works beautifully, though you may want to add an extra pinch of smoked paprika to deepen the flavor.
What to Serve with This Hearty Pasta
Since this dish is very rich and savory, it pairs best with something acidic or crunchy. A simple arugula salad with a lemon vinaigrette is a perfect palate cleanser. The bitterness of the greens balances the creamy cheese sauce.
Roasted broccoli with plenty of garlic is another great side. The charred edges of the broccoli provide a nice textural contrast to the soft macaroni. If you want to get fancy, top the finished pasta with some pickled red onions for a bright pop of color and flavor.
Make-Ahead, Storage, and Reheating Instructions
Leftover pasta tends to absorb the sauce as it sits in the fridge, which can leave it feeling dry the next day. To prevent this, store it in a tightly sealed airtight container for up to three days. I don’t recommend freezing this dish, as dairy-based sauces often separate and become grainy when thawed.
When you are ready to reheat, do not just pop it in the microwave as-is. Add a splash of milk to the bowl first. This extra moisture helps recreate the creamy emulsion as it heats up. Stir it halfway through the reheating process to ensure even warmth.
Expert Tips for the Best Leftovers
If you want to transform your leftovers, turn them into a “Macaroni Bake.” Place the cold pasta in a baking dish, top with a handful of breadcrumbs and a little extra cheese, and broil it for 3 minutes. You get a crispy topping that makes the dish feel brand new.
Expert Tips for Professional Results
Always use a heavy-bottomed skillet, like cast iron or stainless steel. These pans retain heat much better than thin aluminum, which helps keep your sauce at a consistent temperature while you melt the cheese. Consistency is the key to smoothness.
Never rinse your pasta after draining it. That thin layer of starch on the outside of the noodles is like “glue” for the sauce. It helps the cheese cling to the macaroni instead of sliding off to the bottom of the bowl.
Finally, give the dish a 3-minute resting period under a lid before serving. This allows the residual heat to finish melting the top layer of cheese and lets the flavors meld. It is the difference between a good meal and a great one.
Frequently Asked Questions
Can I use gluten-free flour for the roux?
Yes, you can use a gluten-free 1:1 all-purpose flour blend for the roux. However, keep in mind that some gluten-free flours thicken more aggressively than wheat flour. You may need to add an extra tablespoon or two of milk to reach the desired consistency. Avoid using single-ingredient flours like almond or coconut, as they do not contain the starch necessary to stabilize the emulsion.
Why is my cheese sauce stringy instead of smooth?
Stringy sauce usually happens when the cheese is overheated or if you are using a cheese with a very high protein-to-fat ratio. When cheese gets too hot, the proteins tighten up and squeeze out the fat, creating those tough, rubbery strings. To fix this, ensure you are using the “off-heat” method and sticking to high-moisture cheeses like the mozzarella and cheddar blend mentioned in the recipe.
Can I add vegetables directly into the sauce?
You can, but be careful with high-water vegetables like zucchini or frozen peas. If you add them directly to the sauce, they can release moisture and thin out your cheese emulsion, making it watery. It is best to sauté vegetables separately to remove their moisture before folding them into the finished macaroni and beef mixture.
How do I scale this recipe for a crowd?
This recipe scales very easily. To double it, simply double all ingredients and use a large Dutch oven instead of a skillet to ensure you have enough room to stir. When doubling the roux (6 tablespoons butter and 6 tablespoons flour), it may take an extra minute or two to cook out the raw flour taste, so use your nose to guide you.
What is the best substitute for smoked paprika?
If you don’t have smoked paprika, you can use regular sweet paprika mixed with a tiny drop of liquid smoke. If you like a bit of heat, chipotle powder is a fantastic substitute that provides both the smokiness and a spicy kick. If you just want the color without the smoke, standard paprika works perfectly fine.
Ground Beef Macaroni
Course: Main CourseCuisine: AmericanDifficulty: easy6
servings10
minutes20
minutes580
kcal30
MinutesA comforting and savory pasta dish featuring lean ground beef and elbow macaroni coated in a stable, roux-based cheese sauce made from sharp cheddar and mozzarella.
Ingredients
1 pound lean ground beef
1 pound elbow macaroni
2 cups sharp cheddar cheese, freshly shredded from a block
1 cup low-moisture mozzarella cheese, freshly shredded (for the long “cheese pull” strings)
2 ½ cups whole milk
3 tablespoons unsalted butter
3 tablespoons all-purpose flour
1 teaspoon garlic powder
1 teaspoon onion powder
1 teaspoon smoked paprika (for the deep golden color in the photo)
1/2 teaspoon black pepper, plus more for garnish
1 teaspoon salt
Directions
- Bring a large pot of salted water to a boil. Cook the macaroni for 2 minutes less than the package directions for al dente. Drain and set aside.
- While the pasta cooks, brown the ground beef in a large skillet over medium-high heat until fully cooked and slightly crispy. Drain any excess grease. Season with the garlic powder, onion powder, and a pinch of salt and pepper. Remove beef from the pan and set aside.
- In the same skillet or a clean pot, melt the butter over medium heat. Whisk in the flour and cook for 2 minutes to remove the raw flour taste, whisking constantly until it smells slightly nutty.
- Slowly whisk in the milk, a half-cup at a time, ensuring no lumps form. Add the smoked paprika, salt, and pepper. Simmer for 3 to 5 minutes, whisking frequently, until the sauce thickens enough to coat the back of a spoon.
- To solve the grainy sauce problem, turn the heat to the lowest setting or turn it off completely. This prevents the cheese proteins from tightening and “breaking” into oil. Gradually fold in 1 ½ cups of the cheddar and ½ cup of the mozzarella, stirring in one direction until completely smooth.
- Fold the cooked macaroni and the browned beef into the cheese sauce until every piece is thoroughly coated.
- Top the dish with the remaining 1 cup of combined cheese. Cover the pan with a lid for 2-3 minutes to allow the residual heat to create the thick, stretchy cheese melt shown in the image. Garnish with extra cracked black pepper and serve immediately.
Notes
- To prevent a grainy sauce, use hand-shredded cheese from a block and add it over low or no heat to ensure the proteins do not break.


