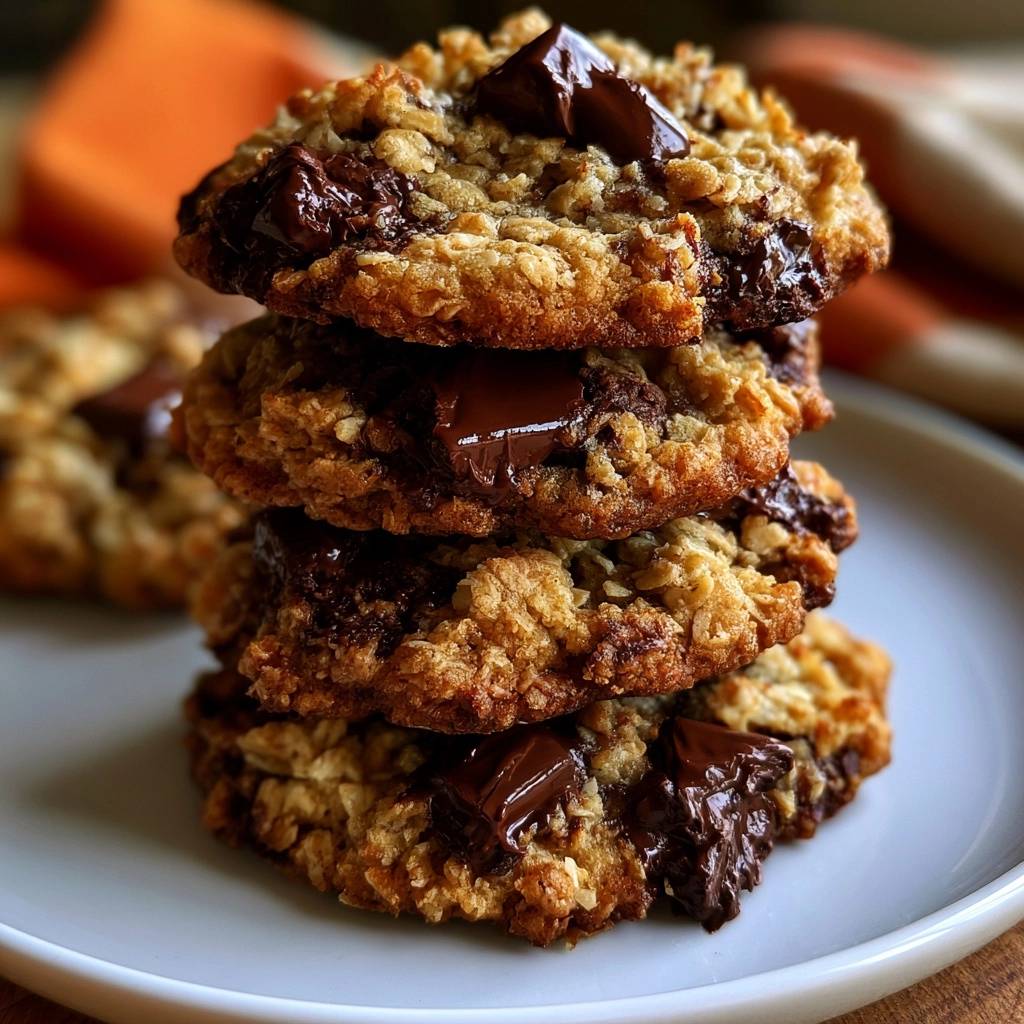
Most oatmeal cookies suffer from a tragic flaw: the soggy bottom. You know the type—they look promising in the oven but emerge greasy, limp, and thin enough to see through. This happens because the oats haven’t had time to hydrate, leaving excess moisture to steam the dough from the inside out.
However, you can achieve that elusive bakery-style contrast of a caramelized, crisp perimeter and a dense, fudgy center. The secret lies in controlling the temperature of your fats and giving the starches time to drink up the moisture. When you master this balance, the cookie becomes a sturdy vessel for massive chocolate chunks rather than a flat puddle on your baking sheet.
I’ve found that the most successful cookies rely on a specific chilling technique that transforms the dough’s chemistry. By letting the dough rest, you ensure the butter stays solid longer in the heat of the oven. This creates a thick, lofty structure that stands tall and delivers a satisfying chew in every single bite.
The Anatomy of a Thick Oatmeal Cookie
Structural integrity is everything when you’re loading a cookie with heavy dark chocolate. To build a cookie that doesn’t collapse, you must use old-fashioned rolled oats. These large, flat flakes act like the “rebar” in a concrete slab, providing a rugged scaffolding that holds the dough together.
Quick oats or instant oats are processed much further, meaning they break down too quickly and turn your dough into a mushy paste. By using three full cups of rolled oats, you create a high-volume dough that resists spreading. This volume is what gives the cookie its signature “thick” profile and hearty mouthfeel.
Furthermore, the ratio of oats to flour is intentionally high in this recipe. While the flour acts as the glue, the oats provide the bulk. This ensures that even as the chocolate melts into molten pools, the cookie maintains its shape and doesn’t become a greasy mess on your parchment paper.
Essential Components for Texture and Flavor
The temperature of your butter is the first hurdle in cookie baking. You want it “cool-to-the-touch” softened, meaning it yields to a thumbprint but still feels slightly chilly. If the butter is too warm or oily before it hits the mixer, your cookies will spread into a giant sheet before the edges have a chance to crisp up.
Sugar selection also plays a massive role in the final texture. We use a 2:1 ratio of light brown sugar to granulated sugar because brown sugar contains molasses. This adds a deep, toffee-like flavor and contributes to a soft, moist “chew” that lasts for days. The granulated sugar is there to help the edges caramelize and get that necessary crunch.
Finally, don’t settle for standard semi-sweet chips. High-quality dark chocolate bars, chopped by hand, offer a superior experience. These irregular chunks create different layers of melting, ensuring you get a hit of rich cocoa in every mouthful rather than small, waxy bumps of chocolate.
Why High-Quality Dark Chocolate Chunks Win
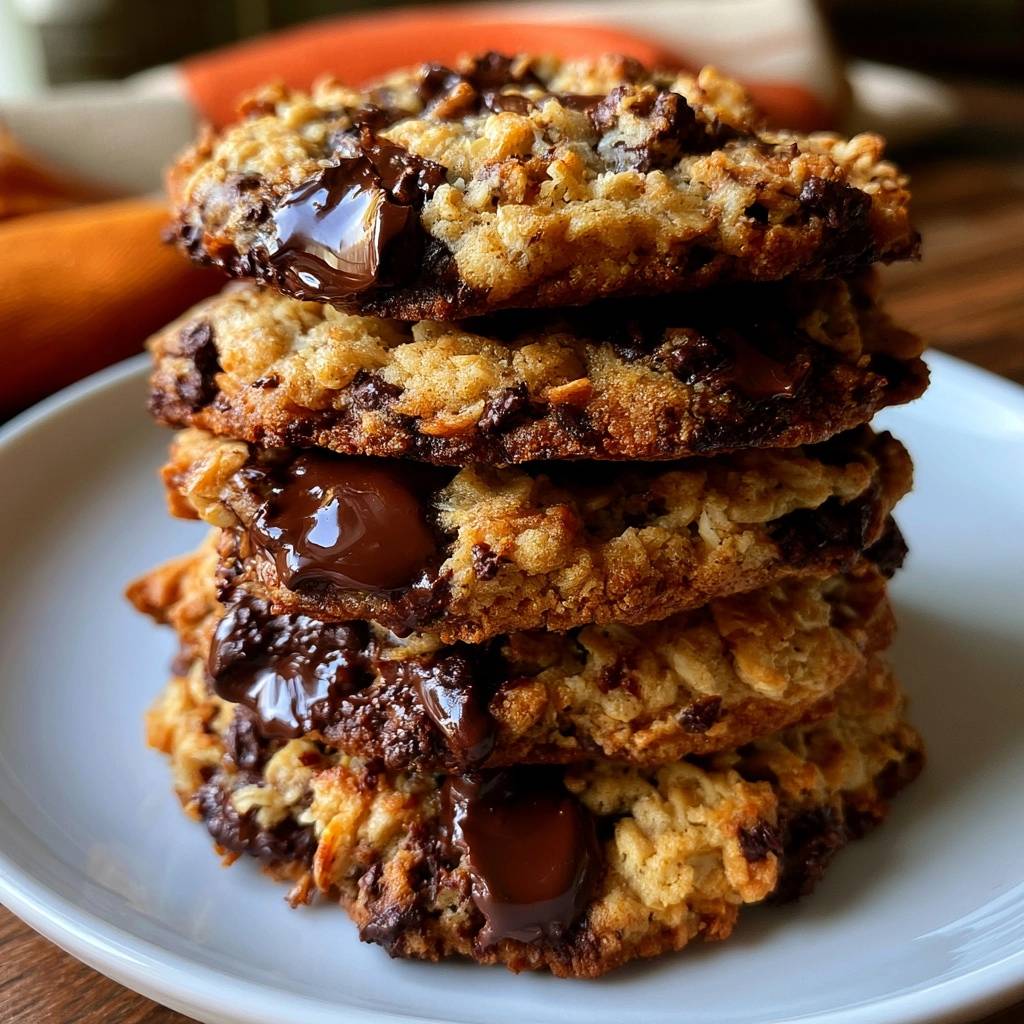
Standard chocolate chips are formulated with stabilizers to help them keep their shape under high heat. While convenient, they don’t actually melt into the dough. Chopped bar chocolate has a lower melting point and no stabilizers, allowing it to create luxurious “pools” of chocolate.
As these irregular chunks melt, they weave through the layers of oats and dough. This integration creates a marbled effect that improves the overall structural mouthfeel. Plus, the contrast between the bitter dark chocolate and the sweet, salty oat base is much more sophisticated than using basic chips.
The Role of Cinnamon and Sea Salt
Cinnamon and sea salt are the unsung heroes of this recipe. Cinnamon doesn’t make this a “spice cookie”; instead, it provides a subtle warmth that highlights the natural nuttiness of the toasted oats. It adds a layer of complexity that makes the cookie taste “expensive.”
Sea salt is even more critical because it acts as a flavor magnifier. It cuts through the richness of the butter and the intensity of the sugar, preventing the cookie from being cloyingly sweet. A little extra sprinkle of flaky salt on top right after baking makes the chocolate flavors pop even more.
The Science of the Anti-Soggy Chill
Oats are incredibly thirsty grains. If you bake the dough immediately after mixing, the moisture from the eggs and butter stays “free” in the batter. In the oven, that free moisture turns to steam, which thins out the dough and leads to that dreaded limp, soggy texture.
A minimum two-hour chill allows for starch hydration. During this time, the oats soak up the liquid, which thickens the dough significantly. This process, often called “ripening,” also deepens the flavor as the flour breaks down into simpler sugars. You’ll notice the dough feels much firmer and less sticky after its rest.
Additionally, chilling solidifies the butter. When the cold dough hits the 350°F oven, the outside of the cookie begins to set and brown before the fat in the center has a chance to melt completely. This head start is exactly how you achieve a thick, tall cookie with a crisp bottom crust.
Step-by-Step: Building the Perfect Cookie Base
Start by creaming your butter and sugars for at least three full minutes. You’re looking for a pale, fluffy texture that looks almost like frosting. This process incorporates tiny air bubbles into the fat, which provides a bit of lift without making the cookie cakey.
When you add the eggs, do it one at a time and beat just until combined. Over-beating the eggs can trap too much air, leading to a puffy, dome-shaped cookie rather than a dense, chewy one. Once the vanilla is in, you should have a smooth, emulsified base ready for the dry ingredients.
Gradually add your flour mixture on the lowest speed of your mixer. Stop the moment you see only a few streaks of white remaining. Over-mixing at this stage develops gluten, which will turn your cookies tough and bready instead of tender and soft.
Folding Techniques for Maximum Volume
Once the flour is in, put away the electric mixer and grab a sturdy spatula. You must fold in the three cups of oats and the chocolate chunks by hand. This manual process protects the integrity of the rolled oats, keeping them whole and flaky.
Using a mixer for this step can crush the oats and break the chocolate into tiny dust particles, which muddies the color of the dough. By folding gently, you maintain the volume of the dough, ensuring those “rebar” oats stay intact to support the cookie’s height during the bake.
Precision Baking for Golden Edges
The most important rule of cookie baking is the “Underbaked Center” rule. If a cookie looks fully cooked while it is still in the oven, it will be hard as a rock once it cools. You want to pull these out when the edges are a deep, caramelized golden brown, but the centers still look slightly soft.
This contrast is what creates the perfect texture. The high heat of the baking sheet will continue to cook the centers for several minutes after you pull them out of the oven. This ensures the middle stays fudgy and soft while the perimeter provides a satisfying crunch.
The Importance of Carryover Cooking
Do not move the cookies to a wire rack immediately. They need to sit on the hot baking sheet for at least 5 to 10 minutes. This is where the “Anti-Soggy” magic happens. The residual heat from the metal pan firms up the bottom crust, making it sturdy and crisp.
If you move them too soon, the soft centers might collapse or tear. This resting period allows the starches to fully set and the chocolate to begin its transition from liquid back to a soft solid. Once they feel stable, you can move them to a rack to finish cooling completely.
Troubleshooting Common Oatmeal Cookie Failures
If your cookies spread into one giant, thin sheet, the culprit is usually warm butter or skipping the chill time. If you’re sure you chilled the dough, check your oven temperature; an oven that isn’t hot enough won’t set the edges fast enough to stop the spread.
Dry, crumbly cookies usually stem from over-measuring the flour. If you scoop the flour directly with the measuring cup, you’re likely packing it down and using too much. Always fluff the flour first and spoon it into the cup, or better yet, use a kitchen scale for accuracy.
If you notice the chocolate tastes burnt, your oven might have hot spots. Dark chocolate has a high sugar content and can scorch if the bottom of the pan gets too hot. Using a heavy-duty baking sheet or a silicone mat can help insulate the cookies and provide more even heat distribution.
Greasy cookies are often the result of using margarine or cheap butter with a high water content. Stick to high-quality unsalted butter. Also, ensure you aren’t using “quick oats,” as they don’t absorb the fat as efficiently as old-fashioned rolled oats do.
Advanced Variations and Ingredient Swaps
Once you’ve mastered the base, you can customize the “add-ins” as long as you keep the total volume consistent. Swapping half of the chocolate chunks for toasted walnuts or pecans adds a wonderful earthy crunch. Just be sure to toast the nuts first to bring out their oils.
For a different flavor profile, try using white chocolate chunks and dried cranberries. However, keep in mind that white chocolate is much sweeter, so you might want to increase the sea salt slightly to balance it out. Always maintain the 3-cup oat ratio to keep that “Thick Chocolate Chunk Oatmeal Cookies” structure.
You can also experiment with the sugars. Swapping light brown sugar for dark brown sugar will result in an even chewier cookie with a more intense molasses flavor. No matter what you add, the hydration and chilling steps remain the most important parts of the process.
Storage and Make-Ahead Strategies
To keep that perfect crisp-chewy contrast, store the cooled cookies in an airtight container at room temperature. However, wait until they are completely cold before sealing the lid. If they are even slightly warm, the trapped steam will soften the crispy edges and make them soft all over.
These cookies also freeze beautifully. You can freeze the baked cookies for up to three months, but the best method is freezing the raw dough balls. Scoop the dough, chill it, and then pop the frozen balls into a freezer bag. This allows you to have a fresh, warm cookie whenever the craving hits.
When baking from frozen, you don’t even need to thaw them. Just place the frozen dough balls on your lined baking sheet and add about two minutes to the total baking time. This is the ultimate “pro move” for always having high-quality treats on hand for guests.
Expert Baking Tips for Professional Results
Invest in a heavy-duty, light-colored aluminum baking sheet. Dark pans absorb more heat and often burn the bottoms of cookies before the centers are done. A light-colored pan reflects heat more evenly, which is essential for that perfect golden-brown finish.
Use a cookie scoop to ensure every dough ball is exactly the same size. This isn’t just for looks; uniform cookies bake at the same rate. If you have small and large cookies on the same tray, the small ones will be burnt by the time the large ones are ready.
Try the “Scoot” technique for perfectly round cookies. Immediately after taking the tray out of the oven, place a circular glass or cookie cutter over a cookie and gently scoot it in a circular motion. This pulls in any stray edges and creates a perfect, professional circle while the dough is still soft.
Finally, if you want the most consistent results, weigh your ingredients in grams. A “cup” of flour can vary by as much as 20 grams depending on how it’s packed. Weighing ensures the ratio of flour to fat to oats is perfect every single time, guaranteeing that thick, chunky result you’re looking for.
How should I store these cookies to keep them from getting soft?
The best way to maintain the crisp edges is to let the cookies cool completely on a wire rack before moving them to a container. Use an airtight glass jar or plastic container and store them at room temperature for up to 5 days. If they do soften up, you can pop them in a 300°F oven for 3-4 minutes to recrisp the base. Avoid storing them in the refrigerator, as this can make the oats feel gritty and the butter fat waxy.
Why did my cookies turn out flat instead of thick?
Flat cookies are almost always caused by butter that was too warm or skipping the refrigeration step. If the butter is near its melting point when it enters the oven, it will spread before the flour and oats can set the structure. Another common culprit is using “Quick Oats” instead of “Old Fashioned Rolled Oats.” Quick oats lack the surface area and thickness needed to hold the dough upright, leading to a much thinner, spread-out cookie.
Can I use chocolate chips instead of chopped chocolate chunks?
You can certainly use chips, but the texture will be different. Chocolate chips contain stabilizers designed to help them hold their shape, so they won’t create those gooey “pools” of chocolate that characterize this recipe. If you use chips, the cookie will be a bit more uniform and less “rustic.” For the best results, I recommend a mix of both or sticking to a high-quality dark chocolate bar chopped into irregular pieces ranging from dust to half-inch chunks.
Can I substitute the all-purpose flour for a gluten-free option?
Yes, you can substitute the all-purpose flour with a high-quality 1:1 gluten-free flour blend that contains xanthan gum. Because oats are the primary structural element here, the swap works better than in many other cookie recipes. However, make sure your oats are certified gluten-free to avoid cross-contamination. The dough may require an extra 30 minutes of chilling time, as gluten-free flours often take longer to fully hydrate and absorb moisture.
What is the best way to reheat these cookies?
To get that “just out of the oven” experience, avoid the microwave, which can make the oats rubbery. Instead, use a toaster oven or a conventional oven at 300°F for about 5 minutes. This gently warms the chocolate chunks into a molten state and crisps the bottom of the cookie back up. If you are in a rush, a 10-second zap in the microwave works, but you will lose the crispness of the edges.
Can I add raisins or nuts to this recipe?
Absolutely. You can swap out up to half of the chocolate chunks for raisins, dried cranberries, toasted walnuts, or pecans. The key is to keep the total volume of “add-ins” to about 8-10 ounces. If you add too many extras, there won’t be enough dough to bind everything together, and the cookies may crumble after baking. If using raisins, soak them in warm water for 10 minutes and pat them dry before adding to ensure they stay plump and juicy during the bake.
Thick Chocolate Chunk Oatmeal Cookies
Course: DessertCuisine: AmericanDifficulty: easy18
cookies15
minutes12
minutes120
Minutes210
kcalAmerican
Ingredients
1 cup (2 sticks) unsalted butter, softened but still cool to the touch
1 cup packed light brown sugar
1/2 cup granulated sugar
2 large eggs, room temperature
1 tablespoon vanilla extract
1 1/2 cups all-purpose flour
1 teaspoon baking soda
1 teaspoon ground cinnamon
1/2 teaspoon sea salt
3 cups old-fashioned rolled oats (do not use quick oats)
8 ounces high-quality dark chocolate, chopped into large, irregular chunks
Optional: Flaky sea salt for finishing
Directions
- Cream the Base: In a large bowl or stand mixer, cream together the butter, brown sugar, and granulated sugar until light and fluffy (about 3 minutes). Add eggs one at a time, beating well after each addition, then stir in the vanilla extract.
- Combine Dry Ingredients: In a separate bowl, whisk together the flour, baking soda, cinnamon, and salt. Gradually add the dry ingredients to the wet mixture, mixing on low speed until just combined. Do not overmix.
- Fold and Hydrate: Fold in the rolled oats and the large chocolate chunks by hand using a sturdy spatula.
- The Anti-Soggy Chill: To solve the soggy bottom problem, you must chill the dough. Scoop the dough into large, rounded mounds (about 3 tablespoons each) and place them on a tray. Cover and refrigerate for at least 2 hours (or up to 24 hours). This allows the oats to fully hydrate and the fats to solidify, which prevents the cookies from spreading too thin and becoming greasy.
- Preheat: Preheat your oven to 350°F (175°C). Line a heavy-duty baking sheet with parchment paper or a silicone baking mat.
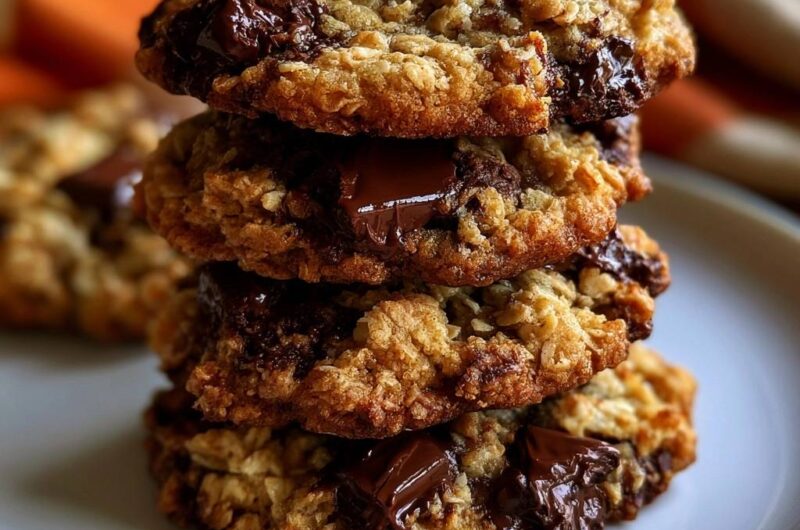
- Arrange: Space the chilled dough balls 3 inches apart on the baking sheet. For the visual “chunk” effect seen in the image, press one or two extra large pieces of chocolate into the top of each dough ball before baking. Do not flatten the dough balls.
- Bake: Bake for 10 to 12 minutes. The key to the perfect texture is removing them when the edges are deep golden brown and crispy, but the centers still look slightly soft and underbaked.
- Set the Base: Let the cookies cool on the hot baking sheet for at least 5 to 10 minutes. This “carryover cooking” is essential; it allows the bottom to crisp up and the structure to set without overcooking the top. Transfer to a wire rack to cool completely.
Notes
- Chilling the dough for at least 2 hours is mandatory to ensure the oats hydrate and the cookies do not spread too thin. Use old-fashioned rolled oats rather than quick oats for the best texture.