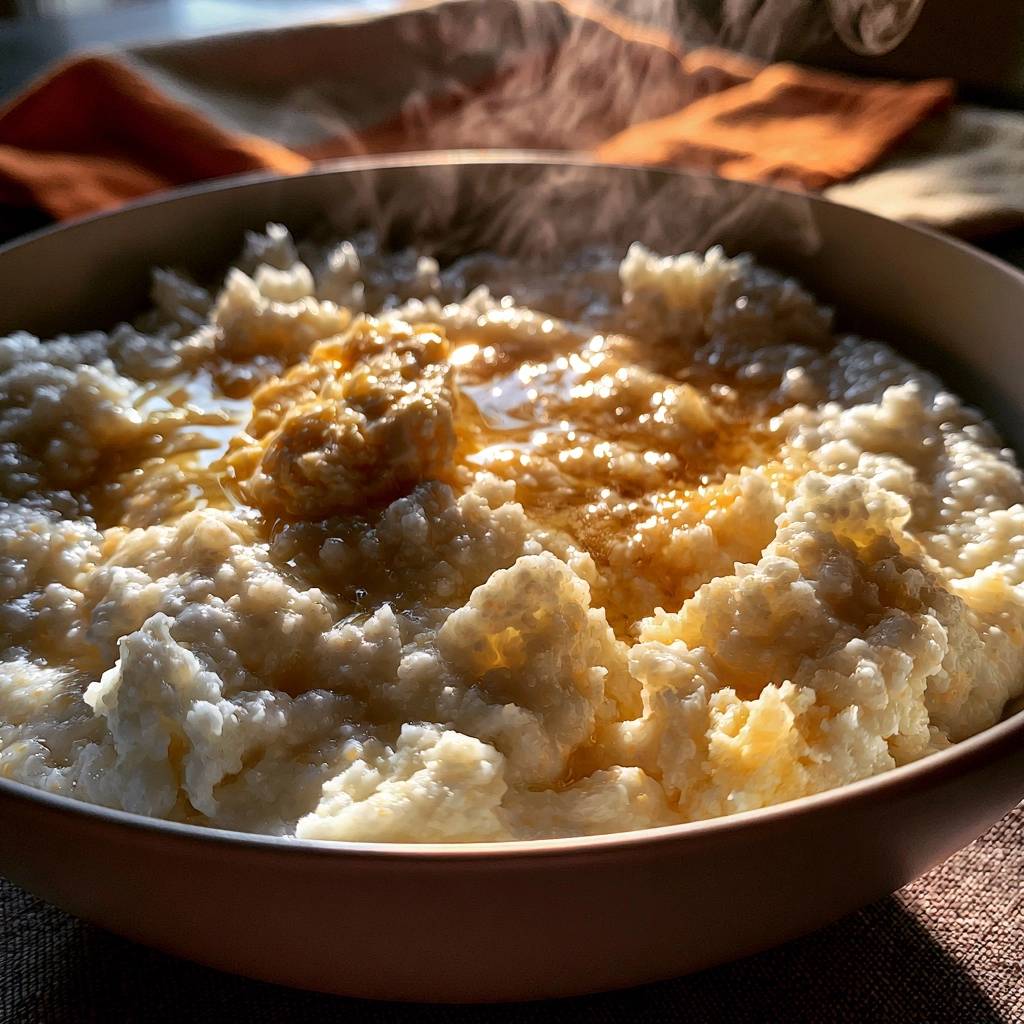
In the heart of Southern kitchens, stone-ground corn isn’t just a side dish; it’s a cultural cornerstone that demands respect and patience. While mass-produced “instant” varieties offer speed, they strip away the soul of the grain, leaving you with a bland, watery mush that lacks character. Artisanal stone-ground grains retain the corn germ and oils, providing a depth of flavor that tastes like a sun-drenched summer harvest.
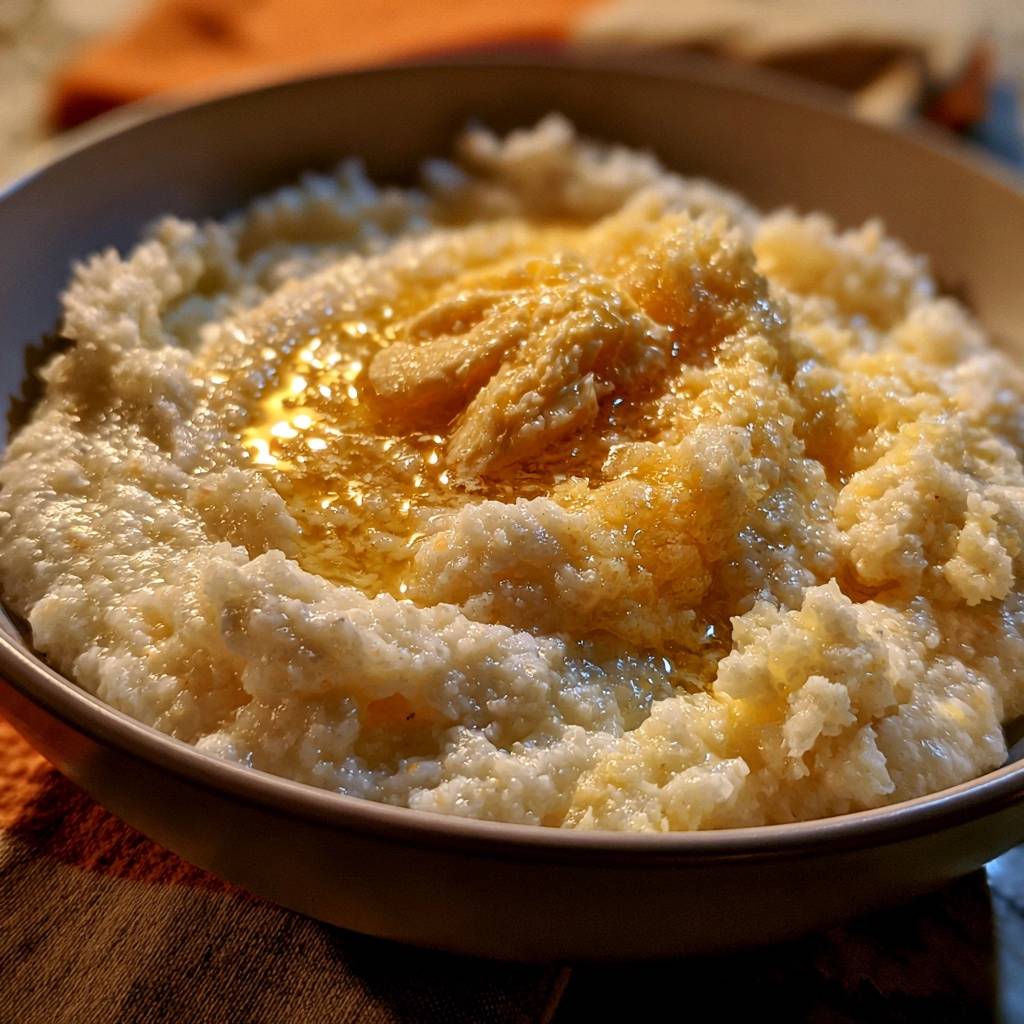
Achieving Ultra-Creamy Stone-Ground Grits is a professional culinary feat that relies on the suspension of starches rather than just dumping in fat. It’s about coaxing the natural creaminess out of the corn through a slow, 60-minute simmer that transforms hard kernels into a velvety masterpiece. When done right, these grits don’t just sit on the plate; they hold a beautiful, shimmering pool of butter in a cloud-like embrace.
The secret to this texture is the high liquid-to-corn ratio combined with a gentle, consistent heat. You’re essentially hydrating the corn cells until they swell and burst, releasing their natural thickening power into the milk and water. If you’ve ever struggled with a “wet sand” texture, it’s likely because the grains didn’t have enough time or liquid to fully surrender their starch.
The Anatomy of Stone-Ground Corn Grains
The milling process is what sets stone-ground grits apart from the gritty, flavorless boxes found on most grocery shelves. Traditional stone-grinding uses heavy millstones to crush the corn slowly, which keeps the temperature low and preserves the delicate oils in the germ. This process keeps the endosperm intact, leading to a superior flavor profile that tastes like actual corn, not just cardboard.
You’ll often find white, yellow, and even blue corn varieties at local mills or specialty shops. White corn tends to be more delicate and floral, while yellow corn offers a robust, buttery sweetness. Regardless of the color, the high starch content in these heirloom varieties is what creates the necessary viscosity for a truly luxurious mouthfeel.
Because these grains are less processed, they require a significantly longer cook time than their degerminated counterparts. You aren’t just boiling them; you’re performing a slow extraction. This patience is rewarded with a complex texture that is simultaneously smooth and substantial, providing a bite that “quick” grits simply cannot replicate.
Essential Components for Ultra-Creamy Stone-Ground Grits
Quality ingredients are the foundation of this dish, starting with the salt. I always reach for kosher salt because its larger flakes dissolve more evenly, seasoning the grain from the inside out without the harsh metallic bite of table salt. It’s the first step in building a balanced flavor profile that highlights the corn’s natural sugars.
The liquid base is equally vital, and I swear by the “golden rule” of a 50/50 water-to-milk ratio. Using 100% milk often leads to scorching at the bottom of the pot during the long simmer, while 100% water lacks the richness we’re after. Whole milk provides the necessary proteins and fats to create a silky emulsion without the risk of burning that comes with heavier creams early on.
Finally, don’t skimp on the butter. High-fat, European-style butter has less water content, which helps create a more stable emulsion when you stir it in at the end. This isn’t just about flavor; it’s about the physics of the dish. The fat coats the hydrated starches, giving the grits that signature glossy finish and a melt-in-your-mouth quality.
Selecting the Right Heirloom Grains
When shopping, look for labels that specifically say “stone-ground” or “heirloom.” These bags often feel heavier and the grains look varied in size, which is a great sign. You might even see little dark specks or bits of the hull, often called the chaff, mixed in with the white or yellow corn.
While we will remove the excess chaff during the soaking process, its presence in the bag is a hallmark of authenticity. It proves the corn hasn’t been over-processed or stripped of its nutritional value. If the grits look like uniform white sand, they probably won’t give you the artisanal results you’re looking for.
The Role of Dairy in Starch Development
The chemistry of milk proteins, specifically casein, plays a huge role in how these grits thicken. As the corn starches expand, they bond with the milk fats to create a stable structure. This interaction is what prevents the grits from becoming “weepy” or separating on the plate.
However, you’ll notice the heavy cream is reserved for the very last step. If you boil heavy cream for an hour, it can break or become too oily. By folding it in at the end, you preserve its aerated structure, which helps create those fluffy, cloud-like peaks that make the dish look as good as it tastes.
Step 1: The Cold Soak and Chaff Removal
Before you even turn on the stove, you need to perform the cold soak. Place your grits in the pot and cover them with your milk and water. Let them sit for about 10 minutes. You’ll notice little bits of the hull, or chaff, floating to the top of the liquid.
These hulls are the primary culprit behind a “gritty” or “sandy” texture because they never truly soften, no matter how long you cook them. Use a fine-mesh strainer to skim these off and discard them. This simple five-minute step is the difference between “okay” grits and the best grits of your life.
Step 2: Achieving the Perfect Initial Boil
Once you’ve skimmed the surface, add your salt and turn the heat to medium-high. This is the most critical time for manual labor. You must whisk constantly as the mixture comes to a boil. Because stone-ground grains are heavy, they want to sink to the bottom and form a thick, burnt crust.
Keep a close eye on the pot. You’ll feel the resistance change as the liquid heats up. You’re looking for the “thickening point,” where the whisk starts to leave brief trails in the liquid. As soon as you see the first big bubbles of a boil, it’s time to drop the heat immediately.
Step 3: The Low-and-Slow Simmering Phase
Now we enter the hydration cycle. Turn your burner to the lowest possible setting and cover the pot with a tight-fitting lid. This traps the steam, which is essential for softening the tough outer layer of the corn germ. A heavy-bottomed pot, like a Dutch oven, is your best friend here because it distributes heat evenly and prevents hot spots.
Over the next 45 to 60 minutes, the corn cells will slowly drink up the seasoned milk and water. This isn’t a “set it and forget it” situation, though. You need to check in on your grits every 10 minutes to give them a vigorous whisk, which helps release more starch and ensures a uniform texture throughout the pot.
Managing Moisture and Heat Levels
Sometimes your grits might get “thirsty” before they are actually tender. If you notice the mixture becoming extremely stiff or sticking to the whisk, but the grains still have a hard center when you taste them, you need more liquid. This is perfectly normal and depends on the age of the corn.
Always add supplemental liquid in small amounts, and make sure it’s warm! Adding cold milk or water to a hot pot will shock the starches and can result in a lumpy texture. Whisk in a half-cup of warm milk, put the lid back on, and keep simmering until that “crunch” is completely gone.
Step 4: The Emulsion and Aeration Technique
Once the grains are completely tender and the mixture is thick, remove the pot from the heat. This is where we transform the dish from a porridge into a luxury. Add your cold butter and the heavy cream. Now, use some muscle and stir vigorously with a wooden spoon or a sturdy whisk.
This mechanical energy forces the fat into the starch, creating a stable emulsion. You’ll actually see the grits lighten in color and increase in volume as you incorporate air. You’re looking for those soft, fluffy peaks that hold their shape but still feel incredibly light on the tongue.
Troubleshooting Common Texture Issues
If your grits feel like “wet sand,” they are under-hydrated. This usually happens if the heat was too high and the liquid evaporated before the corn could absorb it. To fix this, add more warm liquid and keep simmering. There is no shortcut for time when it comes to stone-ground corn.
On the flip side, if they are “soupy,” you likely had too much liquid or didn’t simmer them long enough. Take the lid off and turn the heat up just a tiny bit, whisking constantly until the excess moisture evaporates. If you have leftovers that have turned into a solid block in the fridge, don’t worry. Reheat them on the stove with a splash of milk, whisking constantly to break those starch bonds back down.
Equipment: Why Heavy-Bottomed Cookware Matters
The type of pot you use can make or break this recipe. Thin aluminum pans are notorious for creating hot spots that scorch the corn, leaving a bitter, burnt taste throughout the entire batch. A heavy Dutch oven or a tri-ply stainless steel pot provides the steady, indirect heat that stone-ground grains crave.
I also recommend using a long-handled silicone whisk. It allows you to get into the “corners” of the pot where grains like to hide and clump, but it won’t scrape or react with your cookware. A sturdy wooden spoon is also great for that final, vigorous emulsion step to get those peaks just right.
Flavor Profiles: Sweet vs. Savory Applications
While this specific recipe leans into the comfort of honey and maple syrup, this creamy base is incredibly versatile. The natural sweetness of the corn is a perfect canvas for savory toppings too. You could easily skip the syrup and top these with sautéed garlicky greens, roasted mushrooms, or a perfectly poached egg.
If you do go the sweet route, the maple syrup drizzle isn’t just for sugar; it highlights the toasted, nutty notes of the stone-ground corn. The way the syrup pools in the little crevices of the fluffy grits creates a beautiful contrast of flavors that feels like a warm hug in a bowl.
Optimal Serving and Plating Aesthetics
To serve these like a pro, use the “well method.” Scoop a generous portion into a warmed bowl—warming the bowl is key so the grits don’t seize up immediately. Use the back of a spoon to create a small indentation in the center. This is where your extra pat of butter will live.
Drizzle your honey or syrup directly over the butter so it overflows into the “valleys” of the grits. Serve them while they are still steaming. There is something incredibly satisfying about watching that golden butter melt into the white, creamy peaks as you take your first bite.
Expert Tips for Advanced Texture Control
If you’re short on time in the morning, try the “overnight soak” trick. Place your grits and liquid in the pot the night before and leave them in the fridge. This pre-hydrates the corn germ, which can knock 15-20 minutes off your active cook time the next day. It also results in an even creamier finish.
For an extra layer of aromatic depth, you can drop a single bay leaf into the milk while it simmers. It adds a subtle, savory note that balances the richness of the dairy without overpowering the corn. Just remember to fish it out before you do your final whisking and plating!
Frequently Asked Questions
Can I use a slow cooker for this recipe?
You can use a slow cooker, but there are trade-offs. While it’s great for a “set it and forget it” approach (usually 4 hours on low), you lose the ability to skim the chaff at the beginning. You also won’t get the same level of aeration that comes from manual whisking. If you go this route, make sure to give them a very vigorous stir before serving to incorporate some air.
Why are my grits still crunchy after 45 minutes?
Crunchy grits are usually caused by one of two things: old grains or not enough liquid. Stone-ground corn contains natural oils that can harden over time if the bag has been sitting in the pantry for a year. If your grains are fresh, you simply need to add more warm liquid and keep simmering. Some heirloom varieties are particularly stubborn and might need a full 75 minutes to soften.
How do I store and reheat leftovers?
Grits will firm up into a solid mass as they cool because the starches set. Store them in an airtight container in the fridge for up to 3 days. To reheat, place them in a small saucepan with a splash of milk or water. Use a whisk to break up the clumps over medium-low heat until they become creamy again. Avoid the microwave if possible, as it tends to heat them unevenly and can make them rubbery.
Is there a dairy-free alternative for creaminess?
If you want to skip the dairy, you can substitute the milk with a high-quality, full-fat coconut milk or a homemade cashew cream. Keep in mind that this will change the flavor profile significantly, adding a nutty or tropical undertone. Use a high-quality vegan butter substitute for the final emulsion to maintain that glossy finish.
What is the difference between grits and polenta?
The main difference lies in the type of corn used. Grits are typically made from Dent corn, which has a softer, starchier kernel that results in a creamier texture. Polenta is usually made from Flint corn, which is harder and holds a more granular, firm shape even after long cooking. While you can cook them similarly, grits are designed to be soft and cloud-like, whereas polenta is often served firm or even fried.
Ultra-Creamy Stone-Ground Grits
Course: BreakfastCuisine: AmericanDifficulty: easy4
servings10
minutes1
hour70
Minutes340
kcalAmerican
Ingredients
1 cup high-quality stone-ground white grits (not instant or quick grits)
2 cups whole milk
2 cups water
1/2 teaspoon kosher salt
4 tablespoons unsalted butter (plus extra for topping)
1/4 cup heavy cream
2 tablespoons honey or maple syrup for drizzling
Directions
- The Cold Soak & Rinse: Place the grits in a large heavy-bottomed pot and cover with the water and milk. Stir once and let sit for 5-10 minutes. Any chaff or hulls will float to the top; skim these off with a fine mesh strainer and discard. This ensures a perfectly smooth final texture.
- The Initial Boil: Add the salt. Place the pot over medium-high heat. Whisk constantly as the mixture comes to a boil to prevent the heavy stone-ground grains from clumping or sticking to the bottom.
- The Slow Simmer: As soon as the mixture boils, reduce the heat to the lowest possible setting. Cover with a tight-fitting lid. Stone-ground grits require 45 to 60 minutes to fully soften.
- Hydration Check: Every 10 minutes, uncover and whisk vigorously. If the grits become too thick before they are tender, whisk in an additional 1/2 cup of warm water or milk. The grits are done when they are thick, creamy, and the individual grains have no remaining “crunch” or hard center.
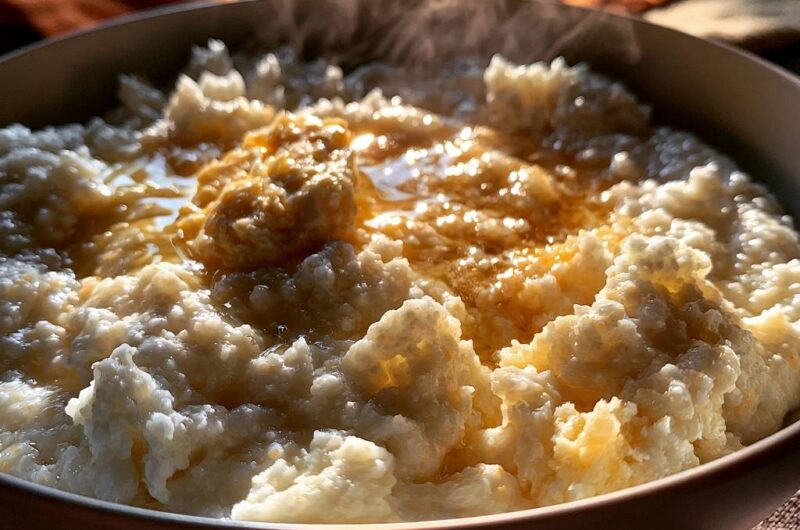
- The Emulsion: Once the grits are tender, remove from heat. Vigorously stir in the 4 tablespoons of butter and the heavy cream. This creates the aerated, fluffy peaks seen in the image.
- Plating: Scoop the grits into a warm bowl. Use the back of a spoon to create a small well in the center. Place a generous pat of butter in the center and drizzle with honey or maple syrup, allowing it to pool in the crevices of the grits. Serve immediately while steaming.
Notes
- Skimming the floating chaff during the cold soak is essential for a smooth texture. If grits thicken too quickly, whisk in extra warm milk or water.