
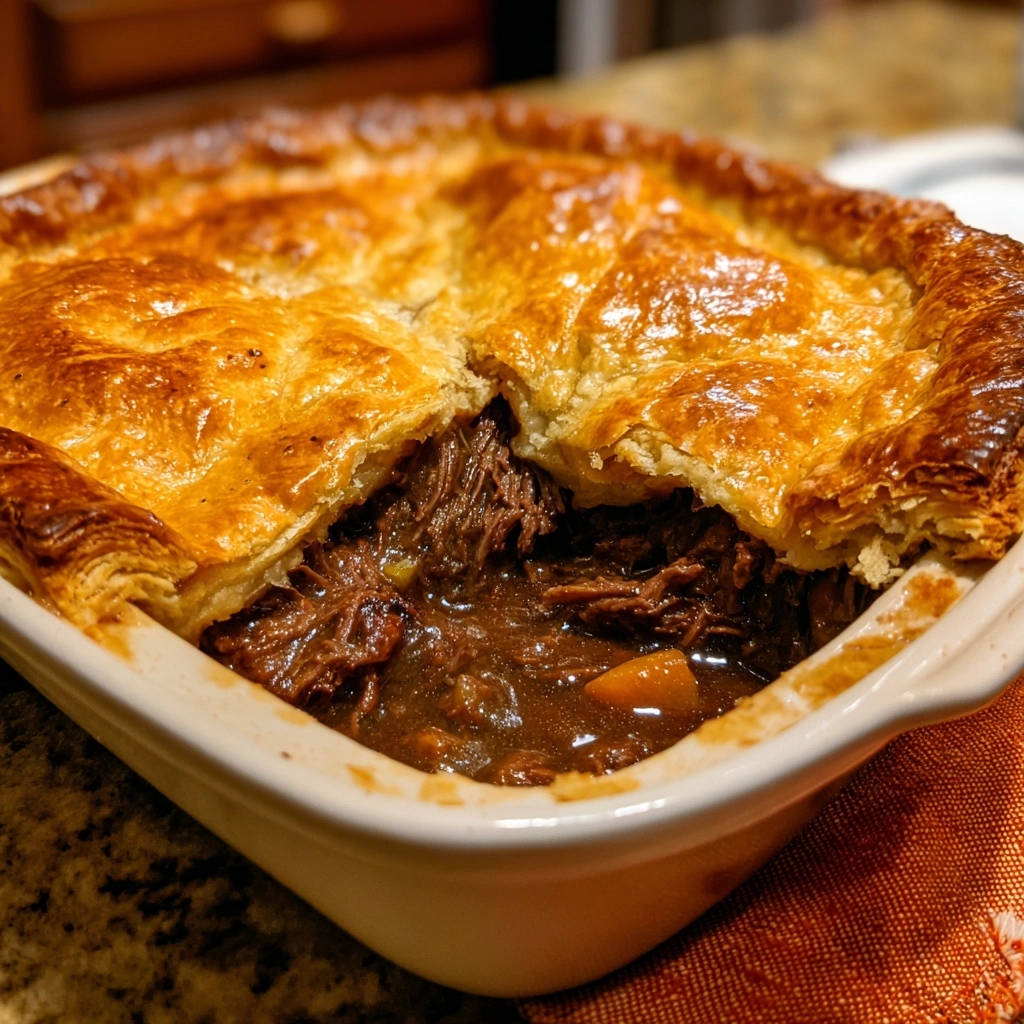
There is nothing more frustrating than cutting into a gorgeous savory pie only to find the filling has turned into a thin, watery mess, compromising the entire experience. I discovered that mastering the rich, cohesive gravy is the foundation of any great comfort meal, and this recipe for Rich Shredded Beef Pot Pie is the guaranteed solution.
For those who prefer a different base, consider this savory ground meat pie for a similar comforting experience.
This dish relies on a simple, strategic technique-the roux-that ensures a deeply flavored, perfectly thick filling that holds its shape every time, promising savory satisfaction from the first bite to the last.
The Secret Weapon: Why Our Rich Shredded Beef Pot Pie Never Has Watery Gravy
The Magic of the Shred: Texture Over Chunks
Traditional pot pies often use large cubes, which require a much thinner gravy to coat them adequately, leading to potential liquid separation. Shredded beef, however, blends seamlessly into the gravy.
The fibrous strands of the shredded meat act like a natural thickener and binder, ensuring the filling is cohesive and satisfyingly rich when you slice into the savory pie.
One Simple Trick: Guaranteeing a Perfectly Thick, Glossy Sauce
The secret lies in the strategic use of a roux-a cooked mixture of butter and flour. By whisking the flour constantly for two full minutes, we completely cook out the raw flavor while maximizing its thickening power.
This process creates a stable, glossy foundation for the broth, preventing the thin, starchy flavor that plagues lesser pot pies and locking in all the savory depth of the braising liquid.
The Ultimate Comfort Factor: Why Puff Pastry is the Perfect Lid
We choose flaky puff pastry over a traditional shortcrust for superior texture contrast. The light, airy, and buttery layers provide an immediate “wow” factor.
When baked directly over the cooled filling, puff pastry achieves incredible lift and creates a beautiful, shatteringly crisp lid that balances the density of the rich shredded beef interior.
Essential Ingredients: Building the Deep Flavor Foundation
Choosing the Perfect Cut: Why Chuck Roast Excels in Braising
We use boneless beef chuck roast because it is rich in marbling and connective tissue, which breaks down over the long, slow braise.
This breakdown results in unparalleled moisture and tenderness, making the beef effortless to shred and infusing the gravy with deep, beefy flavor.
The Dual Role of Flour: Searing and Thickening
Flour plays two vital roles in this pot pie. The initial 2 tablespoons are used to lightly coat the dried beef cubes, which helps create a magnificent, deep brown crust during searing.
The subsequent 1/4 cup of flour is reserved strictly for creating the essential roux, acting as the primary agent for thickening the savory sauce.
Aromatics and Accents: Thyme, Worcestershire, and the Mirepoix
The base of any good stew or pot pie begins with the classic mirepoix of diced carrots and onions, which soften and sweeten the dish.
Minced garlic adds aromatic depth, while the fresh thyme infuses a gentle, earthy note during the three-hour simmer.
A splash of Worcestershire sauce provides that necessary savory umami dimension, deepening the overall richness of the shredded beef filling.
Essential Kitchen Gear for Pot Pie Success
Dutch Oven or Heavy-Bottomed Pot
A heavy pot is crucial because its mass helps retain and distribute heat evenly, ensuring the meat sears beautifully and the subsequent low-heat braise remains consistent without scorching.
9×9 Inch Baking Dish or Deep Pie Dish
A deep dish is recommended to hold the substantial filling and ensure the final presentation is visually appealing, offering height and maximizing the filling-to-crust ratio.
The Best Shredding Tools
You can use two sturdy forks to easily pull the fork-tender meat apart, or for faster results, try transferring the large pieces of cooked beef into the bowl of a stand mixer and using the paddle attachment on low speed for 30 seconds.
From Sear to Simmer: Mastering the Rich Shredded Beef Pot Pie Method
Phase 1: Deep Sear and Flavor Locking
Pat the beef cubes completely dry before tossing them with the initial dose of flour, salt, and pepper. This essential step removes surface moisture, guaranteeing a deep, mahogany brown crust when searing.
Sear the beef in small batches, resisting the urge to crowd the pan, which would steam the meat instead of developing that crucial caramelized flavor layer.
Phase 2: Building the Aromatics Base
After removing the beef, reduce the heat and add the carrots and onions. Cook them until they are softened and the onions become translucent, which releases their sugars.
Add the garlic last, cooking only for one minute until intensely fragrant; cooking it longer risks bitterness.
Phase 3: The Roux Method-Our Sauce Solution
Melt the butter, then sprinkle the reserved flour directly into it, whisking vigorously for two minutes. This ensures the raw starch flavor is neutralized and the flour fully activates its thickening capacity.
Pour in the beef broth very slowly, whisking continuously to prevent any lumps from forming and to incorporate the rich, browned bits (fond) from the bottom of the pot into the liquid.
Phase 4: The Long, Slow Braise for Maximum Tenderness
Return the meat and seasonings to the pot, bring to a simmer, then immediately drop the heat to the lowest setting and cover tightly.
The three-hour minimum braise is non-negotiable; this slow, gentle heat transforms the tough chuck roast into fork-tender shreds and allows the liquid to reduce naturally into a thick, glossy gravy.
The Fluffy Finish: Assembling the Pot Pie with Puff Pastry
The Critical Chill: Preventing a Soggy Bottom
Once the meat is shredded and returned to the gravy, transfer the entire filling into your baking dish and cool it down completely.
If the filling is hot when the puff pastry is added, the steam generated will trap moisture against the crust, resulting in a dense, soggy bottom instead of the desired flaky rise.
Sealing and Venting: Perfect Puff Pastry Application
Lay the thawed pastry sheet over the cooled filling and trim any excess, leaving about a half-inch overhang.
Firmly crimp the edges against the baking dish rim using the tines of a fork to ensure a secure seal; a tight seal helps the pastry achieve maximum puff.
Cut several small slits-steam vents-into the center of the pastry to allow steam to escape during baking, preventing the crust from cracking unevenly.
The Egg Wash Difference: Achieving a Golden Glow
The final step before baking is brushing the entire surface of the pastry with a beaten egg (egg wash).
This thin layer of protein caramelizes beautifully in the oven, giving the pot pie that irresistible, deep golden brown sheen and adding a subtle richness to the crust.
Chef’s Corner: Pro Tips and Troubleshooting for Ultimate Pot Pie Perfection
Make-Ahead Mastery: Preparing the Filling in Advance
The shredded beef filling can be fully prepared up to three days in advance and stored tightly covered in the refrigerator.
Having the filling ready streamlines the dinner process, requiring only 30 minutes for the final chill, assembly, and baking.
Flavor Depth: Adjusting Seasoning After Braising
It is vital to taste the gravy immediately after shredding the beef and returning it to the sauce, before you assemble the pie.
The long simmer concentrates flavors, meaning you may need a final pinch of salt or pepper to balance the richness and elevate the final profile.
Solving Common Issues: My Pot Pie Gravy is Still Thin!
If your gravy appears too thin after the three-hour braise, remove the pot lid and simmer it gently for an extra 15 to 20 minutes uncovered.
Alternatively, mix one tablespoon of cornstarch with two tablespoons of cold water (a slurry) and whisk it into the simmering gravy until thickened.
Troubleshooting: Why Didn’t My Puff Pastry Rise?
The most common culprit is adding the pastry to a warm filling, which melts the butter before it hits the oven.
Ensure the oven is fully preheated to 400°F (high heat is needed for rapid steam creation), and confirm the pastry edges were sealed tightly to trap steam inside.
Serving Suggestions and Storage: Completing the Comfort Meal
What to Serve Alongside Rich Shredded Beef Pot Pie
Since this pot pie is incredibly rich and hearty, balance the meal with lighter sides to cut through the density.
A simple, vibrant green salad dressed with vinaigrette or roasted asparagus tossed with lemon zest makes an excellent pairing.
Reheating and Storage Guidelines
Store leftover pot pie tightly covered in the refrigerator for up to four days.
For the best results, reheat individual slices in a toaster oven or conventional oven at 350°F (175°C) until warmed through, which preserves the crust’s crispness better than microwaving.
Rich Shredded Beef Pot Pie FAQs
Can I use Shortcrust Pastry instead of Puff Pastry?
Yes, shortcrust pastry (like a standard pie dough) can be used, but the resulting texture will be denser and less airy.
If using shortcrust, you may need to adjust the bake time slightly, potentially extending it by 5 minutes to ensure the crust cooks completely through.
Is this recipe freezer-friendly?
Yes, the shredded beef filling freezes exceptionally well on its own. Cool the filling completely, then transfer it to a freezer-safe container for up to three months.
You can also freeze the assembled, unbaked pie. Wrap it tightly, and when ready to bake, brush with egg wash and bake straight from frozen, increasing the baking time by about 20 minutes.
What if I don’t have a Dutch Oven?
You can complete the searing and sautéing in a large, deep skillet, then transfer the contents to a deep oven-safe casserole dish for the 3-hour braising time.
Ensure the casserole dish has a tight-fitting lid to prevent liquid loss during the long simmer.
What is the quickest way to shred the beef?
While the two-fork method works well, the fastest technique for a large batch is using a stand mixer.
Once the beef is removed from the gravy, place it warm into the mixing bowl and use the paddle attachment on low speed for just 20 to 30 seconds until perfectly shredded.
Ready to Impress? Share Your Rich Shredded Beef Pot Pie Masterpiece!
There is immense satisfaction in serving a classic comfort dish that is executed flawlessly, especially when it solves the common pitfall of watery gravy.
This precise methodology guarantees you an incredibly flavorful, cohesive, and deeply satisfying Rich Shredded Beef Pot Pie.
Gather your ingredients, trust the slow braise, and prepare to delight your guests with this hearty, cold-weather classic. Be sure to share your golden, flaky masterpieces!
Shredded Beef Pot Pie
Course: Main CourseCuisine: AmericanDifficulty: medium6
servings25
minutes3
hours650
kcal180
minutesThis comforting pot pie solves the problem of watery fillings using a slow-cooked roux-based gravy and tender, shredded beef chuck. The long braise creates a deep, glossy sauce, topped with flaky puff pastry for the ultimate comfort meal.
Ingredients
2 pounds boneless beef chuck roast, cut into 1-inch cubes
2 tablespoons all purpose flour, plus 1/4 cup
2 teaspoons kosher salt, divided
1 teaspoon black pepper, divided
3 tablespoons olive oil or neutral cooking oil
1 large yellow onion, diced
2 medium carrots, peeled and diced
4 cloves garlic, minced
4 cups beef broth, low sodium
1 tablespoon Worcestershire sauce
1 sprig fresh thyme (or 1/2 teaspoon dried)
2 tablespoons butter
1 sheet puff pastry, thawed
1 large egg, beaten (for egg wash)
Directions
- Prepare the Meat and Sear: Pat the beef cubes completely dry. In a medium bowl, toss the meat with 2 tablespoons of flour, 1 teaspoon of salt, and 1/2 teaspoon of pepper until evenly coated. Heat the olive oil in a large Dutch oven or heavy-bottomed pot over medium high heat until shimmering. Sear the beef in batches, ensuring not to crowd the pan, until deeply browned on all sides. Remove the beef and set aside.
- Build the Aromatics: Reduce the heat to medium. Add the diced onion and carrots to the pot and cook, stirring frequently, until softened and the onion is translucent, about 5 to 7 minutes. Add the minced garlic and cook for 1 minute until fragrant.
- THE SAUCE SOLUTION (The Roux): Push the vegetables to one side of the pot. Add 2 tablespoons of butter to the empty space and let it melt. Sprinkle the remaining 1/4 cup of all purpose flour directly into the melted butter and whisk constantly for 2 minutes to create a dark roux. The flour must cook completely to avoid a raw taste and ensure maximum thickening power. Slowly pour in the beef broth, whisking constantly to incorporate the roux and scrape up any browned bits from the bottom of the pot.
- Braise the Filling: Return the seared beef to the pot. Stir in the Worcestershire sauce, the remaining salt and pepper, and the sprig of thyme. Bring the mixture to a simmer, then reduce the heat to low, cover the pot, and let it braise slowly for 3 hours, or until the beef is fork tender and easily shreds. The long, slow simmer is essential for reducing the liquid down into a thick, glossy gravy.
- Shred and Chill: Remove the beef from the sauce and shred it using two forks. Discard the thyme sprig. Taste the gravy and adjust seasoning if necessary. Return the shredded beef to the pot, stirring to combine. The filling should be very thick and cohesive. Transfer the filling to a 9×9 inch baking dish or a deep pie dish. Allow the filling to cool down completely (at least 30 minutes in the refrigerator) before adding the pastry. Note: Cooling the filling prevents steam buildup that causes a soggy bottom.
- Assemble and Bake: Preheat your oven to 400 degrees F. Lay the thawed puff pastry sheet over the cooled filling. Trim and crimp the edges firmly to seal the pie dish. Cut several small slits or steam vents into the center of the pastry. Brush the entire surface evenly with the egg wash.
- Final Bake: Bake for 20 to 25 minutes, or until the puff pastry is puffed, deeply golden brown, and the filling is bubbling hot. Let the pot pie rest for 10 minutes before serving.
Notes
- Ensure the filling is completely cool before adding the pastry to prevent a soggy bottom crust.


