
For years, I struggled with slow-cooked braises that lacked body, resulting in disappointingly thin sauces that pooled instead of clinging to the meat. This reliable recipe for Rustic French Chicken and Mushroom Braise solves that age-old kitchen dilemma with one simple, foolproof technique.
By establishing the foundation directly from the seasoned chicken, we guarantee a deeply flavorful, luxurious, and velvety sauce that is utterly reliable every single time, making this a classic, comforting dish perfect for cooler evenings.
The Secret to a Clingy, Rich Sauce (No Cornstarch Required!)
The secret to achieving this incredibly rich, clingy, and velvety sauce lies entirely in the preparation of the chicken before it ever hits the hot fat. We are establishing the roux-the sauce thickener-before the braise even begins.
For a similar approach to achieving that luxurious texture, explore this creamy chicken and mushroom fricassee.
The browned bits (or “fond”) left behind after searing contain the seasoned flour residue, which immediately combines with the added butter and oil when you start sautéing the aromatics. This creates an instantaneous, light, nutty roux base.
Understanding the Flour Dredge: A Built-In Roux
The light flour dredge applied to the chicken is not just for seasoning; it acts as a preemptive, dissolved thickening agent that releases into the cooking fat during the searing process.
This built-in roux technique ensures the entire Dutch oven braise is infused with richness and body, achieving a superior texture compared to stirring in a starch slurry at the end.
The Magic of Low and Slow Braising Temperature
Braising at 325°F is critical because it keeps the bone-in chicken thighs below the boiling point, preventing the meat from seizing up, which often results in dry chicken.
This gentle, low and slow braising ensures that tough connective tissues break down slowly into gelatin, resulting in fork-tender meat and adding yet another layer of velvety richness to the sauce.
Building the Deep Flavor Profile: What You Need for This Braise
Choosing the Right Chicken Cut (Bone-In, Skin-On Thighs)
Bone-in, skin-on chicken thighs are non-negotiable for the true flavor depth of this Rustic French Chicken and Mushroom Braise. The bone imparts deeper savory flavor, while the skin protects the meat.
Crucially, the skin renders fat into the Dutch oven, which is necessary to combine with the flour dredge to successfully form that initial sauce base.
If you must use boneless, skinless thighs, reduce the total braising time by about 20 minutes, but be aware that the resulting sauce will have slightly less richness and body.
The Aromatic Foundation: Mushrooms, Onions, and Herbs
We use Crimini or button mushrooms for their earthy, robust flavor, which stands up beautifully to the long braising time. Slicing them thickly ensures they retain texture instead of dissolving.
Whole pearl onions provide a natural, slightly sweet depth that contrasts beautifully with the savory sauce, melting tenderly into the dish after hours of cooking.
Dried thyme and the bay leaf provide the signature earthy, peppery notes essential to classic French technique, infusing the liquid as it slowly reduces.
Selecting Your Liquid Base: Quality Chicken Stock Matters
Always opt for low-sodium chicken stock. As the liquid reduces by nearly a third during the braising process, all seasoning and sodium concentrations intensify dramatically.
Starting with low-sodium stock gives you complete control over the final seasoning profile, preventing the finished dish from becoming overly salty.
Essential Tools for Your Rustic French Chicken and Mushroom Braise Adventure
The Indispensable Dutch Oven
A heavy, enameled cast iron Dutch oven is mandatory for this recipe due to its exceptional heat retention and tight-fitting lid.
This allows the vessel to move seamlessly from the high heat of the stovetop sear directly into the low heat of the oven, ensuring a consistent, even environment for the meat.
Measuring and Prep Must-Haves
Shallow Dredging Dish: A wide plate or shallow dish is necessary for easily and uniformly coating the chicken with the flour mixture without making a mess.
Sharp Knife: Essential for quickly and evenly slicing the mushrooms, ensuring they cook down consistently during the flavor-building phase.
Spatula/Wooden Spoon: Used specifically for scraping up the valuable fond from the bottom of the pot during deglazing-this flavor foundation must be integrated into the sauce.
The Method: Achieving Rustic French Chicken and Mushroom Braise Perfection
Phase 1: Preparing the Chicken and the Thickness Secret
Patting the chicken thighs bone-dry is the most overlooked step; excess moisture prevents proper searing and crust formation, which is where the flavor truly starts.
Lightly dredge the dry chicken in the seasoned flour, ensuring a thin, even coat. Vigorously shake off any excess flour, as too much will make the sauce pasty instead of beautifully velvety.
Phase 2: Achieving the Perfect Sear and Fond Layer
Preheat your Dutch oven over medium-high heat. The goal here is a deep, dark golden crust, which builds the critical fond layer on the bottom of the pot.
Never crowd the pan. Sear the chicken skin-side down for 5 to 7 minutes without moving it until a rich crust is formed; work in batches if needed. Remove and set aside, leaving the fat behind.
Phase 3: Building the Flavor Base (Fat, Veggies, and Roux Activation)
Reduce the heat before adding the butter, mushrooms, and pearl onions. Cook until the mushrooms have released their liquid and caramelized slightly, about 8-10 minutes.
Add the garlic, dried thyme, and tomato paste. Cook the tomato paste for one minute-this process, called “pince,” deepens the color and concentrates the savory notes before the liquid is added.
Phase 4: Deglazing and Setting the Sauce
Pour in the chicken stock and immediately use a wooden spoon to scrape the bottom of the pot aggressively, releasing all the accumulated fond and flour residue into the liquid.
Bring the sauce mixture to a gentle simmer. This initial heat bloom activates the flour residue, ensuring the sauce begins to thicken properly before the long braise starts.
Phase 5: The Low and Slow Braise (Oven Time)
Nestle the seared chicken back into the sauce, ensuring the liquid covers about two-thirds of the thighs. This keeps the exposed skin crisp while allowing the meat to cook gently.
Cover the Dutch oven tightly and braise at 325°F for 75 minutes, or until the meat yields completely and is fork-tender.
Phase 6: Finishing Touches and Serving Presentation
Remove the braise from the oven and let it rest, covered, for at least 10 minutes. This essential rest time allows the chicken to reabsorb juices and the sauce to set to its final, perfect consistency.
Garnish generously with fresh parsley and thyme leaves for a final bright, aromatic lift, contrasting the deep, savory character of the braise.
Elevating Your Braise: Essential Tips from Professional Kitchens
Maximizing Fond Development: Ensure you sear in batches if necessary; crowding the pot drastically lowers the temperature and steams the chicken instead of searing it, severely inhibiting the flavor foundation.
The Salt Control Trick: Only use low-sodium stock, as the reduction process concentrates all flavor and sodium. Add only small amounts of salt early, and adjust only after the braise is complete.
Preparing Pearl Onions Quickly: A quick blanch (boil for 30 seconds, then immediately plunge into an ice bath) dramatically loosens the skins, making peeling whole pearl onions far easier and faster.
Resting is Non-Negotiable: Allowing the braise to rest for at least 10 minutes helps the chicken reabsorb juices and allows the natural gelatin and flour particles in the sauce to set to their final, velvety consistency.
Troubleshooting Common Braise Issues and Quick Fixes
Help! The Sauce is Still Too Thin
If the sauce is thinner than desired after the rest period, carefully remove the chicken and vegetables and place the Dutch oven back on the stove over medium-high heat.
Reduce the sauce uncovered for 10 to 15 minutes, allowing excess liquid to evaporate until it reaches your preferred thickness. As a last resort, whisk in a cornstarch slurry (1 tsp cornstarch mixed with 1 tsp cold water) and boil for 1 minute.
My Chicken Came Out Dry or Rubbery
This usually indicates the braising temperature was too high or the cooking time was too short. Braising relies on long, slow heat to break down collagen, not just rapidly cook the meat.
Ensure your oven temperature is accurate and that the liquid covers the chicken about two-thirds of the way to maintain moisture and prevent the exposed edges from drying out.
Mushrooms Didn’t Brown, They Just Steamed
Mushrooms must be added to a sufficiently hot pan with enough residual fat after the chicken is removed. If the pan is too cool, they release all their moisture immediately, inhibiting caramelization.
Give them sufficient space and time; stir occasionally, allowing the liquid they release to evaporate completely before they start to brown and build savory depth.
From Pot to Plate: Serving Suggestions and Make-Ahead Strategy
Classic Side Dishes That Complement This Braise
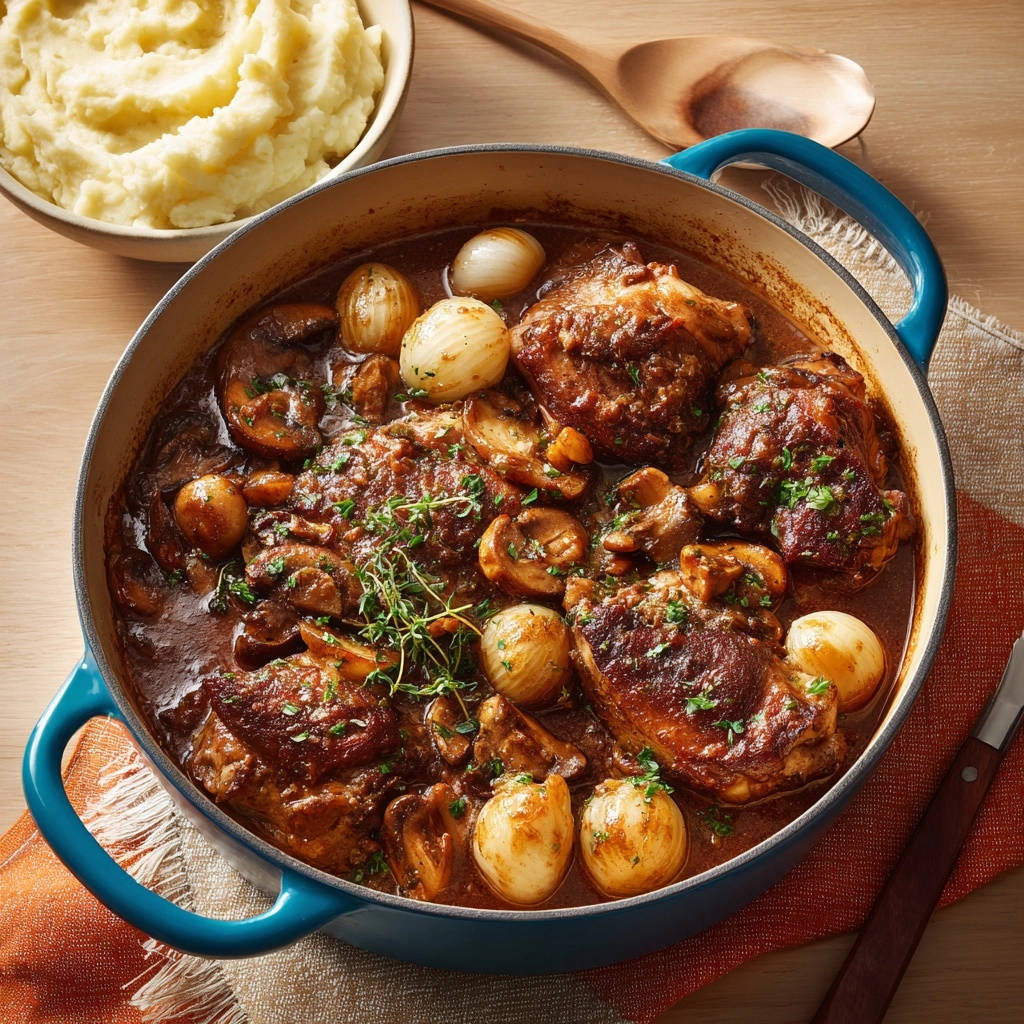
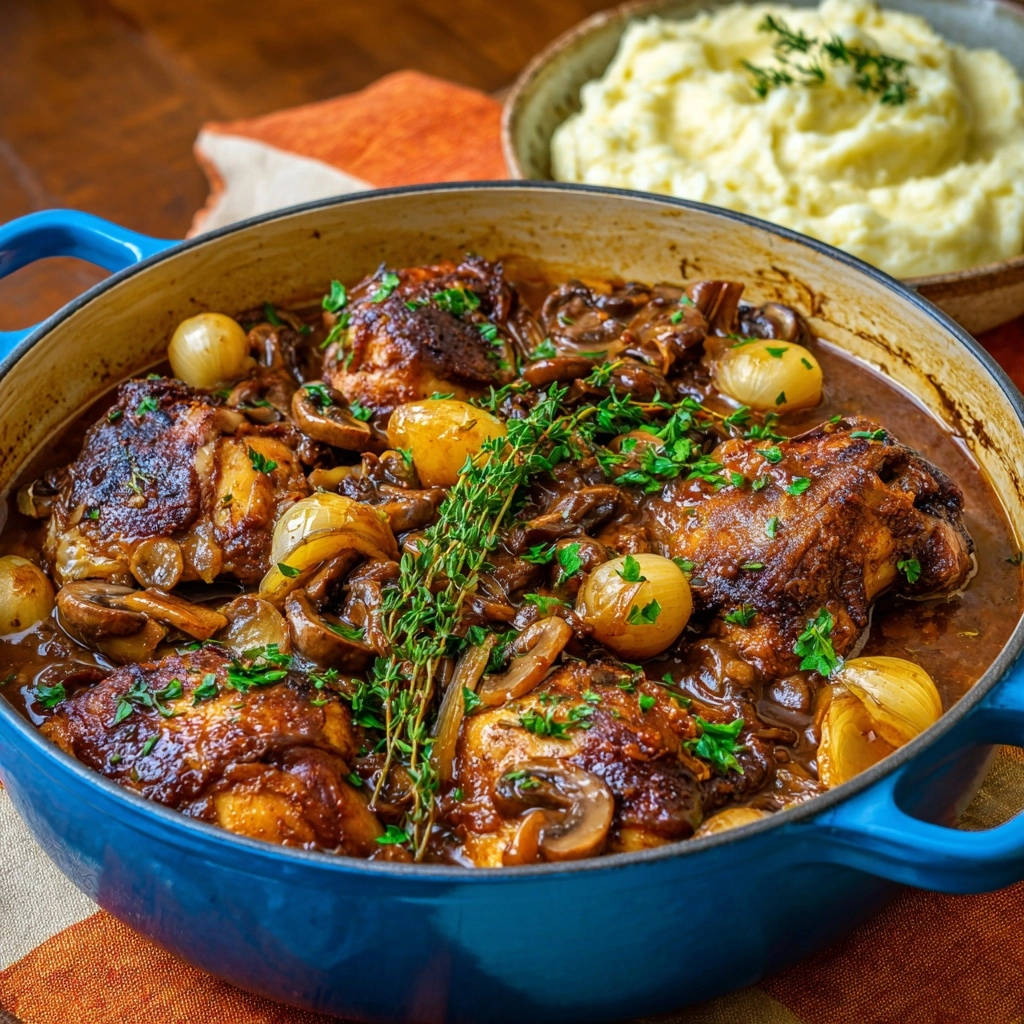
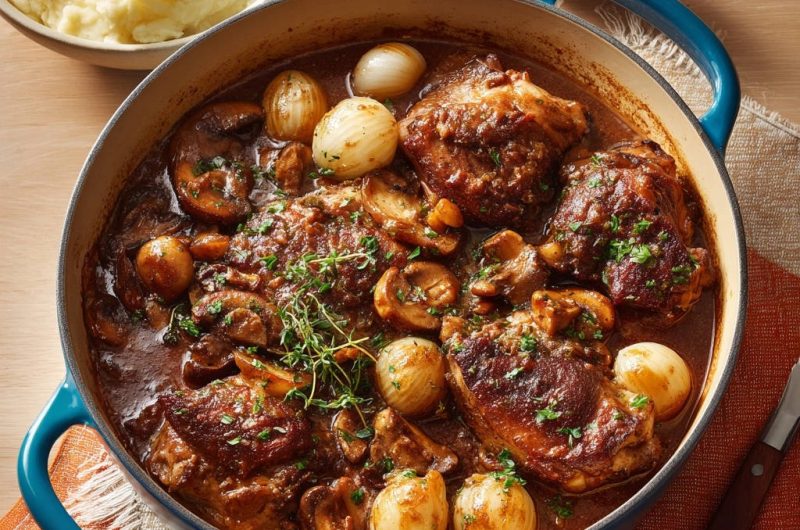
The perfect accompaniment for the rich, complex sauce of this Rustic French Chicken and Mushroom Braise is something absorbent, like creamy mashed potatoes.
Complementary Dishes
To round out your French chicken and mushroom braise, consider these complementary dishes that share similar earthy flavors or offer a bright contrast.
- For another deeply savory mushroom element, explore these roasted garlic mushrooms and onions, which bring out a wonderful caramelized sweetness.
- Complement the richness of the braise with these sweet and tangy balsamic glazed pearl onions, adding a touch of brightness.
Other superb options for soaking up the guaranteed thick sauce include soft, slow-cooked polenta, wide egg noodles tossed simply with butter, or a generous loaf of crusty French bread.
The Perfect Wine Pairing for Rustic French Flavors
For a traditional pairing, look for a light-to-medium-bodied French red, such as a Beaujolais or an earthy Burgundy Pinot Noir.
If you prefer white, choose an unoaked Chardonnay or a dry Sémillon, which have enough body and acidity to cut through the richness of the long-cooked braise.
Make-Ahead, Freezing, and Reheating
This dish is even better the next day, allowing the complex flavors to marry overnight, making it an ideal make-ahead meal. Store leftovers tightly sealed in the refrigerator for up to 3 days.
The complete braise freezes exceptionally well. Cool completely, transfer it to freezer-safe containers, and store for up to three months.
To reheat, thaw overnight and gently warm in a low oven (300°F) or on the stovetop over low heat, adding a splash of chicken stock if the sauce seems too tight after thawing.
Frequently Asked Questions About Braising and Sauce Thickness
Can I make this Rustic French Chicken and Mushroom Braise without flour?
You absolutely can omit the flour dredge, but the resulting sauce will be noticeably thinner and lighter in texture.
To compensate, you would need to rely heavily on adding a thickener at the end, such as a cornstarch slurry or a kneaded mixture of butter and flour (beurre manié).
Is a Dutch oven necessary for this recipe?
While not strictly necessary, the Dutch oven is the gold standard for achieving the best results due to its heavy, even heat distribution, which is ideal for low and slow braising.
You can use any heavy, oven-safe pot with a tight-fitting lid, but monitor the temperature closely, as thinner pots may cause the edges of the braise to scorch.
What is the difference between braising and stewing?
Both are “low and slow” cooking methods, but stewing typically uses smaller, submerged cuts of meat in a large quantity of liquid.
Braising uses larger cuts (like chicken thighs), involves less liquid (only covering two-thirds of the meat), and relies on dry, consistent oven heat after an initial sear, leading to a much more concentrated, saucier result.
Ready to Impress? Share Your Rustic French Chicken and Mushroom Braise Masterpiece!
If you’ve ever dreamed of mastering the rich flavors of classic French technique without complicated steps, this is your recipe. The built-in roux secret guarantees that perfect, velvety sauce you’ve been searching for.
For equally tender results, consider a delicious creamy chicken stew.
Now that you possess the confidence and expertise to achieve the perfect depth of flavor, gather your ingredients and prepare this warming Rustic French Chicken and Mushroom Braise tonight. Come back and share how the unforgettable aroma filled your kitchen!
Chicken and Mushroom Braise
Course: Main CourseCuisine: FrenchDifficulty: medium4
servings20
minutes1
hour650
kcal120
minutesForget thin sauces! This slow-braised chicken recipe uses a simple flour dredge secret to ensure a velvety, rich, and deeply flavored sauce. Bone-in thighs are cooked low and slow with mushrooms and pearl onions until fork-tender.
Ingredients
8 bone-in skin-on chicken thighs
1/2 cup all-purpose flour
2 teaspoons salt, divided
1 teaspoon black pepper
2 tablespoons olive oil
1 tablespoon butter
8 ounces crimini or button mushrooms, sliced thickly
1 cup peeled pearl onions, whole
4 cloves garlic, minced
1 tablespoon tomato paste
1 teaspoon dried thyme
3 cups low-sodium chicken stock
1 bay leaf
1/2 cup fresh parsley, chopped (for garnish)
Fresh thyme sprigs (for garnish)
Mashed potatoes, for serving
Directions
- Prepare the Chicken and Flour Dredge (The Thickness Secret): Pat the chicken thighs completely dry with paper towels. In a shallow dish, combine the flour, 1 teaspoon of salt, and 1/2 teaspoon of pepper. Lightly dredge the chicken pieces in the flour mixture, shaking off any excess. This light coating is the key to building a thick sauce base.
- Sear the Chicken: Preheat a large, oven-safe Dutch oven over medium-high heat. Add the olive oil. Once shimmering, place the floured chicken thighs skin-side down, ensuring not to crowd the pan (work in batches if necessary). Sear for 5 to 7 minutes until the skin is deeply golden brown and crispy. Flip the chicken and sear for 2 minutes on the other side. Remove the chicken and set aside, leaving the oil and browned bits (fond) in the pot.
- Build the Flavor Base: Reduce the heat to medium-low and add the butter to the pot. Add the sliced mushrooms and whole pearl onions. Cook for 8 to 10 minutes, stirring occasionally, until the mushrooms are softened and have released their liquid. Add the minced garlic, tomato paste, and dried thyme. Cook for 1 minute until fragrant, scraping up any browned bits from the bottom of the pot. The flour residue left in the pot from the chicken now combines with the fat and vegetables to create a light roux, ensuring your sauce will never be thin.
- Deglaze and Braise: Pour in the chicken stock and add the bay leaf, remaining 1 teaspoon of salt, and 1/2 teaspoon of pepper. Bring the liquid to a simmer, scraping the bottom of the pot well to lift any remaining fond.
- Cook Low and Slow: Return the seared chicken thighs to the pot, nestling them into the sauce and vegetables. The liquid should cover about two-thirds of the chicken. Cover the Dutch oven tightly and transfer to a preheated oven at 325 degrees F. Braise for 1 hour and 15 minutes, or until the chicken is fork-tender.
- Finish and Serve: Remove the pot from the oven. Let the braise rest for 10 minutes before serving. The sauce will naturally thicken as it cools slightly. Garnish generously with fresh parsley and fresh thyme sprigs. Serve piping hot over creamy mashed potatoes to soak up that guaranteed thick, rich sauce.
Notes
- Serve over mashed potatoes to capture all the thick sauce.


