
I spent years battling rock-hard, sticky, or disappointingly grainy caramel when making layered desserts. It wasn’t until I mastered the low-and-slow technique that I finally achieved the flawless texture required for truly spectacular Salted Caramel Chocolate Bars.
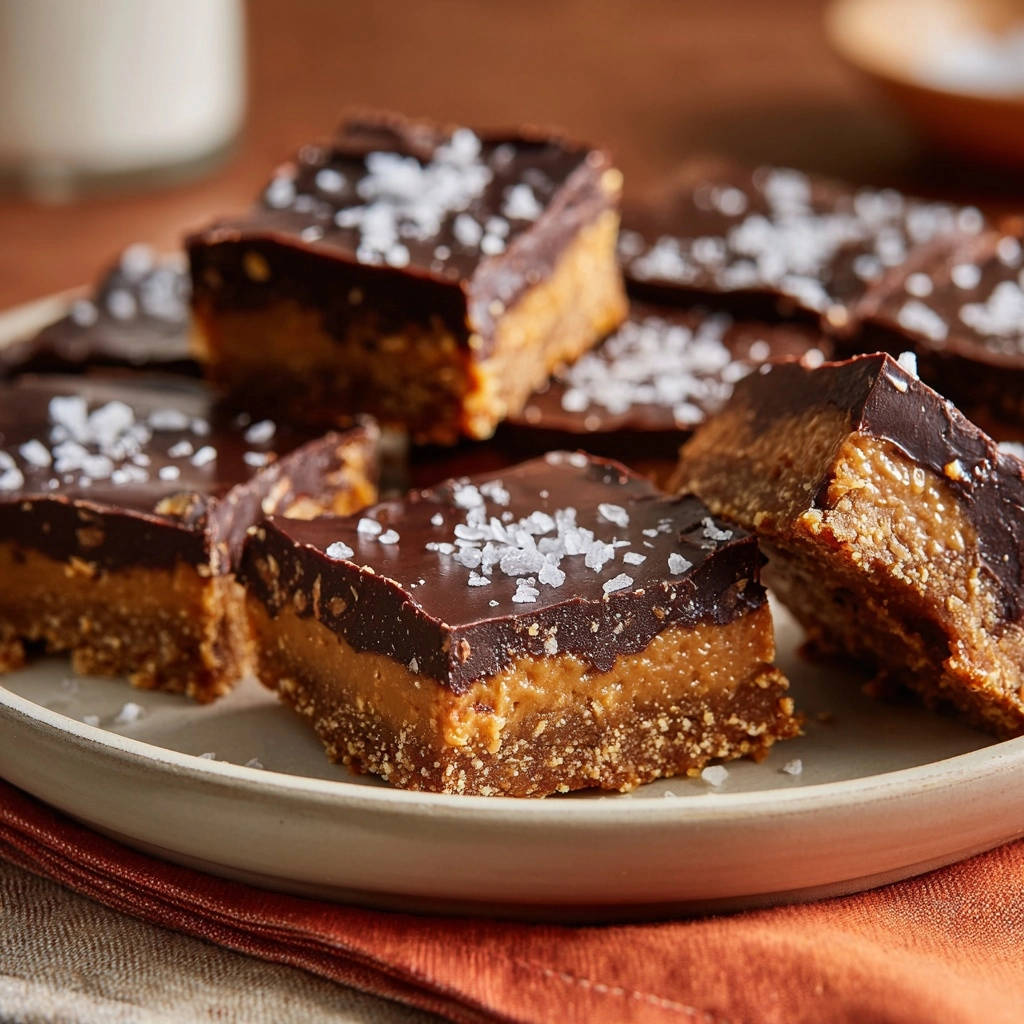
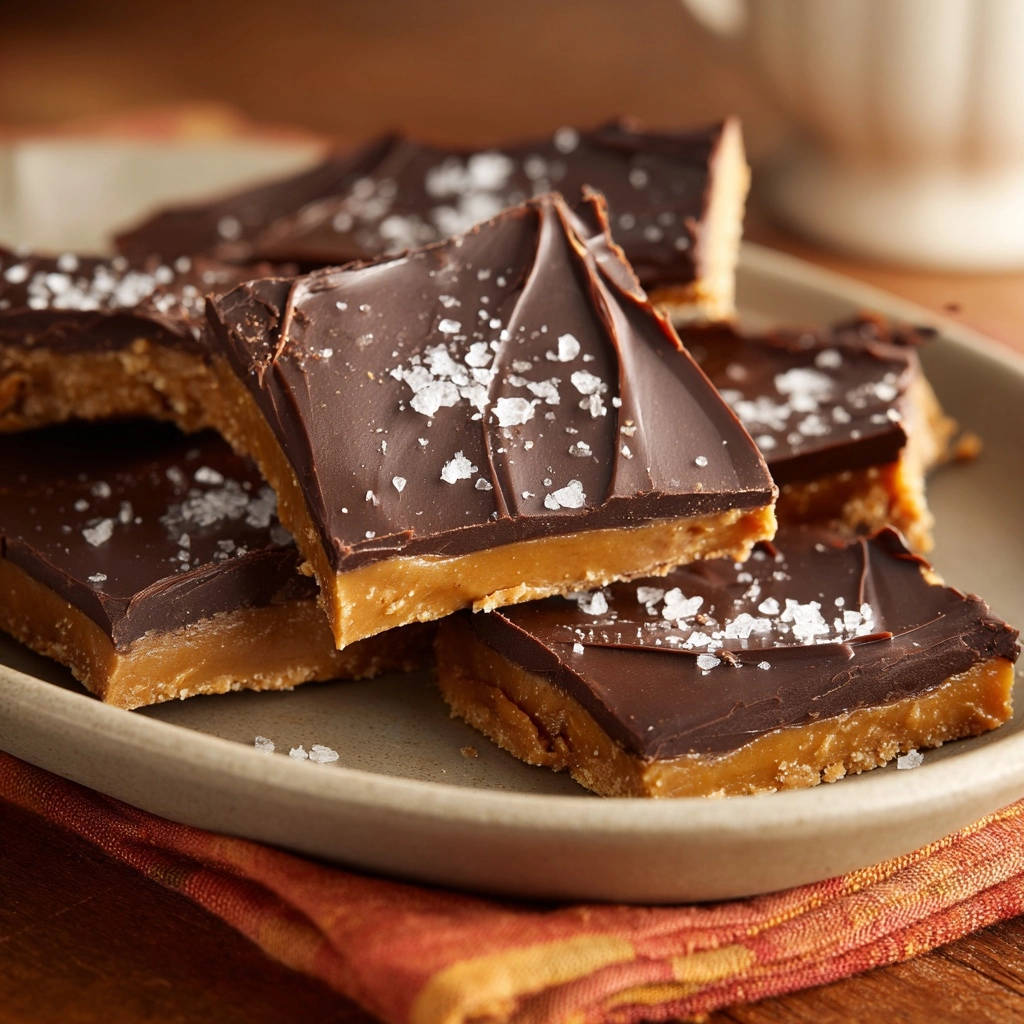
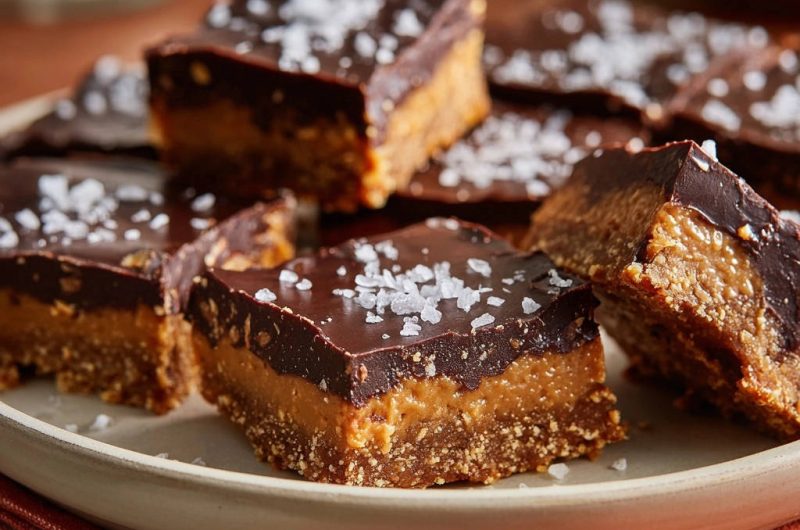
This recipe guarantees a rich, decadent, and perfectly chewy caramel filling every time, solving the biggest challenge most home bakers face. You will love the perfect balance between the tender shortbread crust, the soft caramel layer, and the crisp chocolate topping.
The Game-Changer: Why This Caramel Filling is Never Grainy
Achieving a caramel filling that is both dense and luxuriously chewy requires precision and patience, but the method itself is surprisingly simple to master.
For a similar chewiness that avoids a dense bottom, explore butterscotch blondie bars.
The secret lies in controlling sugar crystallization and careful heat distribution. We avoid a brittle texture by following a specific two-step cooking technique that locks in moisture and flavor.
Decoding the “Consistency Secret”
The first critical step is ensuring the brown sugar is fully dissolved into the melted butter before the condensed milk is introduced.
Undissolved sugar granules act as “seed crystals” that encourage the entire mixture to prematurely crystallize during cooking, leading directly to that undesirable grainy texture. Stir thoroughly until the mixture is visibly smooth and bubbling gently.
The Low-and-Slow Chewy Guarantee
Once the sweetened condensed milk is added, the heat must immediately be reduced to the absolute lowest setting possible. This prevents the caramel from scorching and allows for controlled thickening.
Constant, gentle stirring for 10 to 12 minutes is required to achieve thickness without rapid evaporation or crystallization. This essential slow cooking guarantees the soft, melt-in-your-mouth chewiness desired for these bars.
Flaky Sea Salt: More Than Just a Garnish
The final sprinkle of high-quality flaky sea salt is non-negotiable for true salted caramel chocolate bars. It provides a crucial, sharp counterpoint to the intense sweetness of the caramel and chocolate layers.
Beyond flavor balance, the delicate crunch of the flakes offers a beautiful textural contrast to the smooth, rich chocolate topping.
The Building Blocks: Key Ingredients for Unforgettable Bars
Flour Power and Butter Selection for the Shortbread Crust
Standard all-purpose flour provides the necessary, reliable structure for a sturdy base without making the dough tough.
Using high-quality butter, softened correctly, is crucial for achieving that characteristic tender, buttery shortbread texture. Ensure your butter is truly soft for optimal creaming.
Choosing the Right Dairy: Sweetened Condensed Milk
Sweetened condensed milk is the structural backbone of this chewy caramel filling; there is absolutely no suitable substitute.
Its uniquely high sugar and low water content are necessary to achieve the specific dense and chewy consistency required for these layered caramel bars.
Semi-Sweet Chocolate Chips vs. Baking Chocolate
Semi-sweet chocolate chips are specified because they contain stabilizers that help the topping set firmly and cleanly at room temperature.
If substituting with baking chocolate, ensure you still add the specified butter; this boosts the gloss and ensures the topping pours and spreads easily over the caramel.
Essential Tools for Bar Baking Success
The Crucial 8×8 Pan and Parchment Overhang
An 8×8-inch pan is essential to ensure the bars have the correct height and thickness for a beautiful, proportionate slice.
Lining the pan with parchment paper and leaving a substantial overhang is vital for clean, damage-free removal of the entire chilled slab before cutting.
Why a Heavy-Bottomed Saucepan is Non-Negotiable
Using a heavy-bottomed pot, such as thick stainless steel, is your best defense against scorching the sensitive caramel filling.
It distributes the necessary low heat evenly across the entire base, eliminating hot spots that can cause sugar crystals to burn and ruin the caramel consistency.
Mastering the Method: Step-by-Step Salted Caramel Excellence
Crafting the Golden Shortbread Base
Step 1: Prep and Preheat. Preheat your oven to 350°F and line the 8×8 pan with parchment paper, ensuring a substantial overhang on at least two sides.
Step 2: Creaming the Dough. Combine the softened butter and sugar until the mixture is truly light and fluffy. This adds crucial air that results in a more tender, less dense crust.
Step 3: Pressing and Baking. Add the flour and salt and mix only until the dough just comes together. Press the mixture firmly and evenly across the bottom of the prepared pan.
Bake for 18 to 20 minutes, or until the edges begin to turn a light golden color. Set the crust aside immediately to begin cooling.
Initiating the Caramel: The Consistency Secret
Step 4: Melting the Base. Use medium-low heat to melt the butter in your heavy-bottomed saucepan.
Step 5: Dissolve the Sugar First. Add the packed brown sugar and stir continuously until all the sugar granules have completely dissolved into the butter and the mixture is bubbling gently. This essential step prevents the eventual caramel from being grainy.
Constant Motion: Low-and-Slow Caramel Cooking
Step 6: Adding the Condensed Milk. Pour in the full 14-ounce can of sweetened condensed milk and immediately reduce the heat to the absolute lowest setting.
Step 7: The Chewy Guarantee Stir. Stir without stopping, ensuring you scrape the corners of the pan, for 10 to 12 minutes. The caramel must thicken noticeably and achieve a deep golden hue.
The visual cue for readiness is when the mixture heavily coats the back of a spoon and you can briefly see the bottom of the pan when stirring. Remove immediately from the heat when this stage is reached.
Layering, Setting, and Finishing Touches
Step 8: Finalizing the Filling. Stir in the vanilla extract and the initial 1/4 teaspoon of salt, then immediately pour the hot filling evenly over the cooled shortbread crust.
Step 9: Preparing the Topping. Combine the chocolate chips and butter, melting them gently until completely smooth and glossy-do not overheat. Pour the chocolate over the warm caramel layer.
Step 10: The Chill Factor. Sprinkle immediately with the flaky sea salt. Chill the Salted Caramel Chocolate Bars in the refrigerator for a minimum of three hours, or until the chocolate topping is firm and fully set.
Chef’s Secrets and Troubleshooting Your Caramel Concerns
Precision Cutting Tips for Clean Edges
The Hot Knife Trick: Dip a large, sharp knife into hot water and wipe it completely dry before cutting. The heat helps the blade slice cleanly through the chocolate topping and chewy caramel filling.
Cutting Temperature: Ensure the bars are completely chilled for a firm cut. For easier slicing, allow the slab to sit at room temperature for just 5-10 minutes before cutting; this slightly softens the caramel layer.
Addressing Common Texture Issues
Why Is My Caramel Hard and Brittle?
This texture is almost always due to cooking the caramel too high or too quickly. High heat causes the sugar molecules to rapidly crystallize before the mixture has time to fully condense.
Ensure you use the lowest heat setting possible and stir consistently throughout the entire process. If you notice a granular texture developing early, adding a tablespoon of cold milk can sometimes save the batch by lowering the temperature.
Why Is My Chocolate Topping Cracking?
Chocolate cracks when the temperature difference between the topping and the caramel base is too great, or if the bars are placed in an extreme cold environment.
To prevent this, allow the caramel layer to cool to almost room temperature before spreading the melted chocolate on top. Always chill the assembled bar baking slab in the refrigerator, avoiding the freezer.
Serving, Storage, and Flavor Variations
Make-Ahead Tips and Shelf Life
These salted caramel chocolate bars are excellent make-ahead desserts. Once fully set, they can be stored tightly covered in the refrigerator for up to one week.
For longer storage, they freeze beautifully for up to three months. Cut the bars first and place them in an airtight container separated by layers of parchment paper.
More Sweet Indulgences
If you enjoyed these chocolate bars, you might like these other sweet creations featuring similar flavors.
- For a crunchy, sweet treat that also highlights caramel, consider these Chocolate Peanut Caramel Corn Clusters.
- If you appreciate a soft, yielding caramel center, these Gooey Pecan Sticky Buns offer a similar delightful texture.
Flavor Twists: Bourbon, Espresso, and Extracts
For a sophisticated adult twist, substitute a teaspoon of vanilla extract with 1/2 teaspoon of high-quality bourbon or dark rum in the caramel filling before pouring.
To deepen the chocolate flavor profile, mix 1/2 teaspoon of finely ground espresso powder into the melted chocolate topping. This enhances the cocoa notes beautifully without imparting a strong coffee taste.
Common Questions About Salted Caramel Chocolate Bars
Can I Double This Recipe?
Yes, but you must use a larger 9×13 inch pan to maintain the correct layer ratio. Be aware that the caramel filling will take significantly longer to thicken in a larger volume, potentially requiring 15 to 20 minutes of constant attention.
Patience is absolutely essential; do not increase the heat just to speed up the cooking time.
What is the Best Way to Store Leftover Bars?
Store the bars in an airtight container at cool room temperature for 3-4 days for a softer, slightly gooier caramel experience.
For extended freshness, keep them chilled in the refrigerator for up to 7 days. Allowing the chilled bars to warm up slightly before serving enhances the chewiness of the caramel layer.
Can I Use Granulated Sugar Instead of Brown Sugar in the Caramel?
While technically possible, brown sugar is highly recommended because it contains molasses, which adds rich flavor, deep color, and crucial moisture content.
Using only granulated sugar increases the risk of rapid crystallization and tends to yield a much harder, more brittle caramel consistency, compromising the recipe’s guaranteed chewiness.
Now that you possess the secret to perfectly chewy, non-grainy caramel, these Salted Caramel Chocolate Bars are guaranteed to become a new favorite. They require a little patience during the stirring process, but the decadent layers and flawless texture are well worth the effort.
For a different take on a similar concept, check out these chocolate caramel cheesecake bars.
Don’t forget to take a picture of your masterpiece and share your results! Happy baking!
Salted Caramel Chocolate Bars
Course: DessertCuisine: AmericanDifficulty: medium16
bars20
minutes35
minutes350
kcal180
minutesThis recipe guarantees a rich, decadent, and perfectly chewy caramel layer every single time. Featuring a buttery shortbread crust, a thick layer of slow-cooked caramel, and a rich chocolate topping sprinkled with flaky sea salt, this classic treat is truly game-changing.
Ingredients
For the Shortbread Crust:
1 cup all-purpose flour
1/2 cup butter, softened (1 stick)
1/4 cup granulated sugar
1/4 teaspoon salt
For the Chewy Caramel Filling:
1/2 cup butter
1/2 cup light brown sugar, packed
1 (14 ounce) can sweetened condensed milk
1 teaspoon vanilla extract
1/4 teaspoon salt
For the Chocolate Topping:
1 cup semi-sweet chocolate chips
2 tablespoons butter
1/2 teaspoon flaky sea salt, for finishing
Directions
- Prepare the Crust: Preheat the oven to 350 degrees F. Line an 8×8 inch baking pan with parchment paper, leaving an overhang on two sides for easy removal. In a medium bowl, cream together the softened butter and sugar until light and fluffy. Add the flour and salt and mix until just combined and a soft dough forms. Press the dough evenly into the bottom of the prepared pan. Bake for 18 to 20 minutes, or until the edges are light golden brown. Set aside.
- Begin the Caramel (The Consistency Secret): In a heavy-bottomed saucepan, melt the butter over medium-low heat. Add the packed brown sugar and stir until the sugar is fully dissolved and the mixture is bubbling gently. This prevents graininess later.
- Cook the Caramel Filling (The Chewy Guarantee): Pour in the entire can of sweetened condensed milk. Immediately reduce the heat to the lowest setting possible. STIR CONSTANTLY for 10 to 12 minutes. The key here is low, gentle heat and constant motion. This slow cooking method allows the caramel to thicken and darken to a deep golden color without scorching or crystallizing, locking in that soft, chewy texture instead of a brittle, hard one. When the mixture is thick enough to coat the back of a spoon and you can see the bottom of the pan when stirring, remove it immediately from the heat.
- Finish the Filling: Stir in the vanilla extract and 1/4 teaspoon of salt. Pour the hot caramel evenly over the pre-baked shortbread crust. Place the pan in the refrigerator while you prepare the topping.
- Prepare the Topping: In a heatproof bowl, combine the chocolate chips and 2 tablespoons of butter. Microwave in 30 second intervals, stirring well between each, until the chocolate is smooth and fully melted. Alternatively, melt over a double boiler.
- Assemble and Set: Pour the melted chocolate evenly over the cooled caramel layer. Sprinkle immediately with the flaky sea salt. Return the bars to the refrigerator and chill for at least 3 hours, or until the chocolate topping is firm and set.
- Cut Cleanly: Once fully set, use the parchment paper overhang to lift the entire bar slab out of the pan. Using a large, sharp knife dipped in hot water and wiped dry, cut the slab into 16 even squares. Wipe the knife after every few cuts for the cleanest possible finish. Store leftovers in an airtight container at room temperature or in the refrigerator.
Notes
- Requires a minimum of 3 hours chilling time to set the caramel and chocolate properly.


