
There’s nothing quite as satisfying as the perfect bite of a homemade dessert, yet few things are as frustrating as a beautiful caramel bar with a gooey, runny center. I’ve refined this recipe for Salted Caramel Chocolate Bars over countless batches, ensuring your caramel sets impeccably every single time. Get ready to create a truly irresistible treat that holds its shape beautifully and melts in your mouth.
Salted Caramel Chocolate Bars: Your New Go-To Dessert
The Secret to Irresistibly Set Caramel
The common pitfall with homemade caramel is its tendency to remain too soft or even runny, leading to a messy bar. Our method directly addresses this by focusing on precise temperature control during the caramel-making process.
This ensures your caramel layer achieves that ideal gooey, yet firm, consistency that holds up perfectly when sliced.
Layers of Pure Bliss in Every Bite
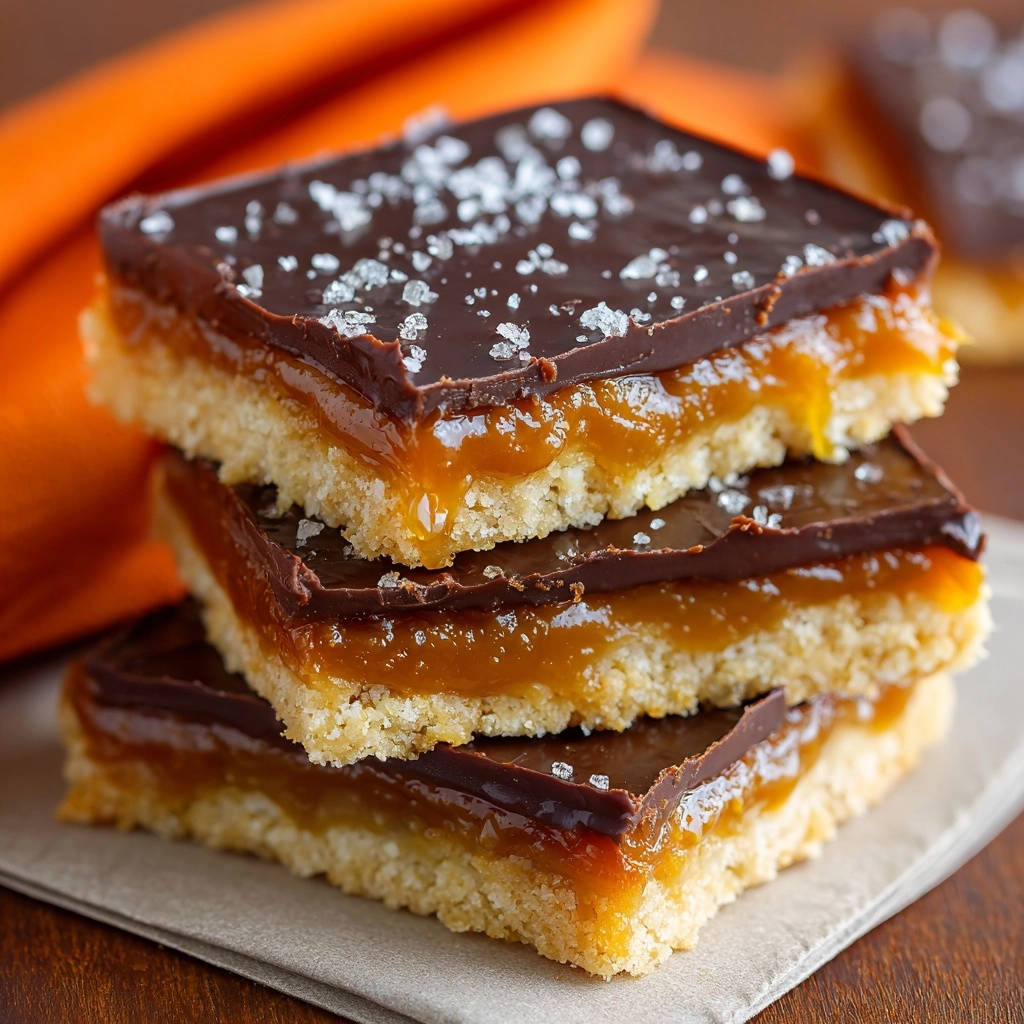
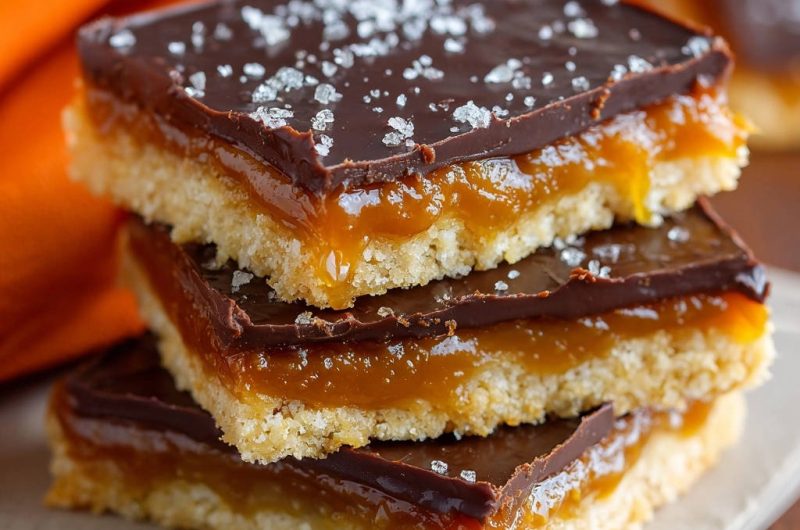
These Salted Caramel Chocolate Bars are a symphony of textures and flavors. You’ll savor the crisp, buttery shortbread crust that provides a delightful crunch.
Above it sits a rich, chewy, and perfectly set salted caramel layer, offering that classic sweet-and-salty balance. Finally, a smooth, decadent chocolate topping, lightly dusted with flaky sea salt, brings it all together in harmonious indulgence.
Why This Recipe is a Sweet Victory
This recipe transforms a potentially intimidating dessert into an approachable and reliable baking project. It simplifies the steps without compromising on the spectacular, bakery-worthy results.

Whether you’re a seasoned baker or just starting, you’ll find this guide easy to follow, consistently delivering impressive chocolate caramel treats that are sure to impress.
Gathering Your Decadent Ingredients
For the Golden Shortbread Base
The foundation of these delicious bars relies on simple, high-quality ingredients. Softened unsalted butter is crucial here; it creams beautifully with sugar, creating a light, airy base.
All-purpose flour and a touch of salt combine to form a tender, crumbly shortbread that bakes up golden and holds its shape perfectly under the rich layers to come.
Crafting the Perfect Caramel Core
This dreamy caramel layer begins with a blend of unsalted butter, light brown sugar, granulated sugar, and heavy cream. This combination yields a depth of flavor that is both rich and utterly comforting.
Vanilla extract adds warmth, while sea salt is essential for balancing the sweetness and enhancing that signature salted caramel taste. This thoughtful pairing elevates the overall experience of these homemade caramel bars.
The Luxurious Chocolate Topping
For the top layer, semi-sweet chocolate chips provide a delightful balance, offering richness without being overly sweet. A small amount of unsalted butter is melted with the chocolate, ensuring a smooth, glossy finish that sets beautifully.
The final sprinkle of flaky sea salt is more than just a garnish; it provides a crucial textural contrast and a burst of savory flavor that makes these Salted Caramel Chocolate Bars truly irresistible.
Essential Tools for Caramel Bar Mastery
Baking Basics
9×13 Inch Baking Pan: This standard size is essential for achieving the correct thickness and yield for your bars. It provides the ideal surface area for even baking.
Parchment Paper: Absolutely crucial for easy removal! Leave an overhang on the sides, which acts as “handles” to lift the entire slab of bars once they’ve set.
Large Mixing Bowls & Saucepan: You’ll need a large bowl for the shortbread crust and a sturdy medium saucepan for preparing the caramel layer.
Precision Helpers
Candy Thermometer: This is your secret weapon for perfectly set caramel. It removes guesswork, ensuring the caramel reaches the exact temperature (240°F / 115°C) required for ideal consistency, avoiding runny caramel woes.
Whisk & Spatula: A whisk is great for combining dry ingredients and initially stirring the caramel. A sturdy spatula is useful for pressing the crust and spreading the chocolate topping smoothly.
Crafting Your Salted Caramel Chocolate Bars: A Step-by-Step Guide
Building the Foundation: Shortbread Prep
Step 1: Preheat and Prep. Begin by preheating your oven to a precise 350°F (175°C). Line a 9×13 inch baking pan with parchment paper, allowing a generous overhang on the long sides to facilitate easy lifting later.
Step 2: Cream and Mix. In a large mixing bowl, combine the softened unsalted butter and granulated sugar for the shortbread crust. Beat them together with an electric mixer until the mixture becomes light, pale, and fluffy, typically taking about 2-3 minutes.
Next, gradually add the all-purpose flour and salt to the creamed mixture. Continue mixing on low speed until the ingredients are just combined and a crumbly dough forms. Avoid overmixing to keep the shortbread tender.
Step 3: Press and Bake. Transfer the crumbly shortbread dough into your prepared baking pan. Using your fingertips or the flat bottom of a glass, press the dough evenly into the bottom of the pan to create a compact, uniform layer.
Bake the crust for 20 to 25 minutes, or until the edges turn a delicate golden brown. Remove the pan from the oven and allow the crust to cool slightly while you prepare the caramel, but keep it warm enough for the caramel to spread easily.
The Caramel Transformation: Watch it Boil
Step 4: Combine Caramel Ingredients. In a medium-sized heavy-bottomed saucepan, combine the unsalted butter, packed light brown sugar, granulated sugar, and heavy cream. Place the saucepan over medium heat.
Stir the mixture constantly with a whisk or heat-proof spatula, ensuring the butter melts and all the sugars fully dissolve. This constant stirring prevents the sugar from scorching at the bottom of the pan.
Step 5: The No-Stir Boil. Once the butter is melted and sugars are dissolved, bring the mixture to a full, rolling boil. This is the absolutely critical moment for achieving perfectly set caramel.
Immediately stop stirring the caramel. Allow it to boil gently and consistently for 5 to 7 minutes, or until your candy thermometer reads 240°F (115°C).
If you don’t have a thermometer, you can test by dropping a tiny amount into a glass of very cold water; it should form a soft, pliable ball that holds its shape. Resist the urge to stir during this boiling phase, as it can encourage crystallization.
Step 6: Finish and Pour. Carefully remove the saucepan from the heat once the caramel reaches the correct temperature. Stir in the vanilla extract and sea salt.
Immediately pour the hot, luscious caramel evenly over the warm shortbread crust in the prepared pan. Allow the caramel layer to cool at room temperature for at least 30 minutes, giving it time to begin setting up and firming slightly.
Spreading the Chocolate Dream
Step 7: Melt the Chocolate. Place the semi-sweet chocolate chips and the extra tablespoon of unsalted butter in a microwave-safe bowl. Microwave in 30-second intervals, stirring thoroughly after each interval, until the chocolate is completely smooth and melted.
Alternatively, you can melt the chocolate and butter together in a heatproof bowl set over a saucepan of simmering water (a double boiler), stirring until silky smooth. Ensure no water gets into the chocolate to prevent seizing.
Step 8: Layer and Sprinkle. Once the chocolate is perfectly melted, pour it evenly over the cooled, slightly set caramel layer. Gently spread it to the edges of the pan using an offset spatula or the back of a spoon to create a smooth, even surface.
Immediately after spreading the chocolate, and while it is still wet, generously sprinkle with flaky sea salt. This ensures the salt adheres beautifully and provides that essential contrasting flavor and visual appeal for your salted caramel chocolate bars.
The Patient Chill and Perfect Slice
Step 9: Chill to Set. Transfer the entire baking pan to the refrigerator. Allow it to chill for at least 1 hour, or until the chocolate topping is completely firm to the touch. This chilling time is vital for clean cuts.
Step 10: Lift and Cut. Once thoroughly chilled and firm, use the parchment paper overhang to carefully lift the entire slab of chocolate caramel treats out of the baking pan. Transfer it to a clean cutting board.
For the neatest slices, use a large, sharp knife. Press down firmly and cut into desired squares or rectangles. Wiping the knife clean between cuts can help achieve crisp edges.
Step 11: Store. Store your finished Salted Caramel Chocolate Bars in an airtight container. They will keep well at room temperature for up to 3-4 days or in the refrigerator for up to a week. Enjoy!
Pro Tips for Flawless Salted Caramel Chocolate Bars
The Candy Thermometer Difference
A candy thermometer is not just a suggestion; it’s the most reliable tool for achieving caramel perfection. It accurately measures the temperature, removing all guesswork and ensuring your caramel reaches the exact consistency required to set properly.
Investing in one will guarantee consistent results for all your caramel-based desserts. Remember to immerse the tip fully into the caramel, without touching the bottom of the pan.
Don’t Rush the Cooling Process
Patience is truly a virtue when making these bars. Allowing both the caramel and chocolate layers sufficient time to cool and set completely is essential.
Rushing this step can lead to messy, oozing bars that are difficult to cut and handle. Proper cooling ensures those beautiful, distinct layers.
Achieving Clean Cuts
For pristine, professional-looking slices, try warming your knife blade under hot water, wiping it dry, and then making a clean cut. Re-warm and wipe between each slice.
Alternatively, you can lightly score the top chocolate layer with a sharp knife before chilling. This helps guide your cuts and minimizes cracking once the chocolate is firm.
The Power of Flaky Sea Salt
Don’t underestimate the impact of flaky sea salt on these bars. It doesn’t just add a beautiful visual sparkle; its coarse texture and bursts of salinity perfectly cut through the sweetness of the caramel and chocolate.
Sprinkle it immediately after pouring the melted chocolate, as the still-wet surface allows the salt to adhere flawlessly for maximum flavor and visual appeal.
Solving Sweet Setbacks: Troubleshooting Your Bars
Runny Caramel Woes
If your caramel didn’t set firmly, it’s highly likely it didn’t reach the critical temperature of 240°F (115°C). Ensure you used a reliable candy thermometer and allowed it to boil without stirring until that precise temperature was achieved.
Vigorous stirring during the boiling phase can also introduce crystals, preventing a smooth set. Always prioritize accurate temperature over guessing.
Crust Too Hard or Crumbly?
A crust that’s too hard might be a sign of overbaking; keep a close eye on the edges for a light golden color, not deep brown. If it’s too crumbly, you might have overmixed the dough, developing too much gluten, or used too much flour.
Ensure your butter is truly softened for easy incorporation, creating a tender, uniform shortbread that holds together well without being tough.
Chocolate Cracking Dilemma
Chocolate cracking when you cut the bars is usually due to the chocolate being too cold and brittle. To prevent this, let the chilled bars sit at room temperature for 10-15 minutes before cutting.
Using a knife warmed in hot water (and dried) for each cut can also help create cleaner slices through the chocolate without splintering it. Scoring the top layer before chilling can also guide your knife.
Frequently Asked Questions for Your Salted Caramel Chocolate Bars
Storage & Shelf Life
Store your Salted Caramel Chocolate Bars in an airtight container to maintain their freshness. At room temperature, they will remain delicious for up to 3-4 days.
For longer storage, or if your kitchen is warm, refrigerate them for up to a week. Bring them to room temperature for about 15-20 minutes before serving for the best texture and flavor.
Can I Customize Ingredients?
Absolutely! While this recipe is perfected as is, you can experiment. For a dairy-free option, use plant-based butter and cream alternatives (results may vary slightly).
You can also try different types of chocolate, such as milk chocolate or dark chocolate, to suit your preference. For more ideas on transforming classic desserts with simple twists, explore our classic apple crumble bars recipe.
Freezing for Future Enjoyment
These Salted Caramel Chocolate Bars freeze beautifully! Wrap individual bars or small batches tightly in plastic wrap, then place them in an airtight freezer-safe container or bag.
They can be frozen for up to 3 months. To thaw, simply remove them from the freezer and let them come to room temperature for several hours or overnight in the refrigerator.
What’s the Best Way to Serve These?
These bars are divine served at room temperature, allowing the caramel to be perfectly chewy and the chocolate to be soft but set. They make a fantastic standalone treat for dessert or an afternoon pick-me-up.
For an extra indulgent experience, try serving them alongside a scoop of vanilla bean ice cream, where the warm ice cream gently contrasts with the cool bar.
Enjoying and Sharing Your Masterpiece
Elegant Serving Suggestions
Present your Salted Caramel Chocolate Bars on a beautiful platter, perhaps with a light dusting of cocoa powder or a few extra flakes of sea salt. The distinct layers themselves are a visual treat.
Arranging them alongside fresh berries can also add a touch of color and brightness, making them perfect for any gathering.
Gifting and Occasions
These bars are an ideal candidate for homemade gifts during holidays or special occasions. Stack them in decorative boxes tied with a ribbon, and you have a thoughtful, delicious present.
They are also a crowd-pleaser for potlucks, bake sales, or simply as a comforting dessert for family and friends. If you love the interplay of caramel and nuts, our irresistible caramel nut squares offer another delightful twist.
Creative Flavor Twists
Feel free to get creative with your homemade caramel bars! You could add a layer of chopped toasted pecans or walnuts to the shortbread crust for extra crunch. A hint of espresso powder in the chocolate topping can deepen its flavor beautifully.
Alternatively, swap out semi-sweet for a darker chocolate for a more intense cocoa experience, creating truly unique chocolate caramel treats.
Indulge in Perfection: A Sweet Farewell
You now have the definitive guide to creating truly exceptional Salted Caramel Chocolate Bars that are perfectly set, never runny, and always a delight. The blend of crisp shortbread, firm salted caramel, and rich chocolate makes for an unforgettable dessert experience.
Don’t hesitate to make these your signature sweet treat. We encourage you to try this recipe, share your creations, and enjoy every decadent bite. And for those who appreciate rich, decadent chocolate in all its forms, don’t miss our guide to a truly decadent chocolate cake that’s never dry.
Salted Caramel Chocolate Bars
Course: DessertCuisine: AmericanDifficulty: medium16
bars25
minutes35
minutes350
kcal120
minutesThere’s nothing more frustrating than biting into a delicious homemade caramel bar only to have the gooey center ooze out everywhere. This recipe shares a secret to ensure your caramel sets perfectly every single time, giving you beautiful, clean layers. Get ready for the best salted caramel chocolate bars you’ve ever made!
Ingredients
For the Shortbread Crust:
1 cup (2 sticks) unsalted butter, softened
1/2 cup granulated sugar
2 cups all purpose flour
1/4 teaspoon salt
For the Salted Caramel Layer:
1 cup unsalted butter
1 cup light brown sugar, packed
1/2 cup granulated sugar
1/2 cup heavy cream
1 teaspoon vanilla extract
1/2 teaspoon sea salt
For the Chocolate Topping:
1 1/2 cups semi sweet chocolate chips
1 tablespoon unsalted butter
1/4 teaspoon flaky sea salt, for sprinkling
Directions
- Preheat your oven to 350°F (175°C). Line a 9×13 inch baking pan with parchment paper, leaving an overhang on the sides to easily lift the bars out later.
- In a large bowl, cream together the softened butter and granulated sugar for the shortbread crust until light and fluffy. Gradually add the flour and salt, mixing until a crumbly dough forms. Press the dough evenly into the bottom of the prepared baking pan.
- Bake the shortbread crust for 20 to 25 minutes, or until lightly golden brown around the edges. Remove from the oven and let cool slightly while you prepare the caramel.
- To make the caramel layer, combine the butter, light brown sugar, granulated sugar, and heavy cream in a medium saucepan over medium heat. Stir constantly until the butter is melted and the sugars are dissolved.
- Bring the mixture to a boil. This is the key to preventing runny caramel: Stop stirring and allow the caramel to boil gently for 5 to 7 minutes, or until it reaches 240°F (115°C) on a candy thermometer. If you don’t have a thermometer, look for it to thicken to a syrupy consistency, holding its shape slightly when a small amount is dropped into a glass of cold water.
- Remove the caramel from the heat and stir in the vanilla extract and sea salt. Pour the hot caramel evenly over the warm shortbread crust. Let it cool at room temperature for at least 30 minutes to set further.
- For the chocolate topping, melt the chocolate chips and 1 tablespoon of butter in a microwave safe bowl in 30 second intervals, stirring until smooth. Alternatively, you can use a double boiler.
- Pour the melted chocolate evenly over the cooled caramel layer. Sprinkle with flaky sea salt immediately while the chocolate is still wet.
- Refrigerate the pan for at least 1 hour, or until the chocolate is completely set. Once firm, use the parchment paper overhang to lift the entire slab out of the pan. Place on a cutting board and cut into squares or rectangles. Store in an airtight container at room temperature or in the refrigerator.
Notes
- Ensure caramel reaches 240°F (115°C) or thickens to prevent runny centers.


