
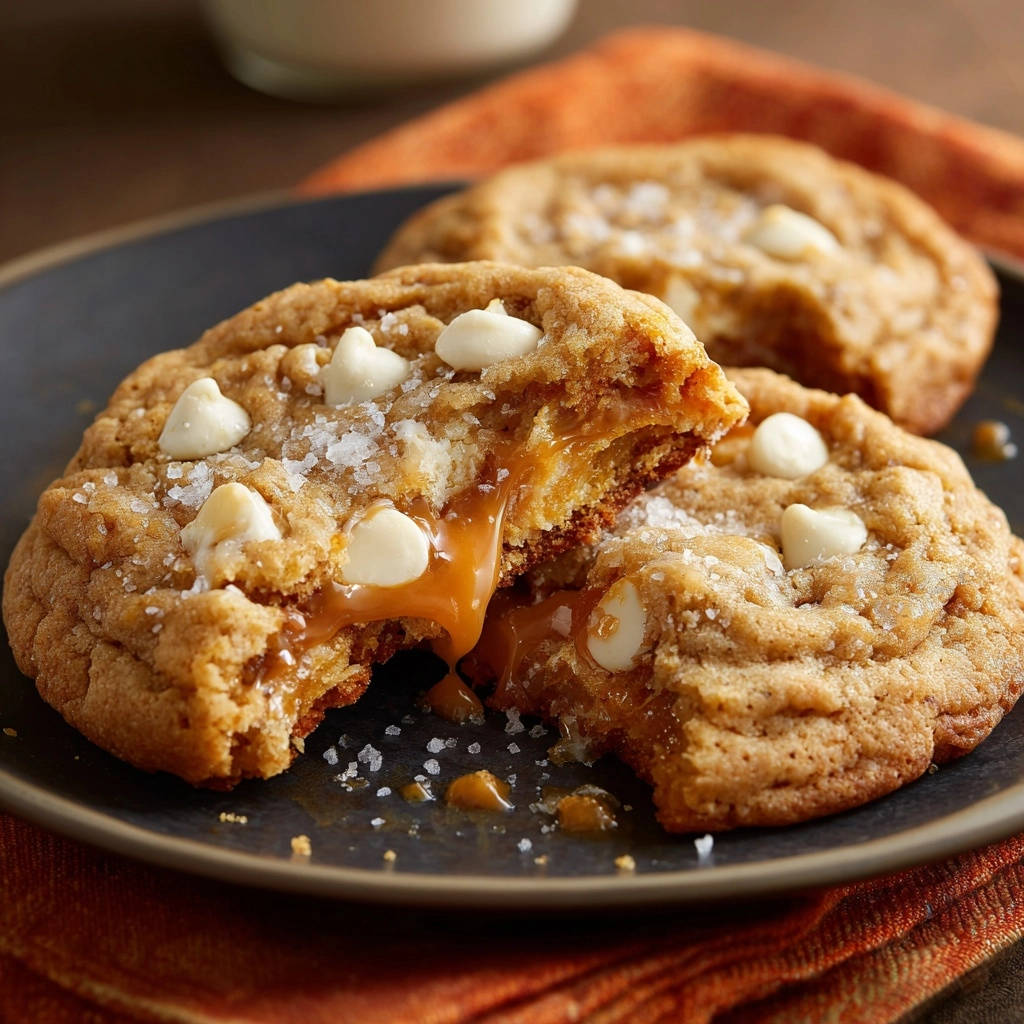
There’s nothing quite like the melt-in-your-mouth experience of a perfectly baked cookie, especially when it comes to Salted Caramel White Chocolate Cookies. For years, I struggled with caramel turning rock-hard, but I finally cracked the code to ensure a wonderfully molten, soft center every single time. This recipe delivers a luxurious, oozy caramel encased in a chewy white chocolate chip cookie, a true triumph for any dessert lover.
Escape the Hard Caramel Trap: Why This Recipe Works Wonders
Many home bakers face the frustrating challenge of caramel that becomes brittle and unyielding in cookies. This carefully developed recipe is designed to overcome that, providing a reliable path to delightful results.
The Molten Magic: Perfectly Oozing Caramel Every Time
The secret lies in both the type of caramel used and precise baking techniques. This recipe guarantees that beautiful, soft caramel center that gently oozes when you break open a warm cookie.
It creates an indulgent experience, elevating the classic cookie to something truly extraordinary and satisfying.
Seamless Sealing: No More Leaky Caramel Catastrophes
One of the most crucial elements is the method for enclosing the caramel. We meticulously guide you through sealing the dough, preventing any precious caramel from escaping or burning.
This attention to detail ensures your cookies look as good as they taste, with no sticky messes on your baking sheet.
Irresistible Flavor Harmony: Sweet, Salty, and Creamy Bliss
These Salted Caramel White Chocolate Cookies strike a perfect balance of flavors. The rich sweetness of white chocolate and gooey caramel is beautifully contrasted by a sprinkle of flaky sea salt.
Each bite offers a complex interplay of creamy, sweet, and savory notes, creating an unforgettable sensory delight.
Gather Your Goodies: The Heart of Salted Caramel White Chocolate Cookies
Selecting the right ingredients and understanding their roles is fundamental to achieving baking success. Here’s what you need to know about each component.
The Dough Duo: Butter and Sugars for a Perfect Base
Unsalted butter, softened: Using unsalted butter allows you to control the overall salt content, especially with the flaky sea salt. Softened butter creams beautifully with sugar, incorporating air for a tender cookie texture.
Granulated sugar: This provides sweetness and contributes to the cookie’s crisp edges.
Packed light brown sugar: The molasses in brown sugar adds moisture, chewiness, and a subtle caramel note to the dough itself. Always pack it tightly for accurate measurement.
Flour Power & Leavening Logic
All-purpose flour: This forms the structure of the cookie. Accurate measurement is key; too much flour can lead to dry, crumbly cookies.
Baking soda: A leavening agent that helps the cookies rise and spread slightly, ensuring a soft, chewy texture. It reacts with the acidic brown sugar.
Salt: A small amount of salt in the dough enhances all the other flavors, balancing the sweetness without making the cookies taste overtly salty.
The Stars of the Show: Caramel and White Chocolate
Soft caramel candies, unwrapped: This is arguably the most critical ingredient for that gooey center. Ensure you use soft, individually wrapped caramels, not hard or chewy taffy-like candies. The brand matters here for melt consistency.
White chocolate chips: Choose good quality white chocolate chips that melt smoothly and offer a creamy, sweet counterpoint. They should be actual chocolate, not just “white baking chips” which may contain less cocoa butter.
The Finishing Touch: Flaky Sea Salt
Flaky sea salt: This isn’t just a garnish; it’s a flavor enhancer. A sprinkle of flaky sea salt on top provides bursts of salinity that cut through the richness of the caramel and white chocolate, making the overall experience far more complex and satisfying. Its delicate crunch also adds textural interest.
Your Baking Toolkit: Essential Gear for Effortless Cookies
Having the right tools makes the baking process smoother and more enjoyable, contributing to consistent, delicious results for your Salted Caramel White Chocolate Cookies.
Mixing Essentials
Electric Mixer (Stand or Handheld): Essential for creaming butter and sugars effectively, ensuring the dough is light and fluffy. A sturdy stand mixer makes quick work of it, but a good handheld mixer works perfectly too.
Large Mixing Bowls: You’ll need at least two: one for wet ingredients and one for dry. This separation prevents overmixing and ensures even distribution.
Baking Sheet & Parchment Power
Baking Sheets: Sturdy, light-colored baking sheets promote even browning. Darker sheets can cause bottoms to overbake or burn.
Parchment Paper: Absolutely non-negotiable! It prevents sticking, ensures easy cleanup, and helps the cookies bake more evenly. Don’t substitute with foil unless greased very well.
Measuring Accuracy
Measuring Cups and Spoons: Crucial for precise ingredient amounts. Using dry measuring cups for dry ingredients and liquid measuring cups for liquids is important for accuracy.
Kitchen Scale (Optional but Recommended): For the most precise baking, especially with flour, a kitchen scale guarantees consistent results every time.
From Bowl to Bake: Your Detailed Guide to Irresistible Salted Caramel White Chocolate Cookies
Follow these steps closely to create cookies with that coveted gooey caramel center and perfect texture.
- Prepping for Success: Oven and Pans Ready
Preheat your oven to 350 degrees F (175 degrees C). Lining two baking sheets with parchment paper is critical; it ensures your cookies won’t stick and promotes even heat distribution, preventing burnt bottoms.
- Creaming the Foundations: Butter, Granulated, and Brown Sugar
In a large bowl, combine the softened unsalted butter, granulated sugar, and packed light brown sugar. Use an electric mixer to beat them until the mixture becomes light, fluffy, and visibly pale, usually about 2-3 minutes.
This creaming process incorporates essential air, which is vital for the cookies’ tender texture and slight rise.
- Bringing in the Wet: Egg and Vanilla Magic
Add the large egg and vanilla extract to the creamed mixture. Continue beating until these wet ingredients are thoroughly combined, ensuring no visible streaks of egg remain in the batter.
- The Dry Mix: Flour, Baking Soda, and Salt Harmony
In a separate medium bowl, take a whisk and combine the all-purpose flour, baking soda, and salt. Whisking dry ingredients together before adding them ensures that the leavening agents and salt are evenly distributed throughout the dough.
- Combining the Elements: Gentle Folding for Tender Dough
Gradually add the dry ingredient mixture to the wet ingredients, mixing on low speed or by hand until they are just combined. It is absolutely crucial not to overmix the dough at this stage, as over-developing the gluten will result in tough, dense cookies.
- The Sweet Surprise: Folding in White Chocolate Chips
Gently fold in the white chocolate chips using a spatula until they are evenly distributed throughout the dough. Again, avoid vigorous mixing here to maintain the tender texture of the dough.
- The Caramel Embrace: Encasing Your Molten Center
Scoop a generous tablespoon of cookie dough and gently flatten it into a disk in the palm of your hand. Place one unwrapped soft caramel candy directly in the center of this dough disk.
Carefully gather and fold the edges of the dough around the caramel, completely enclosing it. Firmly pinch all seams to seal the dough tightly around the caramel, ensuring absolutely none of the filling is exposed. This meticulous sealing step is the most crucial part for preventing the caramel from leaking out and hardening during baking. Once sealed, roll the dough into a smooth ball.
- Forming and Flavoring: Rolling and Salting Your Dough Balls
Place the prepared cookie dough balls onto your parchment-lined baking sheets, making sure to leave about 2 inches of space between each to allow for proper spreading during baking. For an enhanced flavor and a beautiful finish, sprinkle the tops of the cookie dough balls with a small pinch of flaky sea salt.
- The Golden Bake: Achieving Perfect Gooeyness (Not Hardness!)
Bake the cookies for 10 to 12 minutes. Look for edges that are lightly golden and set, while the centers still appear slightly soft and puffy. The most important tip for keeping the caramel molten and gooey is to avoid overbaking; remember, the cookies will continue to cook slightly from residual heat as they cool.
- Cooling with Care: Patience for a Perfect Caramel Set
Allow the baked cookies to cool undisturbed on the baking sheets for 5 minutes. This vital cooling period on the warm surface allows the hot caramel filling to stabilize and begin to set without hardening, and the cookies themselves to firm up properly.
After 5 minutes, carefully transfer the cookies to a wire rack to cool completely. This prevents the bottoms from becoming soggy and further ensures that luscious, soft caramel consistency.
Beyond the Recipe: Expert Tips for Salted Caramel White Chocolate Cookie Mastery
Unlock the full potential of your Salted Caramel White Chocolate Cookies with these insider tips, ensuring every batch is a masterpiece.
The Art of Not Overmixing: Overmixing flour develops gluten, which directly leads to tougher cookies. Always mix only until the dry ingredients are just incorporated, stopping as soon as no dry streaks remain.
Sealing the Deal: Mastering the Caramel Enclosure: Dedicate extra attention to firmly pinching and sealing the dough around each caramel. Any small gap can result in leaks, creating sticky edges and potentially hardening the caramel. Think of it as creating a perfectly wrapped present!
The Golden Window: Perfect Bake Time for Gooey Centers: The ideal bake time is crucial. Watch for lightly golden edges, but trust that centers that still look slightly soft are exactly what you want for that signature gooey caramel. It’s always better to slightly underbake than overbake these beauties.
Cooling Confidence: The Secret to a Stable, Soft Caramel: The initial 5-minute cool-down on the baking sheet isn’t just a suggestion-it’s essential. This brief rest allows the intensely hot caramel to gently cool and stabilize, preventing it from hardening and ensuring it retains its wonderfully molten texture.
Salt’s Strategic Sprinkle: Enhancing Every Bite: Never skip the flaky sea salt. It provides a vital textural contrast and a burst of savory flavor that brilliantly cuts through the sweetness of the caramel and white chocolate. This simple addition elevates the entire cookie experience.
Solving Sweet Dilemmas: Troubleshooting Your Salted Caramel White Chocolate Cookies
Even seasoned bakers encounter challenges. Here are solutions to common cookie woes, ensuring your Salted Caramel White Chocolate Cookies always turn out perfectly.
Problem: Caramel Leaks During Baking
Solution: The most common cause is improper sealing of the dough around the caramel. Ensure you pinch the seams of the dough very firmly, leaving no gaps or exposed caramel. Also, verify that your caramels are soft and pliable, not hard.
Make sure the dough ball is smooth and evenly shaped without any cracks, which could open up in the oven.
Problem: Cookies Spreading Too Much
Solution: This often happens if the butter was too soft or melted, or if too little flour was used. Ensure your butter is softened but still cool to the touch. Chilling the dough balls for 15-30 minutes before baking can also help them hold their shape better.
If your oven runs hot, this can also cause excessive spreading, so consider using an oven thermometer.
Problem: Hard Caramel Centers
Solution: Overbaking is the primary culprit here. Remove cookies from the oven when the edges are just lightly golden and the centers still look soft, even slightly underdone. The residual heat on the baking sheet will finish the cooking.
Additionally, ensure you are using soft, chewable caramel candies, not harder varieties, and allow them to cool on the baking sheet for the instructed 5 minutes.
Problem: Cookies Are Too Dry or Crumbly
Solution: This can be due to overmixing the dough, which develops gluten and creates a tough, dry texture. Mix only until the flour is just incorporated. Too much flour or not enough liquid (butter/egg/vanilla) can also cause dryness, so precise measuring is important.
Keeping Them Fresh: Storage & Make-Ahead Tips for Salted Caramel White Chocolate Cookies
Extend the enjoyment of your delectable Salted Caramel White Chocolate Cookies with these smart storage and make-ahead strategies.
Best Practices for Freshly Baked Cookies
Once completely cooled, store your cookies in an airtight container at room temperature. For optimal freshness and to maintain that soft, chewy texture and gooey caramel, they are best enjoyed within 3-4 days.
Placing a slice of bread in the container can help keep them moist.
Freezing Dough for Future Cravings
You can easily prepare these cookies in advance! Form the dough balls with the caramel inside, seal them well, and arrange them on a parchment-lined baking sheet. Freeze until solid, then transfer the frozen dough balls to a freezer-safe bag or container for up to 2-3 months.
When ready to bake, place frozen dough balls on a baking sheet and add 1-2 minutes to the baking time. This is a fantastic way to always have fresh-baked treats ready, much like our versatile cheesy sausage drop biscuits that can also be frozen for later.
Reviving Day-Old Treats
If your cookies are a day or two old and you want to bring back that warm, gooey center, a quick refresh can work wonders. Pop a cookie into the microwave for 10-15 seconds, or warm it in a preheated oven at 300°F (150°C) for a few minutes until the caramel softens. Be careful not to overheat.
Your Top Questions Answered: Salted Caramel White Chocolate Cookies Edition
Here are quick answers to common queries about making and enjoying these irresistible treats.
Can I use store-bought caramel sauce instead of candies?
Using store-bought caramel sauce is generally not recommended for the filling inside these cookies. The sauce tends to be much thinner and will likely leak out and burn during baking, or simply become too hard, which is exactly what we want to avoid for gooey Salted Caramel White Chocolate Cookies.
What if I don’t have flaky sea salt?
While flaky sea salt provides the best texture and burst of flavor, if you don’t have it, you can use a very small pinch of fine sea salt or even kosher salt. Sprinkle it very lightly to avoid making the cookies too salty. The visual appeal might differ slightly.
Can I make these gluten-free?
You can experiment with a 1:1 gluten-free all-purpose flour blend. Be aware that the texture might be slightly different, potentially a bit more delicate. Ensure your chosen blend contains xanthan gum for structure.
How long do these cookies stay fresh?
When stored properly in an airtight container at room temperature, these Salted Caramel White Chocolate Cookies are at their best for 3-4 days. For extended freshness, consider freezing the baked cookies for up to a month.
Ready to Indulge? Your Salted Caramel White Chocolate Cookies Await!
Armed with these expert tips and a foolproof recipe, you’re now ready to create the most incredible Salted Caramel White Chocolate Cookies you’ve ever tasted. Say goodbye to hard caramel and hello to beautifully gooey, sweet, and salty perfection.
Don’t wait to treat yourself and your loved ones to this truly special dessert. Dive into your kitchen, bake a batch, and share your delightful creations!
If you loved these, you might also enjoy exploring other delightful dessert recipes like our luscious salted caramel swirl brownies or our perfectly sweet mini caramel cheesecakes for even more caramel-infused indulgence.
Salted Caramel White Chocolate Cookies
Course: DessertCuisine: AmericanDifficulty: easy18
cookies20
minutes12
minutes240
kcal32
minutesTired of hard caramel centers in your cookies? This recipe guarantees perfectly molten, soft caramel centers that just oozes out, surrounded by a delicious white chocolate chip cookie dough.
Ingredients
1/2 cup (1 stick) unsalted butter, softened
1/2 cup granulated sugar
1/4 cup packed light brown sugar
1 large egg
1 teaspoon vanilla extract
1 1/4 cups all purpose flour
1/2 teaspoon baking soda
1/4 teaspoon salt
1 cup white chocolate chips
18 soft caramel candies, unwrapped
1 teaspoon flaky sea salt, for sprinkling
Directions
- Preheat your oven to 350 degrees F (175 degrees C). Line two baking sheets with parchment paper.
- In a large bowl, cream together the softened butter, granulated sugar, and brown sugar until light and fluffy.
- Beat in the egg and vanilla extract until well combined.
- In a separate medium bowl, whisk together the all purpose flour, baking soda, and salt.
- Gradually add the dry ingredients to the wet ingredients, mixing until just combined. Do not overmix.
- Fold in the white chocolate chips.
- Take a generous tablespoon of cookie dough and flatten it into a disk in the palm of your hand. Place one unwrapped soft caramel candy in the center of the dough disk.
- Carefully fold the edges of the dough around the caramel, completely enclosing it. Pinch the seams to seal the dough around the caramel so none of the filling is exposed. This step is crucial for preventing the caramel from leaking out and hardening. Roll the dough into a smooth ball.
- Place the cookie dough balls onto the prepared baking sheets, leaving about 2 inches between each. Sprinkle the tops of the cookie dough balls with flaky sea salt.
- Bake for 10 to 12 minutes, or until the edges are lightly golden and set, but the centers still look slightly soft. The key to keeping the caramel gooey is to avoid overbaking. The cookies will continue to cook slightly as they cool.
- Let the cookies cool on the baking sheets for 5 minutes before transferring them to a wire rack to cool completely. This allows the caramel to settle without hardening.
Notes
- Crucial tips included for perfectly gooey caramel and preventing hardening.


