

I used to struggle with turning beautiful fresh greens into a sad, olive-green mess, but finally mastering the ‘color-lock’ technique changed everything.
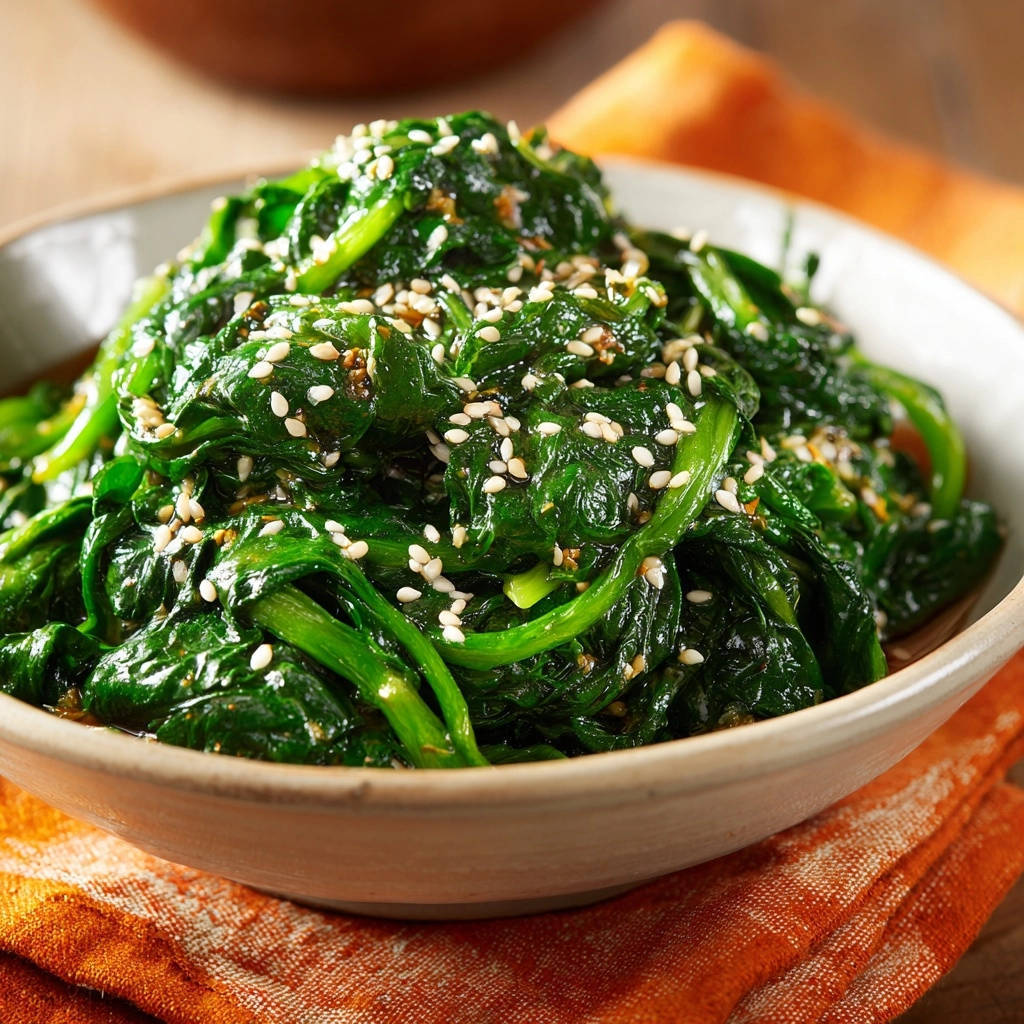
This recipe is the definitive guide to achieving perfect, crisp-tender Sesame Garlic Spinach in just eight minutes, proving that healthy sides can be simple, vibrant, and incredibly reliable.
The Game-Changer: Why This Sesame Garlic Spinach Recipe Works
The Dreaded Mushy Green Problem Solved
Traditional cooking methods like steaming or simmering quickly overcook delicate spinach, leading to a mushy texture and dull, drab color.
For a refreshing change after overcooked greens, consider a lemon soy wakame salad.
Our specialized blanch-and-shock process instantly deactivates the browning enzymes and halts the cooking process.
This ensures the leaves retain their structural integrity and vivid, bright green pigment.The 8-Minute Promise: Speed and Efficiency
With just five minutes of prep and a crucial 90-second cook time, this vibrant side dish is faster than ordering takeout.
This rapid preparation makes Sesame Garlic Spinach the ideal, high-impact component for busy weeknight meals.
Achieving the Perfect Crisp-Tender Texture
The secret to retaining that desirable crisp-tender bite is the immediate plunge into an ice bath.
Shocking the spinach prevents cell walls from breaking down, ensuring your greens maintain their satisfying, slight resistance with every bite, unlike traditional wilted preparations.
Essential Ingredients for the Perfect Sesame Garlic Flavor Balance
Selecting and Preparing Your Greens
Choose firm, bright green spinach leaves.
While removing the stems is optional, it can improve the overall mouthfeel of the dish.
Building the Flavor Foundation: Umami and Oil
Low-sodium soy sauce provides essential umami without making the dish overly salty.
Toasted sesame oil is non-negotiable for that deep, nutty aroma that defines the flavor profile of this classic preparation.
Sweet, Spicy, and Aromatic Elements
A touch of brown sugar or maple syrup balances the saltiness of the soy sauce and adds gloss.
Always use fresh, finely minced garlic for the brightest flavor, avoiding pre-minced jars which often taste muted.
Prepping for Success: Essential Kitchen Tools
Large Stockpot: Crucial for ensuring a rolling boil and preventing overcrowding during blanching, which guarantees an even cook.
Two Large Prep Bowls: One for washing, and one filled with ice water for the critical shocking step necessary to lock in color.
Spider or Tongs: Necessary for swift removal of the spinach from the boiling water, minimizing cooking time to seconds.
Clean Kitchen Towel: Used specifically for squeezing out excess moisture, which is vital for texture and seasoning absorption.
Mastering the Technique: Your Step-by-Step Sesame Garlic Spinach Guide
Phase 1: Setting Up the Blanch and Shock Stations
Prepare the spinach by thoroughly washing it and setting up the crucial ice bath immediately adjacent to the stovetop.
The speed of transfer from heat to ice is the key determinant of success for this technique, so preparation is paramount.
Phase 2: The Critical 90-Second Blanch
Bring the salted water to a rapid, rolling boil-not just a simmer. Submerge the greens and monitor the time precisely.
Blanching for 60 to 90 seconds is the sweet spot; look for a vibrant shift in color just before the leaves begin to truly soften, then move immediately.
Phase 3: Stopping the Cooking Instantly (The Ice Shock)
Use your tongs or spider to swiftly remove the spinach from the boiling water and immediately plunge it into the ice water for one full minute.
This rapid cooling process instantly deactivates the enzymes that cause browning and mushiness, successfully locking in the vivid green hue and desirable texture.
Phase 4: The Crucial Moisture Removal
Drain the cooled spinach thoroughly, then wrap it in a clean kitchen towel or several layers of paper towels.
This step cannot be rushed: firmly squeeze the bundle to extract every drop of residual water. Less water means more concentrated flavor and better dressing adherence.
Phase 5: Whisking and Combining
Whisk together the soy sauce, sesame oil, sweetener, garlic, and sesame seeds until the sugar is fully dissolved.
In a serving bowl, add the squeezed spinach and pour the dressing evenly over the top, tossing gently to coat without bruising the leaves.
Troubleshooting and Advanced Tips for Perfectly Coated Spinach
Why Did My Spinach Turn Olive Green?
Solution: This means you overcooked it or didn’t shock it fast enough. Ensure your water is boiling violently, you blanch for exactly 90 seconds maximum, and the ice bath is fully prepared beforehand.
The Dressing Isn’t Sticking Properly
Solution: The culprit is almost always residual water left after the ice bath. You must squeeze the spinach with significant force until you cannot extract any more liquid; the drier the spinach, the better the dressing adheres and concentrates its flavor.
Flavor Boost: Making it Spicy or Tangy
Variation Tip: Add a teaspoon of finely grated fresh ginger to the dressing for warmth, or a splash of rice wine vinegar for a slightly tangy profile.
A spoonful of savory chili crisp oil can also elevate the heat instantly, adding both texture and rich flavor to the finished dish.
Serving Temperature Secrets
Expert Advice: While often served cold or at room temperature, this side dish is best slightly chilled.
Prepare the Sesame Garlic Spinach completely ahead of time and store it covered in the refrigerator for at least 30 minutes before serving to let all the flavors meld deeply.
Pairing and Presentation: Serving Your Sesame Garlic Spinach
Ideal Pairings for an Asian-Inspired Meal
This vibrant side cuts through the richness of heavier mains, pairing beautifully with slow-cooked pork belly or hearty Teriyaki beef.
It is also a fantastic addition to a simple weeknight spread alongside sticky rice and a protein like baked tofu or grilled shrimp.
What to Try Next
Round out your meal with these vibrant dishes, perfect alongside your sesame garlic spinach.
- For a complete meal, pair your vibrant greens with these crispy sesame chicken bowls, featuring similar savory notes.
- Consider complementing your spinach with this vibrant bell pepper tofu stir-fry for a colorful and satisfying vegetarian option.
Presentation Matters: Garnish and Bowl Selection
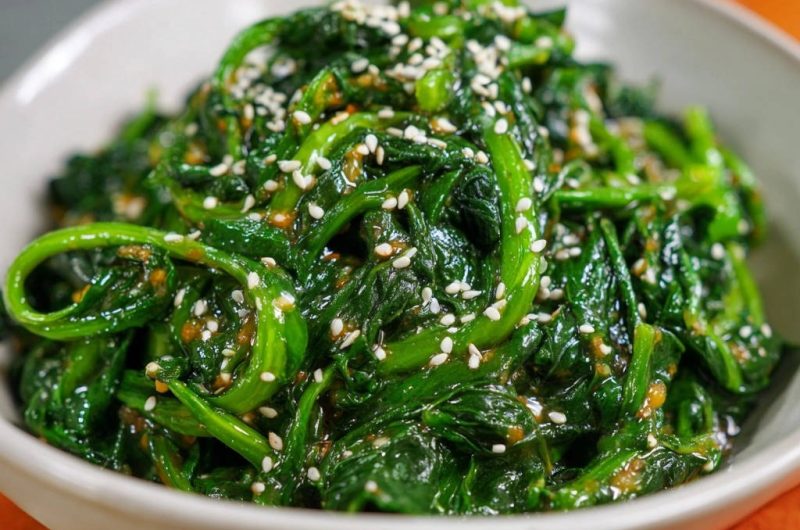
Always garnish generously with extra toasted sesame seeds right before serving for essential crunch and visual appeal.
If you enjoy dishes with a satisfying crunch, you should try this spicy cucumber edamame salad.
Serving in a shallow, wide white bowl showcases the vivid green color contrast, making the simple dish look professional and inviting.
Common Questions About Sesame Garlic Spinach
Can I Use Frozen Spinach for This Recipe?
While technically possible, frozen spinach is not recommended as it will be waterlogged and mushy, completely defeating the purpose of the crisp-tender blanching technique.
This method requires fresh spinach to achieve the desired vibrant color and firm texture.
How Long Will Leftovers Last in the Refrigerator?
Stored in an airtight container, dressed Sesame Garlic Spinach will remain delicious for up to three days.
Note that the greens will gradually lose some of their crispness over time, but the savory garlic and sesame flavor will remain excellent.
Is This Recipe Naturally Gluten-Free and Vegan?
The recipe is naturally vegan if using maple syrup instead of brown sugar.
To ensure it is gluten-free, substitute standard soy sauce with tamari or a certified gluten-free soy sauce alternative.
Ready to Impress? Share Your Sesame Garlic Spinach Masterpiece!
Mastering the blanch-and-shock technique transforms a simple side dish into a show-stopping success. We hope this guide helps you achieve the perfect, vibrantly green Sesame Garlic Spinach every single time.
Don’t forget to rate this recipe and share your results in the comments below!
Sesame Garlic Spinach
Course: Side DishCuisine: AsianDifficulty: easy4
servings5
minutes3
minutes120
kcal8
minutesTired of mushy, dull spinach? This rapid blanching and shocking technique ensures your greens stay beautifully vibrant and crisp-tender. Tossed in a sweet, savory, and nutty sesame garlic dressing, this side dish is fast, healthy, and a total game-changer.
Ingredients
1 pound fresh spinach (stems removed if desired)
4 cups ice water, plus 1 tablespoon salt for blanching
2 tablespoons soy sauce (low sodium preferred)
1 tablespoon toasted sesame oil
1 tablespoon brown sugar or maple syrup
1 teaspoon finely minced garlic
1 teaspoon toasted sesame seeds, plus extra for garnish
Directions
- Prepare the Spinach Prep two large bowls. Fill one with several changes of cold water and wash the spinach thoroughly to remove all grit. Fill the second bowl with ice and water to create a rapid ice bath.
- The Color Lock Technique (Key Step) Bring a large pot of water to a rolling boil and add 1 tablespoon of salt. Carefully submerge the spinach. Blanch the greens for only 60 to 90 seconds, just until the leaves are bright green and slightly wilted. Do not overcrowd the pot or cook longer than 90 seconds.
- Stop the Cooking Immediately Use tongs or a spider to swiftly remove the spinach from the boiling water and plunge it immediately into the prepared ice bath. This process of shocking stops the cooking instantly and locks in that vivid green color. Let the spinach sit in the ice bath for 1 minute.
- Drain and Squeeze Drain the spinach from the ice water and transfer it to a clean kitchen towel or paper towels. This step is crucial: firmly squeeze the spinach to remove as much excess water as possible. The more water you remove, the more concentrated and delicious your seasoning will be, and the better the texture.
- Prepare the Dressing In a small bowl, whisk together the soy sauce, sesame oil, brown sugar or maple syrup, minced garlic, and 1 teaspoon of toasted sesame seeds.
- Combine and Serve Place the squeezed, dried spinach in a serving bowl. Pour the dressing over the greens and toss gently but thoroughly until everything is evenly coated and glossy. Garnish generously with extra sesame seeds before serving.
Notes
- Ensure you firmly squeeze all excess water from the blanched spinach before dressing for the best flavor concentration and texture.


