
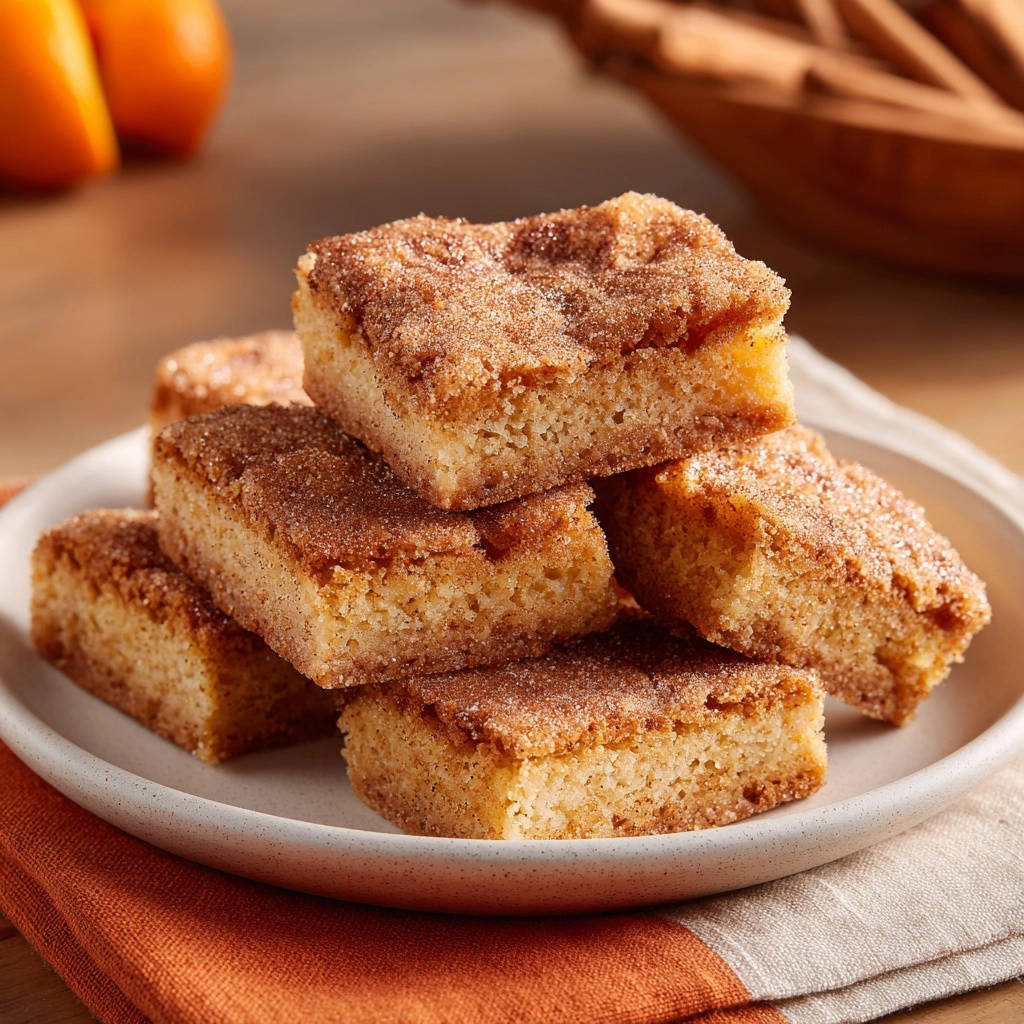
There’s nothing quite like the warm embrace of a classic snickerdoodle, but I’ve perfected a bar version that guarantees that signature soft, tender chewiness without the common pitfalls of dry, crumbly cookies. These Snickerdoodle Bars are a true game-changer, delivering perfectly moist and fluffy results that will make you a baking legend.
Why This Snickerdoodle Bar Recipe Will Be Your New Favorite
The Secret to Unbeatable Moisture and Chewiness
This recipe conquers the common challenge of dry snickerdoodles by focusing on precise creaming techniques and a balanced ratio of wet to dry ingredients. The careful addition of milk ensures a supple batter, while cream of tartar contributes to that unique chew and characteristic tang.
It’s all about creating the right structure within the batter, holding moisture evenly throughout the baking process for a consistently soft and tender interior in every bite.
Effortless Baking, Impressive Results
Designed for bakers of all skill levels, this recipe for Snickerdoodle Bars streamlines the process, delivering professional-tasting treats with minimal fuss. With a prep time of just 15 minutes and a cook time between 25-30 minutes, you’ll have these delightful bars ready in under an hour.
The straightforward steps ensure that even novice bakers can achieve impressive, bakery-quality results, making it an ideal choice for last-minute gatherings or a spontaneous sweet craving.
Beyond the Cookie: A Bar That Stays Fresh Longer
Opting for the bar format over individual cookies offers several advantages, especially when it comes to moisture retention and convenience. These bars tend to stay moist longer due to their compact shape, making them perfect for potlucks, lunchboxes, or simply enjoying over several days.
They are incredibly easy to serve and transport, cutting into perfect squares that showcase their inviting cinnamon-sugar swirl. For another fantastic bar recipe that’s equally easy and delicious, consider trying our irresistible Blueberry Crumble Bars.
Gather Your Gear: Essential Tools for Baking Success
8×8 Inch Baking Pan: This specific size is crucial for achieving the ideal bar thickness and ensures even baking. Using a larger pan may result in thinner, drier bars, while a smaller one could lead to underbaked centers.
Electric Mixer: Whether a stand mixer or a hand mixer, this tool is essential for thoroughly creaming the butter and sugar. Proper creaming is vital for incorporating air, which directly impacts the light and tender crumb of your Snickerdoodle Bars.
Mixing Bowls: You’ll need at least two bowls – one medium for dry ingredients and one large for wet ingredients. This keeps your baking process organized and ensures each component is properly prepared before combining.
Whisk, Spatula, Measuring Cups & Spoons: These basic baking necessities play distinct roles. A whisk ensures dry ingredients are evenly distributed, a rubber spatula helps scrape down the bowl for uniform mixing, and accurate measuring tools are key for consistent results.
The Magic Behind the Batter: A Look at Your Ingredients
Building Blocks: Flour, Leaveners & Salt
All-purpose flour provides the necessary structure for these bars, creating a tender yet cohesive base. The dynamic duo of cream of tartar and baking soda works together to give snickerdoodles their signature tangy flavor and a light, airy lift.
Cream of tartar also helps prevent sugar crystallization, contributing to the classic chewiness. A touch of salt balances the sweetness and enhances all the other flavors within the bar.
The Creamed Base: Butter and Sugar’s Role
Using softened unsalted butter is non-negotiable; it creams seamlessly with granulated sugar to create a light, fluffy foundation. This creaming process incorporates tiny air pockets, which expand during baking, resulting in a wonderfully tender and aerated crumb.
The sugar not only provides sweetness but also helps tenderize the dough and contributes to the golden-brown crust.
Moisture and Flavor Boosters: Egg, Vanilla & Milk
A large egg acts as a binder, bringing all the ingredients together while adding richness and aiding in leavening. Pure vanilla extract infuses the bars with its warm, aromatic notes, deepening the overall flavor profile.
Milk is key for achieving the perfect batter consistency and adding extra moisture, ensuring your Snickerdoodle Bars remain soft and delightful.
The Iconic Cinnamon-Sugar Swirl & Melted Butter Finish
The combination of granulated sugar and ground cinnamon creates the essential topping, sprinkled generously before baking to form a slightly crisp, aromatic crust. This iconic layer is what truly defines a snickerdoodle.
Crucially, brushing warm melted butter over this topping immediately after baking is a genius move. It adds an extra layer of moisture, intensifies the cinnamon flavor, and provides a beautiful, inviting sheen to the finished bars.
Your Path to Perfect Snickerdoodle Bars: Step-by-Step
- Preheat & Prepare Your Pan:
Set your oven to 350°F (175°C). Properly grease and flour an 8×8 inch baking pan, or line it with parchment paper, leaving an overhang on all sides. This critical step prevents sticking and ensures you can easily lift the cooled bars out of the pan for clean, effortless cutting.
- Whisk Dry Ingredients:
In a medium bowl, thoroughly whisk together the flour, 1 teaspoon cinnamon, cream of tartar, baking soda, and salt. This ensures all leavening agents, spices, and salt are evenly distributed throughout the dry mixture, leading to a consistent rise and flavor in every bite of your Snickerdoodle Bars.
- Cream Butter & Sugar:
In a large bowl, using an electric mixer, cream the softened 1/2 cup butter and 1 cup granulated sugar until the mixture is light, fluffy, and pale yellow, typically taking 2-3 minutes. This crucial step incorporates air, which contributes significantly to a tender, rather than dense, crumb in the finished bars.
- Add Egg & Vanilla:
Beat in the large egg and vanilla extract until they are fully combined into the creamed butter and sugar. Remember to scrape down the sides of the bowl periodically with a rubber spatula to ensure all ingredients are incorporated uniformly, preventing any unmixed pockets.
- Combine Wet & Dry:
With the mixer on low speed, gradually add the whisked dry ingredients to the wet mixture, alternating with the milk. Begin and end with the dry ingredients, mixing just until combined after each addition. The critical tip here: stop mixing as soon as no dry flour streaks remain. Overmixing develops gluten, which can lead to tough, dry snickerdoodle bars.
- Spread the Batter:
Carefully spread the prepared batter evenly into your greased or parchment-lined baking pan. An even layer is essential for consistent baking, ensuring all parts of the bar cook at the same rate and achieve uniform texture.
- Prepare & Sprinkle Topping:
In a small separate bowl, combine the 1/4 cup granulated sugar and 1 teaspoon cinnamon for the topping. Sprinkle this aromatic mixture evenly over the unbaked batter. This creates the signature slightly crisp, cinnamon-sugar crust that makes Snickerdoodle Bars so irresistible.
- Bake to Perfection:
Bake for 25-30 minutes, or until a toothpick inserted into the center comes out with moist crumbs, but no wet batter. The edges should appear lightly golden. Avoid the temptation to overbake, as this is a common culprit for dry and crumbly bars; they will continue to set as they cool.
- The Melted Butter Finish:
While the bars are still warm from the oven, melt 2 tablespoons of butter. Gently brush this melted butter over the warm cinnamon-sugar topping. This final touch adds an extra layer of moisture, intensifies the cinnamon flavor, and provides a beautiful, appealing sheen to your freshly baked bars.
- Cool Completely:
Allow the bars to cool completely in the pan before attempting to cut them into squares. Cooling fully allows them to set properly, resulting in clean, firm slices and the best, most stable texture. Impatience here can lead to crumbling or messy cuts.
Unlock Bakery-Level Snickerdoodle Bars: Expert Tips
The Golden Rule: Don’t Overmix Your Dough
Overmixing your batter is the primary enemy of tender baked goods. It develops gluten excessively, which can turn your light and fluffy Snickerdoodle Bars into dense, tough bricks. Mix only until the flour streaks have just disappeared, no more.
Precision Baking: How to Avoid Dry Bars
Your oven’s temperature can vary, so don’t rely solely on the timer. Look for visual cues: the edges should be lightly golden, and a toothpick inserted into the center should come out with moist crumbs, not wet batter. Pulling them out slightly early is better, as they continue to cook from residual heat.
The Secret to Enhanced Flavor and Texture: Post-Bake Butter
Brushing melted butter over the warm cinnamon-sugar topping is a “game-changer” for these Snickerdoodle Bars. This step not only adds a decadent layer of moisture, keeping them tender, but also deepens the spice flavor and gives them a professional, glistening finish.
Patience is a Virtue: Cooling for Clean Slices
Resist the urge to cut into your warm Snickerdoodle Bars immediately. Allowing them to cool completely in the pan is essential. This crucial step lets the bars set fully, ensuring you can cut them into perfectly neat, tidy squares without any crumbling or stickiness.
Help! Troubleshooting Common Snickerdoodle Bar Problems
“My bars are too dense/tough!”
This is almost always a result of overmixing the batter. When you overmix, you develop too much gluten, which makes the bars tough. To fix this next time, cream your butter and sugar thoroughly, but once you add the dry ingredients, mix only until the flour streaks disappear – literally, stop the mixer the second you no longer see dry flour.
“Why are my bars crumbling?”
Crumbling can happen for a few reasons. Overbaking is a common culprit, as it dries out the structure. Ensure you bake until a toothpick has moist crumbs, not completely clean. Not allowing the bars to cool completely before cutting can also cause crumbling, as the structure needs time to set.
Occasionally, an imbalance in fat or liquid can contribute; ensure your measurements are precise, especially for the butter and milk.
“My cinnamon sugar topping disappeared!”
If your topping seems to vanish, it could be due to an overly wet batter that absorbs the sugar, or uneven sprinkling causing it to melt into the dough. Make sure your batter isn’t too thin and sprinkle the cinnamon sugar evenly right before baking. The melted butter brush afterward helps it adhere and adds shine.
Make Them, Keep Them, Love Them: Serving & Storage
Creative Ways to Serve Your Snickerdoodle Bars
These Snickerdoodle Bars are delightful on their own, but elevate them further by serving them warm with a scoop of vanilla bean ice cream or a dollop of whipped cream. A light dusting of powdered sugar adds an elegant touch, making them perfect alongside a steaming cup of coffee or herbal tea.
They also pair wonderfully with other comforting desserts. If you’re looking for another rich treat to serve, our decadent Caramel Nut Squares are always a crowd-pleaser.
Storing for Freshness: Keep Them Perfect Longer
To maintain their irresistible softness and flavor, store your Snickerdoodle Bars at room temperature in an airtight container. They will remain wonderfully fresh for up to 3-4 days. Placing a piece of parchment paper between layers can prevent them from sticking together.
Can You Freeze Snickerdoodle Bars?
Absolutely! Snickerdoodle Bars freeze beautifully. Once completely cooled, wrap individual bars or the entire slab tightly in plastic wrap, then again in aluminum foil. They can be frozen for up to 2-3 months.
To thaw, simply unwrap and let them come to room temperature, or warm gently in the microwave for a few seconds for that freshly baked feel. This is a great strategy for make-ahead treats.
Your Snickerdoodle Bar Questions Answered: FAQs
Is cream of tartar really necessary?
Yes, cream of tartar is essential for classic snickerdoodles! It provides the characteristic tangy flavor and contributes significantly to their chewy texture, preventing the sugar in the dough from crystallizing. While you can substitute with lemon juice or white vinegar, the taste and texture won’t be quite the same.
Can I make these bars gluten-free or dairy-free?
For gluten-free Snickerdoodle Bars, you can typically substitute a good quality 1:1 gluten-free baking flour blend, ensuring it contains xanthan gum for structure. For dairy-free, use a plant-based butter alternative and a dairy-free milk substitute like almond or soy milk. Be aware that these substitutions may result in slight textural differences, but they can still be delicious.
How do I know if they’re baked through without overbaking?
The key is to look for lightly golden edges and a toothpick inserted into the center coming out with moist crumbs attached, not wet batter. Trust your visual cues more than the timer. If the toothpick is completely clean, they are likely overbaked. They’ll continue to set as they cool, so slightly underbaked is better than overbaked.
What’s the best pan size for Snickerdoodle Bars?
An 8×8 inch baking pan is optimal for this recipe, yielding bars of ideal thickness and ensuring even baking. If you use a larger pan, the bars will be thinner and may bake faster, potentially becoming dry. A smaller pan could result in very thick bars that require a longer baking time and might have a doughy center.
Ready to Bake Your Best Batch Yet?
Now that you’re armed with all the secrets to perfect Snickerdoodle Bars, it’s time to preheat that oven! This recipe promises a treat that’s soft, sweet, and bursting with warm cinnamon flavor, ready to delight everyone who tries it.
Whip up a batch, share your creations, and don’t forget to explore our other delightful dessert recipes, like our incredibly satisfying Classic Apple Crumble Bars, for more baking inspiration.
Snickerdoodle Bars
Course: DessertCuisine: AmericanDifficulty: easy12
servings15
minutes25
minutes240
kcal40
minutesAchieve perfectly moist and fluffy snickerdoodle bars with this simple secret. No more dry, crumbly disappointments – just soft, tender chewiness that will have everyone coming back for more. A game-changer for your baking!
Ingredients
1 and 1/2 cups all-purpose flour
1 teaspoon ground cinnamon
1 teaspoon cream of tartar
1/2 teaspoon baking soda
1/4 teaspoon salt
1/2 cup (1 stick) unsalted butter, softened
1 cup granulated sugar
1 large egg
1 teaspoon vanilla extract
1/4 cup milk
For the Topping:
1/4 cup granulated sugar
1 teaspoon ground cinnamon
2 tablespoons unsalted butter, melted
Directions
- Preheat your oven to 350°F (175°C). Lightly grease and flour an 8×8 inch baking pan, or line it with parchment paper leaving an overhang on the sides.
- In a medium bowl, whisk together the flour, 1 teaspoon cinnamon, cream of tartar, baking soda, and salt. Set aside.
- In a large bowl, using an electric mixer, cream together the softened 1/2 cup butter and 1 cup granulated sugar until light and fluffy, about 2-3 minutes. This step is important for a tender crumb.
- Beat in the egg and vanilla extract until well combined, scraping down the sides of the bowl as needed.
- With the mixer on low speed, gradually add the dry ingredients to the wet ingredients, alternating with the milk. Begin and end with the dry ingredients, mixing just until combined after each addition. The crucial tip here is to stop mixing as soon as the flour streaks disappear. Overmixing develops gluten and can lead to tough, dry bars.
- Spread the batter evenly into the prepared baking pan.
- In a small bowl, combine the 1/4 cup granulated sugar and 1 teaspoon cinnamon for the topping. Sprinkle this mixture evenly over the batter.
- Bake for 25-30 minutes, or until a toothpick inserted into the center comes out with moist crumbs, but not wet batter. Avoid overbaking, as this is another common cause of dry bars. The edges should be lightly golden.
- While the bars are still warm from the oven, melt 2 tablespoons of butter. Gently brush the melted butter over the warm cinnamon sugar topping. This adds an extra layer of moisture and flavor.
- Let the bars cool completely in the pan before cutting them into squares.
Notes
- Ensure not to overmix the batter or overbake the bars for the best moist and tender texture.


