
There’s nothing more disheartening than anticipating succulent chicken only to bite into a dry, tough piece. I’ve certainly faced that frustration in my kitchen, but after years of testing, I’ve perfected a method for making Sticky BBQ Glazed Chicken Thighs that come out incredibly tender and juicy, every single time.
For more moist chicken, try these sticky glazed chicken drumsticks which also focus on preventing dryness.
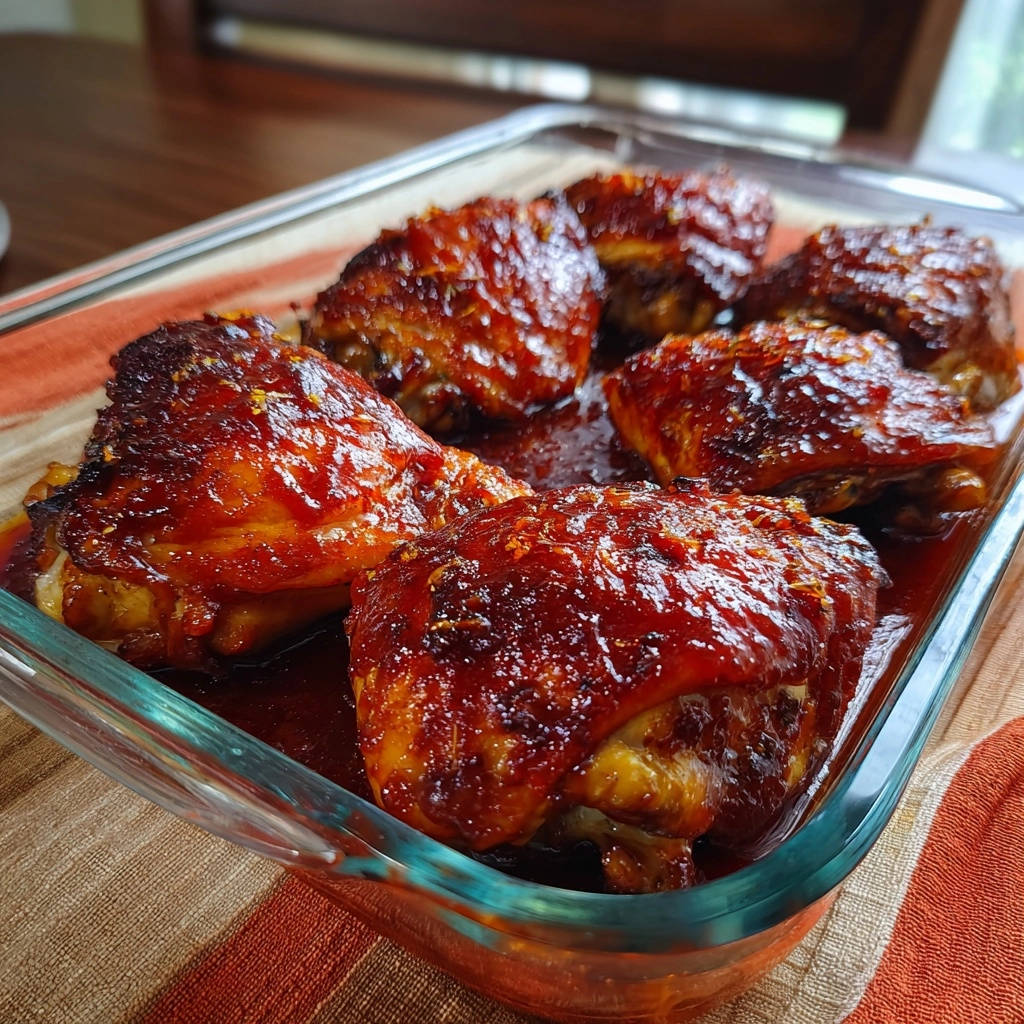
This recipe transforms a simple cut of chicken into an impressive, flavor-packed meal that boasts a truly irresistible, clinging glaze, guaranteeing a moist interior and rave reviews from your family.
Why This Sticky BBQ Glazed Chicken Thighs Recipe Will Be Your New Favorite
Guaranteed Juiciness: The Covered Bake Method
Our initial covered baking step is a game-changer for moisture retention. By creating a steamy, enclosed environment, the chicken thighs cook gently without losing their natural juices.
For an even more tender chicken experience, check out this sweet potato chicken skillet.
This method prevents the common pitfall of dry chicken, ensuring every bite of your Sticky BBQ Glazed Chicken Thighs is incredibly tender and moist from the inside out.
That Irresistibly Sticky, Layered Glaze
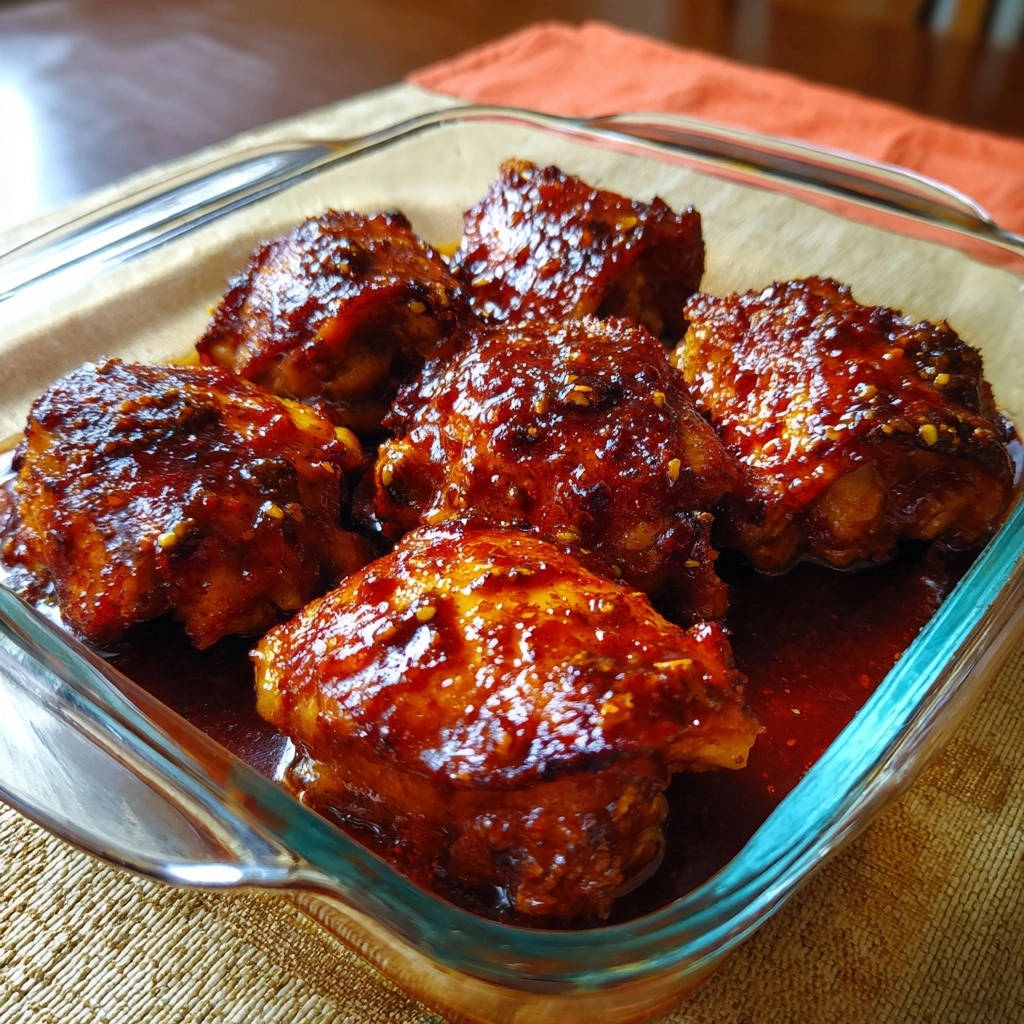
The secret to a truly spectacular glaze lies in careful layering and basting. We apply the flavorful BBQ glaze at multiple stages, building a rich, caramelized coating.
This technique, combined with the ideal balance of brown sugar and apple cider vinegar in our sauce, creates that coveted, deeply flavored, and perfectly sticky texture that clings beautifully to the chicken.
Flavorful Simplicity: Stunning Results, Effortless Process
Despite the gourmet-level results, this recipe for Sticky BBQ Glazed Chicken Thighs is remarkably straightforward. Minimal fuss is involved in achieving a dish that tastes like it came from your favorite BBQ joint.
It’s designed for effortless preparation without compromising on the depth of flavor or that delightful sticky finish.
The Flavor Foundation: Ingredients for Your Best Sticky BBQ Thighs
The Star: Bone-In, Skin-On Chicken Thighs
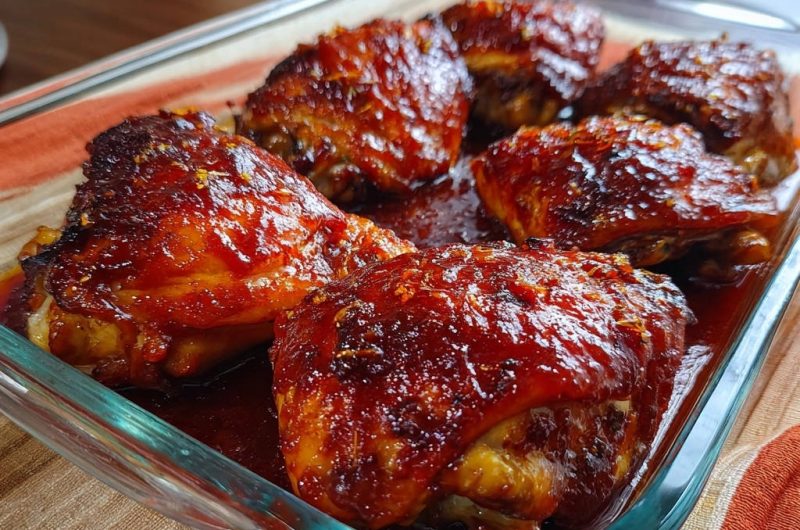
Bone-in, skin-on chicken thighs are my top choice for this recipe due to their inherent juiciness and rich flavor. The bone helps conduct heat evenly, and the skin provides a protective layer against drying out.
When rendered correctly, the skin also crisps up beautifully, adding a textural contrast to the tender meat and forming a delicious crust under the glaze.
Crafting the Perfect BBQ Glaze
The choice of barbecue sauce sets the flavor tone; select a brand you genuinely love, whether smoky, sweet, or tangy. Brown sugar is critical for its deep caramelization properties, contributing to the glaze’s signature stickiness and rich color.
Apple cider vinegar provides an essential tangy counterpoint, balancing the sweetness and adding brightness to the rich BBQ sauce, preventing it from being cloyingly sweet.
Aromatic Boosters: Spices and Citrus Zest
Garlic powder and onion powder infuse the glaze with foundational savory notes, deepening the overall flavor profile. Smoked paprika adds a wonderful layer of smoky warmth, mimicking the flavor of slow-cooked barbecue.
Orange juice introduces a subtle sweetness and acidity, while fresh orange zest amplifies the citrus aroma, adding a bright, fragrant lift that truly elevates the glaze.
Essential Seasoning Staples
Salt is indispensable for seasoning the chicken, bringing out its natural flavors and ensuring the meat itself is seasoned, not just the glaze. Freshly ground black pepper adds a mild, pungent kick that complements the other spices.
These basic seasonings form the foundational flavor layer before the rich BBQ glaze is applied.
Gear Up: Tools for Seamless Sticky BBQ Chicken Thighs Prep
Large Oven-Safe Baking Dish: Essential for accommodating all chicken thighs in a single layer, ensuring even cooking and optimal glaze development.
Whisk and Mixing Bowl: Perfect for effortlessly combining the glaze ingredients into a smooth, cohesive sauce.
Meat Thermometer: Your ultimate guide to perfectly cooked, safe, and juicy chicken every time. Don’t skip this!
Basting Brush: Crucial for layering the glaze, building that signature sticky crust, and imparting deep flavor.
Aluminum Foil: Used for the initial covered baking step, which is key to locking in moisture and tenderness.
Paper Towels: A simple yet vital tool for patting chicken dry to achieve crispy skin and better seasoning adhesion.
Mastering Your Sticky BBQ Glazed Chicken Thighs: The Method
Preheat Your Oven: Set your oven to 375°F (190°C). This ensures the oven is at the correct temperature for even cooking from the moment the chicken goes in.
Prepare and Season the Chicken: Pat the chicken thighs completely dry with paper towels-this is a crucial step for achieving crispy skin and allowing seasonings to adhere better. Season both sides generously with salt and black pepper.
Whisk Together the Irresistible Glaze: In a medium bowl, combine the barbecue sauce, brown sugar, apple cider vinegar, garlic powder, onion powder, smoked paprika, orange juice, and orange zest. Whisk until perfectly smooth and well combined.
Initial Glaze Application and Covered Bake: Arrange the seasoned chicken in a single layer in your large oven-safe baking dish. Pour about half of the prepared glaze evenly over the chicken, making sure to coat the tops. Cover the baking dish tightly with aluminum foil and bake for 30 minutes. This initial covered bake creates a steamy environment that locks in moisture, ensuring the chicken cooks through gently without drying out.
Uncover and Apply More Glaze: After 30 minutes, carefully remove the foil. The chicken should be partially cooked and very moist. Brush the chicken with another generous layer of the remaining glaze. This starts building up the sticky, flavorful crust.
Bake Uncovered with Basting: Return the uncovered dish to the oven and continue baking for another 15-20 minutes, or until the chicken reaches an internal temperature of 175°F (80°C) when checked with a meat thermometer in the thickest part of the thigh, avoiding the bone. Baste the chicken with the pan juices and any remaining glaze every 5-7 minutes during this uncovered baking time to build rich, layered flavor and a beautiful sticky crust.
The Essential Resting Period: Once cooked, remove the chicken from the oven. Let it rest in the baking dish for 5-10 minutes before serving. This crucial resting period allows the juices to redistribute throughout the meat, ensuring every bite is incredibly juicy and tender. Serve with the delicious pan sauce poured over the top.
Chef’s Secrets for Flawless Sticky BBQ Glazed Chicken Thighs
Why Patting Dry is Non-Negotiable
Removing surface moisture from the chicken skin allows it to crisp up beautifully in the oven. Excess water creates steam, which prevents browning and keeps the skin soft.
A dry surface also enables the salt, pepper, and later the glaze, to adhere much more effectively, building a robust flavor foundation and an appealing texture.
The Magic of Internal Temperature
A reliable meat thermometer is your best friend for perfectly cooked chicken. It removes all guesswork, ensuring your chicken is both safe to eat and incredibly juicy without being overcooked.
Aim for an internal temperature of 175°F (80°C) in the thickest part of the thigh, making sure to avoid touching the bone, for optimal tenderness.
Don’t Rush the Rest: Patience Pays Off
Resting the chicken after cooking is a crucial, often overlooked step that dramatically impacts juiciness. As meat cooks, its fibers contract, pushing moisture to the center.
Allowing the chicken to rest for 5-10 minutes allows these fibers to relax, redistributing those delicious juices back throughout the meat for a consistently tender result.
Customizing Your Glaze: Sweetness and Spice
This glaze is incredibly adaptable to your taste preferences. Feel free to adjust the amount of brown sugar for a sweeter or less sweet profile.
For those who love a kick, a pinch of cayenne pepper or a dash of hot sauce can be added to the glaze. Experiment with different BBQ sauce brands to find your perfect flavor base for these Sticky BBQ Glazed Chicken Thighs.
Perfect Pairings: What to Serve with Sticky BBQ Chicken Thighs
Classic Comfort Sides
For a traditional, satisfying meal, classic comfort sides are always a hit. The creamy texture of coleslaw or the tangy bite of potato salad beautifully complements the richness of the chicken.
What to Try Next
Round out your meal with these complementary dishes alongside your sticky BBQ glazed chicken thighs.
- For a touch of sweetness that complements the smoky chicken, try these glazed pearl onions, which cook to a perfect tender gloss.
- To offer a bright and refreshing contrast to the rich chicken, consider a fresh fruit salad that stays vibrant and appealing.
Homemade macaroni and cheese or warm, buttery cornbread also make for hearty, comforting companions.
Fresh & Vibrant Companions
To balance the richness, consider lighter, fresh options. A crisp green salad with a bright vinaigrette, perfectly roasted asparagus, or grilled corn on the cob provides a refreshing contrast.
A vibrant quinoa salad or a simple tomato and cucumber salad also adds a welcome freshness to your plate.
Hearty Starch Options
If you’re looking for something more substantial, several hearty starch options pair wonderfully. Fluffy mashed potatoes are excellent for soaking up that delicious pan sauce.
Flavorful rice pilaf or crispy sweet potato fries offer satisfying textures and flavors that round out the meal beautifully.
Smart Prep: Make-Ahead & Storage Tips for Your BBQ Chicken Thighs
Prepping Ahead: Save Time Later
You can significantly streamline your cooking process by prepping components in advance. The BBQ glaze can be whisked together and stored in an airtight container in the refrigerator for up to 3 days.
Additionally, you can season the chicken thighs up to 24 hours before baking, keeping them covered in the refrigerator. This cuts down on active cooking time on busy weeknights.
Storing Leftovers Safely
Proper storage ensures your leftover Sticky BBQ Glazed Chicken Thighs remain delicious and safe. Allow the cooked chicken to cool completely before transferring it to an airtight container.
Refrigerate promptly for up to 3-4 days. For longer storage, freeze the chicken in a freezer-safe container or bag for up to 3 months.
Reheating for Best Flavor and Texture
To reheat, I recommend using the oven or an air fryer to help maintain some crispness. Place the chicken thighs in a preheated oven at 300-325°F (150-160°C) until warmed through, often about 15-20 minutes.
For an air fryer, use a similar temperature for 8-10 minutes. This method helps prevent the chicken from drying out and keeps the glaze intact, avoiding a rubbery result from microwave reheating.
Solved: Common Sticky BBQ Glazed Chicken Thighs Problems
My Chicken is Dry and Tough!
Dry chicken often results from overcooking or not allowing for a proper resting period. Always use a meat thermometer and aim for 175°F (80°C) in the thickest part of the thigh to avoid exceeding the ideal temperature.
Ensure you adhere to the initial covered bake step; this crucial technique locks in moisture and gently cooks the chicken, preventing it from drying out.
The Glaze Isn’t Sticky or Thick Enough
If your glaze lacks stickiness, it might need more time to reduce and caramelize during the uncovered baking phase. Ensure you’re basting frequently during the final 15-20 minutes.
This regular basting and exposure to direct heat allows the sugars in the glaze to thicken and create that desirable sticky crust. Double-check your brown sugar ratio in the glaze for optimal results.
Skin Isn’t Crispy, Or It’s Too Charred
Crispy skin starts with thoroughly patting the chicken dry before seasoning and baking; moisture inhibits browning. If the skin is too charred, your oven temperature might be too high during the uncovered bake, or the chicken was left uncovered for too long without sufficient basting.
Monitor closely and baste regularly during the final baking to encourage browning without burning. If you notice charring, you can lightly tent with foil for the last few minutes.
Your Sticky BBQ Glazed Chicken Thighs Questions Answered
Can I use boneless, skinless chicken thighs for this recipe?
Yes, you can use boneless, skinless chicken thighs, but be aware of a few adjustments. They will cook faster, so reduce the overall baking time by about 10-15 minutes, or until they reach 165°F (74°C).
While still delicious, boneless, skinless thighs may not be as inherently juicy and won’t develop the same crispy skin or deep flavor layer that the bone-in, skin-on variety offers.
What kind of barbecue sauce is best?
The “best” barbecue sauce is truly a matter of personal preference. I recommend choosing a high-quality brand whose flavor profile you already enjoy-whether it’s sweet and tangy, smoky, or a little spicy.
Don’t be afraid to experiment, or even use a homemade BBQ sauce if you have a favorite recipe. The quality of your base sauce directly impacts the final glaze for these Sticky BBQ Glazed Chicken Thighs.
Can I make this recipe on the grill instead of baking?
Absolutely! To adapt this recipe for the grill, use indirect heat for the initial cooking phase to ensure the chicken cooks through without burning the glaze. Start by searing the chicken over direct medium heat for a few minutes per side to get some color.
Then, move it to indirect heat, cover the grill, and baste frequently during the last 15-20 minutes over low-medium heat until it reaches 175°F (80°C). Be vigilant with basting and heat control to prevent charring.
Is there a substitute for apple cider vinegar?
If you don’t have apple cider vinegar, white wine vinegar or even fresh lemon juice can be used as a substitute. Both will provide the necessary acidity to balance the sweetness of the glaze.
Keep in mind that using lemon juice might add a slightly more pronounced citrus note than the vinegar.
Can I double or halve the recipe?
Yes, this recipe scales well. When doubling, ensure you use a larger baking dish or two separate dishes to accommodate all the chicken thighs in a single layer, preventing overcrowding.
You’ll also need to double all the glaze ingredients. Halving the recipe is straightforward-simply use half the chicken and half of each glaze ingredient, and the cooking times should remain largely consistent, though always check the internal temperature.
Ready to Enjoy Your Irresistible Sticky BBQ Glazed Chicken Thighs?
Your New Go-To Dinner for Rave Reviews
This recipe for Sticky BBQ Glazed Chicken Thighs truly delivers on its promise of perfectly tender, juicy chicken with an incredible, clinging glaze that will have everyone asking for seconds. It’s a remarkably easy method that consistently yields spectacular results, making it an instant classic for weeknight dinners or casual entertaining.
Say goodbye to dry chicken and hello to your new favorite way to enjoy baked BBQ chicken thighs!
Share Your Culinary Triumph!
I can’t wait for you to experience the magic of this recipe. Once you’ve cooked up your own batch of these irresistible Sticky BBQ Glazed Chicken Thighs, snap a photo and share your culinary triumph.
I love seeing your creations and hearing about your successes in the kitchen!
Sticky BBQ Glazed Chicken Thighs
Course: Main CourseCuisine: AmericanDifficulty: easy4
servings15
minutes45
minutes350
kcal60
minutesSay goodbye to dry chicken! This super simple method bakes chicken thighs to be perfectly tender and juicy, coated in a rich, flavorful glaze that sticks just right. You’ll wonder how you ever made them any other way!
Ingredients
6 bone-in, skin-on chicken thighs
1 teaspoon salt
1/2 teaspoon black pepper
1 cup barbecue sauce (your favorite brand)
2 tablespoons brown sugar
1 tablespoon apple cider vinegar
1 teaspoon garlic powder
1 teaspoon onion powder
1/2 teaspoon smoked paprika
1/4 cup orange juice
1 tablespoon orange zest (from one orange)
Directions
- Preheat your oven to 375°F (190°C).
- Pat the chicken thighs completely dry with paper towels. This is a crucial step for getting that initial skin texture. Season both sides generously with salt and black pepper.
- In a medium bowl, whisk together the barbecue sauce, brown sugar, apple cider vinegar, garlic powder, onion powder, smoked paprika, orange juice, and orange zest until well combined. This is your delicious glaze.
- Place the seasoned chicken thighs in a single layer in a large oven-safe baking dish. Pour about half of the prepared glaze evenly over the chicken, making sure to coat the tops.
- Cover the baking dish tightly with aluminum foil. Bake for 30 minutes. This initial covered bake creates a steamy environment that helps the chicken cook through gently and prevents it from drying out, locking in moisture.
- After 30 minutes, remove the foil. The chicken should be partially cooked and very moist. Brush the chicken with another generous layer of the remaining glaze.
- Return the uncovered dish to the oven and continue baking for another 15-20 minutes, or until the chicken reaches an internal temperature of 175°F (80°C) when checked with a meat thermometer in the thickest part of the thigh, avoiding the bone. Baste the chicken with the pan juices and remaining glaze every 5-7 minutes during this uncovered baking time to build layers of flavor and a beautiful sticky crust.
- Once cooked, remove the chicken from the oven. Let it rest in the baking dish for 5-10 minutes before serving. This resting period allows the juices to redistribute throughout the meat, ensuring every bite is incredibly juicy and tender. Serve with the delicious pan sauce poured over the top.
Notes
- Patting chicken dry is crucial for initial skin texture. Covering during the first bake locks in moisture. Resting the cooked chicken allows juices to redistribute for maximum tenderness.


