
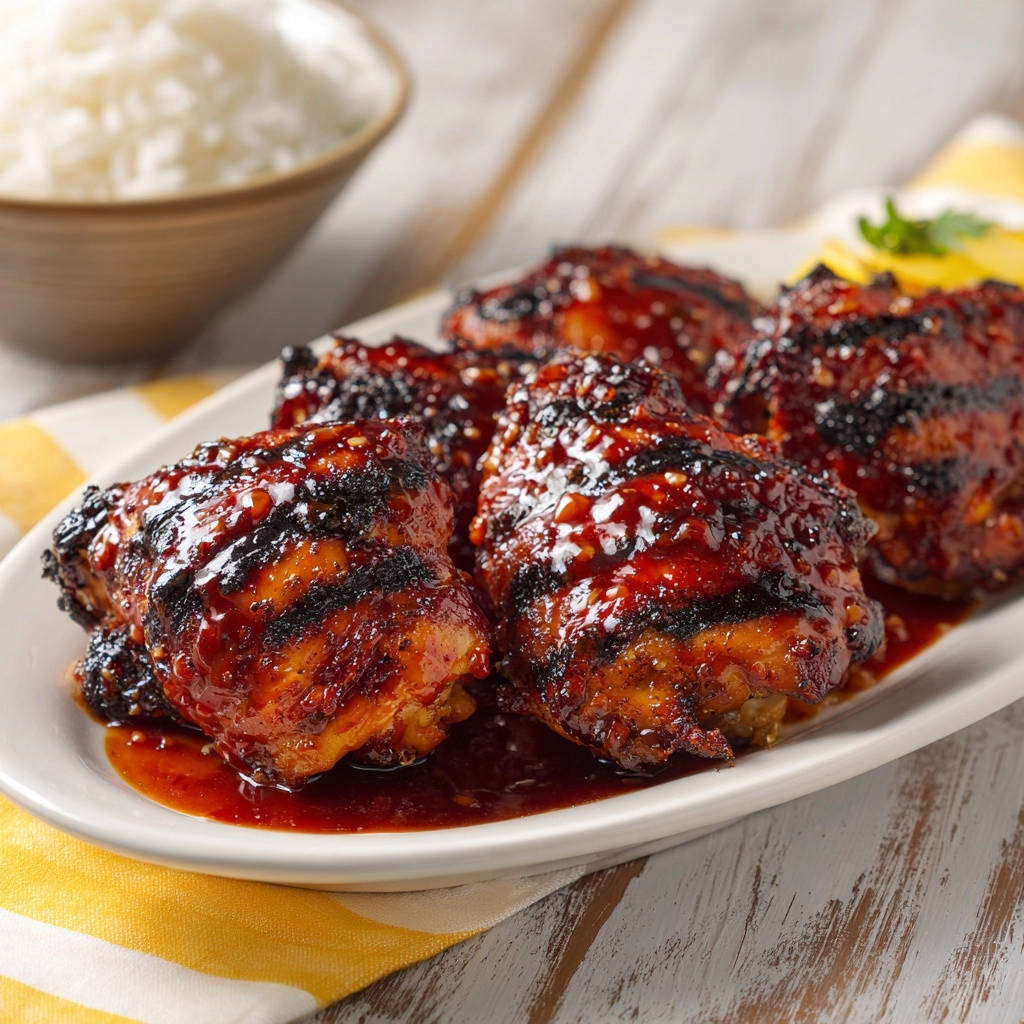
Trying to achieve truly sticky, lacquered Sticky Glazed Grilled Chicken Thighs often ends in bitter, scorched disappointment when the sugar hits the grill too early.
I spent years perfecting the foolproof two-stage cooking method detailed here, which allows the chicken to cook fully before the glaze ever sees the intense heat.
This technique is the key to securing perfect caramelization, resulting in the most tender, intensely flavorful grilled chicken every single time.
Beyond the Basic BBQ: Mastering the Anti-Scorching Grill Technique
Cracking the Code: Preventing the Dreaded Glaze Scorch
The core challenge when glazing meat is that sugar burns at a lower temperature than it takes for chicken to cook through safely.
We aim for caramelization-a controlled browning-but applying sugar too early causes it to quickly scorch, turning bitter and black long before the chicken hits 165°F internally.
The solution is timing: Cook the chicken “naked” first, reserving the sticky glaze application for the final few, rapid minutes of cooking.
Why Chicken Thighs Are the Superior Choice for Grilling
Chicken thighs boast significantly higher fat content and connective tissue compared to lean breasts, making them far more forgiving on the grill.
This extra buffer of moisture is essential for withstanding the 20-minute slow cook and the final high-heat glaze phase without drying out.
Thighs retain their tenderness and juicy texture, which is crucial for perfect glazed chicken thighs that are guaranteed not to be chewy.
The Two-Zone Grill Setup: Ensuring Even, Low-and-Slow Cooking
The secret to the initial low-and-slow “naked” cook is maintaining a precise, medium-low heat.
If you are using a gas grill, turn half the burners to low and place the chicken on the side with the burners off (indirect heat) or keep all burners at their lowest setting.
For charcoal, bank all the hot coals to one side, aiming for a consistent grill temperature between 300°F and 350°F to gently cook the meat without aggressive searing.
The Essential Building Blocks: Ingredients for Maximum Stickiness and Flavor
The Umami Trio: Soy Sauce, Sesame Oil, and Rice Vinegar
Soy sauce provides the fundamental salty and savory umami base for the marinade.
Using low-sodium soy sauce is advisable to better control the overall salinity of the dish, especially since the glaze concentrates the flavor.
Rice vinegar adds a necessary acidic tang, which cuts through the richness of the brown sugar glaze and the natural fattiness of the chicken thighs.
Creating the Perfect Lacquer: Brown Sugar and Ketchup (The Glaze Base)
Brown sugar is critical for the glaze because the added molasses provides deep color, richness, and moisture.
This results in a much deeper, more complex perfect caramelization than can be achieved with plain white granulated sugar.
For another fruity twist on tender chicken, consider these juicy pineapple chicken skewers.
Ketchup, or a quality tomato paste, functions as a superb natural thickener and binder for the glaze, helping it adhere perfectly to the grilled meat.
Aromatic Foundation: Fresh Ginger and Garlic
Always use fresh, finely minced garlic and ginger in this marinade for maximum flavor impact.
Dried substitutes simply lack the bright, pungent aromatic oils that infuse deeply into the chicken fibers during the marinating process.
A Note on Heat: Customizing Your Crushed Red Pepper Flakes
Crushed red pepper flakes offer clean heat without significantly altering the glaze’s texture or consistency.
You can easily adjust the quantity based on your preference, from a subtle background warmth to a fiery intensity.
For a slightly deeper, richer heat, consider substituting a teaspoon of chili garlic sauce in the glaze mixture.
Preparing the Flavor: Marinade & Glaze Steps (Stages 1 & 2)
-
Stage 1: The Flavor Bath (Initial Marinade Prep)
Ensure you pat the chicken thighs completely dry using paper towels before adding them to the marinade.
This preparatory step removes excess surface moisture, allowing the soy-based seasoning to penetrate the meat fibers better.
The minimum 30-minute marinating time is crucial for surface flavor, but going up to four hours provides a deeper flavor profile.
Avoid marinating longer than four hours, as the rice vinegar’s acidity can begin to break down the meat structure, resulting in a slightly mushy texture.
-
Stage 2: Simmering for Success (Creating the Finishing Glaze)
The critical first step is straining a quarter cup of the raw marinade liquid into a saucepan, leaving the raw solids behind.
Safety Note: We use a portion of the raw marinade for the glaze base because it will be boiled for several minutes, rendering it completely safe for consumption.
Add the brown sugar, ketchup, and water to the saucepan, bringing the mixture to a simmer for about three minutes.
The glaze is ready when it slightly thickens and coats the back of a spoon; do not over-thicken it, as it will thicken further upon cooling.
For more ideas on achieving that perfect sticky glaze, check out sticky sesame glazed chicken thighs.
Your Path to Sticky Glazed Grilled Chicken Thighs Perfection: Grilling Guide
Stage 3: The Naked Grill Phase (Low & Slow Cooking)
Preheating the grill to a consistent medium-low heat (300-350°F) is non-negotiable for successfully implementing this anti-scorching grill technique.
-
Oil and Place:
Lightly oil the clean grill grates to prevent the chicken from sticking as it cooks.
Remove the chicken thighs from the marinade (discarding the remaining raw liquid) and season lightly with black pepper only, as the soy sauce provides enough sodium.
Place the seasoned chicken directly on the preheated grates.
-
Monitor and Turn:
Grill for a total of 18 to 20 minutes in this phase, rotating the chicken every five to six minutes.
The goal here is to achieve an even, light color and to cook the chicken most of the way through without developing deep, aggressively charred grill marks.
-
The Internal Temperature Check (155°F):
Use an instant-read thermometer to verify the chicken is near completion, measuring an internal temperature of 155°F.
Hitting this precise temperature is the critical trigger moment before applying the sugar-rich glaze.
Stage 4: High Heat Finish (Applying the Glaze for Caramelization)
This rapid, high-heat exposure at the very end ensures the glossy, deep lacquer develops without any risk of scorching.
-
First Glaze Coat:
Brush one side of the chicken generously with the prepared sticky glaze.
Flip the chicken immediately and cook for exactly two minutes to begin the controlled caramelization of the sugar.
-
Final Glaze and Temp Check (165°F):
Brush the second, unglazed side generously with the sauce.
Flip one final time and cook for two more minutes, checking the internal temperature to ensure it reaches the safe 165°F.
The short, intense exposure provides just enough heat for the glaze to set and shine beautifully.
Chef’s Secrets: Elevate Your Sticky Glazed Grilled Chicken Thighs Game
The Post-Grill Rest is Mandatory: Allowing the chicken to rest for five minutes off the heat allows the internal temperature to stabilize and the meat fibers to relax.
This resting period redistributes the internal juices, guaranteeing incredibly tender, moist results for your Sticky Glazed Grilled Chicken Thighs.
Use an Instant-Read Thermometer: Relying on visual cues for cooked chicken is inherently risky, especially when timing the critical transition into the glaze phase.
A reliable, calibrated thermometer is the best investment for achieving perfect internal temperatures and avoiding both dry chicken and food safety concerns.
Maximize the Leftover Glaze: Don’t let any excess finishing glaze go to waste.
Simmer any remaining sauce separately until it is reduced to a thick syrup, then spoon it generously over the finished, resting chicken for maximum stickiness and shine.
Clean Grates, Happy Glaze: Ensure your grill grates are pristine and free of old, charred residue before starting the cook.
Leftover carbon and residue from previous cooks are prime accelerants for scorching when the sugar-rich glaze is introduced to the heat.
Troubleshooting Common Sticky Glazed Grilled Chicken Thighs Mistakes
Problem: The Glaze is Still Burning Too Quickly
If your glaze scorches even after following the low-and-slow method, your “medium-low” heat is almost certainly too high during Stage 3.
Focus on reducing the ambient grill temperature further, perhaps aiming for the lower end of the range (300°F) or even 275°F for extremely thick thighs.
Ensure you are utilizing a dedicated cool zone, avoiding direct high heat entirely until the very final two-minute glazing passes.
Problem: The Chicken Is Dry Despite Using Thighs
This issue typically stems from insufficient internal temperature monitoring or accidental overcooking during the “naked” phase.
Ensure you pull the chicken precisely at 165°F, using the thermometer near the thickest part of the meat without touching bone.
Problem: The Glaze is Runny and Not Sticky
The initial glaze preparation step requires the mixture to simmer until it visibly thickens enough to coat the back of a spoon.
If the glaze is too thin upon cooling, return it to the saucepan and simmer for an additional one to two minutes.
Always use packed brown sugar, as measuring loosely packed sugar will throw off the necessary sugar-to-liquid ratio needed for true stickiness.
Complementary Recipes
To round out your meal with the Sticky Glazed Grilled Chicken Thighs, consider these refreshing additions.
- For a bright and crunchy contrast to the grilled chicken, try this Spicy Cucumber Edamame Salad, offering a cool counterpoint.
- Another excellent option to pair with your chicken is the Lemon Soy Wakame Salad Recipe, bringing a zesty, oceanic note.
Serving Suggestions and Make-Ahead Strategies
Perfect Pairings: What Complements Asian-Inspired Grilled Chicken?
Classic complementary sides include steamed Jasmine or coconut rice, which soak up the residual glaze wonderfully.
For something green, grill some bok choy or serve a refreshing, crisp cucumber salad dressed with sesame and rice vinegar.
These sides provide a necessary clean, cool contrast to the deep, sweet, and sticky profile of the chicken.
Prep Ahead: Making the Most of Marinating Time
Both the initial marinade mixture and the fully cooked, finished glaze can be prepared up to 48 hours in advance.
Store the glaze separately in an airtight container in the refrigerator, allowing you to focus solely on the grilling process on the day of your meal.
Reheating Leftovers: Keeping the Glaze Shiny and Moist
To maintain the beautiful texture and glossy shine of the glaze, avoid reheating the chicken in the microwave.
Instead, use an oven or air fryer set to a low temperature (around 300°F) for about five to seven minutes.
This gentle heat prevents the sugar from crystallizing and ensures the chicken remains moist.
Frequently Asked Questions About Grilling Chicken
Can I use boneless, skinless chicken breasts instead of thighs?
Yes, but breasts require careful modification of the method due to their extremely low fat content.
You must reduce the initial cooking time significantly, targeting 145°F internal temperature before applying the glaze.
Monitor the internal temperature frequently to ensure they do not exceed the safe but drying temperature of 165°F.
Do I really need to discard the marinade?
Yes, any raw marinade that has been in contact with uncooked chicken must be safely discarded due to the high risk of bacterial contamination.
The small portion reserved for the glaze (Stage 2) is safe only because the act of fully boiling it kills all harmful bacteria.
Never use leftover, unboiled raw marinade as a finishing sauce, regardless of how good it smells.
What type of grill works best for this recipe (Gas vs. Charcoal)?
Both gas and charcoal grills work perfectly for this recipe.
Charcoal imparts a deeper, more robust smoky flavor, which pairs well with the sticky sweetness of the glaze.
However, gas provides better, more consistent temperature control for maintaining the specific medium-low setting required in the initial slow-cooking phase.
Ready to Grill the Best Sticky Glazed Grilled Chicken Thighs of the Season?
This unique approach to grilling chicken thighs-separating the cooking and glazing phases-is truly transformative for barbecue cooks who love rich, sticky flavor without the bitterness of scorched sugar.
Mastering this technique ensures you achieve perfect caramelization and intensely juicy meat every time.
Try this recipe for your next gathering and share your success stories!
Happy Grilling!
Grilled Chicken Thighs
Course: Main CourseCuisine: AsianDifficulty: easy4
servings15
minutes25
minutes350
kcal60
minutesCracked the code on perfect glazed chicken! Get deep grill marks and a thick, lacquered coating without the frustration of burning the sticky glaze. This game-changing method uses low heat and late application for flawless barbecue results.
Ingredients
4 boneless, skinless chicken thighs
1/4 cup Soy Sauce
2 tablespoons rice vinegar
1 tablespoon sesame oil
1 tablespoon fresh ginger, minced
3 cloves garlic, minced
1/2 cup brown sugar (packed)
1/4 cup ketchup or tomato paste
2 tablespoons water
1 teaspoon crushed red pepper flakes (optional)
Salt and black pepper to taste
1 teaspoon sesame seeds (for garnish)
Directions
- Prepare the Marinade: In a medium bowl, whisk together the soy sauce, rice vinegar, sesame oil, ginger, and garlic. Pat the chicken thighs dry and place them in the marinade. Let them sit for at least 30 minutes or up to 4 hours in the refrigerator.
- Prepare the Glaze: While the chicken marinates, strain 1/4 cup of the marinade liquid into a small saucepan. Add the brown sugar, ketchup, and water. Bring the mixture to a simmer over medium heat, stirring constantly until the sugar is fully dissolved and the glaze thickens slightly (about 3 minutes). Remove from heat and set aside. This will be your finishing glaze.
- The Anti-Scorching Grill Technique: The key to preventing that sticky glaze from burning is separating the cooking process. Preheat your grill to a medium-low heat (about 300 to 350 degrees F). Lightly oil the grates.
- Grill Naked: Remove the chicken thighs from the marinade (discard the remaining marinade) and season lightly with salt and pepper. Place the chicken on the preheated, oiled grill grates. Grill the chicken over medium-low heat for 18 to 20 minutes, turning every 5 to 6 minutes, until the internal temperature reaches about 155 degrees F.
- Apply the Glaze: Once the chicken is nearly cooked (155 F), brush one side generously with the prepared sticky glaze. Flip the chicken and cook for 2 minutes to caramelize the sauce lightly.
- Glaze and Finish: Brush the other side generously with the glaze. Flip one more time and cook for another 2 minutes. The goal is to cook the chicken until it reaches 165 degrees F internally, giving just enough high heat exposure at the very end to caramelize the sugar without burning the sauce entirely. Because the chicken is already almost done, the glaze has minimal time to scorch.
- Rest and Serve: Remove the finished glazed chicken from the grill and let it rest for 5 minutes. Spoon any residual sauce remaining on the serving platter over the thighs and garnish with sesame seeds before serving alongside rice.
Notes
- The glaze is applied only during the final 4-5 minutes of cooking to ensure the sugar caramelizes without scorching.


