
The pursuit of truly restaurant-quality Chinese-American chicken at home often ends in disappointment: a perfectly sticky, glossy glaze that instantly turns the crispy coating into a gummy mess. After years of testing techniques, I am confident that this recipe for Sticky Sesame Ginger Chicken has finally cracked the code, guaranteeing a loud, satisfying crunch that lasts from the first bite to the last, thanks to two specific, non-negotiable steps.
Beyond Basic Takeout: Why This Recipe Guarantee’s Long-Lasting Crunch
The defining characteristic of excellent sticky chicken is not the sauce-it’s the texture. Our approach moves beyond standard frying methods by implementing a precise dual-starch coating and a high-heat finishing fry, designed specifically for maximum crispness retention under a heavy, wet sauce.
For perfectly crisp chicken every time, try crispy glazed chicken cutlets.
The Double-Starch Method: Our Secret Weapon Against Gummy Crust
The traditional method uses only a wet batter, which quickly succumbs to sauce moisture. We first coat the chicken in a thick, pancake-like wet batter composed of flour and cornstarch, followed immediately by a light dusting of dry cornstarch.
This dual-application creates a microscopic porous shell; the dry cornstarch acts like an insulating sponge, absorbing residual surface moisture before the sauce hits and ensuring the crust sets up hard and durable during the frying process.
The High-Heat Second Fry: Driving Out Moisture for Maximum Durability
The second fry is the most crucial 90 seconds of the entire recipe. After the chicken is fully cooked in the first fry, it is rested and then returned to oil heated significantly higher (375°F).
This rapid, high-temperature blast instantly vaporizes any moisture that has crept into the crust during resting, effectively sealing and hardening the exterior. This process, known as flash-frying, is what allows the crust to withstand the sticky glaze without going soggy.
The Building Blocks of Flavor: Inside Your Sticky Sesame Ginger Chicken
While the texture is key, the flavor must be vibrant and balanced. Choosing quality ingredients, especially fresh aromatics, is essential for a deep, complex, sweet-and-savory glaze that complements the crunchy chicken.
Selecting the Right Cuts: Thighs vs. Breasts
Boneless, skinless chicken thighs are highly recommended because their higher fat content makes them juicier and more forgiving, ensuring they remain tender even after the double-fry process.
Chicken breasts offer a leaner option and cook faster, but they are prone to drying out if fried for too long; if using breasts, ensure they are cut into uniformly sized 1-inch pieces to prevent overcooking.
For a reliably tender result, try these crispy chicken cutlets with glaze.
The Crisping Components: Flour, Cornstarch, and Oil
All-purpose flour provides the necessary structure and gluten base for the initial wet batter, allowing it to adhere tightly to the chicken pieces.
Cornstarch is superior to flour for crispness because it contains no gluten and, when fried, absorbs less oil, resulting in a lighter, harder, and shatteringly crisp exterior.
We recommend a neutral, high-smoke-point vegetable or canola oil. It is imperative that the oil temperature for the first fry is precisely 350°F (175°C) to cook the chicken through evenly.
The Umami-Rich Glaze Foundation
The glaze uses orange juice not just for subtle citrus brightness but also for natural acidity and sweetness, perfectly balancing the deep saltiness provided by the low-sodium soy sauce.
Freshly grated ginger and minced garlic are non-negotiable aromatics; pre-minced jars will result in a muted, flat sauce, so take the time to grate the ginger finely.
Chili garlic sauce adds a crucial layer of sweet heat and tang. For a milder flavor, you can substitute Sriracha, or for zero heat, a tiny dash of tomato paste provides necessary color and depth.
Your Path to Sticky Sesame Ginger Chicken Perfection: A Detailed Guide
-
Phase 1: Preparing the Batter and Double Coat
Ensure the wet batter reaches a thick, smooth, pancake-like consistency, adjusting water slightly if necessary. The batter should cling heavily to the chicken, like thick paint, without being runny.
Crucially, ensure every battered piece is lightly but completely coated in the dry cornstarch before frying to lock in moisture and build the durable shell. Shake off the excess dry coating to avoid clumping in the oil.
-
Phase 2: The First Fry for Internal Cook
Maintain the oil temperature consistently at 350°F (175°C). Use a thermometer for accuracy, as overcrowding the pan will drop the temperature too quickly, leading to greasy chicken.
Fry for 4-5 minutes until light golden and cooked through internally. Remove the chicken and place it on a wire rack-never on paper towels-to allow air circulation, which prevents steaming and softens the crust.
-
Phase 3: Crafting the Glossy, Balanced Sauce
Whisk together the orange juice, soy sauce, sugar, vinegar, ginger, garlic, and chili garlic sauce in a saucepan and bring them to a gentle simmer. Simmering helps dissolve the sugar and melds the aromatics before thickening.
Prepare the cornstarch slurry (cornstarch + cold water). Using cold water prevents lumps from forming, and adding it slowly while whisking vigorously ensures a smooth, glossy finish without starch pockets.
-
Phase 4: The Final Anti-Soggy Crisping Fry (The 90-Second Rule)
Raise the oil temperature to 375°F (190°C). This high heat is essential for the rapid moisture-expulsion needed for maximum durability before saucing.
Return the already cooked chicken to the oil and fry for a maximum of 60 to 90 seconds until they are deep golden brown and the surface is audibly hard. This quick burst sets the exterior without drying out the inside.
-
Phase 5: The Critical Final Toss and Immediate Serve
Immediately transfer the piping hot, re-crisped chicken pieces directly into a clean mixing bowl and quickly toss with the warm glaze. Over-tossing or letting the chicken cool will allow moisture exchange, compromising the crunch.
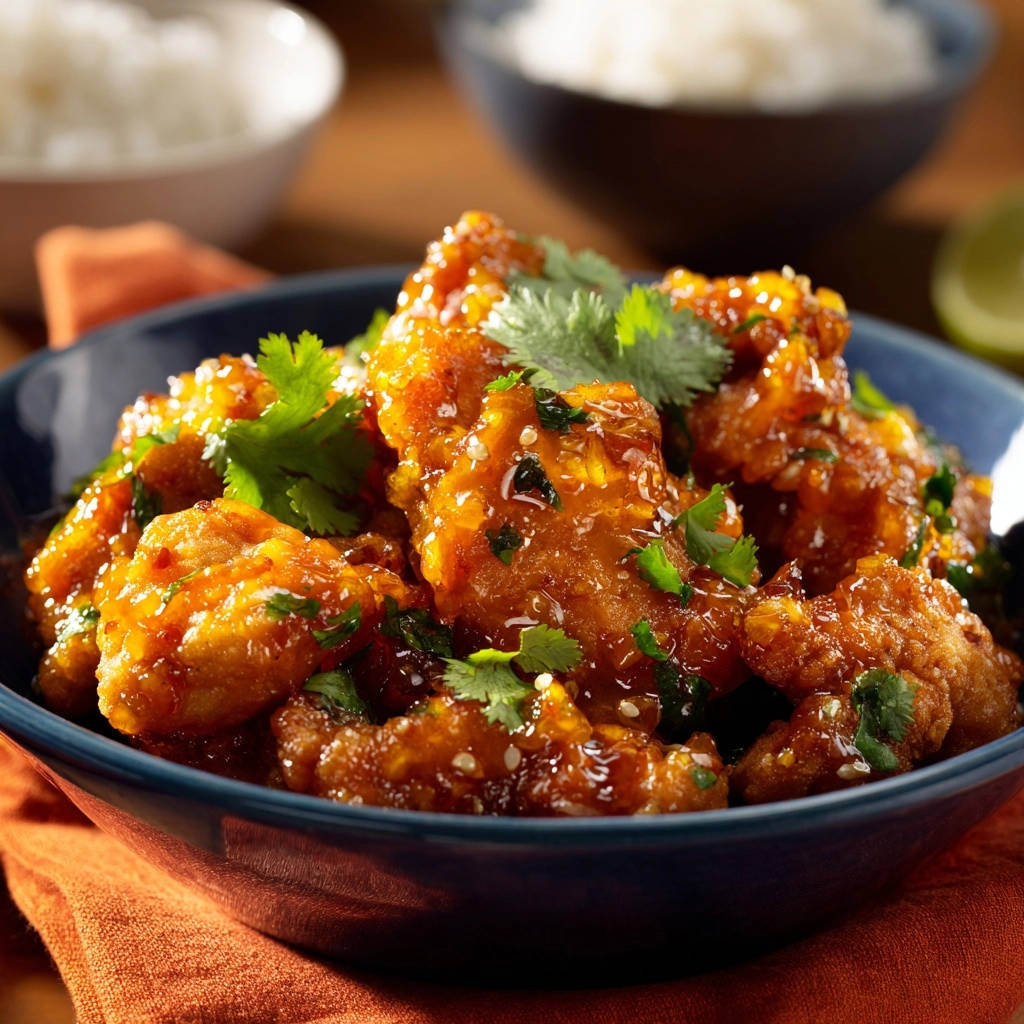
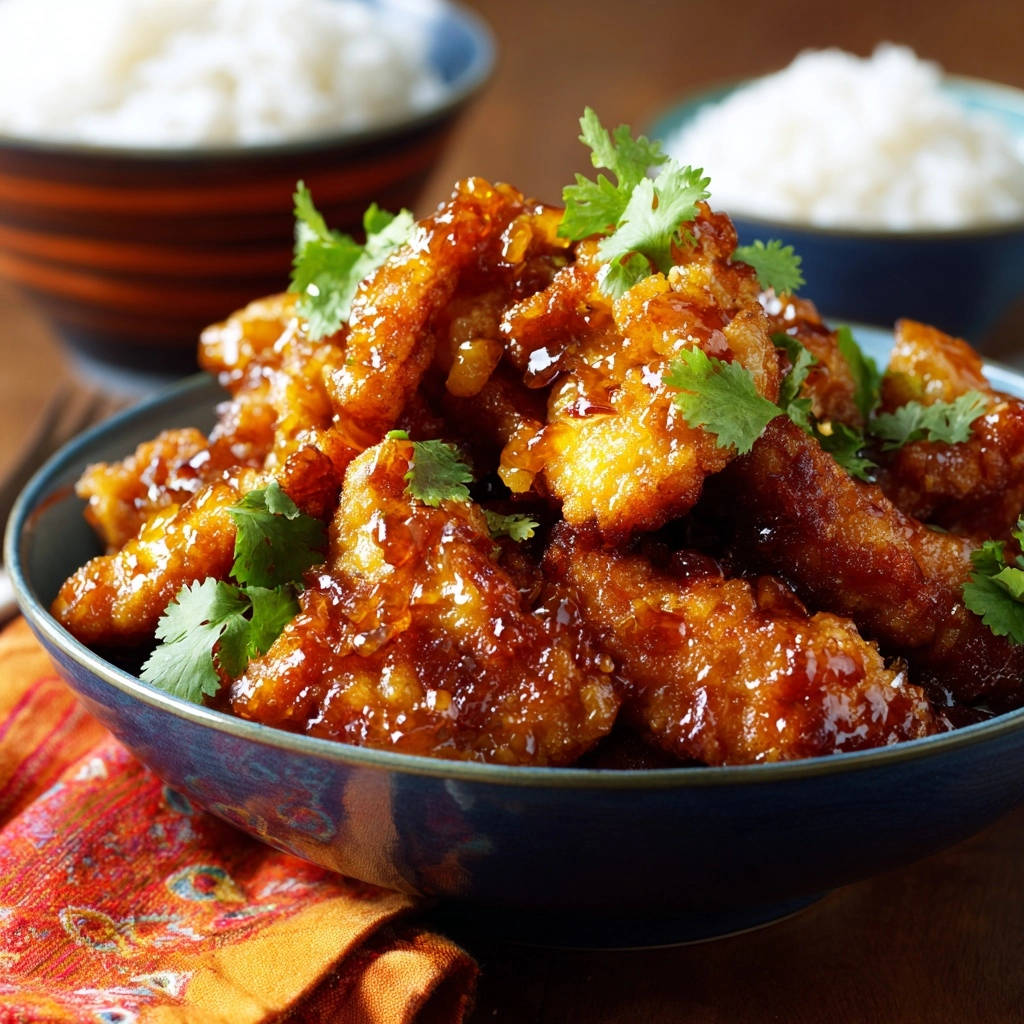
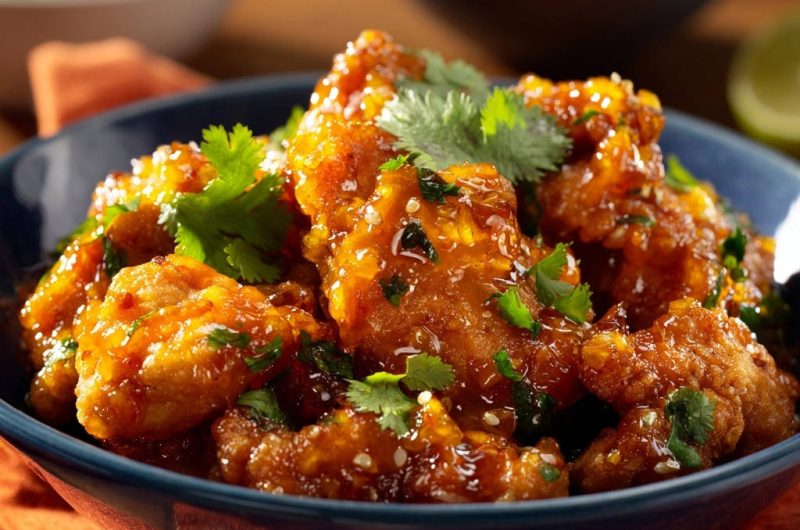
Garnish immediately with toasted sesame seeds and cilantro and serve over steamed rice while the crust is at its absolute peak crispness to enjoy the perfect Sticky Sesame Ginger Chicken texture.
Chef’s Secrets: Elevating Your Sticky Sesame Ginger Chicken Game
This recipe relies on precision. Mastering these specific techniques ensures the texture and flavor payoff is truly exceptional.
Perfect Oil Management for Frying Consistency
Monitor Temperature Religiously: Use a high-quality digital thermometer or a deep-fry thermometer. If the oil drops below the specified temperature, the chicken will absorb oil and become greasy rather than crisp. Fry in very small batches to maintain heat recovery speed.
Achieving the Ideal Glaze Texture
The Slurry Must Be Whisked Constantly: When adding the cornstarch slurry, pour it in a slow stream while whisking vigorously for at least one minute after it begins to thicken. Stop pouring immediately once the desired thickness is achieved-it should coat the back of a spoon-as it will continue to thicken slightly as it cools.
Glaze Personalization: Adjusting Heat and Sweetness
Balancing Sweetness: If you find the glaze too sweet (especially if you substitute sugar with honey), add a small splash of fresh lemon juice or extra rice vinegar at the end to cut through the richness and brighten the flavor profile.
Controlling the Spice: Start with half the recommended chili garlic sauce amount and taste before adding the rest. For a completely non-spicy version, substitute the chili garlic sauce with 1 teaspoon of plain tomato paste, which provides necessary color and glutamic acid for depth of flavor.
Troubleshooting Your Frying Technique: Common Sticky Chicken Issues Solved
“Why Isn’t My Sauce Thickening?”
The primary culprit is often insufficient heat or insufficient cooking time after the slurry is added. Ensure the mixture reaches a full, rolling simmer and is whisked for at least 60 seconds after adding the slurry to fully activate the cornstarch.
Alternatively, if the sauce still seems thin, your cornstarch may have lost potency. Mix another small emergency slurry (1 tsp cornstarch with 1 tsp cold water) and add it slowly until the desired consistency is achieved, always keeping it at a simmer while whisking.
“My Chicken Turned Out Greasy.”
This happens when the oil temperature is too low (below 350°F). Low oil temperature prevents the rapid surface crisping, allowing the crust to absorb the fat instead of forming a durable shell. Use an accurate thermometer and always allow the oil to return to temperature between batches, even if it takes a few minutes.
“The Coating Fell Off During Frying.”
The main reason the coating separates is either insufficient initial adherence (not fully coating the chicken in the wet batter) or not dropping the battered chicken into the hot oil quickly enough. The dry cornstarch coat must be applied immediately after the wet batter for the best adhesion and durability.
Pairing and Prep: Storage, Serving, and Make-Ahead Strategies
Optimal preparation and smart storage are vital for maximizing the enjoyment of your perfect Sticky Sesame Ginger Chicken.
The Best Sides to Serve with Sticky Sesame Ginger Chicken
We recommend a foundation of fluffy jasmine rice or brown rice to soak up the residual, intensely flavorful glaze. For a necessary textural and temperature contrast, serve a side of blanched, cold snap peas or a simple, refreshing sesame-dressed cucumber salad.
What Else to Try?
Complement your sticky sesame ginger chicken with these fresh options.
- For a bright contrast, consider this spicy cucumber edamame salad, offering a crisp texture that plays well with the chicken.
- You might also enjoy this lemon soy wakame salad, which brings a zesty, oceanic note to the meal.
Optimal Storage and Reheating (Maintaining Crispness)
Store leftover chicken separate from any remaining glaze in an airtight container for up to 3 days. To reheat while maximizing crispness, use an air fryer or convection oven at 375°F (190°C) until piping hot, then gently toss with the reserved, warmed glaze. Avoid the microwave at all costs, as it destroys the texture.
Can I Prep the Glaze Ahead of Time?
Absolutely. Prepare the glaze through Step 4, combining all ingredients but intentionally omitting the cornstarch slurry. Store the un-thickened glaze base in the refrigerator for up to 5 days. Thicken it just before the final toss to ensure it is warm, glossy, and ready to meet the hot, freshly crisped chicken.
Frequently Asked Questions About Sticky Sesame Ginger Chicken
Can I Bake or Air Fry the Chicken instead of Frying?
While the double-fry technique is essential for the guaranteed “anti-soggy” texture, you can air-fry for a healthier option. Coat the chicken completely using the double-starch method, spray heavily with oil, and air fry at 390°F (200°C) for 10-12 minutes, flipping halfway. Understand that the crispness will not be as durable as the deep-fried version, so it must be served immediately after saucing.
What is the best substitute for fresh ginger?
If fresh ginger is unavailable, you can substitute 1 teaspoon of ground dried ginger for every 1 tablespoon of fresh grated ginger required in the recipe. However, note that the flavor will be less bright, slightly milder, and earthier, lacking the pungent kick of fresh root.
Is it possible to make this recipe gluten-free?
Yes, this recipe adapts easily with simple substitutions. Substitute the all-purpose flour with a high-quality gluten-free flour blend (ensure it contains xanthan gum) and ensure the soy sauce is replaced entirely with tamari or a certified gluten-free soy sauce alternative.
Ready to Impress? Share Your Sticky Sesame Ginger Chicken Masterpiece!
Say goodbye to soggy takeout disappointments forever. The precision methods outlined here-the double-starch coating and the 90-second finishing fry-will revolutionize how you approach glazed Asian-style chicken, delivering unparalleled flavor and texture.
We’ve guaranteed the crunch; now it’s your turn to prove the technique works! Try this recipe for Sticky Sesame Ginger Chicken tonight and leave a comment below sharing your experience with the anti-soggy secret.
Sticky Sesame Ginger Chicken
Course: Main CourseCuisine: AsianDifficulty: medium4
servings20
minutes25
minutes650
kcal45
minutesTired of soggy takeaway-style chicken? This recipe features a crucial double-starch and double-fry technique that ensures your sweet, sticky orange ginger glaze never destroys the crunch. Enjoy restaurant-quality texture that lasts until the very last bite.
Ingredients
For the Chicken:
2 pounds boneless, skinless chicken thighs or breasts, cut into 1-inch pieces
1 cup all-purpose flour
1 cup cornstarch
1 teaspoon salt
1/2 teaspoon black pepper
1 cup water (or slightly more, for consistency)
Vegetable oil, for frying
For the Glaze:
1 cup orange juice
1/2 cup sugar (or honey)
1/4 cup soy sauce (low sodium preferred)
2 tablespoons rice vinegar
1 tablespoon grated fresh ginger
4 cloves garlic, minced
1 tablespoon chili garlic sauce (adjust to taste)
2 tablespoons cornstarch (for thickening)
2 tablespoons cold water
For Garnishing:
1 tablespoon toasted sesame seeds
1/4 cup chopped cilantro
Directions
- Prepare the Batter and Chicken: In a large bowl, whisk together the flour, 1/2 cup of the cornstarch, salt, and pepper. Gradually whisk in the water until a thick, smooth, pancake-like batter forms. Add the chicken pieces to the batter, ensuring every piece is fully coated.
- The Crispy Coating Secret (First Fry): In a deep pot or large Dutch oven, heat 2 inches of oil to 350 degrees F. While the oil heats, place the remaining 1/2 cup of dry cornstarch in a shallow dish. Working in batches, use tongs to lift the battered chicken pieces out of the wet batter and immediately drop them into the dry cornstarch, tossing lightly to coat them with a second, dry layer of starch. This double-starch method is crucial for durability.
- Fry the Chicken: Carefully drop the coated chicken pieces into the hot oil (do not overcrowd the pan). Fry for 4 to 5 minutes, until light golden and cooked through. Remove the chicken and place it on a wire rack set over a baking sheet. Repeat with remaining batches.
- Prepare the Glaze: In a medium saucepan, whisk together the orange juice, sugar, soy sauce, rice vinegar, ginger, garlic, and chili garlic sauce. Bring the mixture to a simmer over medium heat. In a small cup, whisk the 2 tablespoons of cornstarch with the 2 tablespoons of cold water to create a slurry.
- Thicken the Glaze: Once the glaze is simmering, slowly pour the cornstarch slurry into the sauce while whisking constantly. Continue whisking until the sauce thickens significantly and becomes glossy. Remove from heat and keep warm.
- The Anti-Soggy Technique (Second Fry and Final Toss): Increase the oil temperature to 375 degrees F. Return all the fully cooked chicken pieces to the very hot oil for a second fry. This step quickly drives out any remaining moisture from the crust, making it incredibly durable. Fry for 60 to 90 seconds, until they are deep golden brown. Remove immediately and drain excess oil.
- Combine and Serve: Place the piping hot, re-crisped chicken pieces in a large, clean mixing bowl. Pour the warm glaze over the chicken. Use a rubber spatula to toss the chicken gently and quickly just until coated. Garnish immediately with sesame seeds and fresh cilantro. Serve immediately over rice, enjoying the guaranteed crunch.
Notes
- The double-starch and double-fry method is essential for a durable, non-soggy crust.


