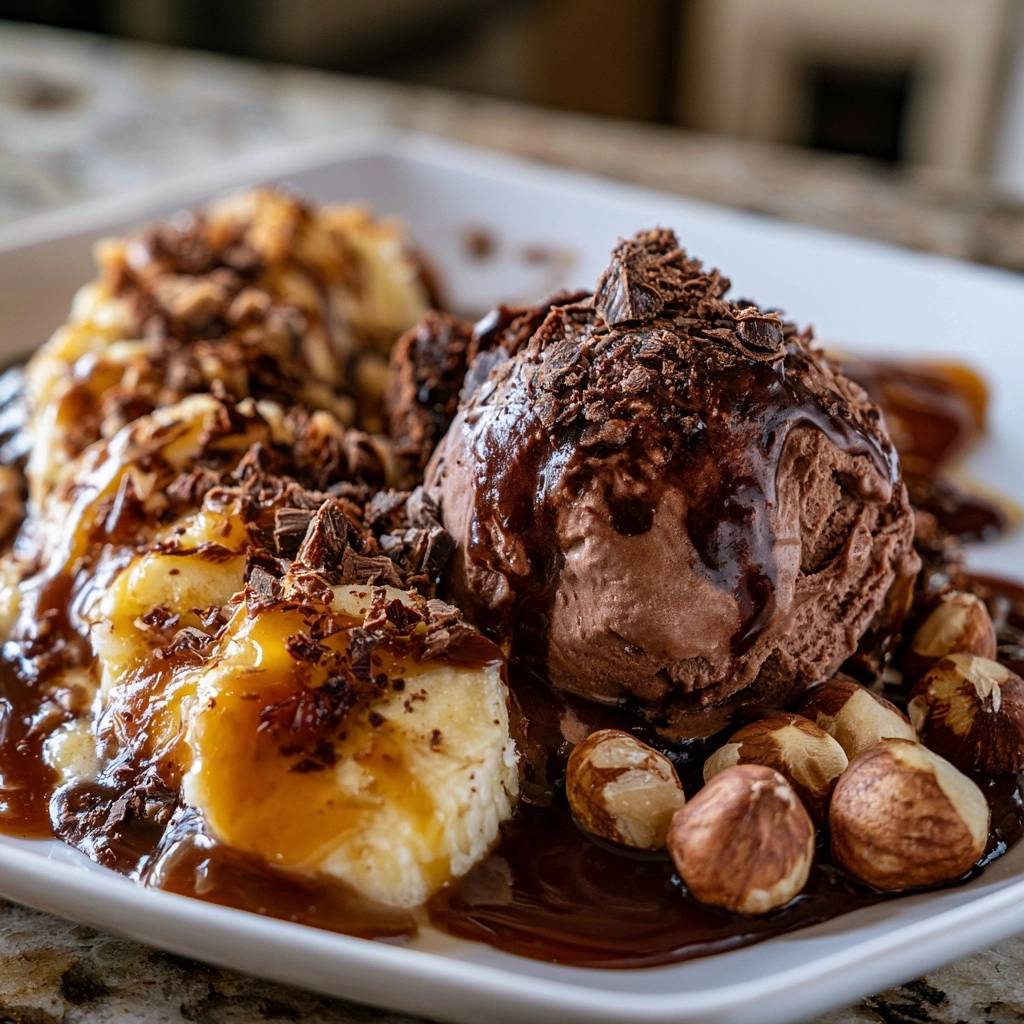
Imagine digging your spoon into a mountain of dark, velvety chocolate ice cream, only to find the bananas underneath are perfectly firm and chilled. Most sundaes suffer from the “mush factor,” where warm sauces turn the fruit into a weeping, brown mess within minutes. This Decadent Chocolate Banana Hazelnut Sundae solves that problem with a clever culinary pivot that prioritizes structural integrity and temperature contrast.
The secret lies in the interplay between the molten fudge and the cold-shocked fruit. By treating the bananas with a specific chilling technique, you create a dessert that feels like it came from a high-end bistro rather than a casual kitchen counter. You get the crunch of toasted hazelnuts, the snap of dark chocolate shards, and fruit that actually bites back instead of dissolving into the sauce.
Professional pastry chefs know that great desserts aren’t just about sugar; they’re about the architecture of the bite. This recipe uses a quick-chill method to ensure your fruit stays firm and fresh while the chocolate remains perfectly molten. It’s a simple move, but it completely changes how the flavors land on your palate, making every spoonful a deliberate balance of hot and cold.
The Science of the Cold-Shock Technique
Bananas are notorious for oxidizing the moment they hit the air. This browning is caused by an enzyme called polyphenol oxidase, which reacts with oxygen to create those unappealing brown spots. When you add heat from a warm fudge sauce, you accelerate this process and break down the cellular walls of the fruit, leading to a soggy texture.
The cold-shock technique works on two fronts to combat this. Firstly, the lemon juice provides citric acid, which lowers the pH on the surface of the banana. This acidity effectively stalls the enzymatic browning, keeping the fruit bright and ivory-colored. It’s a chemical shield that protects the aesthetic of your dessert from the very first slice.
Secondly, the five-minute flash-freeze creates a structural barrier. By dropping the temperature of the outer layers of the banana rapidly, you firm up the pectin within the fruit’s cell walls. This means that when the warm salted caramel and fudge hit the banana, the fruit has enough “thermal mass” to resist softening. It stays crisp and refreshing, providing a necessary relief from the richness of the chocolate.
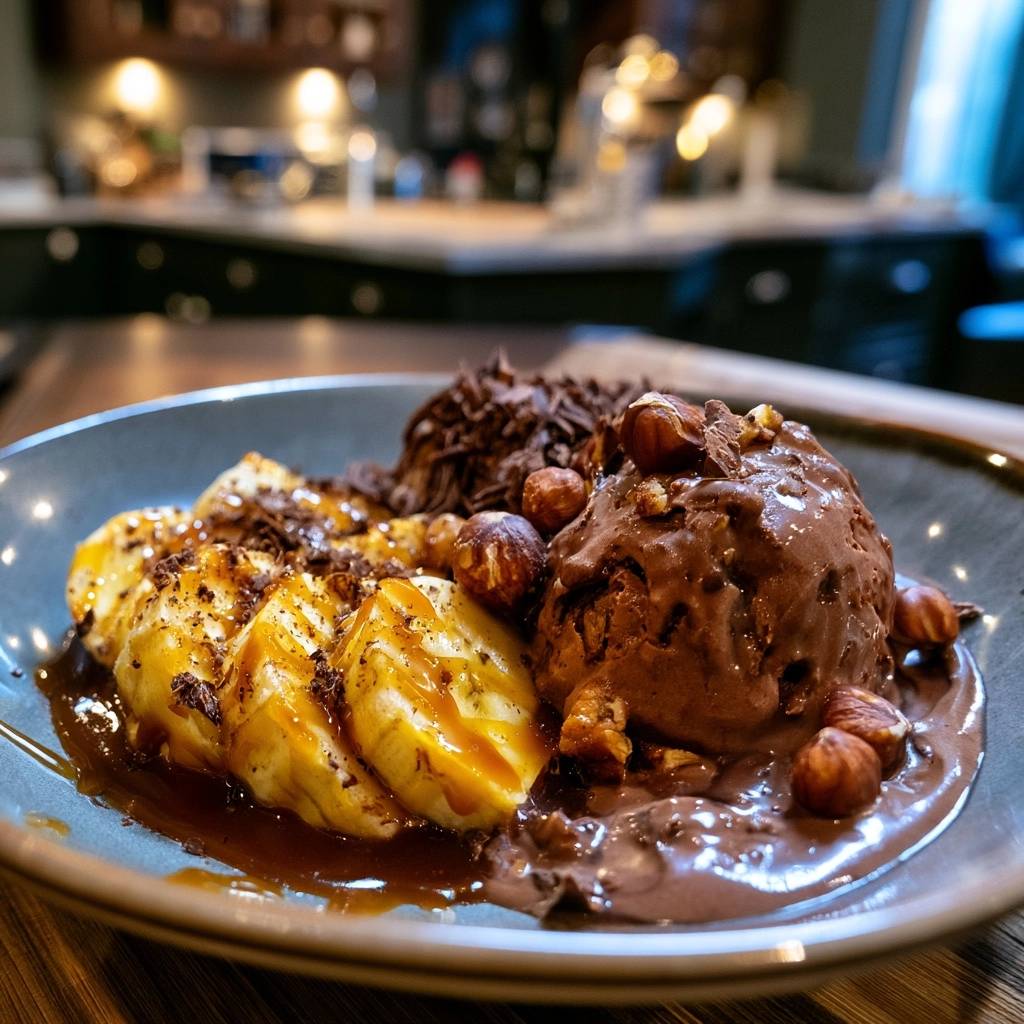
Without this step, the heat from the sauces would penetrate the fruit instantly. Instead, the cold-shocked banana acts as a chilled foundation. You end up with a sundae where the fruit maintains its identity rather than becoming a secondary syrup. It’s a small investment of time that yields a massive return in mouthfeel.
Essential Components for the Ultimate Chocolate Sundae
When a recipe has few ingredients, the quality of each one becomes the star of the show. For this sundae, you want to look for premium Dutch-process chocolate ice cream. Dutch-process cocoa has been treated with an alkalizing agent to reduce its natural acidity, resulting in a darker color and a much smoother, mellower chocolate flavor that doesn’t compete with the lemon juice on the bananas.
The bananas themselves should be at the “firm-ripe” stage. Look for fruit that is solid yellow with perhaps a tiny hint of green at the stem. If the peel has too many brown speckles, the starch has already converted to sugar, making the fruit too soft for the cold-shock method to be fully effective. You want that slight resistance when you bite into the slice.
Don’t settle for standard chocolate chips here. A bar of high-quality dark chocolate that you chop yourself provides a variety of textures. You’ll get fine shavings that melt instantly into the ice cream and larger chunks that provide a satisfying snap. This variety makes the eating experience much more interesting than uniform, store-bought morsels.
Selecting the Right Dark Chocolate Percentage
The percentage of cacao in your chocolate bar dictates the entire flavor profile of the dish. A 60% cacao bar is relatively sweet and approachable, but it might get lost among the caramel and fudge. However, an 85% cacao bar offers an intense, earthy bitterness that provides a sophisticated counterpoint to the sugary sauces.
For most palates, the 70% range is the “sweet spot.” It contains enough cocoa butter to melt beautifully against the warm fudge while maintaining a robust flavor. This bitterness is essential because it cuts through the fat of the ice cream and the saltiness of the caramel, preventing the dessert from feeling cloying or overly sugary.
Why Whole Blanched Hazelnuts Outperform Pre-Crushed Nuts
Hazelnuts are packed with volatile oils that provide that signature toasted aroma. When nuts are pre-crushed or chopped in a factory, those oils are exposed to oxygen and begin to go rancid almost immediately. By using whole blanched hazelnuts and toasting them yourself, you lock in that freshness until the very moment you serve the dish.
Whole nuts also offer a superior “snap” compared to small fragments. There is something incredibly satisfying about the contrast between a soft scoop of ice cream and a whole, crunchy hazelnut. Blanched nuts are preferred here because the bitter skins have been removed, allowing the sweet, buttery flavor of the nut to shine through without any astringency.
Step-by-Step: Preparing the Cold-Shocked Fruit Base
Start by slicing your bananas into thick, 1/2-inch rounds. If you slice them too thin, they will lose their structural integrity in the freezer and turn into ice chips. You want enough thickness so that the center of the banana remains creamy while the outside gets that firm, protective chill.
Place the slices in a bowl and drizzle the teaspoon of lemon juice over them. Use a gentle folding motion with a silicone spatula to coat them. You aren’t trying to mash them; you just want a thin film of acidity on every surface. Work quickly so the fruit spends as little time as possible at room temperature.
Set your timer for exactly five minutes in the freezer. This isn’t long enough to freeze the fruit solid, which would be unpleasant to eat. Instead, it’s just enough time to “set” the exterior. While the bananas are chilling, you can focus on the hazelnuts, ensuring the fruit is ready the second the nuts come off the heat.
Dry-Toasting Hazelnuts for Maximum Aroma
Toasting nuts is a fast process that requires your full attention. Place the whole hazelnuts in a dry skillet over medium heat. Do not add oil or butter; the nuts have plenty of their own natural fats. Within a minute or two, you will start to smell a rich, popcorn-like aroma filling your kitchen.
Keep the pan moving by shaking it frequently. You are looking for the white surface of the blanched nuts to turn a light, golden tan. Because hazelnuts are round, they can easily develop “hot spots” where they burn on one side while staying raw on the other, so constant motion is your best friend here.
The transition from perfectly toasted to burnt happens in a matter of seconds. As soon as they reach a warm gold color, slide them out of the hot pan and onto a room-temperature plate. If you leave them in the pan, the residual heat will continue to cook them, potentially turning them bitter and dark.
Plating Strategy: The Architecture of Temperature
Forget the tall, narrow sundae glass for this recipe. A wide, shallow bowl or even a small rimmed plate is a much better choice. This allows you to spread the ingredients out so that every bite can include a bit of banana, a bit of nut, and a bit of ice cream without having to dig through layers.
Arrange your chilled banana slices in a tight cluster on one side of the bowl. This creates a “platform” for the ice cream. By nesting the scoop directly against the bananas, you create a temperature-stable zone. The cold fruit helps keep the base of the ice cream from melting too quickly, preserving that perfect sphere for longer.
This horizontal plating also ensures that the sauces don’t just pool at the bottom of a glass. Instead, they drape over the ingredients, coating them evenly. It makes for a much more professional presentation that looks like it was plated by a chef rather than scooped at a soda fountain.
Layering the Salted Caramel and Fudge Sauces
The order in which you apply the sauces matters for both flavor and physics. Drizzle the salted caramel over the bananas first. The viscosity of the caramel acts as an additional sealant for the fruit, locking in the cold. The salt in the caramel also wakes up the natural sweetness of the banana before the heavy chocolate hits.
Next, drape the warm chocolate fudge sauce over the ice cream and the bananas. You want the fudge to be warm but not boiling. If it’s too hot, it will defeat the purpose of your cold-shocked fruit. Aim for a temperature that is comfortable to the touch, allowing it to flow slowly and create those beautiful, thick drips down the side of the scoop.
Finishing with Textural Contrast
Now it’s time for the final flourishes. Sprinkle the chopped dark chocolate over the top while the fudge is still warm. The smaller shavings will melt into the sauce, creating a “double chocolate” effect, while the larger chunks will stay firm. This creates a multi-layered chocolate experience that changes with every bite.
Scatter the whole toasted hazelnuts last. Some should land in the pools of sauce, while others should perch on top of the ice cream. This ensures that some nuts stay perfectly dry and crunchy, while others get coated in the salty-sweet caramel. Serve it immediately to capture the peak of the temperature contrast.
Troubleshooting Common Sundae Mistakes
If you find that your ice cream is melting into a soup before you even finish plating, your bowls might be too warm. Professional kitchens often keep their dessert plates in the refrigerator. Chilling your bowls for ten minutes before assembly can buy you an extra five minutes of “solid” ice cream time at the table.
Sometimes, hazelnuts can taste slightly bitter if they were toasted just a few seconds too long. If this happens, a tiny extra pinch of flaky sea salt over the nuts can help mask the bitterness and enhance their nuttiness. It’s a quick fix that balances the flavors perfectly.
If you accidentally leave the bananas in the freezer for ten or fifteen minutes, they might become too hard to bite through comfortably. Don’t panic. Just let them sit at room temperature for two minutes before adding the warm sauce. The heat from the fudge will soften the exterior just enough to make them palatable while keeping the core icy and firm.
Flavor Variations and Ingredient Swaps
If you have a nut allergy, you don’t have to miss out on the crunch. Toasted sunflower seeds or pumpkin seeds (pepitas) make an excellent substitute for hazelnuts. They offer a similar earthy flavor and a great “snap” when toasted in a dry pan. Just be sure to watch them closely, as smaller seeds toast much faster than whole nuts.
You can also apply the cold-shock principle to other fruits. Firm pears or even grilled stone fruits like peaches work beautifully. For pears, slice them thin and follow the same lemon juice and flash-freeze routine. The acidity of the lemon pairs exceptionally well with the floral notes of the pear and the richness of the dark chocolate.
For a different flavor profile, try swapping the chocolate ice cream for a high-quality vanilla bean or even a coffee-flavored base. The cold-shocked bananas and toasted hazelnuts are versatile enough to pair with almost any creamy foundation. Just ensure your sauces remain high-quality, as they are the “glue” that holds the textures together.
Expert Tips for Professional Presentation
To get that perfect, restaurant-style sphere of ice cream, dip your ice cream scoop into a glass of hot water between every serving. The heat from the metal allows the scoop to glide through the frozen cream, creating a smooth surface. Shake off any excess water before scooping to avoid ice crystals forming on your dessert.
For a truly high-end look, use a microplane or a fine grater to dust a little extra dark chocolate over the very top of the finished sundae. This creates a “chocolate snow” effect that looks beautiful against the dark fudge. It’s a small detail that signals to your guests that this isn’t just a standard bowl of ice cream.
Finally, consider the “negative space” in your bowl. Don’t feel the need to cover every inch of the plate with sauce. A clean, focused arrangement in the center of a wide bowl looks much more sophisticated than a dish that is overflowing. A few well-placed hazelnuts around the base can act as a garnish that frames the main event.
Frequently Asked Questions
Can I use lime juice instead of lemon?
Yes, you can certainly use lime juice. Lime has a slightly higher acidity and a more distinct, tropical flavor profile compared to the neutral brightness of lemon. It pairs exceptionally well with chocolate and banana, though it may add a very subtle “zestiness” to the dish. If you enjoy a hint of citrus punch, lime is a fantastic alternative that still prevents browning effectively.
How long will the bananas stay firm?
The peak texture for the cold-shocked bananas lasts about 10 to 15 minutes after assembly. Because this dish relies on the temperature contrast between the chilled fruit and the warm sauce, it is not a “make-ahead” dessert. The longer it sits, the more the temperatures will equalize, eventually leading to the fruit softening. For the best experience, assemble and serve it immediately.
What is the best way to store leftover hazelnuts?
Toasted hazelnuts can go rancid quickly because their oils have been activated by heat. Store any leftovers in a small, airtight glass jar once they have cooled completely. Keep the jar in a cool, dark pantry for up to a week, or in the refrigerator for up to a month. If they lose their crunch, you can briefly re-toast them in a dry pan for 60 seconds to refresh them.
Can I substitute store-bought chocolate syrup?
While you can use syrup in a pinch, it won’t provide the same experience as a thick fudge sauce. Chocolate syrup is usually water-based and very thin, meaning it will run off the ice cream and pool at the bottom. Fudge sauce has a higher fat content and a much higher viscosity, which allows it to “cling” to the bananas and ice cream, creating that decadent, chewy layer that defines a great sundae.
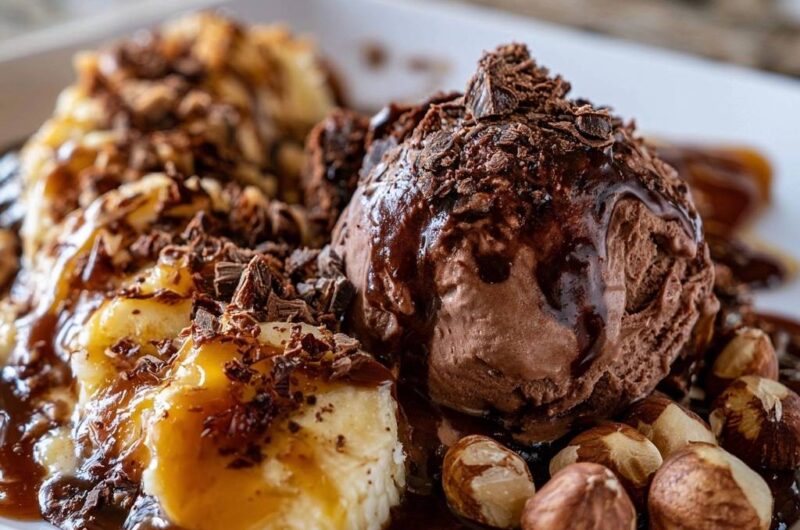
Decadent Chocolate Banana Hazelnut Sundae
Course: DessertCuisine: AmericanDifficulty: easy2
servings10
minutes5
minutes15
Minutes520
kcalAmerican
Ingredients
2 large firm-ripe bananas, sliced into thick 1/2-inch rounds
2 large scoops premium Dutch-process chocolate ice cream
1/3 cup dark chocolate, roughly chopped (chunks and shavings)
1/2 cup whole blanched hazelnuts
1/4 cup warm dark chocolate fudge sauce
1/4 cup salted caramel sauce
1 teaspoon fresh lemon juice
Directions
- Place your banana slices in a small bowl and gently toss with the lemon juice. Immediately place the bowl in the freezer for exactly 5 minutes. This cold-shock method firms the exterior of the fruit so it holds its shape against the warm sauces and prevents enzymatic browning.
- While the bananas chill, place the whole hazelnuts in a dry pan over medium heat. Toast for 3-4 minutes, shaking the pan frequently, until fragrant and golden. Remove from heat immediately to prevent burning.
- Remove the bananas from the freezer. Arrange them in a tight cluster on one side of a wide, shallow white bowl or plate.
- Place a large, firm scoop of chocolate ice cream nestled directly against the banana pile.
- Drizzle the salted caramel sauce generously over the bananas first, then follow with the warm chocolate fudge sauce, allowing it to drape over both the ice cream and the fruit.
- Top the entire dish with the roughly chopped dark chocolate, ensuring the chunks settle into the crevices of the ice cream.
- Scatter the whole toasted hazelnuts around the base of the ice cream and over the sauce pools. Serve immediately while the bananas are crisp-cold and the sauces are warm.
Notes
- The secret to this recipe is the 5-minute freezer flash-chill which prevents the bananas from oxidizing and turning mushy when in contact with warm sauces.