
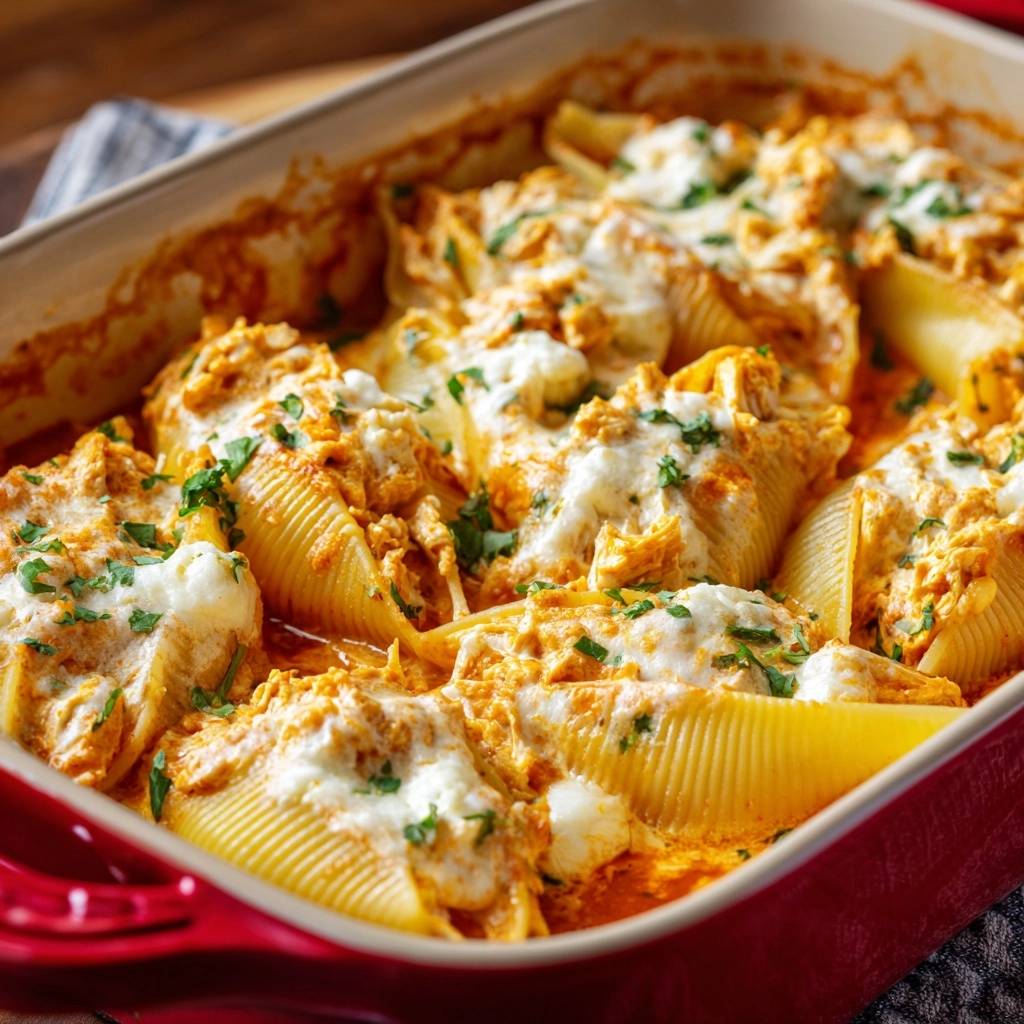
Imagine the bold, tangy heat of a classic buffalo wing combined with the deep, soul-warming comfort of a baked pasta dish. It’s the kind of meal that makes everyone at the table reach for seconds before they’ve even finished their first shell. However, many home cooks struggle with the dreaded “watery bottom” syndrome, where the sauce separates and the pasta turns into a mushy mess.
This recipe solves that problem by focusing on structural integrity and a stabilized sauce. We’re moving away from thin, runny fillings and embracing a creamy, hearty center that stays exactly where it belongs. You’ll get all that game-day excitement in a format that’s elegant enough for a family dinner but rugged enough for a tailgate party.
The secret to this “Anti-Soggy” method lies in the cream cheese binder. While many recipes rely solely on bottled dressing, we use softened cream cheese to act as a stabilizer. This prevents the buffalo sauce from thinning out under the high heat of the oven, ensuring your shells remain firm and the sauce stays velvety.
Why Most Buffalo Chicken Stuffed Shells Fail
Most baked pasta dishes fail because of simple physics. When you combine high-moisture sauces with fully cooked pasta and then bake them, the pasta continues to absorb liquid like a sponge. This leads to a bloated, soft texture that lacks any bite.
Furthermore, standard buffalo sauce is often a simple emulsion of hot sauce and butter. In a hot oven, that emulsion can break, leaving a pool of orange oil at the bottom of your baking dish. This “weeping” effect is exactly what we want to avoid to maintain a professional, appetizing look.
Finally, using low-quality, pre-shredded cheeses can contribute to the problem. Those bags are often coated in potato starch to prevent clumping, which can interfere with how the cheese melts and integrates with the buffalo flavors. We want a clean, gooey melt that stretches perfectly with every forkful.
Essential Components for the Perfect Buffalo Filling
The foundation of this dish is the chicken. While you can use various types, shredded cooked chicken breast provides the best texture for stuffing. It’s lean enough to soak up the buffalo flavor without adding excess grease to the filling, which helps keep the shells structurally sound.
The cream cheese is our unsung hero here. You must ensure it’s completely softened to room temperature before mixing. If it’s too cold, you’ll end up with white lumps in your orange sauce rather than a smooth, uniform cream. It provides the “body” that holds the chicken and spices together.
For the buffalo sauce, look for a traditional vinegar-based sauce. The acidity is crucial because it cuts through the richness of the mozzarella and cream cheese. It provides that signature “zing” that wakes up your taste buds and balances the entire flavor profile.
The Role of Stabilizers: Cream Cheese and Ranch
The fat content in the cream cheese does more than just add flavor; it creates a thick matrix that traps the moisture from the buffalo sauce. This prevents the sauce from leaking out of the shells and creating a puddle. It’s the difference between a stuffed shell and a pasta soup.
We also incorporate ranch dressing directly into the filling. Instead of just drizzling it on top at the end, mixing it in provides a consistent, cooling herb flavor throughout. It adds moisture without the thinning effect of plain milk or cream, keeping the interior succulent but stable.
Selecting the Right Jumbo Pasta Shells
When you’re at the grocery store, look for jumbo shells made from 100% durum semolina. High-protein pasta is essential because it has the strength to hold a heavy chicken filling. Cheaper, lower-protein pastas tend to tear easily when you’re trying to stuff them.
Check the box carefully to ensure the shells aren’t broken. Since the shell is the vessel for all that buffalo goodness, you need them to be intact. A sturdy shell acts as a protective barrier, allowing the filling to steam gently inside while the exterior gets slightly golden.
The Secret to Firm, Al Dente Pasta Shells
This is the most important technical step in the entire process. You must follow the “Minus Two” rule. Boil your jumbo shells for exactly two minutes less than the package’s lowest al dente time. If the box says 10 minutes for al dente, you pull them out at 8 minutes.
The pasta should still feel slightly stiff and undercooked in the center. Don’t worry, it won’t stay that way. The shells will finish cooking in the oven by absorbing the moisture from the chicken filling and the sauce base. This ensures they reach a perfect al dente state just as the cheese finishes browning.
The Cold Water Shock Technique
As soon as you drain the shells, you must hit them with cold running water. This stops the carry-over cooking immediately. If you leave them in a hot colander, they will continue to soften and eventually turn to mush before they even hit the oven.
Rinsing also washes away the excess surface starch. This is a pro tip that prevents the shells from sticking to each other while you’re working. It makes the stuffing process much faster and prevents the pasta from tearing when you try to pull them apart.
Step-by-Step: Constructing Your Buffalo Chicken Stuffed Shells
Start by preparing your filling in a large bowl. Combine the smooth cream cheese mixture with your shredded chicken and half of the mozzarella. You want a thick, paste-like consistency that holds its shape on a spoon. If it’s too runny, add a little more shredded cheese.
When stuffing, hold the shell gently in the palm of your hand. Use a small spoon or a cookie scoop to pack the filling tightly. You want to eliminate air pockets, as these can cause the shells to collapse during the baking process. Aim for a generous mound of filling in each one.
Creating the Moisture Barrier Base
Before placing the shells in the dish, mix 1/2 cup of buffalo sauce with 1/4 cup of water. Spread this thinly across the bottom of your 9×13 pan. This isn’t just for flavor; it creates a controlled steam chamber. The water evaporates to cook the pasta, while the sauce stays behind to coat the bottom.
This thin layer prevents the shells from sticking to the glass or ceramic. It also ensures the bottom of the pasta doesn’t get dry or crunchy. By diluting the sauce slightly with water, you prevent it from becoming too salty or concentrated as it reduces in the oven.
Stuffing Techniques for Maximum Yield
If you want to be extra precise, you can use a large piping bag with the tip cut off to fill the shells. This is often faster than using a spoon and results in a very clean look. However, a simple tablespoon works perfectly fine for a rustic, home-cooked feel.
Place the shells in the dish “open side up.” This allows the heat to hit the cheese topping directly, creating those beautiful bubbly brown spots. It also keeps the filling tucked safely inside the pasta cradle so it doesn’t spill out into the pan.
The Two-Phase Baking Process for Melted Perfection
Baking is a two-step journey. First, you must cover the dish tightly with aluminum foil. This traps the steam from the sauce base, which is what actually finishes cooking the underboiled pasta. Without the foil, the shells would dry out and become hard before the chicken is hot.
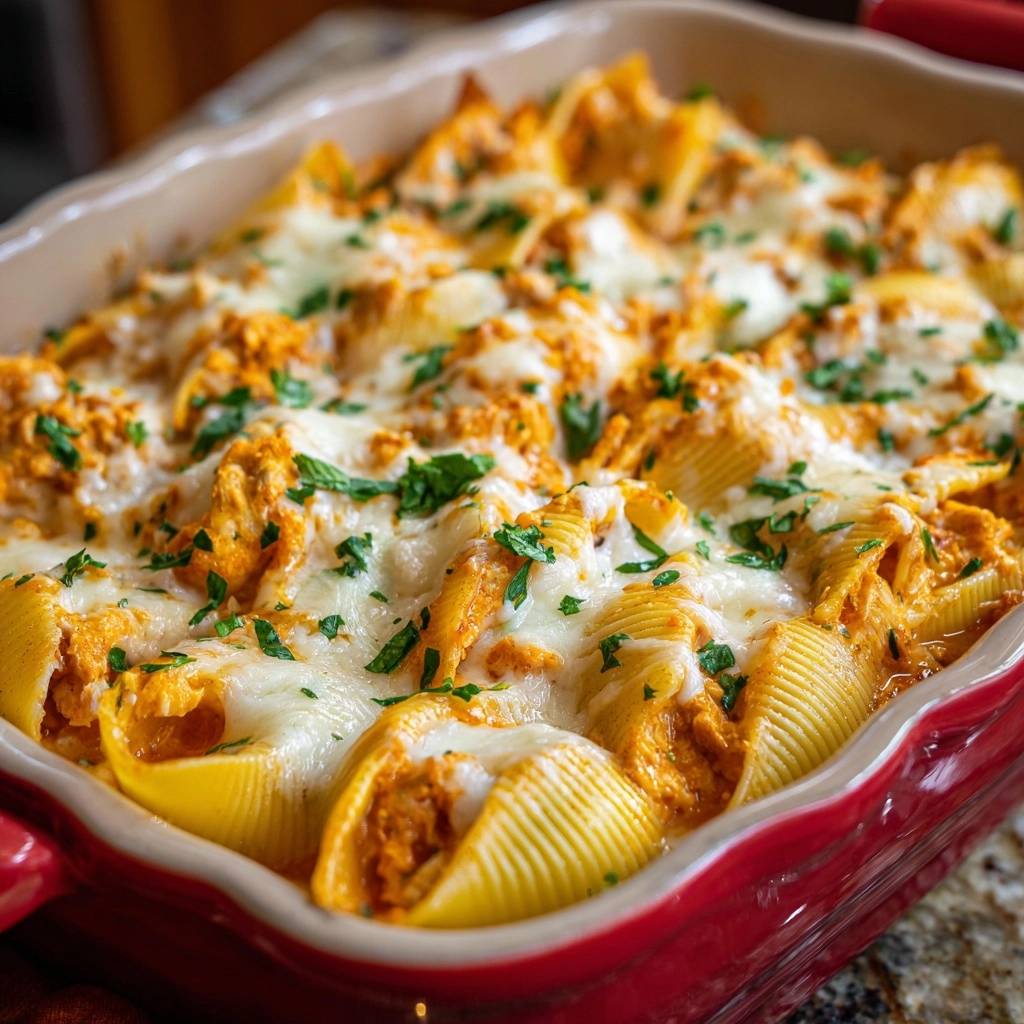
After 20 minutes, remove the foil for the final 10 minutes of baking. This is the “transformation phase.” The trapped moisture escapes, the sauce thickens, and the cheese on top begins to caramelize. This phase is what gives you that irresistible contrast between creamy filling and bubbly cheese.
Monitoring the Cheese Melt
Keep a close eye on the oven during those last 10 minutes. You’re looking for the mozzarella to be completely melted and starting to show small golden-brown freckles. The sauce around the edges of the shells should be simmering vigorously.
The blue cheese won’t melt quite the same way as the mozzarella; it will soften and become creamy. This creates little “flavor bombs” throughout the dish. If you see the edges of the pasta starting to turn dark brown, it’s time to pull the dish out immediately.
Troubleshooting Common Buffalo Pasta Issues
If you notice the sauce looks a bit oily when you pull it out, don’t panic. This usually happens if the cheese was very high in fat. A quick 5-minute rest will often allow the oils to re-absorb into the sauce. You can also use a paper towel to gently blot any excess oil from the corners of the pan.
If your shells feel too hard after the initial 20 minutes, your foil seal might not have been tight enough. Add a tablespoon of water to the bottom of the pan, reseal the foil tightly, and give it another 5 minutes. The extra steam will usually fix the problem and soften the pasta right up.
Make-Ahead Strategies and Freezing Instructions
This is a fantastic meal-prep dish. You can assemble the shells up to 24 hours in advance. Just cover the dish tightly with plastic wrap and keep it in the fridge. When you’re ready to eat, swap the plastic for foil and bake. You may need to add 5-10 minutes to the covered baking time since the dish is starting cold.
To freeze, it’s best to freeze the shells unbaked. Place the stuffed shells on a baking sheet to freeze individually for an hour, then transfer them to a freezer bag. This prevents them from sticking together. When you’re ready to bake, place them in the dish with the sauce base and bake from frozen, adding about 20 minutes to the covered baking time.
Flavor Variations and Ingredient Swaps
If you want to lighten things up, you can use Greek yogurt in place of the ranch dressing. It provides a similar tang and moisture but with more protein and less fat. Just be sure to use full-fat Greek yogurt to prevent the sauce from curdling under the high heat.
For those who want more heat, you can add a teaspoon of cayenne pepper or a few dashes of your favorite extra-hot sauce to the filling. Conversely, if you’re cooking for kids, you can use a “mild” buffalo sauce and increase the amount of mozzarella to mellow out the spice level.
What to Serve with Buffalo Chicken Stuffed Shells
Since this dish is very rich and savory, you want sides that offer a crisp, refreshing contrast. A simple celery and carrot salad with a light vinaigrette is a classic nod to the traditional wing platter. The crunch of the raw vegetables cleanses the palate between bites of cheesy pasta.
A vinegar-based coleslaw is another excellent choice. The acidity of the vinegar cuts right through the cream cheese and ranch, making the whole meal feel lighter. Avoid serving heavy garlic bread or mashed potatoes, as the shells are already quite filling and starch-heavy.
Frequently Asked Questions
Can I use pre-cooked rotisserie chicken?
Yes, rotisserie chicken is a fantastic time-saver for this recipe. It’s usually very tender and easy to shred. However, keep in mind that rotisserie chickens are often heavily seasoned with salt. You may want to taste your filling before adding any extra salt to ensure the dish doesn’t become overly salty once the buffalo sauce is added.
For another easy way to prepare chicken, try this cheesy chicken penne skillet.
How do I prevent the cheese from sticking to the foil?
There is nothing more frustrating than pulling off the foil and taking all the cheese with it. To prevent this, you can lightly spray the underside of the foil with non-stick cooking spray. Alternatively, you can “tent” the foil by arching it slightly so it doesn’t physically touch the top of the shells, though you must ensure the edges are still sealed tight to trap the steam.
Is there a substitute for blue cheese?
Blue cheese is a love-it-or-hate-it ingredient. If you fall into the latter camp, you can easily swap it for extra-sharp white cheddar. It provides a similar “bite” and sharpness without the funky aroma of blue cheese. Gorgonzola is another option if you want a much milder blue cheese flavor that is creamier and less pungent.
How long do leftovers stay fresh in the fridge?
Leftovers will stay fresh in an airtight container for 3 to 4 days. To reheat, the oven is your best friend. Place the shells in a small baking dish, add a splash of water to the bottom, cover with foil, and bake at 350°F until heated through. This preserves the “Anti-Soggy” texture much better than a microwave, which can make the pasta rubbery.
The Importance of the Five-Minute Rest
Once you pull that bubbling tray out of the oven, the temptation to dive in immediately is huge. However, the five-minute rest is a mandatory step. During this time, the starches in the pasta and the proteins in the cheese begin to “set.” This stabilization period ensures that the filling stays inside the shell when you lift it out of the pan.
If you serve them piping hot, the sauce will be too fluid and will likely run all over the plate. After five minutes, the sauce thickens to a perfect coating consistency. Finish the dish with a sprinkle of fresh parsley. The burst of green adds a necessary brightness and a fresh herbal note that rounds out the deep, spicy flavors of the buffalo chicken.

Buffalo Chicken Stuffed Shells
Course: Main CourseCuisine: AmericanDifficulty: easy6
servings20
minutes30
minutes485
kcal50
MinutesA delicious twist on stuffed shells featuring shredded chicken, buffalo sauce, and ranch dressing. This method ensures the pasta remains al dente and the sauce stays thick and stable throughout the baking process.
Ingredients
1 box jumbo pasta shells (12 ounces)
3 cups shredded cooked chicken breast
8 ounces cream cheese, softened
1/2 cup buffalo hot sauce
1/2 cup ranch dressing
2 cups shredded mozzarella cheese, divided
1/4 cup crumbled blue cheese (optional)
1/2 cup buffalo sauce mixed with 1/4 cup water (for the base)
2 tablespoons fresh parsley, chopped
Directions
- Preheat your oven to 350 degrees F.
- Boil the jumbo shells in salted water for 2 minutes LESS than the package directions for al dente. This is the first secret to preventing sogginess; the pasta must be undercooked so it finishes softening in the oven without breaking down. Drain and rinse with cold water immediately to stop the cooking process.
- In a large mixing bowl, combine the softened cream cheese, 1/2 cup buffalo sauce, and ranch dressing. Stir until completely smooth. The cream cheese acts as a stabilizer that prevents the buffalo sauce from thinning out and making the pasta soggy.
- Fold in the shredded chicken and 1 cup of the mozzarella cheese until the mixture is thick and uniform.
- Mix the remaining 1/2 cup buffalo sauce with 1/4 cup water and spread it in a thin, even layer across the bottom of a 9×13 inch baking dish. This provides a flavorful moisture barrier that matches the orange-hued sauce seen in the dish.
- Stuff each undercooked shell generously with the chicken mixture and place them open side up in the baking dish.
- Sprinkle the remaining mozzarella and blue cheese over the top of each shell.
- Cover the dish tightly with foil. Bake for 20 minutes. Remove the foil and bake for an additional 10 minutes until the cheese is bubbly and the sauce is simmering.
- Let the dish rest for 5 minutes before serving. This allows the internal juices to set so the sauce doesn’t run. Garnish with fresh parsley and enjoy perfectly firm, flavorful shells.
Notes
- To prevent sogginess, boil the shells for 2 minutes less than the package directions and use the cream cheese stabilizer as directed. Let the dish rest for 5 minutes after baking to allow the sauce to set.


