
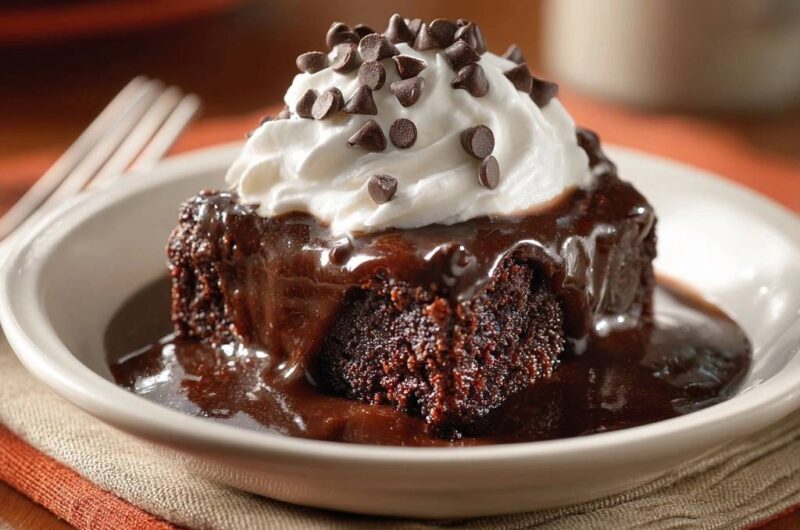
Imagine sinking your spoon into a thick, dense brownie that sits proudly in a pool of warm, glistening chocolate ganache. Most lava-style desserts turn into a sad, grainy mush the moment the sauce hits the plate, but these are different. You get that incredible, toothsome chew of a premium fudge brownie paired with a silky sauce that coats every bite without dissolving the cake.
The secret to this “Ultimate” version lies in the structural integrity of the crumb. We aren’t making a light, airy cake here; we’re engineering a high-density chocolate base designed to withstand a literal flood of fudge. It’s the perfect balance of a sturdy, chewy exterior and a rich, melting heart that stays intact until the very last morsel.
For an even richer chocolate experience, explore the details of ultimate walnut fudge brownies.
For a similar rich chocolate experience, consider these fudgy cherry chocolate brownies.
The real magic happens during the blooming process. By whisking your cocoa powder into hot, melted butter before adding any other ingredients, you create a fat-protected barrier. This professional technique ensures the brownie stays firm and fudgy rather than soaking up the sauce like a sponge and becoming soggy. It’s a total game-changer for your dessert game.
For a similar fudgy center, explore molten lava brownie cookies.
The Science of the Anti-Soggy Brownie Base
When you pour a warm sauce over a standard brownie, the liquid usually migrates into the air pockets of the cake, leading to a structural collapse. To prevent this, we focus on creating a high-density crumb. By reducing the amount of leavening and increasing the fat-to-flour ratio, we build a brownie that is physically too dense to absorb excess moisture quickly.
This sturdy base is essential because it acts as an anchor for the heavy dark chocolate ganache and the cloud of whipped cream on top. Therefore, the brownie maintains its shape and “bite” even as it sits in a shallow pool of sauce. You want a dessert that feels substantial on the fork, providing a satisfying resistance that contrasts beautifully with the liquid lava.
Furthermore, the physics of this recipe relies on starch retrogradation. As the brownie cools, the starches in the flour lock together, creating a reinforced network. This network is what allows the brownie to hold its own against the heat of the sauce. Without this specific density, you’d just have a bowl of chocolate soup instead of a plated masterpiece.
Blooming Cocoa in Hot Butter
Blooming is a chemical process where the cocoa solids are hydrated by a hot liquid, which in this case is melted butter. When you whisk the cocoa into the hot fat, it releases trapped flavor compounds that would otherwise stay dormant. You’ll notice the aroma immediately becomes more intense and “darker” as the powder dissolves into the golden butter.
In addition to flavor, this step creates a protective coating around the cocoa particles. Because fat and water don’t mix easily, this fat-heavy mixture prevents the final baked brownie from acting like a thirsty sponge. It’s the primary defense mechanism against the “soggy bottom” syndrome that plagues most sauced desserts.
Building Protein Structure with Eggs
Eggs are the glue that holds this dense structure together. By beating the eggs vigorously into the sugar and butter mixture, you are creating a strong protein network. You want to whisk until the batter looks shiny and smooth, which indicates that the eggs have fully emulsified with the fats and sugars.
This protein structure is vital for supporting the weight of the semi-sweet chocolate chips folded into the batter. If the structure is too weak, the chips will all sink to the bottom during baking. A well-beaten batter ensures every bite has an even distribution of melted chocolate pockets and a consistent, chewy texture throughout.
Essential Pantry Items for Dense Fudge Brownies
Success starts with the right ingredients, and for this recipe, the quality of your pantry staples makes a huge difference. We use granulated sugar here instead of brown sugar because we want a specific type of structure. While brown sugar adds moisture and a soft texture, granulated sugar helps create that classic “crackly” top and a firmer, more stable crumb.
You also need to ensure your eggs are at room temperature. Cold eggs can cause the melted butter to seize or clump, which ruins the smooth emulsion we worked so hard to build. If you’re in a hurry, just pop the eggs in a bowl of warm water for five minutes. It’s a small step that makes a massive difference in the final glossiness of your batter.
Finally, don’t skip the salt. It might seem counterintuitive in a sweet dessert, but salt is the ultimate flavor enhancer for chocolate. It cuts through the richness of the butter and sugar, allowing the complex notes of the cocoa to shine. Use a fine sea salt so it dissolves evenly into the thick batter without leaving crunchy hot spots.
Selecting High-Quality Chocolate and Cocoa
For the best results, use a high-quality unsweetened cocoa powder. Natural cocoa works perfectly here because its slight acidity reacts with the baking powder to give just a hint of lift. This prevents the brownie from being a literal brick while still maintaining that desired fudge-like density.
In the batter, semi-sweet chocolate chips provide a familiar, nostalgic sweetness. However, for the lava sauce, we switch to dark chocolate chips. This contrast is intentional. The dark chocolate provides a sophisticated, slightly bitter edge that balances the sweetness of the brownie and the whipped cream, making the dish taste like it came from a high-end bistro.
The Role of Corn Syrup in Ganache
You might wonder why we add a tablespoon of light corn syrup to the sauce. In professional pastry kitchens, corn syrup is used as an “interference agent.” It prevents the sugar molecules in the chocolate from crystallizing, which is the main cause of grainy or dull-looking sauces.
The result is a ganache with a mirror-like gloss that stays fluid even as it cools slightly on the plate. It gives the sauce that “lava” look—thick, shiny, and incredibly smooth. If you want that professional, photo-ready finish, this tiny addition is the secret weapon you’ve been looking for.
Step-by-Step: Constructing the Ultimate Fudge Lava Brownies
Creating these brownies is a process of transformation. You start with simple fats and powders and end with a complex, multi-textured dessert. The key is to follow the sensory cues at each stage to ensure you’re on the right track. Don’t rush the mixing or the cooling, as each minute serves a specific purpose in the final outcome.
What Else to Bake?
If you enjoyed these rich chocolate brownies, consider these sweet treats.
- For a delightful morning or afternoon bite, try these assorted fruit and chocolate scones, offering a different texture with fresh fruit notes.
- If you’re in the mood for something equally comforting, these diner-style fluffy pancakes provide a light, airy contrast to the dense brownies.
Phase 1: Preparing the Pan and Blooming
Start by preheating your oven to 350 degrees F. Use the “sling method” for your 8×8 inch pan by lining it with parchment paper that hangs over two sides. Pro tip: grease the pan lightly before putting the paper down so it sticks perfectly to the corners. This makes it much easier to lift the heavy, dense brownies out later without them breaking.
Melt your butter until it’s hot and bubbling, then immediately whisk in the cocoa powder. Let it sit for a full two minutes. You’ll see the mixture transform from a grainy paste into a smooth, dark, and fragrant chocolate liquid. This is the “bloom” in action, and it’s the foundation of your flavor profile.
Phase 2: Emulsifying the Batter
Once you’ve stirred in the sugar and vanilla, it’s time for the eggs. Add them one at a time, whisking hard after each addition. You’re looking for the batter to change from a dull, matte finish to a bright, glossy sheen. This visual change tells you the fats and liquids have successfully bonded into a stable emulsion.
When it’s time for the flour, put the whisk away and grab a spatula. Gently fold the dry ingredients in until you see no more white streaks. Overmixing at this stage develops gluten, which would turn your fudgy brownie into something tough and bread-like. Keep it gentle to maintain that melt-in-your-mouth texture.
Phase 3: The Precision Bake
Pour the batter into your prepared pan and smooth the top. Bake for 25 to 30 minutes, but start checking at the 23-minute mark. Every oven is different, and even two minutes can be the difference between fudgy and dry. Use a toothpick to test the center; you want it to come out with a few moist, sticky crumbs attached.
If the toothpick comes out completely clean, you’ve overbaked them. If it comes out with wet, liquid batter, they need more time. Remember that the brownies will continue to cook for several minutes after you pull them out of the oven due to the residual heat in the pan. This is called “carry-over cooking,” and it’s why we pull them out while they still look slightly underdone.
The Critical Cooling Phase for Structural Integrity
I know it’s tempting to cut into a warm brownie, but for this recipe, you must wait at least two hours. This cooling phase is non-negotiable. As the brownies reach room temperature, the melted fats solidify and the starches set firmly. This creates the “Anti-Soggy” shield that allows the brownie to hold its shape under the sauce.
If you cut them while they’re hot, the structure will be too fragile and crumbly. By letting them rest, you ensure a clean cut and a dense, chewy mouthfeel. Think of it as the final “set” of the recipe. Once they are completely cool, you can lift the whole block out using the parchment sling and slice them into nine sturdy, perfect squares.
Crafting the Glossy Dark Chocolate Lava Sauce
The lava sauce is a simple ganache, but the technique matters. Heat your heavy cream and corn syrup until it just starts to simmer—don’t let it reach a rolling boil or you might scorch the cream. Pour the hot liquid over your dark chocolate chips and let it sit undisturbed for five minutes. This allows the heat to penetrate the center of the chips evenly.
When you start whisking, begin in the very center of the bowl using small circular motions. Slowly work your way outward as the mixture darkens and thickens. This “center-out” technique creates a perfect emulsion without whipping in air bubbles. You’ll end up with a sauce that is incredibly smooth, heavy, and ready to pool beautifully around your brownie.
Troubleshooting Common Brownie Texture Issues
If your brownies turn out too crumbly, you likely overbaked them or used too much flour. Always spoon your flour into the measuring cup rather than scooping it directly, which packs the flour down and leads to dry treats. If the sauce feels grainy, the chocolate might have “seized” from a drop of water getting into the bowl. Keep everything bone-dry when working with chocolate.
Another common issue is a “cakey” texture. This usually happens if you overbeat the batter after adding the flour or if your eggs were too cold. To fix a cakey batch, you can try chilling the brownies in the fridge before saucing them; the cold will help firm up the fats and give them a denser feel, even if the crumb is a bit lighter than intended.
Preventing a Greasy Batter
Sometimes you might notice oil pooling on top of your batter. This happens if the butter was too hot when the eggs were added, causing the emulsion to break. To prevent this, ensure you’ve stirred the sugar into the butter first, which helps lower the temperature slightly before the eggs hit the bowl. If it does happen, a vigorous whisking can usually bring it back together.
Fixing a Broken Ganache
If your lava sauce looks oily or separated, don’t panic. This is a “broken” ganache. You can usually fix it by adding a teaspoon of warm milk or extra cream and whisking gently. The extra liquid helps the fat and solids re-bind. Just add it a tiny bit at a time until the sauce regains its glossy, uniform appearance.
Plating and Presentation for Maximum Impact
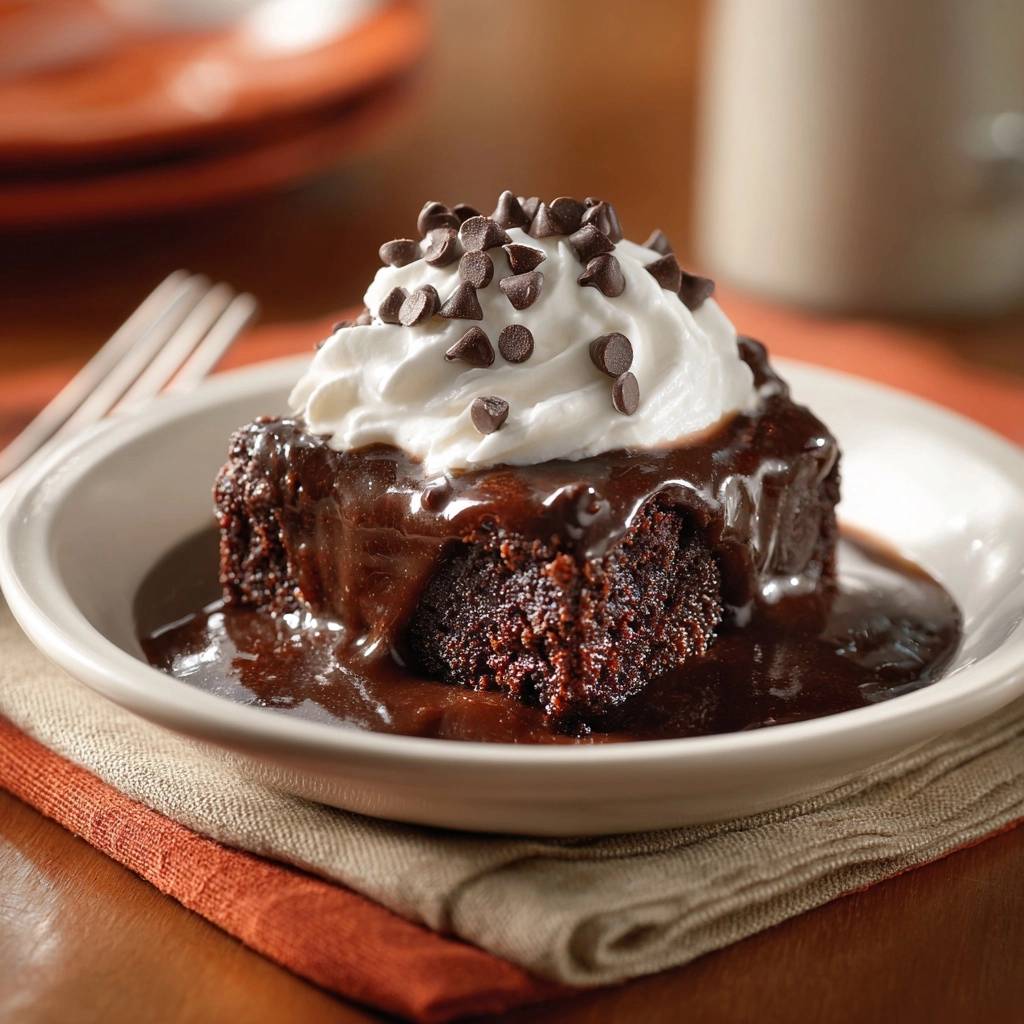
For the best experience, serve these in a shallow bowl rather than a flat plate. This allows the sauce to pool around the base of the brownie, creating that “lava” effect. Place a sturdy brownie square in the center, then pour the warm sauce generously over the top. The sauce should run down the sides and fill the bottom of the bowl.
Top it off with a large dollop of cold whipped cream. The contrast between the warm sauce and the chilled cream is heavenly. Finally, add a heavy sprinkle of mini chocolate chips. These provide a tiny bit of crunch that contrasts with the soft brownie and silky sauce, hitting all the right textural notes in one bite.
Storage and Reheating Without Losing Texture
Store any leftover brownies in an airtight container at room temperature for up to three days. Do not refrigerate them, as this can make the crumb dry and stale. The lava sauce should be stored separately in the fridge. It will firm up into a solid fudge, which is actually quite delicious on its own, but you’ll want to melt it back down for serving.
To reheat, pop a brownie square in the microwave for about 15 seconds just to take the chill off. Heat the sauce separately in short 10-second bursts, stirring in between, until it’s fluid and glossy again. Pour the warm sauce over the room-temperature brownie right before eating to maintain that perfect “Anti-Soggy” structural integrity.
Expert Tips for Customizing Your Chocolate Experience
If you want to take the flavor even deeper, add a teaspoon of espresso powder to the dry ingredients. You won’t taste the coffee, but it acts as a megaphone for the chocolate, making it taste richer and more complex. You can also sprinkle a few flakes of sea salt over the finished sauce to provide a sharp contrast to the deep sweetness.
These brownies are naturally pork-free and alcohol-free, making them a great choice for diverse crowds. Because they are so dense and sturdy, they also travel well. You can bring the brownies and the sauce separately to a potluck and assemble them on-site for a dessert that looks like it required hours of professional plating work.
Temperature Contrast: The Secret to Dessert Success
The most important tip for serving is managing your temperatures. You want the brownie at room temperature so it’s chewy, the sauce warm so it flows, and the whipped cream cold so it stays thick. This triple-threat of temperatures creates a multi-sensory experience that makes this dessert feel truly special. It’s the difference between a simple snack and a gourmet experience.
How should I store leftover brownies and sauce?
Store the brownies in an airtight container at room temperature for up to 3 days. Do not refrigerate the brownies, as the cold air can pull moisture out of the crumb and make them stale. The chocolate lava sauce should be stored in a separate container in the refrigerator for up to a week. When you are ready to serve, reheat the sauce gently in the microwave or in a small saucepan until it is pourable and glossy again.
Why did my brownies turn out cakey instead of fudgy?
Cakey brownies are usually the result of two things: overmeasuring the flour or overbeating the batter after the flour is added. When you scoop flour directly with a measuring cup, it packs down, and you end up with more than the recipe calls for. Always spoon the flour into the cup and level it off. Additionally, once the flour is in, only fold the mixture until the white streaks disappear. Overmixing develops gluten, which creates a bread-like, cakey texture instead of a dense fudge.
Can I use a different type of chocolate for the sauce?
Yes, you can substitute the dark chocolate chips in the sauce with milk chocolate or even white chocolate if you prefer a sweeter profile. However, keep in mind that dark chocolate provides a necessary bitterness that balances the sugar in the brownie. If you use milk chocolate, you might want to add an extra pinch of salt to the sauce to keep the flavors balanced. Avoid using chocolate bars with fillings or nuts, as they won’t melt down into a smooth ganache.
What if I don’t have light corn syrup for the sauce?
The corn syrup is primarily used to give the sauce a professional, mirror-like gloss and prevent crystallization. If you don’t have it, you can simply omit it. The sauce will still taste delicious and have a great texture, though it may look slightly more matte and could become slightly grainy if stored and reheated multiple times. The flavor and overall “lava” effect will remain largely the same.
Why do the brownies need to cool for two hours?
Cooling is the most important step for the “Anti-Soggy” effect. During these two hours, the starches in the flour undergo a process called retrogradation, where they firm up and create a stable structure. Simultaneously, the melted butter and chocolate chips in the batter solidify. This creates a dense, “shielded” crumb that won’t fall apart or turn into mush when you pour the warm sauce over it. If you cut them early, they will be too soft and fragile to handle the sauce.
Can I freeze these brownies for later?
Yes, these brownies freeze exceptionally well. Wrap individual, unsauced squares tightly in plastic wrap and then place them in a freezer-safe bag for up to 3 months. To serve, thaw a square at room temperature for about an hour. Do not freeze the lava sauce, as the emulsion of the cream and chocolate can break when thawed, resulting in an oily mess. It is best to make the sauce fresh or keep it in the fridge for short-term use.
Fudge Lava Brownies
Course: DessertCuisine: AmericanDifficulty: medium9
servings15
minutes25
minutes410
kcal120
MinutesA decadent brownie recipe designed with a high-density crumb structure and bloomed cocoa to stay firm and chewy even when smothered in rich chocolate ganache sauce.
Ingredients
1 cup unsalted butter, melted and hot
2 cups granulated sugar
2 teaspoons vanilla extract
4 large eggs, room temperature
3/4 cup unsweetened cocoa powder
1 cup all-purpose flour
1/2 teaspoon salt
1/2 teaspoon baking powder
1 cup semi-sweet chocolate chips (for the batter)
1/2 cup heavy cream (for the sauce)
1 cup dark chocolate chips (for the sauce)
1 tablespoon light corn syrup (for sauce glossiness)
Whipped cream for topping
Mini chocolate chips for garnish
Directions
- Preheat your oven to 350 degrees F (175 degrees C). Grease an 8×8 inch baking pan and line with parchment paper, leaving an overhang on two sides for easy removal.
- The secret to the Anti-Soggy Bottom is blooming the cocoa. Whisk the cocoa powder directly into the hot melted butter and let it sit for 2 minutes. This hydrates the cocoa and creates a fat-protected barrier that prevents the brownie from absorbing too much external moisture later.
- Stir in the sugar and vanilla. Add eggs one at a time, beating vigorously with a whisk after each addition until the batter is glossy. This builds a strong protein structure to support the heavy sauce.
- Gently fold in the flour, salt, and baking powder using a spatula until just combined. Do not overmix. Fold in the 1 cup of semi-sweet chocolate chips.
- Pour into the prepared pan and bake for 25 to 30 minutes. The center should be set and a toothpick should come out with a few moist crumbs (not wet batter).
- CRITICAL STEP: Let the brownies cool completely in the pan for at least 2 hours. This cooling phase is vital for the starches to set and the crumb to densify so they don’t turn to mush when sauced.
- Make the sauce: Heat the heavy cream and corn syrup in a small saucepan until it reaches a gentle simmer. Place the dark chocolate chips in a heat-proof bowl and pour the hot cream over them. Let sit for 5 minutes, then whisk from the center outward until a thick, glossy ganache forms.
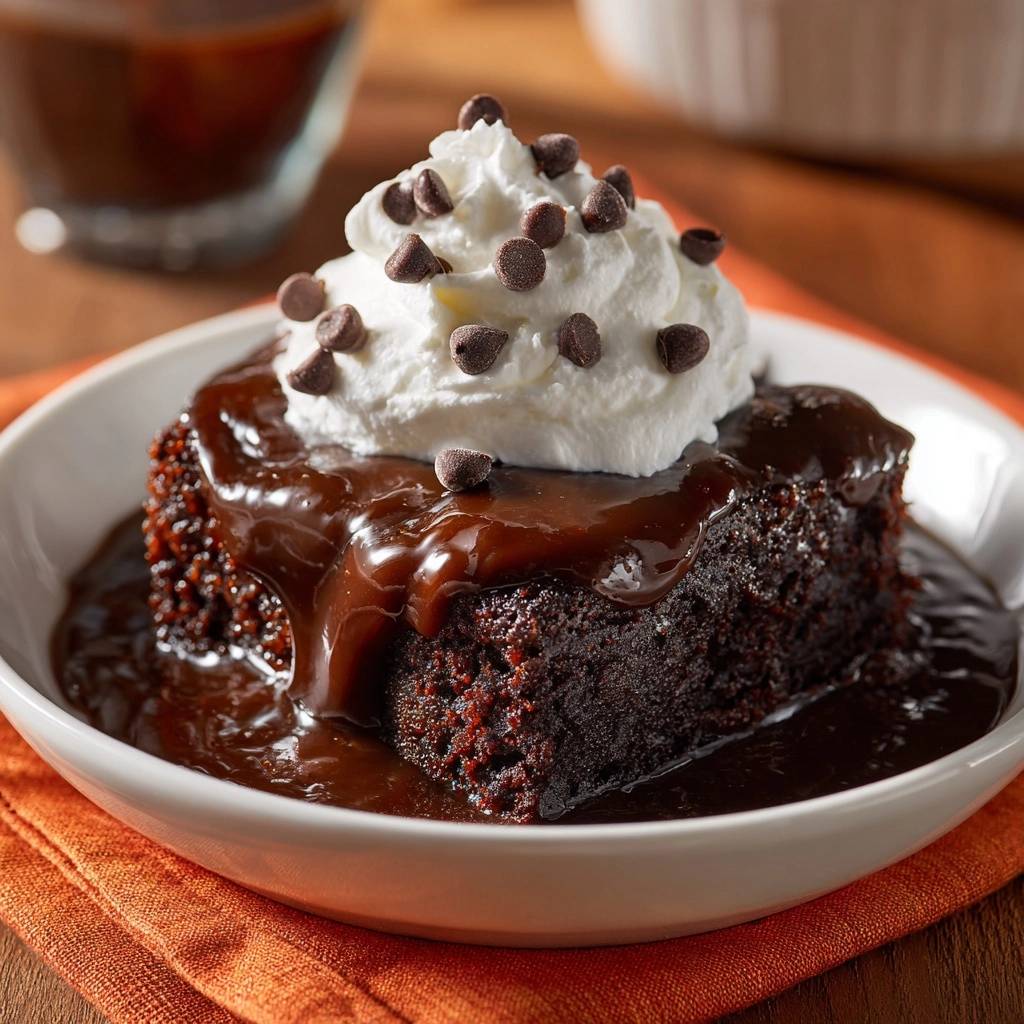
- To serve, cut the cooled brownies into sturdy squares. Place a square in a shallow bowl. Pour the warm sauce generously over the top, allowing it to pool around the base.
- Finish with a large dollop of whipped cream and a heavy sprinkle of mini chocolate chips as shown in the image. The brownie will remain perfectly intact and chewy despite the pool of rich sauce.
Notes
- The cooling phase of at least 2 hours is critical for the starches to set and the crumb to densify, preventing the brownie from turning to mush when the warm sauce is added.


