
Finding the perfect brownie feels like a lifelong quest for many home bakers. You want that deep, dark chocolate flavor, but the texture is where most recipes fall short. Too often, a homemade batch ends up dry, airy, or suspiciously similar to a piece of chocolate cake. If you’re looking for a brownie that is dense, heavy, and intensely fudgy, you’ve come to the right place.
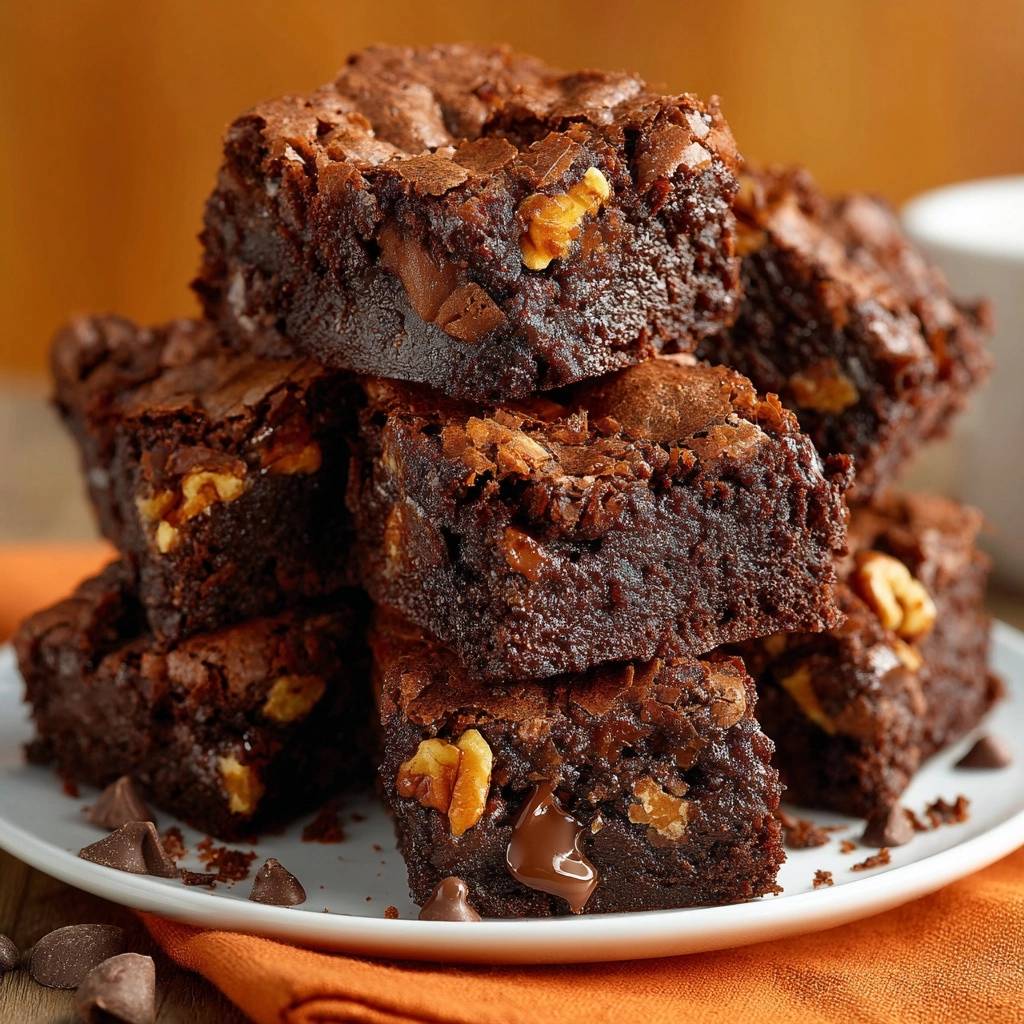
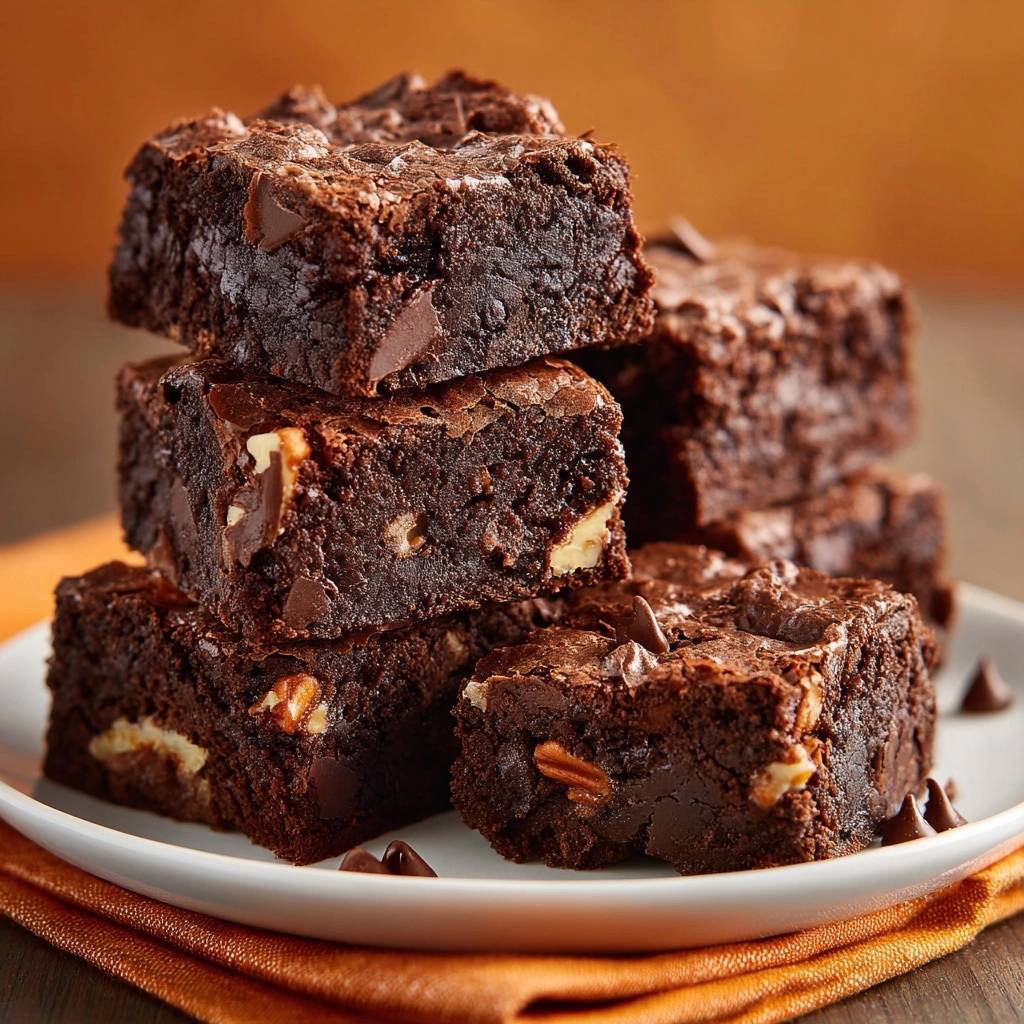
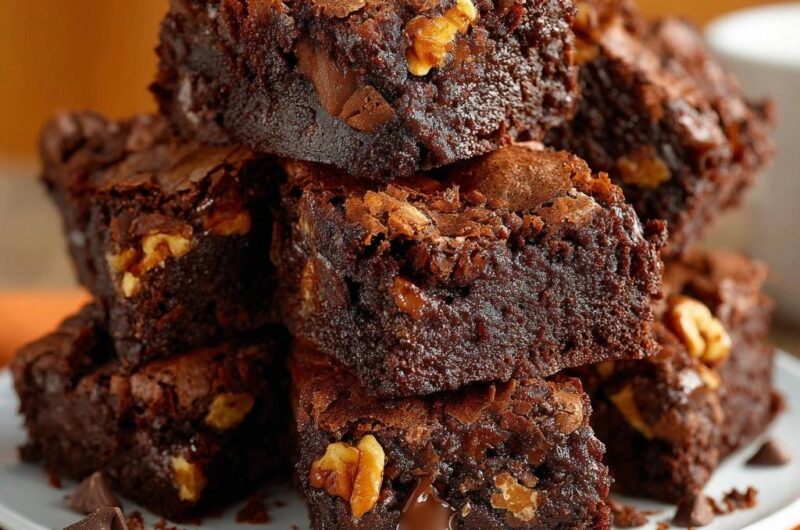
The “Anti-Cakey” philosophy is all about embracing moisture and density over fluff. These Ultimate Walnut Fudge Brownies deliver a sensory experience that starts with a paper-thin, crackly top that shatters when you bite into it. Beneath that crust lies a center so rich it almost resembles truffle ganache, punctuated by the earthy crunch of toasted walnuts. It’s a professional-grade result that makes boxed mixes feel like a distant memory.
For an even richer, fudgier texture, consider exploring the ultimate fudge lava brownies.
The secret to this specific texture isn’t just the ingredients; it’s the way you handle the sugar and fat. By following a precise whisking method, you create a stable emulsion that traps just enough air for structure without turning the batter into a sponge. You’ll notice the difference the moment you lift these heavy, fudgy squares out of the pan.
The Science of Fudgy vs. Cakey Textures
Brownie chemistry is a delicate balance of fat, sugar, and flour. To achieve a fudgy result, we intentionally omit chemical leaveners like baking soda or baking powder. These ingredients create carbon dioxide bubbles that lift the batter, resulting in a “cakey” crumb. By leaving them out, the brownies remain dense and concentrated.
The fat-to-flour ratio is the second pillar of the fudgy brownie. This recipe uses a high proportion of butter and eggs compared to a relatively small amount of all-purpose flour. This prevents a bread-like structure from forming. Furthermore, we want to minimize gluten development, which is why we only fold the flour in at the very end until it’s just combined.
Why Sugar Dissolution Creates the Crackly Top
That coveted “meringue-like” shiny crust isn’t a matter of luck; it’s a matter of physics. When you whisk hot, melted butter with granulated sugar for a full two minutes, the heat helps dissolve the sugar crystals. This creates a sugar-fat syrup that migrates to the top of the brownies as they bake.
As the moisture evaporates in the oven, this dissolved sugar layer dries out into a thin, crispy film. If you skip the vigorous whisking or use cold butter, the sugar stays suspended in the batter. This results in a dull, matte surface rather than the professional, crackly finish seen in high-end bakeries.
Essential Components for Ultimate Walnut Fudge Brownies
Quality ingredients are the foundation of a great brownie. For the deepest chocolate flavor, Dutch-processed cocoa powder is non-negotiable. Unlike natural cocoa, Dutch-processed is treated with alkali to neutralize its acidity. This gives it a darker color and a smoother, more mellow flavor that pairs perfectly with the high sugar content in this recipe.
Temperature also plays a vital role in your success. Ensure your eggs are at room temperature before you start. Cold eggs can cause the melted butter to seize or clump, preventing a smooth emulsion. If you’re in a hurry, place the eggs in a bowl of warm water for five minutes to take the chill off.
Selecting the Right Walnuts and Chocolate
Walnuts provide more than just texture; their slight bitterness is the perfect foil for the rich, sweet chocolate. While you can use raw walnuts, lightly toasting them in a dry pan for three minutes before chopping will unlock a much deeper, nuttier aroma. Aim for large halves that you chop yourself so you get substantial chunks in every bite.
For the chocolate chips, semi-sweet is the gold standard here. With roughly 60% cacao, semi-sweet chips hold their shape well and provide a sophisticated bitterness. Milk chocolate tends to get lost in the sweetness of the batter, while ultra-dark chocolate can make the brownies taste overly dry.
Step-by-Step: Mastering the Fudgy Technique
Preparation is key when working with a batter this thick. Start by lining your 8×8 inch square pan with parchment paper. Leave an extra inch or two hanging over the sides to create a “sling.” Because these brownies are so soft and fudgy, trying to scoop them out of a greased pan will likely result in them falling apart.
Phase 1: Emulsifying the Base
Start by whisking your hot melted butter and sugar. You’ll notice the mixture looks grainy and oily at first, but keep going. After adding the eggs and vanilla, whisk for another two minutes. You are looking for the “ribbon stage,” where the batter becomes thick, pale, and glossy. When you lift the whisk, the batter should fall back into the bowl in a slow, distinct trail.
Phase 2: The Gentle Fold
Once your wet base is ready, sift the cocoa powder and flour directly over the bowl. Sifting is crucial because cocoa powder is notorious for forming stubborn clumps that won’t disappear during baking. Use a rubber spatula to fold the dry ingredients in using a “J” motion—cut through the center, scoop across the bottom, and fold over the top.
Stop the second you no longer see white streaks of flour. The batter will be incredibly heavy and thick, almost like a stiff frosting. This is exactly what you want. Fold in your walnuts and chocolate chips last, ensuring they are evenly distributed throughout the dense mixture.
For a similar texture in your next bake, check out this guide to Cookies and Cream Cinnamon Rolls.
Precision Baking for a Moist Center
Most people bake brownies at 350°F, but we use 325°F for this recipe. This “low and slow” approach ensures the heat penetrates the dense center without drying out the edges. If the oven is too hot, you’ll end up with hard, chewy corners and a middle that is still raw and liquid.
The Moist Crumb Toothpick Test
Forget the old rule that a toothpick must come out clean. If a toothpick comes out clean from a fudge brownie, you have already overbaked it. For the perfect texture, the toothpick should come out with several moist, sticky crumbs attached. It shouldn’t be liquid batter, but it definitely shouldn’t be dry. Start checking at the 30-minute mark.
Critical Cooling and Setting Requirements
The hardest part of this recipe is the wait. When you pull the pan out of the oven, the brownies are still technically cooking. The residual heat from the metal pan continues to set the fats and sugars for at least 20 minutes. If you cut into them while they are hot, the structure will collapse, and you’ll have a greasy mess.
Allow the brownies to cool completely in the pan for at least two hours. This resting period allows the fudge to firm up into that dense, biteable structure. For the cleanest squares, you can even pop the pan into the fridge for 30 minutes once it reaches room temperature. This makes slicing much easier.
Troubleshooting Common Brownie Failures
If you end up with an oily top, it usually means the butter was too hot when the eggs were added, or you didn’t whisk long enough to emulsify the fats. The oil separates from the sugar and pools on top. Next time, ensure you hit that full four-minute whisking target to keep everything bound together.
Rock-hard edges are usually the result of using a glass baking dish instead of metal. Glass retains heat much longer and can continue “frying” the edges of the brownies even after they are out of the oven. If you must use glass, reduce the baking time by 5 minutes and check them early.
Storage and Longevity Tactics
These brownies stay fresh and fudgy for 3 to 5 days when stored in an airtight container at room temperature. Interestingly, many people find they taste even better on day two. The flavors have more time to meld, and the texture becomes even more concentrated. If you prefer a firmer, chewier brownie, try storing them in the refrigerator.
Freezing for Long-Term Freshness
Fudge brownies freeze exceptionally well because of their high fat content. To freeze, wrap individual squares tightly in plastic wrap, then place them in a heavy-duty freezer bag or wrap them again in aluminum foil. They will stay fresh for up to 3 months. To thaw, leave them on the counter for an hour; avoid microwaving them, as this can ruin the crackly top.
Expert Tips for Professional Results
For the cleanest, most professional-looking squares, use a plastic knife to cut your brownies. Chocolate and sugar don’t stick to plastic the way they do to metal, allowing the knife to glide through the fudge without tearing it. If you use a metal knife, wipe it clean with a warm, damp cloth between every single cut.
To take the flavor to the next level, sprinkle a tiny pinch of flaky sea salt over the top immediately after taking them out of the oven. The salt heightens the perception of the chocolate and cuts through the richness of the walnuts. Also, stick to a light-colored metal baking pan for the most even heat distribution.
More Sweet Ideas
After enjoying these chocolatey brownies, you might want to explore more baked delights.
- For a breakfast treat, consider these cinnamon sugar jam-filled waffles, which offer a warm, spiced sweetness.
- If you’re in the mood for something fried and enjoyable, try these fluffy fried dough bites for a light, satisfying bite.
Frequently Asked Questions
Can I use natural cocoa powder instead of Dutch-processed?
You can, but the results will be different. Natural cocoa is more acidic and lighter in color, which may result in a slightly tangier brownie that isn’t as dark. Since this recipe doesn’t use baking soda, the acidity of natural cocoa won’t affect the rise, but Dutch-processed is highly recommended for that classic “fudge” flavor profile.
Why are my walnuts sinking to the bottom?
This usually happens if the batter is too thin or if the walnut pieces are too small. However, with this specific recipe, the batter is so thick and heavy that sinking is rarely an issue. If you find it happening, try tossing your chopped walnuts in a teaspoon of flour before folding them into the batter to help them “grip.”
Can I double this recipe for a 9×13 pan?
Yes, you can double the ingredients to fit a standard 9×13 inch baking pan. However, keep a close eye on the bake time. It may need an extra 5 to 10 minutes depending on your oven. Always rely on the “moist crumb” toothpick test rather than the clock to ensure the center is perfectly set.
How do I get perfectly clean squares?
The secret is temperature and tool choice. Chill the brownies in the fridge for at least an hour before slicing. Use a long, sharp knife (or a plastic knife) and wipe it clean with a hot, wet towel after every single slice. This prevents the fudgy crumbs from sticking to the blade and dragging through the next cut.
What if I don’t have a whisk?
You can use a fork or a wooden spoon, but you will need to work much harder. The goal is to dissolve the sugar and aerate the eggs. If you aren’t using a whisk, double your mixing time and use a vigorous circular motion until the batter visibly lightens in color and looks glossy. An electric hand mixer on medium speed also works perfectly for the first few steps.
Walnut Fudge Brownies
Course: DessertCuisine: AmericanDifficulty: medium12
servings15
minutes30
minutes310
kcal45
MinutesA decadent brownie recipe designed to eliminate cakey textures by using a high fat-to-flour ratio and a specific sugar-dissolving technique. These brownies feature a shiny, meringue-like crust, a dense center, and a combination of semi-sweet chocolate chips and chopped walnuts.
Ingredients
1 cup (225g) unsalted butter, melted and hot
2 cups (400g) granulated sugar
3 large eggs, room temperature
1 tablespoon vanilla extract
1 cup (100g) high-quality Dutch-processed cocoa powder
3/4 cup (95g) all-purpose flour
1/2 teaspoon salt
1 cup semi-sweet chocolate chips (plus extra for topping)
1 cup large walnut halves, roughly chopped
Directions
- Preheat your oven to 325°F (165°C). A slightly lower temperature ensures the edges don’t dry out before the center is set. Line an 8×8 inch square baking pan with parchment paper, leaving an overhang on the sides.
- In a large bowl, combine the hot melted butter and granulated sugar. Whisk vigorously by hand for 2 minutes. The heat from the butter helps dissolve the sugar, which is the scientific requirement for that shiny, “meringue-like” crackly crust.
- Add the eggs and vanilla extract. Whisk for another 2 minutes until the batter lightens in color and becomes thick and glossy.
- Sift the cocoa powder, flour, and salt directly into the bowl. Using a rubber spatula, gently fold the dry ingredients into the wet. Stop the moment the last streak of flour disappears to prevent gluten development.
- Fold in the chocolate chips and the chopped walnuts. The batter will be very thick and heavy.
- Spread the batter into the prepared pan, smoothing the top with your spatula. Press a few extra chocolate chips and walnut pieces into the surface to match the visual profile of the image.
- Bake for 30 to 35 minutes. Because these are ultra-fudgy, the “toothpick test” should yield several moist, sticky crumbs. If the toothpick is clean, they are overbaked.
- Allow the brownies to cool completely in the pan for at least 2 hours. This setting time is mandatory; the residual heat finishes the cooking process and creates the dense, fudgy structure. Lift from the pan using the parchment paper and slice with a sharp knife.
Notes
- For the best results, whisk the hot butter and sugar vigorously to ensure a crackly top. Cooling for at least 2 hours is mandatory to allow the fudgy structure to set properly.


