Most people feel a wave of disappointment when they pull a tray of brownies from the oven only to find they’ve baked a chocolate sponge cake. You wanted a dense, decadent treat, but you ended up with something airy and bread-like. This frustration usually stems from a misunderstanding of how air and flour interact with heat.
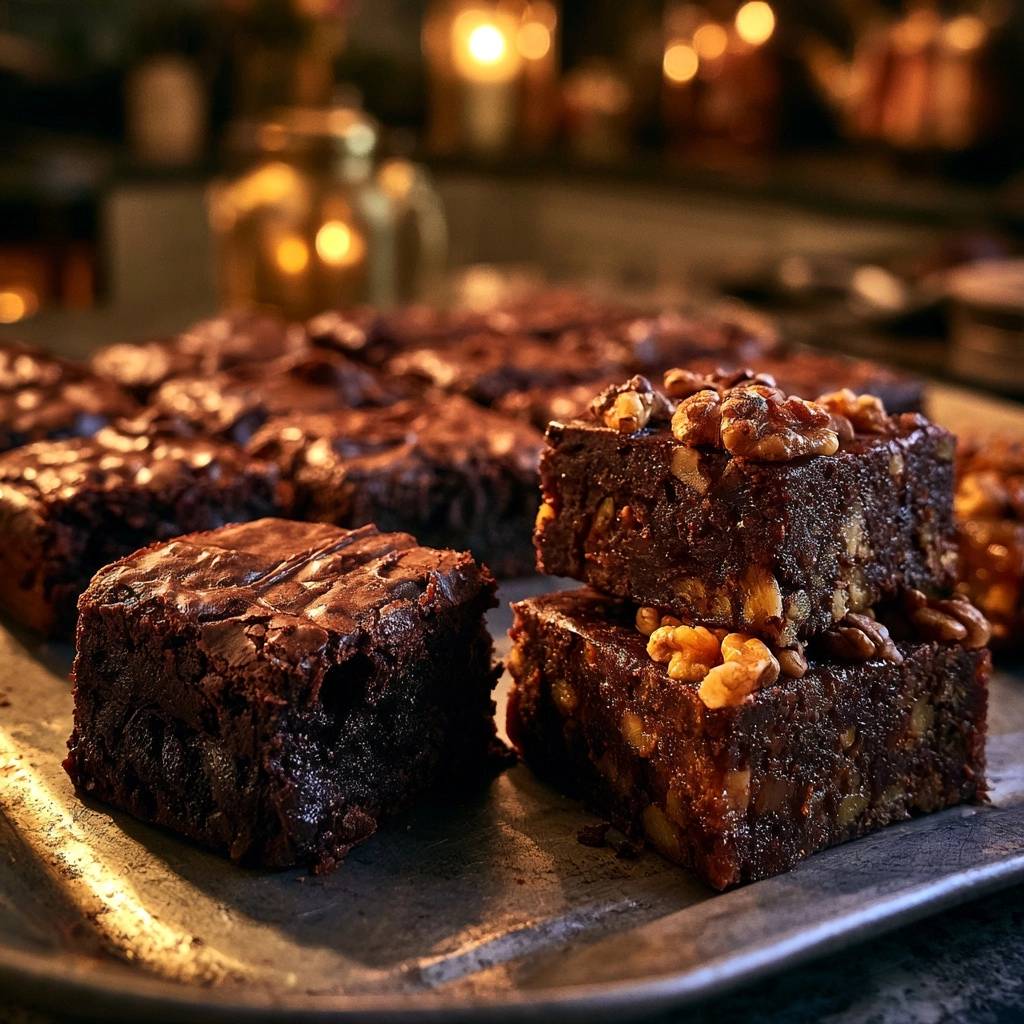
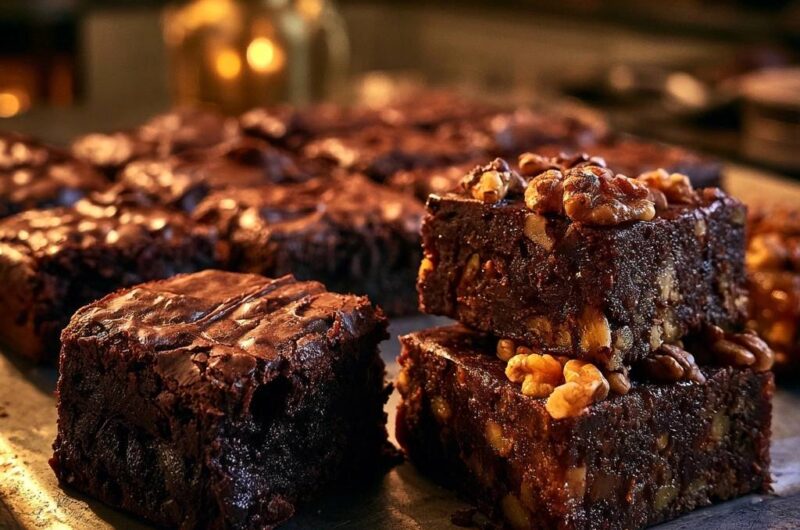
The Ultimate Walnut Fudge Brownies are designed with an “Anti-Cakey” philosophy that prioritizes a truffle-like interior over a light crumb. By focusing on a high fat-to-flour ratio and a specific temperature-control method, you create a brownie that feels heavy in the hand and melts on the tongue. The visual appeal comes from a massive density of walnuts that creates a beautiful, rugged cross-section in every single bite.
The secret to that iconic, paper-thin crackly top lies in the chemistry between hot butter and granulated sugar. When you stir these together vigorously, the sugar partially dissolves and migrates to the surface during baking, forming a delicate meringue-style crust. I’ve found that skipping the whisk and sticking to a spatula is the only way to ensure the center stays fudgy rather than fluffy.
The Science of the Fudgy Brownie Ratio
Baking is essentially a series of chemical reactions where the ratio of ingredients dictates the final structure. To achieve a fudgy result, you must minimize the structural support provided by flour and maximize the moisture provided by fats. This recipe uses only 3/4 cup of flour for two full sticks of butter, which is significantly lower than standard recipes.
This specific “sweet spot” of flour provides just enough gluten to hold the brownies together without creating a tough or bready network. When you reduce the flour, the brownies can’t trap as much air, leading to that sought-after dense texture. Furthermore, the absence of chemical leaveners like baking powder ensures the batter stays compressed rather than rising into a cake.
The choice of cocoa also plays a massive role in the physics of the crumb. Dutch-process cocoa powder has been treated with an alkalizing agent to neutralize its natural acidity. Because it isn’t acidic, it won’t react with other ingredients to create lift. It also offers a darker, more intense color and a smoother flavor profile that complements the earthy bitterness of the walnuts.
Why Temperature Control Prevents Cakey Textures
Most recipes call for a standard 350°F oven, but that’s often too aggressive for a truly fudgy brownie. We drop the temperature to 325°F to allow the heat to penetrate the dense batter slowly. This prevents the edges from becoming dry and overcooked before the center has a chance to set.
You must also account for “carry-over cooking,” which is the heat retained by the pan after it leaves the oven. If you wait until a toothpick comes out clean, you’ve already overbaked them. The residual heat will continue to firm up the center as the brownies cool, turning a slightly jiggly middle into a perfect fudge block.
Essential Components for Ultimate Walnut Fudge Brownies
Quality ingredients are the foundation of this dish, starting with unsalted butter. Using unsalted butter is mandatory because it allows you to control the exact amount of salt in the batter. Since different brands of salted butter have varying sodium levels, going unsalted ensures your brownies don’t end up surprisingly salty.
Granulated sugar is another heavy hitter here. While some bakers love brown sugar for moisture, granulated sugar is actually better for creating that shiny, crackly top skin. When combined with the hot melted butter, the sugar crystals break down just enough to create a glossy emulsion that rises to the top as the brownies bake.
Eggs act as the primary binder, but they must be at room temperature before you start. Cold eggs will cause the melted butter to seize and clump, ruining the smooth emulsion you worked hard to create. Room temperature eggs incorporate seamlessly, ensuring the fat and liquids stay bonded for a consistent, velvety texture.
Finally, the walnuts aren’t just a garnish; they are a structural component. Using 2.5 cups of walnuts ensures that the nuts are packed tightly throughout the brownie. This high volume prevents the chocolate chunks from sinking to the bottom and provides a satisfying, crunchy contrast to the soft fudge.
The Role of Dutch-Process Cocoa Powder
Dutch-process cocoa is the gold standard for deep, dark brownies. The alkalization process removes the harsh, fruity acidity found in natural cocoa powder. This results in a mellow, woody chocolate flavor that doesn’t compete with the walnuts. It also creates a much thicker batter, which helps maintain the “Anti-Cakey” density we’re looking for.
Step-by-Step: Mastering the Anti-Cakey Technique
The first phase is the sugar-butter emulsion. You need to stir the hot melted butter and sugar together for at least two full minutes. You’ll notice the mixture change from a greasy, grainy mess to a pale, slightly thickened paste. This step is the only way to guarantee that beautiful, shimmering top crust.
Phase two involves the gentle integration of eggs. This is where most people fail. You must stir the eggs in one at a time until they are just barely combined. If you whisk them vigorously, you’ll incorporate air bubbles that will expand in the oven, turning your fudge into a sponge. Keep your movements slow and deliberate.
The final phase is the folding method. When you add the dry ingredients, use a rubber spatula to perform a “J-fold.” Cut through the center of the bowl, scoop under the bottom, and fold the batter over the top. Stop the moment you see only a few tiny streaks of flour. Over-mixing at this point develops gluten, which is the enemy of a tender, fudgy bite.
Achieving the Signature Walnut-Crusted Surface
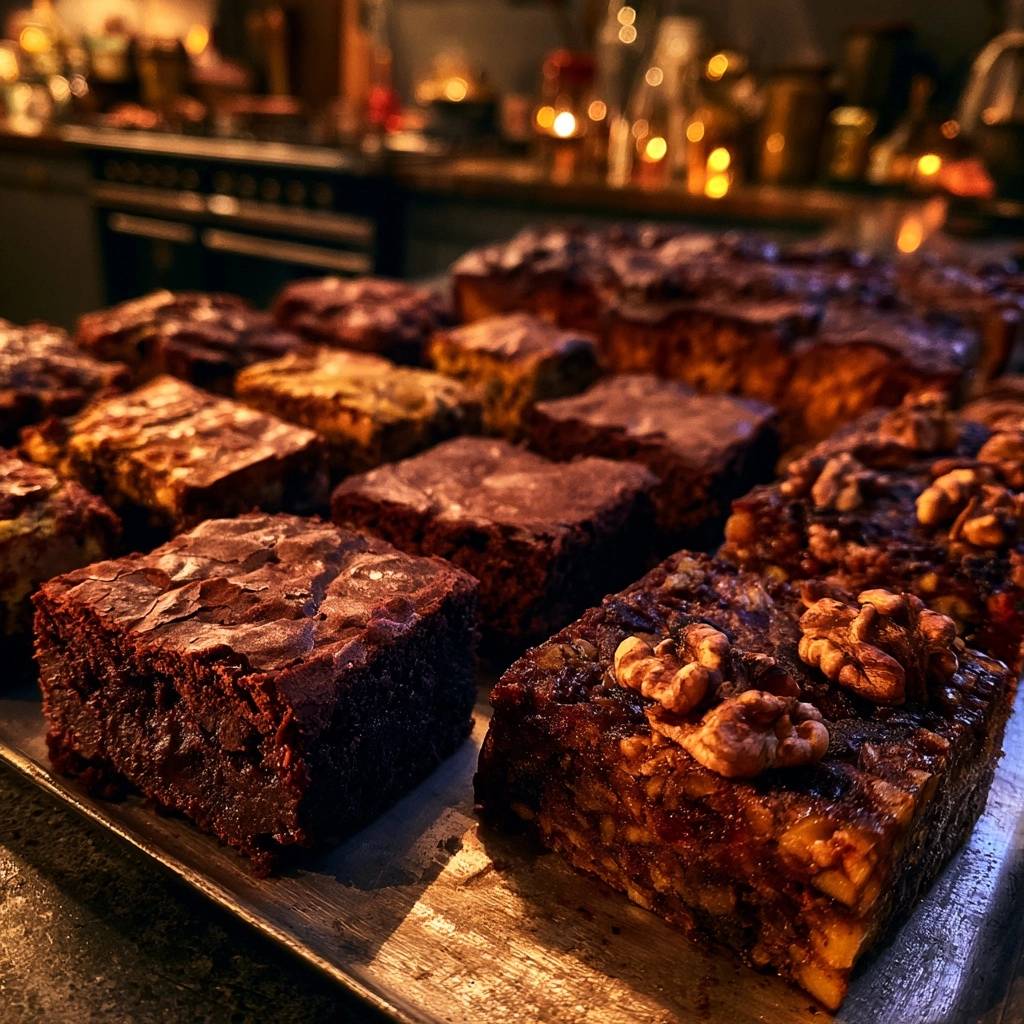
To get that professional, bakery-style look, don’t just dump all the walnuts into the batter. Fold in 1.5 cups to ensure the interior is packed with crunch. Then, once the batter is smoothed into the pan, hand-press the remaining cup of walnut halves into the surface. This keeps them visible and allows them to toast in the direct heat of the oven.
Troubleshooting Common Brownie Baking Errors
If your brownies turn out greasy, you likely didn’t emulsify the butter and sugar well enough. The sugar needs that heat and agitation to bond with the fat. Next time, make sure the butter is truly hot when you add the sugar and don’t skimp on the two minutes of stirring.
Dry brownies are almost always a result of overbaking or a miscalibrated oven. Even five extra minutes can turn a fudge brownie into a dry brick. I recommend using an oven thermometer to ensure your 325°F is accurate. Remember, the center should still have a slight jiggle when you pull the pan out.
If you don’t get a crackly top, the sugar didn’t dissolve properly. This usually happens if the butter wasn’t hot enough or if you used a sugar substitute. Stick to standard granulated sugar and ensure the butter is freshly melted and steaming when you begin the mixing process.
The Mandatory Cooling and Slicing Protocol
The hardest part of this recipe is the wait. You must allow the brownies to cool in the pan for at least three hours. During this time, the melted fats and chocolate chunks solidify, creating the structural integrity needed for a clean bite. If you cut them while warm, they will simply collapse into a messy pile.
For those who want the ultimate “fudge-block” experience, I recommend chilling the pan in the fridge for an hour after it reaches room temperature. This makes the brownies incredibly dense and easy to handle. It also intensifies the chocolate flavor, making every bite feel like a rich truffle.
To get those perfectly clean, sharp edges you see in professional photos, use a large chef’s knife. Dip the blade into a tall glass of hot water, wipe it dry, and make one clean slice. Repeat the dipping and wiping process for every single cut. This prevents the fudgy center from sticking to the blade and tearing the brownie.
Storage and Longevity for Dense Brownies
These brownies stay moist for a long time because of their high fat content. At room temperature, keep them in an airtight container for up to four days. I like to place a piece of parchment paper between layers to prevent them from sticking together. Make sure the container is truly sealed to prevent the edges from hardening.
If you prefer a firmer texture, store them in the refrigerator. They will last for about a week this way and become even chewier. Many people actually prefer the taste of a cold walnut brownie because the flavors of the Dutch cocoa and toasted nuts seem to meld together more effectively when chilled.
For long-term storage, these brownies freeze beautifully. Wrap individual squares tightly in plastic wrap, then place them in a heavy-duty freezer bag. They will stay fresh for up to three months. When you’re ready for a treat, just let a square thaw on the counter for 20 minutes, and it will taste just as fudgy as the day you baked it.
Expert Tips for Customizing Your Batch
While the recipe is fantastic as written, a few small tweaks can elevate it further. I highly recommend sprinkling a pinch of Maldon sea salt flakes over the top immediately after baking. The large salt crystals provide a sharp contrast that cuts through the sweetness of the two cups of sugar and highlights the chocolate.
When it comes to the chocolate, semi-sweet chunks are far superior to standard chips. Chips are designed to hold their shape and contain stabilizers that prevent them from melting fully. Chunks, however, will melt into luxurious “pools” of chocolate throughout the brownie, adding to the overall fudgy mouthfeel.
If you have an extra five minutes, toast your walnut halves in a dry skillet over medium heat before adding them to the batter. You’ll know they’re ready when they smell fragrant and earthy. Toasting the nuts brings out their natural oils and ensures they stay crunchy even after being surrounded by moist brownie batter.
Frequently Asked Questions
Can I use natural cocoa powder instead?
You can, but the results will be different. Natural cocoa is more acidic and lighter in color. It may react with the eggs to create a slightly more aerated, cake-like crumb. The flavor will also be sharper and more citrus-toned rather than the smooth, mellow chocolate flavor provided by Dutch-process cocoa.
Why did my brownies turn out like cake?
This usually happens for two reasons: over-beating the eggs or using too much flour. When you whisk eggs, you incorporate air that acts as a leavener. Additionally, if you measure your flour by scooping the measuring cup directly into the bag, you likely packed it down and used more than 3/4 cup. Always spoon the flour into the cup and level it off with a knife.
How do I know they are done without overbaking?
Forget the “clean toothpick” rule. For fudgy brownies, you want to see thick, moist crumbs clinging to the toothpick. If the toothpick comes out with wet, liquid batter, they need a few more minutes. If it comes out completely clean, they are already overbaked. Look for a slight jiggle in the center of the pan when you gently shake it.
Can I substitute the walnuts for other nuts?
Pecans or macadamia nuts are excellent substitutes. However, walnuts are the traditional choice because their slightly bitter skin balances the rich sugar content of the brownie. If you switch nuts, keep the volume the same (2.5 cups) to maintain the dense, packed texture that defines this specific recipe.
Is the parchment paper overhang really necessary?
Yes, it is highly recommended. This is called the “sling” method. Because these brownies are so soft and fudgy, trying to scoop them out of the pan with a spatula will likely break them apart. The parchment overhang allows you to lift the entire block of brownies out of the pan at once so you can slice them cleanly on a cutting board.
Ultimate Walnut Fudge Brownies
Course: DessertCuisine: AmericanDifficulty: easy16
brownies15
minutes35
minutes50
Minutes310
kcalAmerican
Ingredients
1 cup (2 sticks) unsalted butter, melted and hot
2 cups granulated sugar
1 tablespoon vanilla extract
4 large eggs, room temperature
3/4 cup unsweetened Dutch-process cocoa powder
3/4 cup all-purpose flour (reduced for maximum fudginess)
1/2 teaspoon salt
2 1/2 cups walnut halves and pieces, divided (extra for that dense visual look)
1/2 cup semi-sweet chocolate chunks or chips
Directions
- Preheat your oven to 325°F (165°C). A lower temperature ensures the edges don’t dry out before the dense center sets. Grease an 8×8 inch baking pan and line it with parchment paper, leaving an overhang on the sides.
- In a large bowl, combine the hot melted butter and granulated sugar. Stir vigorously with a spatula for 2 minutes. The heat from the butter helps dissolve the sugar, which is the secret to the shiny, crackly top skin seen in the photo.
- Add the eggs one at a time. To achieve the “Anti-Cakey” promise, stir gently until just combined. Do not whisk or beat, as incorporating air will create a cake-like rise. Stir in the vanilla extract.
- Sift the cocoa powder, flour, and salt directly into the wet ingredients. Use a rubber spatula to fold the dry ingredients in until just a few streaks of flour remain. Over-mixing at this stage develops gluten, which leads to a tough, bread-like texture.
- Fold in 1 1/2 cups of the walnuts and the chocolate chunks. The high volume of walnuts ensures every bite has the cross-section texture shown in the image.
- Pour the thick batter into the prepared pan and smooth the top. Generously press the remaining 1 cup of walnut halves into the surface of the batter so they are prominently visible after baking.
- Bake for 32 to 38 minutes. Because these are ultra-dense, they require a longer bake at a lower temp. Pull them out when the edges are set but the center still has a slight jiggle. A toothpick inserted should come out with thick, fudgy crumbs (not raw batter, but definitely not clean).
- Allow the brownies to cool completely in the pan for at least 3 hours, or refrigerate for 1 hour. This cooling period is mandatory for the fats to solidify into the fudge structure shown. Lift the parchment to remove and slice with a sharp knife dipped in hot water for clean edges.
Notes
- The cooling period is mandatory for the fats to solidify into a fudge structure. Use a sharp knife dipped in hot water for clean slices.