
There is nothing more frustrating than bringing a beautiful layered appetizer to a gathering only for it to turn into a sloppy, watery mess after the first few scoops. I struggled for years with layers that bled and bases that became soggy, but I finally cracked the code to making the Ultimate Layered Taco Dip that stays structurally sound and perfect from start to finish.
This recipe focuses intensely on moisture control and building an impenetrable foundation, ensuring clean, distinct layers and the reliable scoopability every party dip demands.
Beyond Soggy: Why This Ultimate Layered Taco Dip Recipe Works
The Cream Cheese Foundation: Structure and Scoopability
The secret to a base that doesn’t collapse or absorb moisture is the addition of softened cream cheese to the refried beans and seasoning mixture.
This creates a thick, putty-like layer that is rich in fat and density, physically preventing liquids from the upper layers-like sour cream or guacamole-from penetrating the foundation.
Structural Integrity is Key: A Deep Dive into Moisture Control
We use two primary defense barriers against wateriness, the number one dip killer. First, we actively salt and dry the fresh diced tomatoes to extract their inherent moisture before assembly.
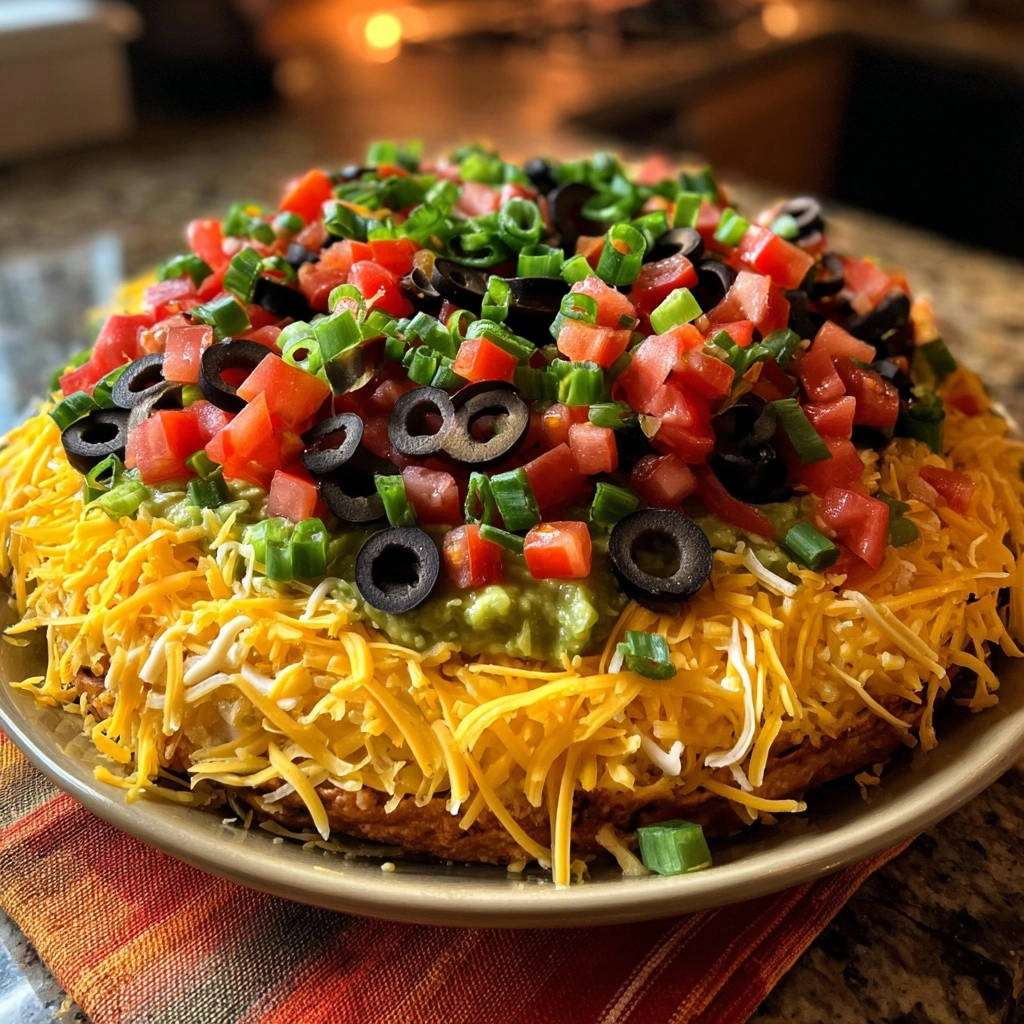
Second, the thick layer of shredded cheese acts as a dry, non-absorbent shield, separating the wet dairy layers (sour cream, guacamole) from the wet toppings (tomatoes, olives) above it.
The Magic of Chill Time: Why Waiting Makes the Ultimate Difference
Chilling is non-negotiable for success. The cold firms the high-fat dairy components, specifically the cream cheese base and the sour cream layer.
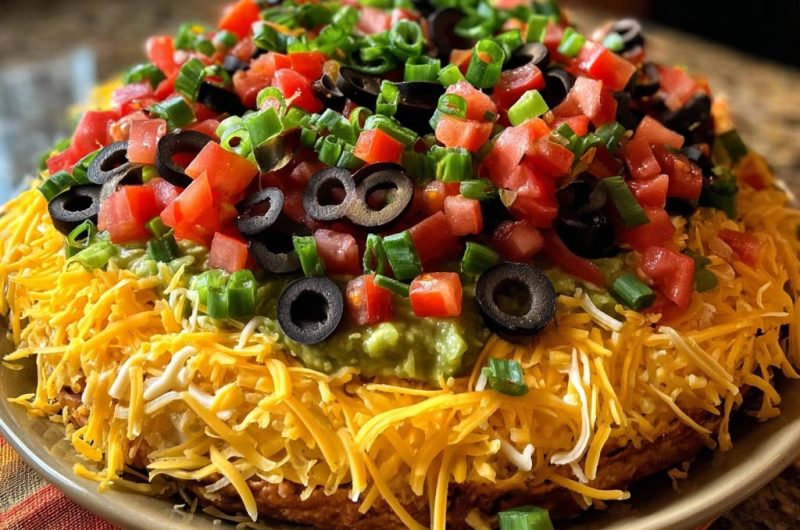
This solidification ensures that when a chip or spoon enters the dip, the layers slice cleanly rather than mixing or becoming muddy, resulting in beautiful, distinct layers every time.
The Anatomy of Flavor: Selecting Your Ultimate Taco Dip Ingredients
Choosing Your Base: Refried Beans and the Taco Seasoning Ratio
You can use either traditional or vegetarian refried beans; consistency is more important than specific flavor here. Look for thicker, denser canned beans, avoiding any variety that appears watery or soupy.
The full package of taco seasoning ensures the base layer carries the robust, savory flavor expected in a taco dip, making it much more complex than a plain bean layer.
The Perfect Dairy Trio: Softening Cream Cheese and Sour Cream Roles
Ensure the cream cheese is fully softened to achieve a smooth, lump-free base blend. If it’s too cold, the base will be clumpy and hard to spread evenly.
The small amount of sour cream (1/4 cup) in the base blend helps to create the ideal spreadable texture, while the larger portion (1 1/2 cups) is dedicated solely to forming the clean, creamy middle layer.
Freshness Factor: Guacamole vs. Smashed Avocado
Pre-made guacamole is convenient but often contains excess water, lime juice, or preservatives that can compromise the layer below it. Always check the ingredients and drain if necessary.
Simple smashed avocado seasoned lightly with lime juice and salt is often the best choice for this dip as it provides a cleaner, firmer texture that resists bleeding into the bean layer.
Moisture Extraction Protocol: Preparing the Key Toppings
This single, specialized step is the foundation of preventing your taco dip from becoming watery hours after assembly. Ignoring this protocol guarantees a soggy base.
Salting Roma Tomatoes: The Essential Pre-Drying Technique
Dicing and Salting: The key is a fine dice to maximize surface area. Sprinkle lightly with salt-not too much, or the flavor will be affected-and let the salt draw out excess moisture.
The Paper Towel Step: After 10 minutes, the tomatoes must be patted aggressively dry with paper towels. Failure to remove this liquid will compromise the cheese barrier below.
Ensuring Drain Integrity for Black Olives
Canned black olives sit in salty brine which is highly detrimental to dip integrity. It is essential to drain the olives completely, perhaps even patting them dry on a paper towel.
An optional, extra step is a quick rinse under cold water to remove residual brine, followed by an extremely thorough draining to ensure only dry toppings meet the cheese layer.
Layering for Success: Step-by-Step Assembly for Picture-Perfect Results
Forging the Structural Foundation: The Bean and Cream Cheese Base
-
The Base Blend:
Ensure the cream cheese is fully softened and the ingredients are blended until perfectly smooth and creamy. Lumps lead to uneven layers and potential seepage.
The smooth consistency of this initial base is what prevents the subsequent layers from sinking or mixing.
-
Platter Spreading Technique:
Use a rubber spatula and work slowly from the center outward, ensuring the layer is firm and even. This is the bedrock of your Ultimate Layered Taco Dip.
The Middle Layers: Guacamole and Dairy Control
-
Applying the Guacamole Layer:
For a clean application, drop small dollops of guacamole across the surface and gently spread them together using the back of a spoon rather than dragging the mixture.
-
Creating the Sour Cream Layer:
Use the same gentle dollop and spread technique for the plain sour cream (1 1/2 cups). This layer should be noticeably thicker than the guacamole layer for visual appeal.
For more ideas with cheese, discover sweet blueberry cheese quesadillas that are crispy every time.
The Essential Cheese Barrier and Final Toppings
-
The Cheese Layer: Your Second Moisture Defense:
Sprinkle the shredded cheese blend evenly and thickly. This dry, shredded texture is essential, acting as the final buffer against the wetness from the diced tomatoes.
-
The Finishing Touches and Mandatory Chill:
Layer the moisture-free tomatoes, olives, and scallions on top. Cover loosely with plastic wrap, being careful not to press down on the toppings, and chill for at least one hour before serving.
Make-Ahead Strategy and Pro Tips for Ultimate Layered Taco Dip Mastery
How Far in Advance Can You Prepare the Dip?
You can prepare the bean base (Steps 1-3) and chop all the toppings (except tomatoes, which must be salted right before use) up to two days ahead, storing them separately.
The assembled Ultimate Layered Taco Dip can be made and chilled up to 8 hours in advance. Do not add the toppings (tomatoes, olives, scallions) until just 1-2 hours before serving, even with the moisture protocol in place.
Elevating Flavor: Customizing the Dairy Layer
While the recipe calls for plain sour cream to act as a neutral buffer, you can infuse flavor for a richer profile.
Stirring a splash of fresh lime juice, a pinch of cumin, or a tablespoon of dry ranch powder into the 1 1/2 cups of sour cream adds depth without compromising the texture.
Choosing the Right Vehicle: Serving Chips and Dippers
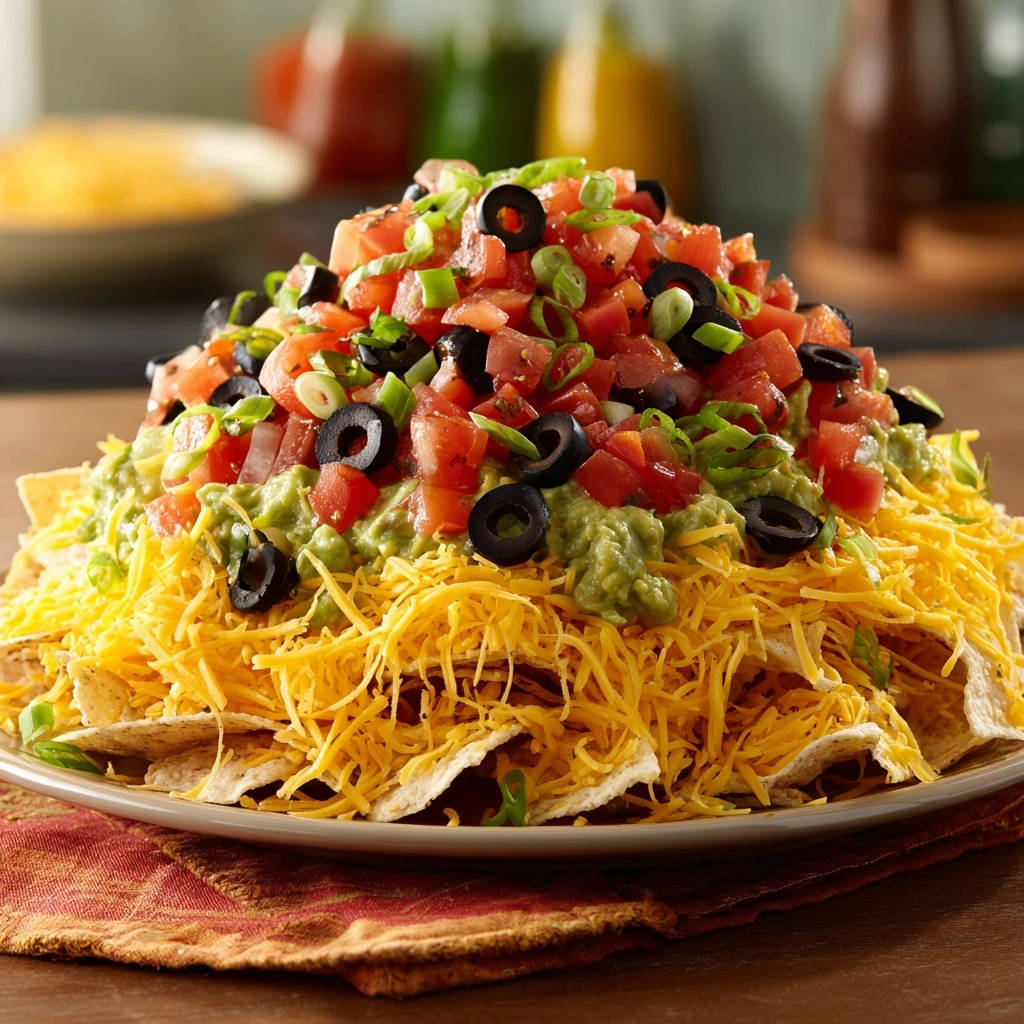
For structural integrity when scooping, opt for sturdy, scoop-shaped tortilla chips (like Fritos Scoops or Tostitos Scoops).
Offering fresh dippers like sliced cucumbers, bell peppers, or thick-cut jicama provides a contrasting texture and makes the dip appealing to those avoiding high-carb options.
Troubleshooting Your Ultimate Layered Taco Dip: Common Issues and Expert Solutions
Problem: The Layers Are Blurring or Mixing When I Spread
This is usually a temperature or technique issue. Ensure your bean base is slightly chilled or very firm before layering on the guacamole.
Always use a soft touch; spreading aggressively or dragging a large amount of product will inevitably disturb the layer beneath. Use the gentle dollop technique described in the steps.
Problem: The Dip Still Ended Up Watery After Chilling
The moisture removal protocol was incomplete. This usually happens when the tomatoes weren’t salted long enough, weren’t patted dry aggressively enough, or the olives weren’t drained well.
Ensure your shredded cheese layer is generous; a sparse layer will allow moisture from the toppings to seep down through gaps.
Problem: My Bean Base is Too Hard to Scoop
If your dip was chilled for longer than 4 hours, the cream cheese base will be incredibly firm. This is usually a sign of success!
Let the dip sit at room temperature for 15 minutes before serving. This slight temperature adjustment will soften the base just enough to allow for perfect, scoopable portions.
FAQs: Quick Answers to Your Ultimate Layered Taco Dip Questions
Can I substitute Greek yogurt for sour cream in this recipe?
While Greek yogurt is thicker, it has a much higher natural moisture content than sour cream and a sharper flavor.
If you choose to substitute, ensure you drain the yogurt thoroughly overnight in a cheesecloth or coffee filter to minimize the risk of liquid seepage.
What are the best alternatives if I don’t like black olives?
Excellent alternatives that hold up well include diced roasted bell peppers, thinly sliced pickled jalapeños (drained very well), or a small amount of sweet corn relish.
Always prioritize toppings that are dry, firm, and have a good textural contrast to the soft layers.
How should I store leftovers and for how long?
Store any leftovers in an airtight container, pressing plastic wrap directly onto the surface to minimize oxygen exposure, which helps prevent avocado browning.
The dip is safe to consume for 3-4 days, though the fresh toppings like tomatoes and scallions may start to degrade and become slightly softer after the first day.
Ready to Impress? Share Your Ultimate Layered Taco Dip Masterpiece!
Mastering the Ultimate Layered Taco Dip is simply a matter of respecting structure and moisture. By dedicating time to softening your cream cheese foundation and implementing the essential salting and drying protocol for the tomatoes, you guarantee a visually stunning and perfectly scoopable party hit.
Go forth and create the party dip that will earn you legendary status. Don’t forget to share your beautifully layered results!
Taco Dip
Course: AppetizerCuisine: MexicanDifficulty: easy10
to 12 servings25
minutes350
kcal25
minutesStop serving watery dips! This ultimate layered taco dip uses critical moisture control techniques and a firm cream cheese base to ensure every scoop is structural and perfect. It’s easy to prepare and guaranteed to be a party favorite.
Ingredients
1 (16 ounce) can refried beans (vegetarian optional)
1 (8 ounce) package cream cheese, softened
1/4 cup sour cream (for the bean mix)
1 package taco seasoning mix
2 cups prepared guacamole or smashed avocado
1 1/2 cups sour cream (for the middle layer)
4 cups shredded cheddar and Monterey Jack cheese blend
2 large Roma tomatoes, finely diced
1 (3.8 ounce) can sliced black olives, drained
1 bunch scallions, chopped
Directions
- Moisture Control for Toppings: This is the most important step for preventing a watery dip. After finely dicing the Roma tomatoes, place them in a small strainer and sprinkle lightly with salt. Let them sit for 10 minutes to draw out excess liquid. Pat them very dry with paper towels before use. Drain the sliced olives thoroughly.
- Build the Base Layer: In a medium bowl, combine the softened cream cheese, refried beans, the 1/4 cup of sour cream, and taco seasoning mix until completely smooth and creamy. The addition of the cream cheese is key to making a structural, scoop-friendly base that liquids cannot penetrate easily.
- Spread the Base: Using a spatula, spread the bean and cream cheese mixture evenly across the bottom of a large platter or shallow serving dish. Ensure the layer is firm and even.
- Add the Guacamole Layer: Carefully spread the prepared guacamole or smashed avocado over the bean mixture, making sure not to disturb the base.
- Create the Sour Cream Layer: Gently spread the remaining 1 1/2 cups of sour cream over the guacamole.
- The Cheese Barrier: Sprinkle the shredded cheese blend evenly over the sour cream layer. This thick, dry layer acts as an additional moisture barrier, protecting the base layers from the wet toppings.
- Top and Chill: Finish by layering the dry, prepared diced tomatoes, sliced black olives, and chopped scallions on top. Cover loosely and chill in the refrigerator for at least 1 hour before serving. Serving cold helps the layers hold their distinct shape and prevents mushiness when scooped.
Notes
- Moisture control (salting tomatoes) and chilling for at least 1 hour are essential for a firm, non-watery dip.


