
There’s nothing more disheartening than a casserole with a crumbly, dry meat layer. I’ve perfected this Cheesy Bacon Beef Bake to deliver an incredibly tender and juicy beef filling every single time.
This recipe isn’t just about combining flavors; it’s about a simple trick that locks in moisture, ensuring a comforting, delicious meal that your family will rave about.
Why This Cheesy Bacon Beef Bake Wins Every Time
The “Never Dry” Promise: Juicy Beef Every Bite
Forget dry, flavorless ground beef. Our secret blend of milk and breadcrumbs creates a remarkably moist and tender beef layer that stays perfectly juicy through baking.
For similar results with stuffed vegetables, learn about making cheesy beef stuffed peppers.
This technique elevates a simple casserole into a truly satisfying experience.
Quick & Comforting: Weeknight Perfection
With a total time of just 50 minutes, this cheesy bacon beef bake is ideal for busy weeknights.
It offers hearty, satisfying flavors without requiring hours in the kitchen.
Family Favorite: Flavors Everyone Devours
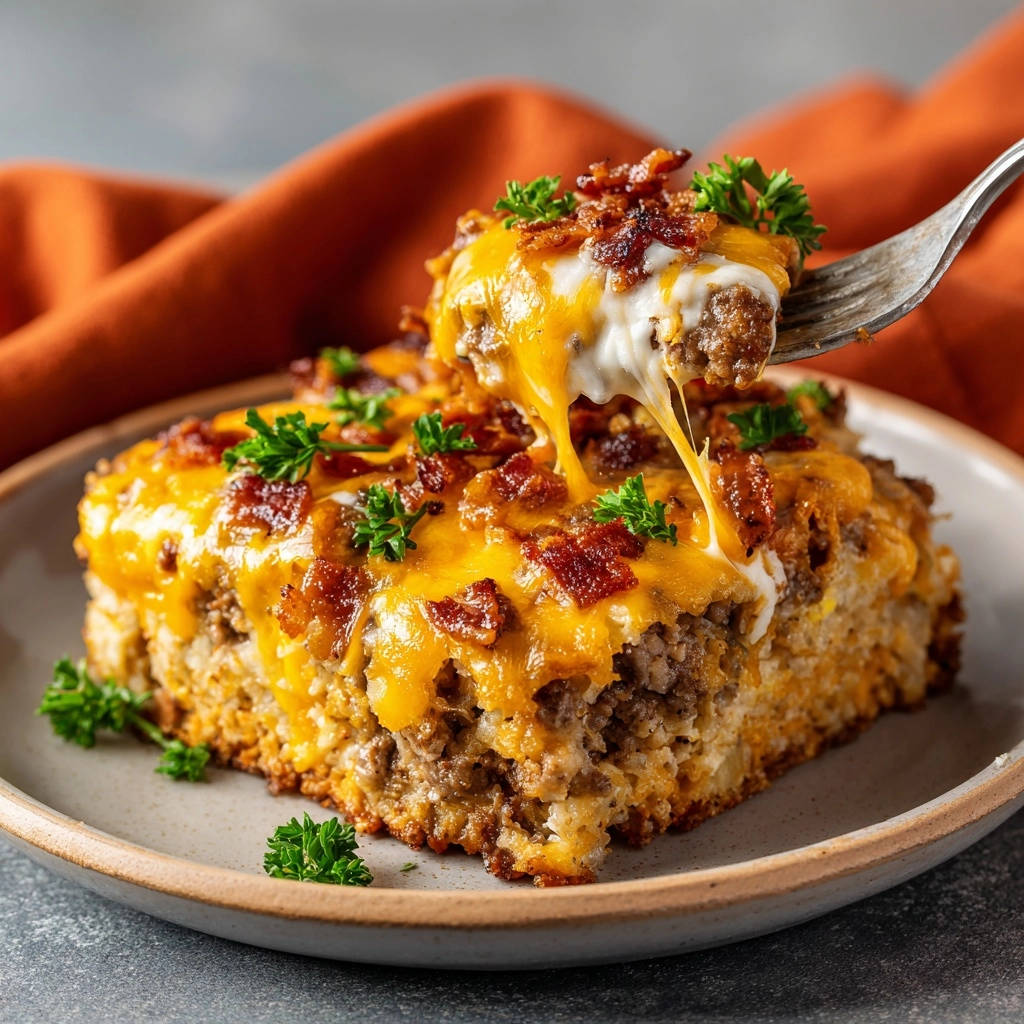
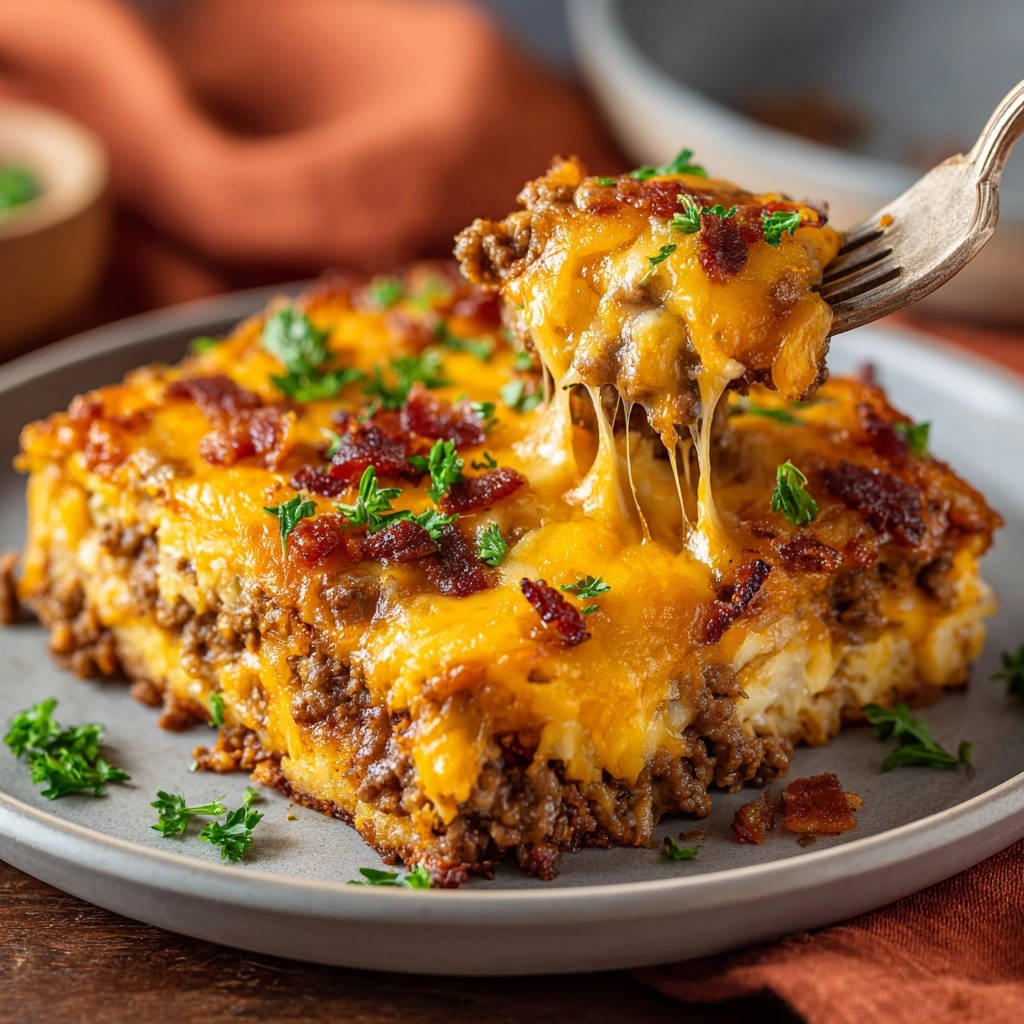
The irresistible combination of savory beef, crispy bacon, and melted cheddar cheese makes this a guaranteed crowd-pleaser.
Even the pickiest eaters will ask for seconds of this flavorful bake.
Gather Your Gear: Essential Ingredients for Your Bake
For the Tender, Flavorful Base
The base is the unsung hero, providing a soft, resilient foundation. All-purpose flour gives it structure, while baking powder ensures a slight lift.
A touch of salt balances the flavors, and milk with vegetable oil binds everything into a pliable, easy-to-press dough.
For the Irresistibly Juicy Beef Layer
Lean ground beef forms the heart of this dish. Plain breadcrumbs and milk are the secret weapon, working in harmony to keep the beef incredibly moist.
Salt and black pepper enhance the natural beef flavor, while generous amounts of shredded cheddar cheese and savory cooked crispy bacon provide the signature taste and texture.
The Finishing Touches
Sour cream adds a delightful tang and creaminess to the top layer, creating a rich mouthfeel.
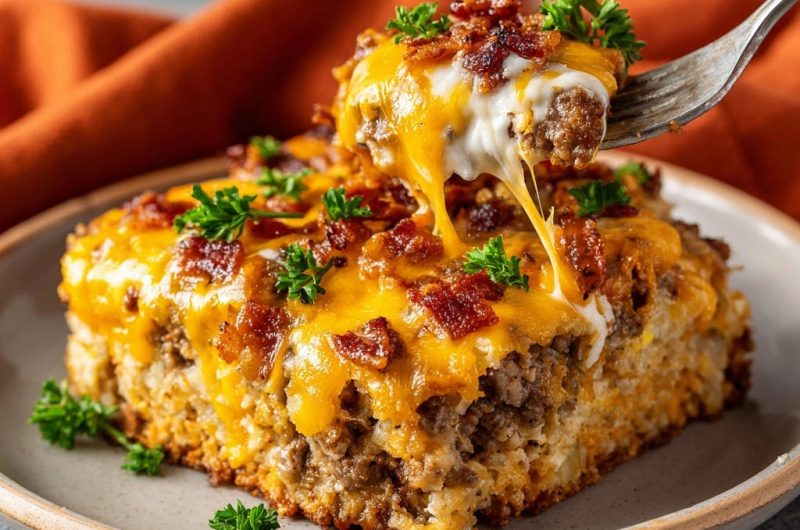
Fresh chopped parsley provides a vibrant color and a burst of fresh herbaceousness, lifting the overall profile of the cheesy bacon beef bake.
Equip Your Kitchen: Tools for a Seamless Cheesy Bacon Beef Bake
Baking Dish Essentials
An 8×8 inch baking dish is crucial for this recipe. Its size ensures the layers are perfectly portioned and cook evenly.
Using the correct size prevents the bake from being too thin or too thick, achieving ideal texture.
Mixing Bowls & Utensils
You’ll need at least two mixing bowls: one medium for the dough base and a large one for the beef mixture.
A whisk, spatula, and your hands (for gentle beef mixing) are essential for successful preparation.
Crafting Your Cheesy Bacon Beef Bake: The Detailed Method
- Preheating and Preparing Your Dish:
Set your oven to 375°F (190°C) and lightly grease an 8×8 inch baking dish.
Proper greasing prevents sticking and ensures easy serving, allowing you to lift out perfect squares.
- Crafting the Soft Dough Base:
In a medium bowl, whisk together the flour, baking powder, and salt. Add the milk and vegetable oil, stirring until just combined to form a soft, workable dough.
Avoid overmixing to keep the base tender; visible streaks of flour are acceptable.
- Pressing the Base into Place:
Evenly press the prepared dough into the bottom of the greased baking dish.
A thin, consistent layer is key for even baking and a balanced texture against the beef layer.
- The Secret to the Juicy Beef Layer:
In a large bowl, combine the ground beef, breadcrumbs, 1/4 cup milk, 1/2 teaspoon salt, and 1/4 teaspoon black pepper.
Use your hands to gently mix until just combined, ensuring not to overmix, which can lead to tough meat.
The breadcrumbs and milk are critical here, working together to lock in moisture and create that signature juicy texture for your Cheesy Bacon Beef Bake.
- Layering the Beef:
Spread the beef mixture evenly over the dough base in the baking dish.
Maintain an even thickness for uniform cooking and a pleasing presentation.
- Initial Bake for the Beef and Base:
Bake for 20 minutes, or until the beef is mostly cooked through and the dough base is slightly golden around the edges.
This pre-baking ensures both layers cook adequately before the final cheese addition.
- First Cheese Layer Application:
Remove the dish from the oven and evenly sprinkle 1 cup of shredded cheddar cheese over the beef layer.
- Melting the First Cheese Layer:
Return to the oven and bake for another 8-10 minutes, or until the cheese is beautifully melted and bubbly.
This creates a wonderfully golden and stretchy cheese crust.
- Adding Creaminess and More Cheese & Bacon:
Remove from the oven. Dollop spoonfuls of sour cream over the top, then sprinkle with the remaining 1/2 cup shredded cheddar cheese and the cooked crumbled crispy bacon.
These additions contribute to the richness and enhance the savory flavor profile of the bake.
- Final Quick Bake for Perfection:
Return to the oven for 2-3 minutes, just until the added cheese is slightly melted and the sour cream is warm.
This short bake warms everything through without overcooking the beef or burning the toppings.
- Garnish and Rest:
Garnish with fresh chopped parsley before serving. Let it rest for a few minutes before slicing and serving.
Resting allows the flavors to meld and the casserole to set, making for cleaner slices and preventing it from falling apart.
Unlocking the Juiciest Beef: Our Signature Moisture Trick
The Magic of Milk & Breadcrumbs in Ground Beef
The combination of milk and breadcrumbs in this Cheesy Bacon Beef Bake is a game-changer for ground beef. Breadcrumbs act like tiny sponges, absorbing the milk and holding onto moisture within the meat mixture.
For another flavorful bake that’s sure to impress, check out cheesy sausage crescent ring.
As the beef cooks, this moisture is gradually released, basting the meat from the inside and preventing it from drying out, even at higher temperatures.
Why Overmixing is the Enemy of Tenderness
When you overmix ground meat, you develop the protein strands, making the texture dense and tough, similar to how gluten develops in bread dough.
For a truly tender beef layer in your bake, mix gently and just until the ingredients are combined. Your hands are the best tool for this, allowing you to feel when it’s just right.
Elevate Your Bake: Expert Tips & Clever Twists
Perfecting Your Dough Base: Ensure your dough is just combined. Overworking can lead to a tough, dense base, so mix until barely incorporated and then press it gently into the dish.
Choosing Your Cheese: While cheddar is classic, try a blend of sharp cheddar and Monterey Jack for extra meltiness and flavor depth. For the best melt and flavor, always opt for freshly shredded cheese over pre-shredded.
Bacon Bliss: For crispier bacon that holds up in the bake, cook it slightly past your preferred doneness before crumbling. It will soften just a touch as it bakes into the casserole, maintaining a pleasing texture.
Don’t Skimp on the Rest: Allowing the casserole to rest for 5-10 minutes after baking helps the layers set and the juices redistribute. This makes for cleaner, more presentable slices and a more cohesive bite of your juicy beef bake.
Beyond the Basic Bake: Creative Variations & Substitutions
Spice It Up: Flavor Boosters
For those who love a bit of heat, consider adding a pinch of cayenne pepper or a dash of your favorite hot sauce to the beef mixture.
Finely diced jalapeños (seeded for less heat) can also be folded into the beef for a subtle kick, elevating this comfort food.
Veggie Ventures: Adding More Goodness
Boost the nutrition and flavor by incorporating finely diced vegetables into the beef layer. Sautéed onions, bell peppers, or even a handful of fresh spinach can blend beautifully.
Ensure any added vegetables are finely chopped and pre-cooked to avoid excess moisture and ensure even cooking within the Cheesy Bacon Beef Bake.
Dairy-Free or Gluten-Free Adaptations
This recipe can be adapted for dietary needs. Use dairy-free milk, sour cream, and shredded cheese alternatives for a lactose-free version.
For a gluten-free option, substitute all-purpose flour with a gluten-free baking blend and use gluten-free breadcrumbs.
What to Serve with Your Cheesy Bacon Beef Bake
Classic Pairings for Ultimate Comfort
A simple crisp green salad with a light vinaigrette makes an excellent counterpoint to the rich Cheesy Bacon Beef Bake.
Round Out Your Meal
To complement your Cheesy Bacon Beef Bake, consider these flavorful additions.
- For a touch of sweet and savory, try these balsamic glazed pearl onions, featuring a similar smoky element.
- If you’re looking for a fresh, crisp vegetable, these bacon-wrapped asparagus bundles offer a delightful texture contrast.
Steamed green beans or roasted broccoli are also fantastic choices, offering a fresh, earthy balance to the hearty flavors.
Lighter Sides to Complement the Richness
For a refreshing contrast, consider a vibrant tomato and cucumber salad.
Another excellent option is a batch of perfectly roasted corn chunks, which adds a touch of sweetness and textural variety to your meal.
Plan Ahead: Prep, Store, and Reheat Your Bake
Make-Ahead Marvel: Prepping for Busy Nights
You can prepare the dough base and the beef mixture ahead of time. Keep them separately covered in the refrigerator for up to 24 hours.
Assemble the Cheesy Bacon Beef Bake just before baking to maintain optimal freshness and texture.
Storage Solutions: Keeping Leftovers Fresh
Store any leftover Cheesy Bacon Beef Bake in an airtight container in the refrigerator for up to 3-4 days.
This helps retain its moisture and prevents it from drying out.
Reheating for Optimal Enjoyment
To reheat individual slices, microwave briefly until warm. For the entire casserole, cover it loosely with foil and reheat in a preheated oven at 300°F (150°C) until heated through.
Adding a splash of beef broth or water to the pan before reheating can help keep the beef layer moist.
Common Questions & Quick Fixes: Bake Troubleshooting
“My Beef Layer is Dry!”
The primary culprits are often overmixing the beef or too little milk/breadcrumbs. Ensure you mix gently until just combined.
When reheating, always add a splash of beef broth or water to help revive the moisture in your juicy beef bake.
“The Base Isn’t Cooked Through”
This usually happens if the dough base is pressed too thick or unevenly. Make sure to spread it as thinly and uniformly as possible.
If you consistently encounter this issue, pre-bake the base alone for 5-7 minutes before adding the beef layer.
“Cheese Didn’t Melt Evenly”
For the best melt, use freshly shredded cheddar cheese, as pre-shredded varieties often contain anti-caking agents that hinder melting.
Ensure the cheese is sprinkled evenly over the hot beef layer for a uniform, bubbly topping on your Cheesy Bacon Beef Bake.
Your Cheesy Bacon Beef Bake Questions, Answered!
Can I use a different type of ground meat?
Absolutely! You can substitute ground beef with ground turkey or chicken for a lighter version of this delicious bake. You might need to add a touch more oil to the pan when browning poultry, as it tends to be leaner.
For another comforting beef-based meal, you might enjoy our cheesy beef pasta bake.
What if I don’t have breadcrumbs?
If you’re out of breadcrumbs, finely crushed crackers or even old-fashioned oats can work as a substitute to help bind and retain moisture in the beef mixture.
The texture may be slightly different, but the core function of locking in juices will remain.
Can I freeze this casserole?
Yes, you can freeze this cheesy bacon beef bake! For best results, freeze it before baking. Assemble the casserole up to the point of adding the first layer of cheese, then cover tightly with foil and freeze for up to 3 months.
Thaw in the refrigerator overnight before baking as directed, adding about 10-15 minutes to the initial bake time.
Is this recipe kid-friendly?
This Cheesy Bacon Beef Bake is incredibly kid-friendly! The familiar flavors of beef, bacon, and cheese are universally loved, and the tender texture makes it easy for little ones to enjoy.
It’s a fantastic way to get picky eaters to enjoy a hearty meal.
Ready to Bake? Share Your Cheesy Bacon Beef Bake Success!
There you have it – the ultimate guide to creating a truly exceptional, never-dry Cheesy Bacon Beef Bake. This recipe isn’t just about ingredients; it’s about technique, passion, and delivering a comforting meal that brings smiles to every face at the table.
I encourage you to try this recipe tonight and experience the juicy difference. Share your culinary success with us, and let’s celebrate the joy of perfectly cooked comfort food together!
Cheesy Bacon Beef Bake
Course: Main CourseCuisine: AmericanDifficulty: easy6
servings20
minutes30
minutes550
kcal50
minutesThere’s nothing worse than digging into a hearty casserole only to find the meat layer is dry and crumbly. This Cheesy Bacon Beef Bake offers a simple trick to keep every bite incredibly juicy and flavorful. You’ll love how tender and delicious it turns out, every single time!
Ingredients
For the Base:
1 1/2 cups all-purpose flour
1 teaspoon baking powder
1/2 teaspoon salt
1/2 cup milk
1/4 cup vegetable oil
For the Beef Layer:
1 pound lean ground beef
1/2 cup plain breadcrumbs
1/4 cup milk (whole or 2%)
1/2 teaspoon salt
1/4 teaspoon black pepper
1 1/2 cups shredded cheddar cheese, divided
1/2 cup cooked crumbled bacon, divided
1/4 cup sour cream
2 tablespoons fresh parsley, chopped, for garnish
Directions
- Preheat your oven to 375F (190C). Lightly grease an 8×8 inch baking dish.
- Prepare the Base: In a medium bowl, whisk together the flour, baking powder, and salt. Add the milk and vegetable oil, stirring until just combined to form a soft dough. Press the dough evenly into the bottom of the prepared baking dish.
- Prepare the Juicy Beef Layer: In a large bowl, combine the ground beef, breadcrumbs, 1/4 cup milk, 1/2 teaspoon salt, and 1/4 teaspoon black pepper. Use your hands to gently mix until everything is just combined. Do not overmix, as this can make the meat tough. The milk and breadcrumbs are your secret weapon here, locking in moisture and ensuring a tender, flavorful beef layer that won’t dry out in the oven.
- Spread the beef mixture evenly over the base in the baking dish.
- Bake for 20 minutes, or until the beef is mostly cooked through and the base is slightly golden.
- Remove the dish from the oven. Sprinkle 1 cup of the shredded cheddar cheese evenly over the beef.
- Return to the oven and bake for another 8-10 minutes, or until the cheese is melted and bubbly.
- Remove from oven. Dollop spoonfuls of sour cream over the top, then sprinkle with the remaining 1/2 cup shredded cheddar cheese and the cooked crumbled bacon.
- Return to the oven for 2-3 minutes, just until the added cheese is slightly melted and the sour cream is warm.
- Garnish with fresh chopped parsley before serving. Let it rest for a few minutes before slicing and serving.
Notes
- For a perfectly tender base, don’t overmix the dough; just combine until it barely comes together. Ensure your beef mixture is well-seasoned before baking, as the flavors will meld beautifully during cooking.


