
For years, I struggled with the common dilemma of soggy Chicken Parmesan, where that promised golden crust turned to mush under the sauce. It was a disheartening culinary challenge, but I’ve finally cracked the code to truly crispy, flavorful Chicken Parmesan Perfection.
This recipe isn’t just another take on a classic; it’s a foolproof method that ensures a profoundly crispy exterior every single time. Get ready to transform your weeknight meals with a dish that consistently delivers on its delicious promise.
The Secret to Savoring Truly Crispy Chicken Parmesan
This particular recipe for Chicken Parmesan Perfection stands out from the rest, solving common culinary woes and elevating a beloved dish. Its unique approach guarantees a delightful texture and taste that will impress even the most discerning palates.
Bidding Farewell to Soggy Crumb Coats
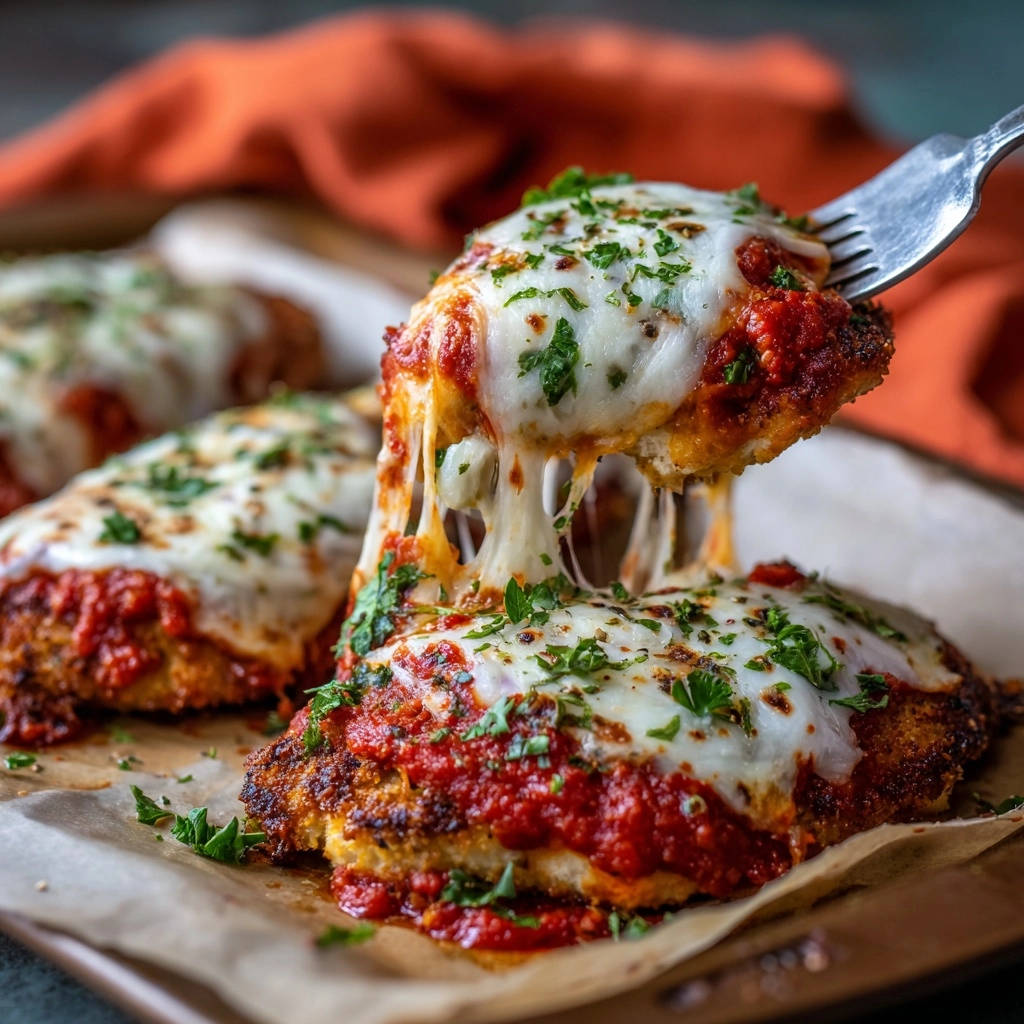
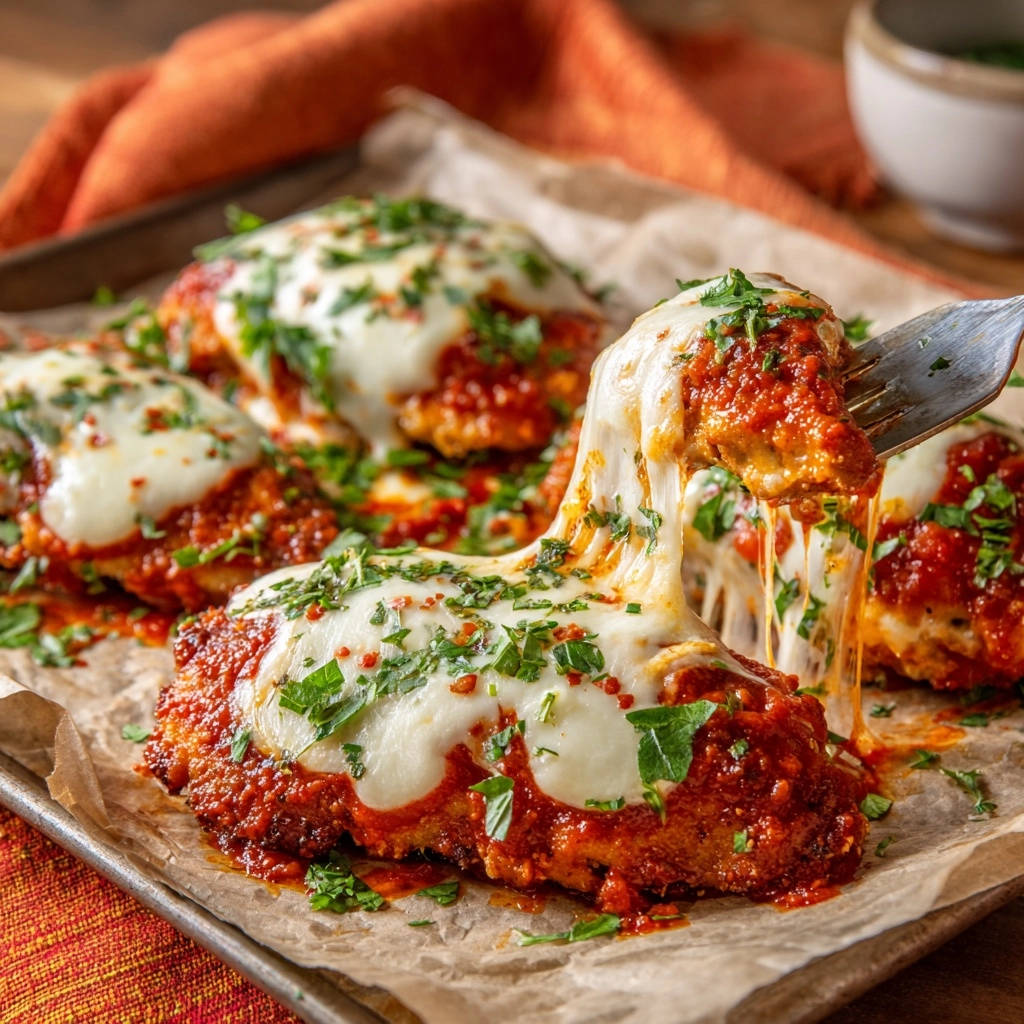
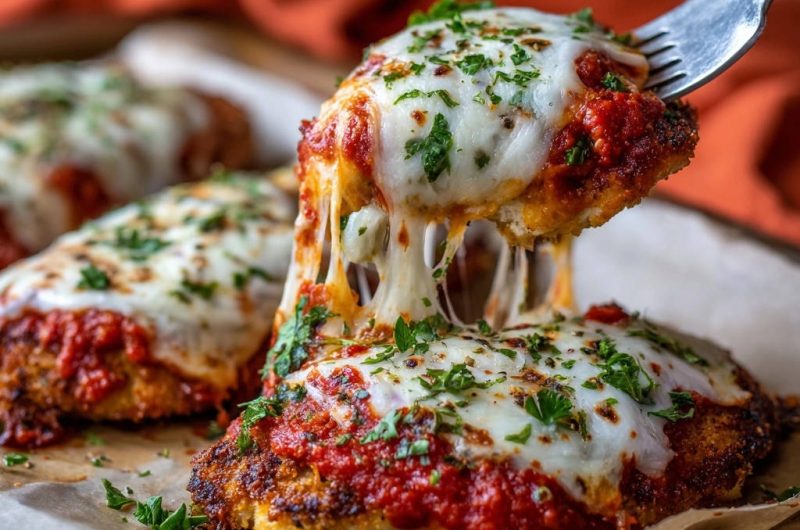
The cardinal sin of Chicken Parmesan is a soggy breading. Our method directly confronts this by ensuring the chicken achieves ultimate crispness through frying before any sauce is introduced. A quick broil then melts the cheese, leaving the crust intact and perfectly crunchy.
Quick Prep, Impressive Results: Your Weeknight Hero
Despite its gourmet taste, this crispy chicken parm requires only 15 minutes of prep and 20 minutes of cook time, totaling just 35 minutes. It’s an ideal recipe for busy weeknights when you crave something satisfying and spectacular without spending hours in the kitchen.
Flavorful Feasts: Why This Recipe Becomes a Family Favorite
The universal appeal of Chicken Parmesan is undeniable, but this version elevates it with its impeccable balance. The deeply golden, crisp chicken, rich marinara, and gooey mozzarella create a harmonious flavor profile that is guaranteed to become a cherished family favorite.
Gathering Your Arsenal: Essential Ingredients for Flawless Chicken Parm
The success of your Chicken Parmesan Perfection hinges on selecting the right ingredients and understanding their roles. Each component contributes to the final masterpiece, from the tender chicken to the luscious cheese.
Chicken Breast: The Foundation of Flavor
Choose boneless, skinless chicken breasts for ease and quick cooking. Pounding them thinly ensures even cooking, tenderness, and a larger surface area for that delicious, crispy coating.
Crafting the Perfect Crispy Breading
All-purpose flour provides the initial dry layer, helping the egg adhere. Beaten eggs act as a binder, creating a crucial bridge between the flour and breadcrumbs. Plain breadcrumbs, or panko for an even lighter crunch, form the crispy exterior.
Italian seasoning, garlic powder, salt, and black pepper infuse the breadcrumbs with aromatic flavors. This blend ensures every bite of your chicken parm is seasoned perfectly, contributing to the dish’s overall depth.
The Sauce and Cheese: Melty, Tangy Perfection
A good quality marinara sauce, warmed, provides the essential tangy and savory counterpoint to the crispy chicken. Warming it prevents it from cooling down your freshly fried cutlets, ensuring a quick transition to the broiler.
Low-moisture mozzarella cheese is paramount for its superior melting qualities without releasing excessive water. This prevents a watery sauce and maintains the integrity of your crispy chicken parmesan.
Frying Essentials: Achieving That Golden Crust
Vegetable oil is ideal for frying due to its high smoke point and neutral flavor. Using enough oil ensures even browning and a truly golden, crispy crust on your chicken cutlets.
Garnish: A Fresh Finish
Fresh chopped parsley adds a vibrant pop of color and a touch of herbaceous freshness. It brightens the rich flavors of the dish and offers a lovely presentation.
Equipping Your Kitchen: Must-Have Tools for Success
Meat Mallet or Rolling Pin: For evenly pounding chicken breasts.
Shallow Dishes: Three are needed for the breading station.
Large Skillet: Essential for frying the chicken cutlets.
Baking Sheet with Parchment Paper: For broiling and easy cleanup.
Tongs: For safely handling hot chicken.
Grater (if not pre-shredded): For mozzarella cheese.
Your Culinary Journey: Step-by-Step Towards Chicken Parmesan Mastery
- Preheat the Broiler:
Set your oven’s broiler to high and line a baking sheet with parchment paper. This preparation ensures everything is ready for the final melty, bubbly cheese finish.
- Prepare the Chicken Cutlets:
Place each boneless, skinless chicken breast between two pieces of plastic wrap. Using a meat mallet or rolling pin, pound them thin to about 1/2 inch thickness. This crucial step promotes quick, even cooking and ensures tenderness.
- Set Up Your Breading Station:
Arrange three shallow dishes. In the first, place the all-purpose flour. In the second, beat the two large eggs. In the third, combine the breadcrumbs, Italian seasoning, garlic powder, salt, and black pepper, mixing them thoroughly. A well-organized station streamlines the breading process.
- Dredge and Coat the Chicken:
Take one pounded chicken cutlet and dredge it first in the flour, shaking off any excess. Next, dip it into the beaten egg, allowing excess to drip off. Finally, press the chicken firmly into the seasoned breadcrumbs, ensuring it’s completely coated on all sides. This multi-step coating is key to a robust, crispy crust.
- Achieve Ultimate Crispness (Frying):
Heat 1/2 inch of vegetable oil in a large skillet over medium-high heat until it shimmers. Carefully place no more than two chicken cutlets in the hot oil (avoid overcrowding). Cook for 4 to 6 minutes per side, or until the breading is a deep golden brown and the chicken is cooked through and undeniably crispy. The goal here is a perfectly golden, firm crust before any sauce is added, preventing sogginess. Remove cooked chicken to the prepared baking sheet and repeat with remaining cutlets, adding more oil if needed.
- Sauce the Crispy Chicken:
Spoon about 1/2 cup of warmed marinara sauce over each crispy chicken cutlet. Spread it evenly, but be mindful not to drench the very edges of the breading, preserving that coveted crispness.
- Top with Mozzarella:
Generously cover each sauced cutlet with the shredded or sliced low-moisture mozzarella cheese. The quantity is up to your cheesy preference!
- Broil to Bubbly Perfection:
Place the baking sheet under the preheated broiler for 2 to 4 minutes, or until the cheese is beautifully melted, bubbly, and lightly golden. Watch very closely to prevent burning, as broilers work quickly.
- Garnish and Serve Immediately:
Remove from the oven, sprinkle with fresh chopped parsley for a burst of color and flavor, and serve your perfectly crispy, cheesy Chicken Parm immediately. Enjoy!
Beyond the Recipe: Expert Tips for Ultimate Crispy Chicken Parmesan
The “Double Fry” Secret: For the absolute crispiest exterior, some chefs briefly refry the chicken for 30 seconds after it cools slightly from the initial fry, right before adding sauce. This is optional but intensifies the crunch!
Don’t Skip the Pound: Pounding the chicken not only ensures even cooking but also makes the cutlets more tender and creates a larger surface area for that delicious breading.
Temperature is Key for Frying: Ensure your oil is hot enough (around 350-375°F / 175-190°C). If it’s too cool, the breading will absorb too much oil and become greasy. Too hot, and it will burn before the chicken cooks through.
Low-Moisture Mozzarella Advantage: Using low-moisture mozzarella is crucial. High-moisture varieties can release too much water, making your dish watery and potentially soggy. Shredded or sliced works equally well.
Warm Your Sauce: Heating your marinara sauce before adding it to the chicken helps prevent cooling down the fried cutlets and ensures a quicker, more even heating under the broiler.
Keep an Eye on the Broiler: Broilers can go from perfect to burnt in seconds. Stay by the oven and check frequently to achieve that ideal golden, bubbly cheese without charring.
Solving Common Challenges: Achieving Flawless Chicken Parmesan
Why isn’t my chicken crispy?
Ensure your oil is hot enough during frying and avoid overcrowding the pan, which lowers oil temperature. Also, make sure to pat the chicken completely dry before breading, as excess moisture is a crispy crust’s enemy.
My cheese is burning before it melts.
This usually means the broiler is too high or the chicken is too close to the heat source. Try lowering your oven rack or reducing the broiling time. The goal is melted and lightly golden, not deeply browned.
How to prevent chicken from drying out.
Pounding the chicken to an even thickness and not overcooking it during the initial fry are key. Since it finishes under the broiler, aim for just cooked through during frying, as it will continue to cook slightly.
Your Top Chicken Parmesan Questions, Answered!
Can I bake instead of fry the chicken?
While frying is key to this recipe’s “crispy, never soggy” promise, you can bake it. Lightly spray the breaded cutlets with cooking oil and bake at 400°F (200°C) for 15-20 minutes, flipping halfway, until golden and cooked through. It won’t be quite as crispy, but still delicious.
What kind of marinara sauce is best?
A good quality store-bought marinara or your favorite homemade sauce will work perfectly. Look for one with a balanced flavor – not too sweet, not too acidic – as it plays a significant role in the overall dish.
Can I make this recipe gluten-free?
Absolutely! Substitute the all-purpose flour with a gluten-free all-purpose flour blend and use gluten-free breadcrumbs or finely crushed gluten-free crackers for the coating.
How can I make this dish spicier?
Add a pinch of red pepper flakes to your breadcrumb mixture or stir them into your marinara sauce for a pleasant kick. You could also sprinkle a few on top of the cheese before broiling.
Serving & Savoring: Completing Your Chicken Parmesan Experience
Perfect Pairings: What to Serve Alongside
Classic accompaniments include a simple spaghetti or linguine tossed with extra marinara sauce, a fresh green salad with a vinaigrette, or some garlic bread to soak up any extra sauce. Roasted or steamed vegetables also make a great side.
For a lighter option, consider pairing this crispy chicken with chicken parmesan with zucchini noodles for a fresh twist.
Storing Leftovers: Keeping It Fresh
Store any leftover Chicken Parmesan in an airtight container in the refrigerator for up to 3-4 days. While it won’t retain its original crispness perfectly, it will still be delicious.
For a hearty meal that also features that satisfying crunch, check out this chicken parmesan pasta bake.
Reheating Tips: Bring Back the Warmth
To reheat, the best method for retaining some crispness is in an oven or toaster oven at 350°F (175°C) until heated through and the cheese is bubbly again. Microwaving is quicker but will result in softer chicken.
What Else to Make?
Round out your chicken parmesan meal with these complementary dishes.
- For an easy addition that complements the Italian flavors, try these Cheesy Garlic Breadsticks, perfect for soaking up extra sauce.
- Add a vibrant touch to your table with this Colorful Beet & Mozzarella Salad Recipe, offering a fresh contrast to the richness of the chicken.
Make-Ahead Magic: Prep Smart, Enjoy Later
You can prepare and bread the chicken cutlets up to a day in advance. Store them uncovered on a baking sheet lined with parchment paper in the refrigerator. This helps keep the coating dry and ready for frying.
Your Masterpiece Awaits: Share Your Chicken Parmesan Perfection!
With these expert tips and a clear, detailed guide, you’re now equipped to create Chicken Parmesan Perfection that truly lives up to its name. Say goodbye to soggy crusts and hello to truly crispy, cheesy, and utterly satisfying comfort food.
We encourage you to embark on this culinary adventure. Don’t forget to share your delicious creations and tag us with your amazing Chicken Parmesan results! Happy cooking!
Chicken Parmesan
Course: Main CourseCuisine: Italian-AmericanDifficulty: easy4
servings15
minutes20
minutes750
kcal35
minutesSay goodbye to soggy Chicken Parm! This game-changing recipe guarantees truly crispy chicken, bathed in delicious sauce and cheese, for the ultimate Chicken Parmesan Perfection.
Ingredients
4 boneless, skinless chicken breasts
1/2 cup all-purpose flour
2 large eggs, beaten
1 1/2 cups plain breadcrumbs (or panko)
1 teaspoon Italian seasoning
1/2 teaspoon garlic powder
1/2 teaspoon salt
1/4 teaspoon black pepper
1/2 cup vegetable oil, plus more if needed, for frying
2 cups marinara sauce, warmed
1 1/2 cups low-moisture mozzarella cheese, shredded or sliced
2 tablespoons fresh parsley, chopped, for garnish
Directions
- Preheat your oven’s broiler to high. Line a baking sheet with parchment paper.
- Prepare the chicken: Place each chicken breast between two pieces of plastic wrap and pound them thin, to about 1/2 inch thickness. This helps them cook quickly and evenly.
- Set up your breading station: In one shallow dish, place the flour. In a second shallow dish, place the beaten eggs. In a third shallow dish, combine the breadcrumbs, Italian seasoning, garlic powder, salt, and black pepper. Mix well.
- Dredge each chicken cutlet first in the flour, shaking off any excess. Then dip it into the beaten egg, allowing any excess to drip off. Finally, press the chicken firmly into the seasoned breadcrumbs, ensuring it’s completely coated on all sides.
- Achieve Ultimate Crispness: Heat 1/2 inch of vegetable oil in a large skillet over medium-high heat until shimmering. Carefully place 2 chicken cutlets in the hot oil (do not overcrowd the pan). Cook for 4 to 6 minutes per side, or until the breading is a deep golden brown and the chicken is cooked through and crispy. The goal here is a perfectly golden, firm crust before any sauce is added. Remove the cooked chicken to the prepared baking sheet. Repeat with remaining chicken, adding more oil to the skillet if needed.
- Spoon about 1/2 cup of warmed marinara sauce over each crispy chicken cutlet, spreading it evenly but avoiding drenching the edges too much.
- Top each sauced cutlet generously with mozzarella cheese.
- Place the baking sheet under the preheated broiler for 2 to 4 minutes, or until the cheese is melted, bubbly, and lightly golden. Keep a close eye on it to prevent burning.
- Remove from the oven, garnish with fresh chopped parsley, and serve immediately. Enjoy your perfectly crispy, cheesy Chicken Parm!
Notes
- For extra crispy chicken, ensure your oil is hot enough before frying and don’t overcrowd the pan. A thin layer of marinara sauce prevents sogginess while still adding delicious flavor.


