
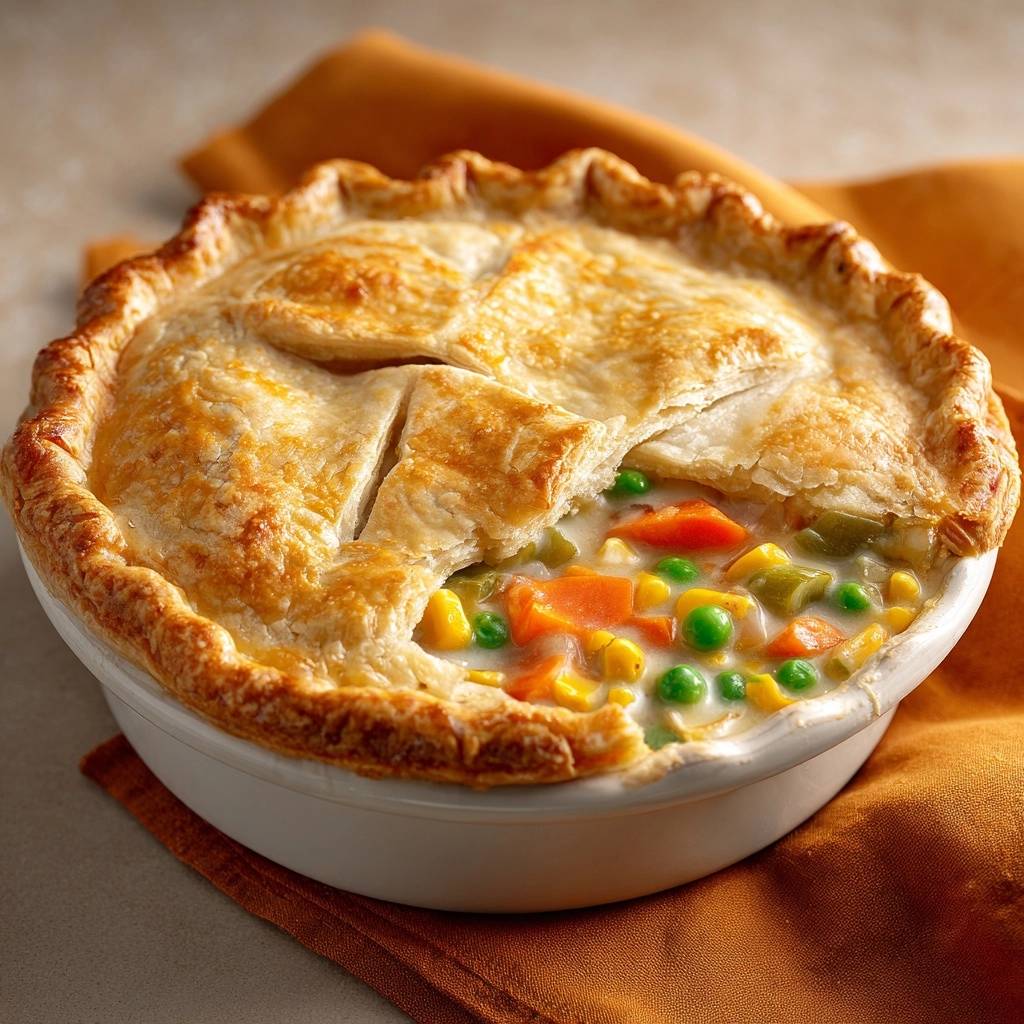
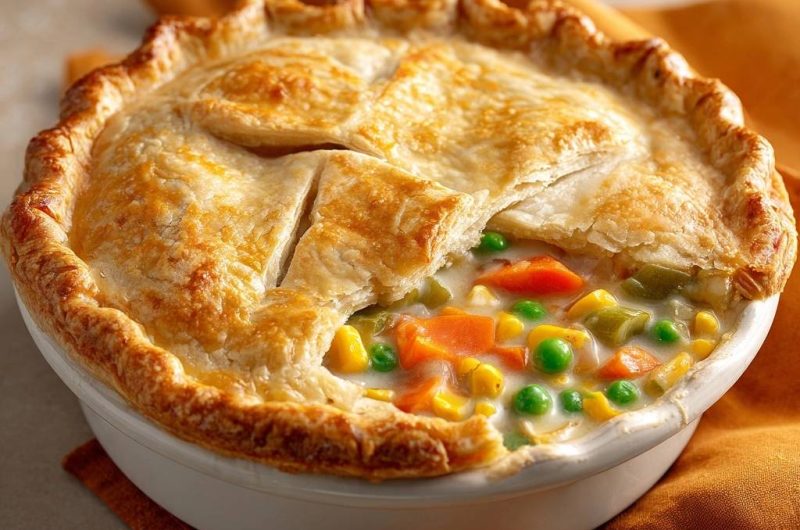
Nothing ruins a Chicken Pot Pie faster than a soggy crust that turns into a mushy mess right when you dig in. You’ve been there, haven’t you? That steamy filling betrays the dough, leaving you with disappointment instead of flaky joy. But this Chicken Pot Pie changes everything with a chill-and-seal method that locks in crisp perfection.
Here’s why it works so well. Most recipes skip the cooling step, so hot filling steams up the crust from below. However, we thicken the filling fully first, cool it quick, then top with ice-cold dough. In addition, an egg wash seals the deal for golden edges that stay crunchy.
The real secret lies in that ultra-thick roux base. It grabs all the moisture before it can escape, so your Chicken Pot Pie crust puffs up flaky every time. You’ll get restaurant-quality results without the fuss, and it takes under an hour from start to finish.
Why Chicken Pot Pie Crusts Fail
Steam Traps and Soggy Results
Steam from hot Chicken Pot Pie filling acts like a hidden enemy. It rises and softens the dough from underneath, turning crisp layers into a gummy trap. Picture moisture migrating through the crust like fog on a window; that’s what happens without cooling.
However, this recipe flips the script. We cool the filling for 10 minutes, dropping its temperature below the point where steam forms. Therefore, your Chicken Pot Pie stays dry and flaky on the inside while browning perfectly outside.
Common Filling Thickness Pitfalls
Thin gravies leak steam during baking, dooming the crust. Many skip a proper roux, so the sauce stays watery and separates. In addition, overcooked veggies release extra liquid that thins everything out.
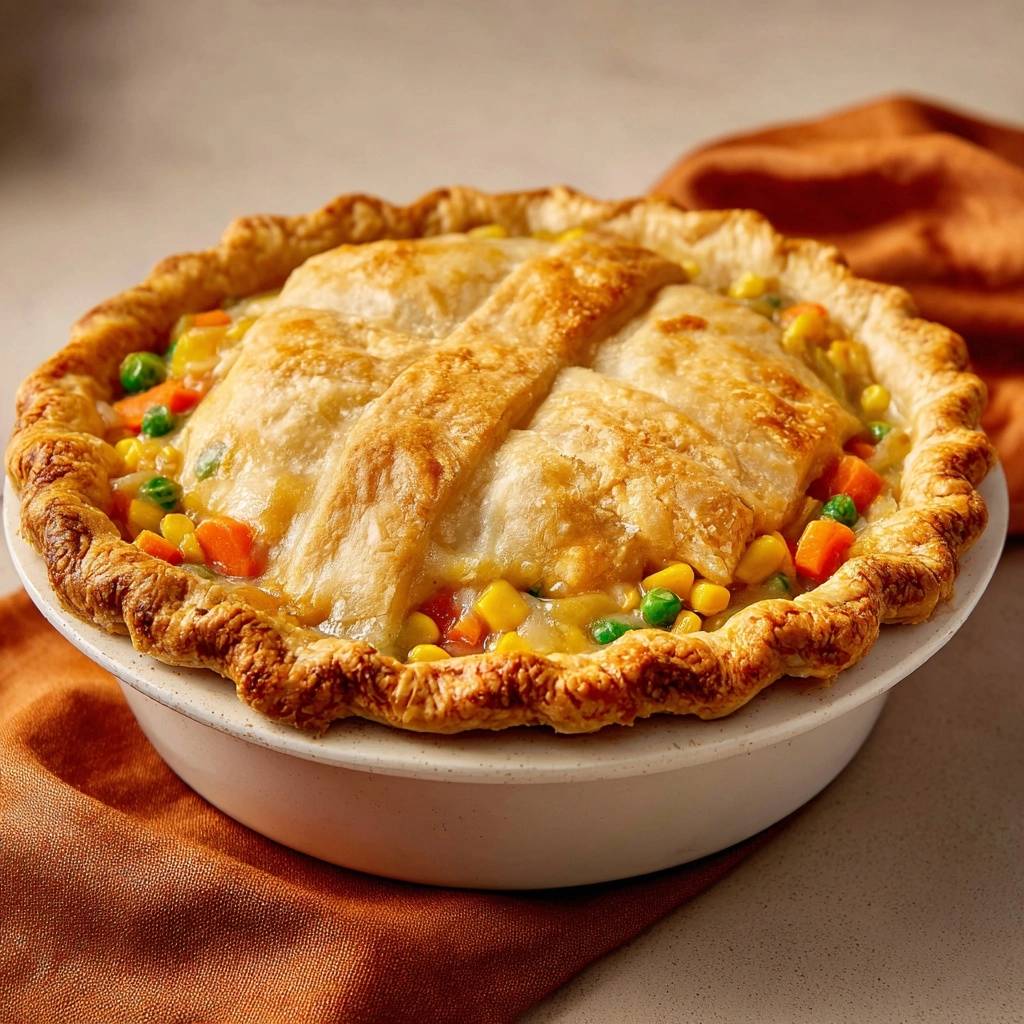
This Chicken Pot Pie avoids that with a glossy-thick base. The flour-butter mix binds broth and milk tight, holding veggies in place. You’ll see the difference in every bite.
Science of Flaky Chicken Pot Pie Crust
Roux Formation for Thick Filling
A good roux starts with butter and flour cooking together over medium heat. The starch granules in flour gelatinize, swelling to trap liquids without lumps. Stir for just one minute, and you get that nutty aroma without burning.
Then, whisk in broth and milk slowly. It simmers into a thick sauce that coats the spoon, unlike runny versions that fail. This Chicken Pot Pie filling stays stable, so no separation or sogginess sneaks in.
Pro tip: Use a whisk constantly here. It prevents clumps and ensures even thickening for foolproof results.
Cooling Prevents Dough Breakdown
Cooling the filling drops its temp fast, stopping steam at the source. Hot filling hits 212°F, but 10 minutes on the counter brings it under 140°F, below the dew point. Meanwhile, cold dough relaxes its gluten for better puff.
Therefore, layers stay distinct and flaky. Skip this, and thermodynamics works against you with soggy results.
Egg Wash for Golden Crisp Seal
Egg wash triggers the Maillard reaction at 425°F, browning proteins for that deep gold color. It creates a barrier that crisps without sogginess. Milk washes fall short; they lack the proteins for true shine and crunch.
Brush generously, and watch edges seal tight. In addition, it adds a subtle richness that elevates every Chicken Pot Pie.
Key Ingredients for Chicken Pot Pie Success
Vegetable Mix: Carrots, Peas, Corn, Celery
Carrots and celery dice to 1/2-inch for even cooking; they soften without mush. Frozen peas and corn hold firm texture and burst with sweetness. No watery releases here to thin your sauce.
These pot pie veggies pack nutrition too, like beta-carotene from carrots. However, dice uniform so everything simmers tender in five minutes flat.
Chicken and Broth Base Choices
Cooked chicken breast dices juicy and stays tender; thighs work if you prefer darker meat. Use low-sodium chicken broth for control over salt. Diced, it absorbs flavors without drying out.
Fresh broth beats boxed for depth, but either way, two cups build the savory base.
Dough and Butter: Puff Pastry Edge
Puff pastry’s cold butter layers explode into flakes when baked. Thaw it overnight in the fridge for best results. Pie dough works too, but puff gives superior lift.
For an even fluffier topping, consider trying this biscuit-topped chicken pot pie.
Stick to unsalted butter in the filling. It lets you season precisely without over-salting the whole dish.
Equipment for Perfect Chicken Pot Pie
Skillet Size for Roux Mastery
A 12-inch skillet gives room for whisking without scorching. Stainless steel builds fond for flavor; non-stick eases cleanup. Even heat distribution prevents hot spots in your roux.
Medium heat keeps things steady. Therefore, no burnt bits ruin the Chicken Pot Pie filling.
Oven-Safe Ramekins and Rack Position
16-oz ramekins portion perfectly for four; they focus heat for crisp bottoms. Bake on the top rack to brown crusts evenly. Cast iron skillets substitute well for single-serve vibes.
Portion control means no leftovers go soggy overnight.
Step-by-Step Chicken Pot Pie Assembly
Building the Thickened Filling Base
Preheat your oven to 425°F. Melt four tablespoons butter in a skillet over medium heat. Add 1/2 cup diced onion and 1/2 cup celery; cook three minutes until soft and fragrant, not browned.
Stir in 1/3 cup flour and cook one minute. It bubbles into a roux with a toasty smell. Slowly whisk in two cups chicken broth and 1/2 cup milk; stir constantly as it simmers five minutes to thick, glossy perfection.
This Chicken Pot Pie filling transformation is key. It clings to your spoon, ready to hold veggies without leaking steam later. Pro tip: Whisk vigorously for smoothness.
Cooling and Portioning into Bowls
Stir in two cups diced chicken, one cup each carrots, peas, corn, plus salt and pepper. Simmer five more minutes until veggies tenderize and sauce shines thick. Remove from heat and cool 10 minutes; it firms up noticeably.
Spoon evenly into four ramekins, smoothing tops to avoid air pockets. Ramekins beat a big dish for even baking and crisp seals all around.
Chilling, Cutting, and Sealing Dough
Roll thawed puff pastry on a floured surface to fit bowls with 1/2-inch overhang. Cut three small vents in each top for steam escape. Drape over cooled filling and press edges tight to seal.
Chill assembled pies five minutes if dough warms up. Brush with beaten egg evenly; it glistens and promises gold. In addition, trim excess for neat edges.
Baking to Golden Flaky Perfection
Bake on top rack 25 to 30 minutes. Crust puffs high, turns deep gold, and smells irresistible. Check internal temp at 165°F for safety.
Rotate halfway if your oven runs hot. Cool five minutes; filling sets firm while crust stays crisp.
Avoiding Chicken Pot Pie Disasters
Fixing Runny or Separated Filling
Runny sauce means thin roux or overcooked veggies releasing water. Rescue with a cornstarch slurry: one teaspoon cornstarch in cold water, whisked in off heat. It thickens instantly.
Prevention recaps cooling and full simmer. Therefore, no disasters hit your table.
Crust Sealing and Venting Errors
Too little overhang leaves gaps for steam leaks. Over-venting dumps too much moisture. Press edges firm and cut small slits only.
Brush egg wash edge-to-edge. It seals and crisps without fails.
Oven Temp and Timing Troubles
Low heat steams instead of bakes; stick to 425°F. Tent with foil if browning too fast. At high altitude, add five minutes and check temp.
Hot oven crisps fast. However, watch closely your first time.
Flavor Variations in Chicken Pot Pie
Herb and Spice Twists
Add one teaspoon thyme or rosemary to the roux for earthy lift. Poultry seasoning swaps in easily for classic vibe. A pinch of cayenne brings gentle heat without overpowering.
These Chicken Pot Pie variations keep it fresh. Stir herbs early so flavors bloom.
Protein and Veggie Swaps
Turkey sub for chicken post-holidays. Tofu cubes work for plant-based. Mushrooms add umami depth; swap half the corn.
Seasonal veggies like green beans rotate in. Keep dice size consistent.
Make-Ahead Chicken Pot Pie Guide
Freezing Assembled Pies
Assemble and freeze unbaked in ramekins up to two months; wrap tight. Thaw overnight in fridge, then bake from cold at 425°F adding 10 minutes. Par-bake 15 minutes, cool, freeze, and finish later for crisp results.
Reheat at 375°F covered, then uncover to crisp. Shelf life stays great.
Batch Cooking and Storage
Filling keeps five days in fridge airtight. Prep dough rounds ahead and freeze flat. Double recipe for family; it scales easy to eight servings.
Portion math simplifies weeknight wins.
Pairing Sides with Chicken Pot Pie
Crisp Salads and Pickles
Vinegar-based slaw cuts the richness with tang. Cucumber salad with dill adds refresh. Acidity balances creamy filling perfectly.
Quick pickles brighten every bite.
Breads and Simple Starches
Cornbread soaks up juices without heaviness. Fluffy biscuits echo the crust. Rice pilaf keeps it light.
No overlaps; just complements.
Chicken Pot Pie FAQ
Can I Use Rotisserie Chicken?
Yes, rotisserie chicken saves time and adds flavor. Cool it first, then shred or dice two cups worth. Reduce added salt by half since it’s often seasoned; taste the filling before baking to adjust perfectly.
How to Make Gluten-Free Version?
Swap all-purpose flour with a 1:1 gluten-free blend in the roux; it thickens similarly. Use gluten-free puff pastry from the freezer section. Texture stays flaky, though slightly less lift; cool filling fully for best seal.
Why Is My Crust Still Soggy?
Usually from skipping the cooling step or thin filling. Hot filling steams the dough; always cool 10 minutes and ensure roux thickens to spoon-coating stage. Check seals too; loose edges let moisture escape upward instead of venting properly.
Scaling for Larger Crowds?
Double ingredients and use a 9×13-inch pan; filling fits eight servings. Roll dough to fit top with vents. Bake 30-35 minutes at 425°F, rotating midway; top rack ensures even browning without soggy spots.
Vegetarian Chicken Pot Pie Adaptation?
Replace chicken with diced mushrooms or chickpeas for texture; two cups sautéed first. Switch to vegetable broth for savory depth. Filling thickens the same; add extra herbs like thyme for that classic pot pie essence.
Chicken Pot Pie
Course: Main CourseCuisine: AmericanDifficulty: medium4
servings20
minutes40
minutes450
kcal60
MinutesTired of pot pie crust turning mushy? This recipe delivers flaky, golden top crust every time with our chill-and-seal method: thicken the filling fully, cool it quick, then top with ice-cold dough brushed with egg wash for crisp perfection.
Ingredients
2 cups cooked chicken breast, diced
1 cup carrots, diced
1 cup frozen peas
1 cup corn kernels
1/2 cup celery, diced
4 tablespoons butter
1/3 cup all-purpose flour
1/2 cup onion, diced
2 cups chicken broth
1/2 cup milk
1 teaspoon salt
1/2 teaspoon black pepper
1 sheet puff pastry or pie dough, thawed
1 egg, beaten
Directions
- thicken the filling fully, cool it quick, then top with ice-cold dough brushed with egg wash for crisp perfection.
- Ingredients:
- cups cooked chicken breast, diced
- cup carrots, diced
- cup frozen peas
- cup corn kernels
- /2 cup celery, diced
- tablespoons butter
- /3 cup all-purpose flour
- /2 cup onion, diced
- cups chicken broth
- /2 cup milk
- teaspoon salt
- /2 teaspoon black pepper
- sheet puff pastry or pie dough, thawed
- egg, beaten
- Directions:
- Preheat oven to 425 degrees F. In a large skillet over medium heat, melt butter. Add onion and celery; cook 3 minutes until softened. Stir in flour and cook 1 minute to form roux.
- Slowly whisk in broth and milk. Bring to simmer, stirring constantly until thickened, about 5 minutes. This creates the ultra-thick base that prevents moisture release.
- Stir in chicken, carrots, peas, corn, salt, and pepper. Simmer 5 minutes more until veggies are tender and filling is glossy-thick. Remove from heat and cool 10 minutes. Spreading filling into 4 oven-safe bowls or ramekins now locks in the seal against sogginess.
- On a floured surface, roll dough to fit bowls with 1/2-inch overhang. Cut vents in tops. Place chilled dough over cooled filling, pressing edges to seal tightly. Brush tops generously with beaten egg for golden crispness.
- Bake on top oven rack 25-30 minutes until crust is puffed, flaky, and deeply golden. No steam escapes to sog! Cool 5 minutes before serving.
Notes
- Key to crisp crust: Fully thicken and cool filling before topping with chilled dough. Use oven-safe bowls or ramekins for individual portions.


