

I used to avoid ordering Caesar salads with chicken because, honestly, nothing is worse than that dry, rubbery slice of poultry resting atop a crisp bed of greens.
After years of testing, I developed a simple dual-temperature pan-searing technique that locks in moisture, guaranteeing the most tender chicken you have ever tasted for this Classic Chicken Caesar Salad.
This method solves the common dryness problem completely, making it the only recipe you will ever need for a genuinely superior and reliable result.
Say Goodbye to Dry Chicken: The Secret to a Perfect Caesar Plate
The difference between a sad salad and a truly excellent one often comes down entirely to the texture of the chicken.
Our focus is achieving a beautiful golden crust on the exterior while preserving the inherent moisture inside the breast.
The Science of the Sear: Why Dual-Temperature Cooking is Essential
Starting the chicken on medium-high heat is essential to develop the Maillard reaction-that deep golden crust and intense, savory flavor.
By immediately reducing the heat after the sear, we prevent the outside from burning while the interior finishes cooking gently and evenly.
This crucial temperature control prevents the muscle fibers from contracting too quickly, which is the primary cause of tough, rubbery meat.
The Foolproof 10-Minute Resting Technique (The Moisture Lock)
When meat cooks, the intense heat causes the muscle fibers to contract, pushing the internal moisture forcefully toward the center of the cut.
Resting allows those fibers to relax, letting the internal juices redistribute throughout the entire piece of meat.
This mandatory 10-minute rest is the “moisture lock” that defines this recipe’s success, guaranteeing juicy results every time.
Crucially, resting also allows the carryover heat to safely bring the chicken’s internal temperature from 160°F to the required 165°F final temperature.
Why This Homemade Classic Chicken Caesar Salad Wins Every Time
Following this precise method delivers significant advantages over standard chicken prep.
Superior Texture: The dual-temperature cook and the dedicated rest ensure the chicken is juicy, tender, and easy to slice.
Fast Execution: The pan-searing method is quick, requiring only 30 minutes from start to plate, ideal for weeknight meals.
Maximized Flavor: The simple seasoning combined with the depth of flavor from the sear makes the chicken complex and satisfying, complementing the dressing perfectly.
For an equally satisfying chicken experience, try this grilled chicken Caesar salad.
Building the Perfect Bite: Key Components of Your Classic Caesar
A truly great Caesar relies on attention to quality and specific preparation methods for every ingredient.
Complementary Dishes
Round out your meal with these comforting pasta dishes.
- For a rich, cheesy pasta experience, pair your chicken Caesar salad with Creamy Garlic Parmesan Tortellini.
- If you enjoy creamy, cheesy pasta, you’ll also appreciate this Creamy Mac and Cheese with Crispy Fried Onions.
Selecting the Star: Boneless, Skinless Chicken Breasts
Always start by thoroughly patting your boneless, skinless chicken breasts dry with paper towels.
Excess surface moisture hinders the searing process, which can lead to steaming instead of crust formation.
If the chicken breasts are very thick (over one inch), slicing them horizontally into two cutlets ensures faster and more even cooking throughout the entire piece.
Flavor Amplifiers: Italian Herbs, Salt, and Pepper
We rely on simple Kosher salt, black pepper, and Italian herbs for seasoning the poultry.
This classic aromatic blend provides depth without competing with the savory punch of the Caesar dressing.
The seasoning provides a critical foundational layer that prevents the chicken from tasting bland.
Achieving the Crisp Base: Romaine Heart Selection and Prep
Romaine lettuce hearts are preferred because their central leaves offer the best structure and crunch, holding up beautifully to the rich dressing.
The most critical step is ensuring the lettuce is completely dry after washing.
Use a salad spinner or gently blot the leaves with a clean kitchen towel to remove every drop of excess water, which prevents a soggy finished salad.
The Finishing Touches: Parmesan and Croutons
For Parmesan, use freshly grated cheese for better incorporation into the tossed salad and thin shreds or shavings for an attractive, flavorful garnish.
If using store-bought croutons, look for a variety that is well-seasoned and has a substantial crumb structure.
Homemade croutons, while requiring slightly more effort, always offer superior texture and intense garlic flavor.
For an even crunchier delight, explore this crispy breaded chicken Caesar salad.
Essential Tools for Pan-Searing Success
Having the right equipment ensures your searing process is efficient and foolproof.
Choosing Your Skillet: Cast Iron vs. Stainless Steel
A heavy-bottomed skillet is absolutely non-negotiable for achieving a proper, consistent sear and maintaining temperature.
Cast iron and stainless steel are the best choices because they retain heat extremely well across the entire cooking surface.
Thin or non-stick pans often develop uneven hot spots and lose too much temperature when the cold chicken is added, resulting in a poor crust.
Other Essential Prep Equipment
These supporting tools simplify the prep and guarantee safe, accurate cooking.
Accurate Meat Thermometer: Essential for hitting the target temperature of 160°F precisely before the chicken is removed to rest.
Sturdy Tongs: Used for easily flipping the chicken without piercing it, which helps keep the valuable juices sealed inside the meat.
Reliable Cutting Board: Dedicated for raw poultry prep to avoid cross-contamination with your finished salad components.
The Step-by-Step Method: Assembling Your Classic Chicken Caesar Salad
Preparing the Protein: Patting, Slicing, and Seasoning
Pat the chicken thoroughly dry and season both sides heavily with the salt, pepper, and Italian herbs.
If the breasts are very thick, slice them horizontally to create thinner cutlets; this ensures faster and more consistent cooking.
The Dual-Temperature Cook: Achieving the Golden Crust
Heat the olive oil in your heavy-bottomed skillet over medium-high heat until it is shimmering and just starting to smoke.
Carefully place the chicken in the hot pan, ensuring the pieces do not touch, and sear for exactly 4 minutes without moving them until a deep golden crust forms.
Flip the chicken and immediately reduce the heat to medium-low. Continue cooking for another 4 to 6 minutes, checking the internal temperature often until it registers 160°F.
Juices Guaranteed: Implementing the Full 10-Minute Rest
Remove the chicken immediately from the pan and transfer it to a clean cutting board.
Allow the chicken to rest, uncovered, for a mandatory full 10 minutes; this is the key to achieving truly juicy results and finalizing the safe internal temperature.
Resist the urge to slice it early, as doing so will allow all the accumulated juices to run out onto the board, creating a dry result.
Final Toss and Plating Strategy
While the chicken rests, toss the crisp Romaine lettuce with most of the Caesar dressing.
Add in the croutons and about half of the Parmesan cheese, tossing gently to coat the leaves evenly without bruising them.
Slice the rested chicken against the grain into 1/2-inch thick pieces.
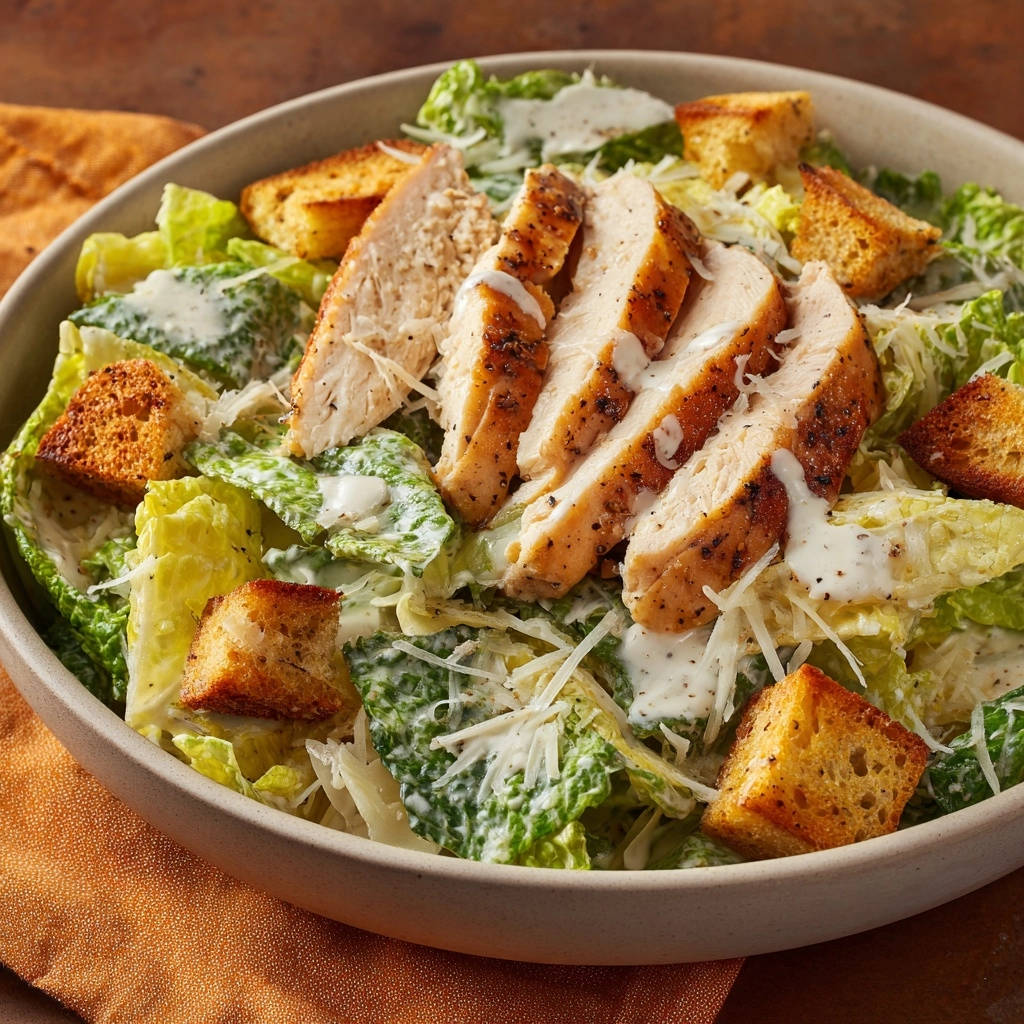
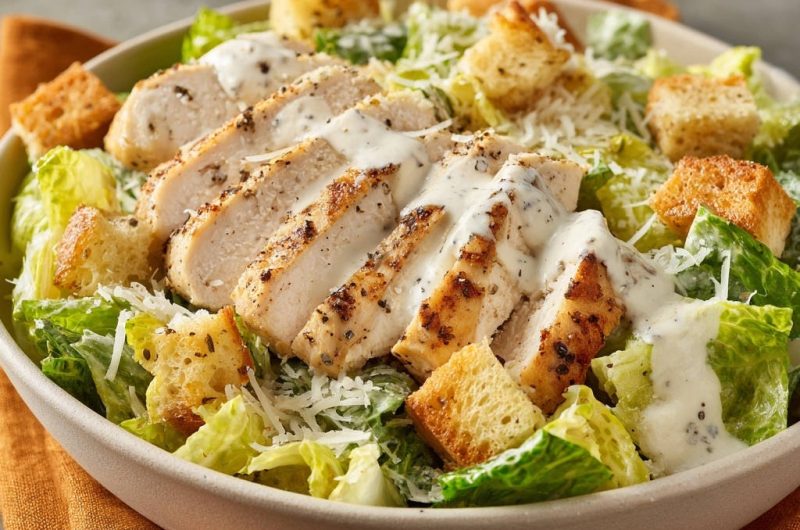
Arrange the dressed salad mixture in bowls, top each with the tender sliced chicken, and garnish generously with the remaining shredded Parmesan.
Chef’s Corner: Advanced Tips and Troubleshooting for Caesar Mastery
Tips for the Ultimate Salad Texture
The Double-Toss Technique: To prevent the salad from becoming soggy, only dress the Romaine lightly with two-thirds of the dressing before plating.
Save the remaining dressing for a final drizzle over the top of the sliced chicken and assembled salad just before serving, which maximizes flavor without compromising crunch.
Maximizing Crouton Crunch: After removing the chicken, toss store-bought croutons in the warm pan drippings for about 60 seconds.
This quick toast incorporates the savory chicken drippings into the croutons, adding incredible flavor and restoring maximum crispness.
Common Classic Chicken Caesar Salad Problems Solved
Help! My Chicken is Still Dry After Resting
If your chicken is dry despite resting, it was almost certainly sliced too soon, causing all the internal moisture to spill out onto the cutting board.
Another potential issue is that the initial searing temperature was held too high for too long, forcing too much moisture out during the cooking process.
Ensure you trust your meat thermometer and always implement the full 10-minute rest before slicing.
Why Is My Lettuce Soggy?
Sogginess is primarily caused by inadequate drying of the Romaine after washing; residual surface water dilutes the dressing immediately.
The second cause is over-dressing the salad; use the dressing sparingly, ensuring the lettuce is coated but never left swimming in the liquid.
Make-Ahead Secrets and Perfect Pairings
Preparing components in advance is key to hosting or efficient meal prep.
Preparing the Chicken and Components in Advance
The chicken can be cooked, rested, and sliced up to 24 hours in advance without losing significant tenderness.
Store the sliced chicken and the dressing separately in airtight containers in the refrigerator.
Keep the croutons stored at room temperature, adding everything together only immediately before serving.
How to Store Leftover Classic Chicken Caesar Salad
Never store dressed salad, as the acid and moisture in the dressing will rapidly wilt the lettuce within a few hours.
If you anticipate leftovers, dress only the portion you plan to eat; store the undressed Romaine, croutons, and chicken in separate containers to maintain maximum freshness.
Wine and Beverage Pairings for a Light Lunch
A crisp, unoaked Sauvignon Blanc is the classic pairing, as its high acidity cuts beautifully through the rich, creamy texture of the Caesar dressing.
For a lighter option, a dry Prosecco or a light lager beer works well to refresh the palate.
Non-alcoholic choices include sparkling water infused with fresh lemon and mint, or a ginger kombucha for a pleasant, acidic tang.
Your Top Questions About Classic Chicken Caesar Salad, Answered
Can I substitute the protein, such as using shrimp or steak?
Absolutely. Thin-cut steak, salmon, or large shrimp can all be substituted using a similar searing method.
The key principle-searing the protein hot and then allowing it to rest fully-must be maintained to lock in moisture, regardless of the protein type.
What is the ideal internal temperature for the chicken?
Cook the chicken until it reaches 160°F while still in the pan.
The residual heat (carryover cooking) during the 10-minute rest will safely bring the final internal temperature up to the required 165°F for consumption.
Homemade vs. Bottled Caesar Dressing: Which is recommended?
While homemade Caesar dressing offers unparalleled fresh, garlicky flavor and depth, a quality bottled dressing works beautifully for convenience.
If choosing bottled, look for brands that list high-quality ingredients and ideally avoid artificial stabilizers to ensure the best texture and taste.
Ready to Impress? Share Your Classic Chicken Caesar Salad Masterpiece!
This technique transforms the reliable but often boring classic into a truly impressive meal centerpiece that highlights perfectly cooked protein.
Mastering the dual-temperature sear and the crucial resting period means you never have to settle for dry chicken again in your ultimate Classic Chicken Caesar Salad.
Give this method a try and let me know in the comments below how this tender, juicy chicken changed your Caesar game!
Chicken Caesar Salad
Course: SaladCuisine: AmericanDifficulty: easy4
servings15
minutes15
minutes550
kcal30
minutesThis recipe guarantees the best homemade Caesar salad by using a simple pan-searing and resting trick for perfectly tender, juicy chicken. Never worry about dry poultry again with this foolproof method.
Ingredients
For the Chicken:
2 large boneless, skinless chicken breasts
1 teaspoon dried Italian herbs (or oregano and thyme)
1 teaspoon Kosher salt
1/2 teaspoon black pepper
2 tablespoons olive oil
For the Croutons and Salad:
8 cups chopped Romaine lettuce hearts
1 cup store bought or homemade croutons
1/2 cup shredded or grated Parmesan cheese
1 cup creamy Caesar dressing (bottled or homemade)
Directions
- Prepare the Chicken for Success (The Moisture Lock): Pat the chicken breasts thoroughly dry using paper towels. This is crucial for a great sear. If the breasts are very thick (over 1 inch), slice them horizontally to create two thinner cutlets, ensuring quicker and more even cooking. Season both sides heavily with the salt, pepper, and Italian herbs.
- Start Hot, Finish Low: Heat the olive oil in a heavy-bottomed skillet (cast iron or stainless steel is best) over medium-high heat until shimmering and just starting to smoke. Place the chicken breasts carefully in the hot pan, ensuring they do not touch. Sear for 4 minutes without moving them until a deep golden crust forms.
- Finish Gently: Flip the chicken breasts. Reduce the heat immediately to medium-low. This shift in temperature is the key to preventing the outside from burning while the interior finishes cooking. Continue cooking for another 4 to 6 minutes, until the internal temperature reaches 160 degrees F.
- The Secret Resting Technique (Solving the Dryness): Immediately remove the chicken from the pan and place it on a cutting board. Crucially, allow the chicken to rest, uncovered, for a full 10 minutes. Do not slice early! This step allows the internal juices, which were pushed to the center during cooking, to redistribute throughout the meat, guaranteeing a truly juicy result (reaching the safe final temperature of 165 F during the rest).
- Assemble the Salad: While the chicken rests, toss the Romaine lettuce with most of the Caesar dressing. Add in the croutons and half of the Parmesan cheese. Toss gently to coat.
- Slice and Serve: Slice the rested chicken breasts against the grain into 1/2-inch thick pieces. Arrange the dressed salad mixture in bowls, top each with the sliced chicken, and drizzle any remaining dressing over the chicken slices. Garnish generously with the remaining shredded Parmesan cheese.
Notes
- The 10-minute uncovered resting period is essential for maximizing chicken moisture and achieving a safe final temperature.


