
There’s a special joy in biting into a truly perfect piece of fried chicken – crunchy crust, incredibly juicy meat. I’ve faced the disappointment of dry, flavorless chicken many times, but after years of perfecting, I finally unlocked the secrets to an unforgettable Classic Crispy Fried Chicken Plate.
This recipe isn’t just about frying chicken; it’s a meticulously developed method ensuring every bite is tender, moist, and encased in that coveted golden, shatteringly crisp exterior. Say goodbye to dry chicken forever and hello to your new favorite meal.
For another crunchy chicken option, consider this crispy chicken sweet potato bowl.
Beyond Basic: The Secret to Our Perfectly Juicy Fried Chicken
Unmasking the Buttermilk Magic: Why It’s Non-Negotiable
Buttermilk is the cornerstone of truly juicy fried chicken. Its mild acidity gently breaks down the chicken fibers, resulting in meat that is incredibly tender and moist from the inside out.
For even more crispy chicken perfection, check out this homestyle fried chicken platter.
This crucial marinade step also infuses the chicken with a subtle tang and ensures the breading adheres beautifully, preventing dryness and delivering exceptional flavor.
Crispy Crust, Tender Heart: The Perfect Texture Balance
Achieving that perfect textural contrast is key to a superior Classic Crispy Fried Chicken Plate. Our method ensures a thick, golden-brown crust that shatters with every bite.
Beneath that incredible crunch, you’ll find impeccably cooked, juicy chicken, free from any hint of stringiness or dryness.
Effortless Flavor: A Plate That Impresses Without Stress
Despite its impressive results, this Classic Crispy Fried Chicken Plate recipe is surprisingly straightforward. We focus on reliable techniques that deliver consistent, delicious outcomes every time.
You can confidently serve this to family and friends, knowing you’ll create a memorable meal without undue kitchen stress.
Gather Your Golden Essentials: Key Ingredients for This Classic Dish
The Star of the Show: Selecting Your Chicken Pieces
For the ultimate Classic Crispy Fried Chicken Plate, opt for bone-in, skin-on chicken pieces. Thighs, drumsticks, and breasts all work beautifully in this recipe.
The bone helps conduct heat evenly, ensuring juicy meat, while the skin crisps up perfectly, protecting the chicken from drying out during frying.
Our Signature Marinade: Buttermilk & Flavor Boosters
Our simple yet powerful marinade combines buttermilk for tenderness and an optional touch of hot sauce. The hot sauce adds subtle depth and zest, enhancing the chicken’s natural flavor without adding significant heat.
This essential step ensures a moist interior, making your perfectly fried chicken truly stand out.
Crafting the Crispy Coating: The Perfect Breading Blend
The foundation of our crispy crust is all-purpose flour, creating a robust base for the seasonings. A thoughtful blend of spices guarantees maximum flavor in every crunch.
Salt & Black Pepper: Fundamental for seasoning the chicken from the outside.
Paprika: Contributes to that appealing golden color and a subtle sweet, peppery note.
Garlic Powder & Onion Powder: These aromatic powders build a savory, irresistible depth of flavor into the crust.
Frying Fundamentals: Choosing the Right Oil
Vegetable oil is the ideal choice for frying chicken due to its high smoke point and neutral flavor. This ensures your chicken fries evenly without imparting any unwanted tastes.
Having enough oil is crucial to submerge the chicken halfway, promoting consistent cooking and a beautiful golden finish.
Vibrant Sides: Yellow Rice and Tender-Crisp Green Beans
Our vibrant yellow rice uses long grain white rice, brightened with turmeric powder and seasoned with salt, cooked in chicken broth for rich flavor. This creates a comforting, aromatic accompaniment.
Round Out Your Meal
To complement your crispy fried chicken, consider these dishes that bring out similar comforting flavors or offer a fresh contrast.
- For a warm, tender bread experience, try this Golden Skillet Cornbread, known for its moist texture.
- Add a vibrant touch with a Green Bean Salad featuring sweet caramelized onions and salty feta.
Fresh green beans are simply blanched until tender-crisp, then sautéed with olive oil, salt, and pepper. They add a refreshing pop of color and essential freshness to your Classic Crispy Fried Chicken Plate.
Your Kitchen Arsenal: Essential Tools for Frying Success
Temperature Control: The Indispensable Oil Thermometer
An accurate oil thermometer is your most valuable tool for perfect fried chicken. It ensures the oil maintains the ideal frying temperature of 350°F (175°C).
This prevents greasy chicken from oil that’s too cool, and burnt exteriors with undercooked interiors from oil that’s too hot.
Frying Vessels: Choosing Your Pot or Dutch Oven
A large, heavy-bottomed pot or Dutch oven is essential for safe and effective deep frying. Its substantial weight helps maintain a consistent oil temperature.
The pot’s depth allows for proper oil submersion and minimizes splattering, ensuring a safer cooking experience.
The Crisping & Draining Duo: Wire Rack and Baking Sheet
After frying, transferring your chicken to a wire rack set over a baking sheet is vital. This setup allows air circulation around all sides, preventing the bottom from becoming soggy.
It also effectively drains excess oil, ensuring your Classic Crispy Fried Chicken Plate remains gloriously crunchy.
From Prep to Plate: Mastering Your Crispy Fried Chicken Journey
Phase 1: The Flavor Foundation (Marinade)
Begin by combining the buttermilk and optional hot sauce in a large bowl. Submerge your bone-in, skin-on chicken pieces completely in this tangy mixture.
Cover the bowl and refrigerate the chicken for at least 4 hours, or ideally overnight. This extended soak is the secret to tenderizing the meat and infusing it with unparalleled juiciness, preventing any dry bites.
Phase 2: The Perfect Coating & Oil Setup
In a separate shallow dish, whisk together the all-purpose flour, salt, black pepper, paprika, garlic powder, and onion powder until well combined. This forms your flavorful breading mixture.
Next, prepare your frying oil: pour 4-6 cups of vegetable oil into a large, heavy-bottomed pot or Dutch oven, ensuring it reaches about 2-3 inches deep. Heat the oil over medium-high heat until it accurately registers 350°F (175°C) on your oil thermometer – precision here is key.
Phase 3: Achieving Golden-Brown Perfection
Remove chicken pieces from the buttermilk marinade, letting any excess liquid drip off briefly. Dredge each piece thoroughly in the seasoned flour mixture, pressing firmly to create a thick, even coating.
Gently shake off any excess flour before carefully placing 3-4 chicken pieces into the hot oil. Avoid overcrowding the pot; this helps maintain oil temperature and ensures even frying.
Fry for approximately 6-8 minutes per side, turning occasionally, until the chicken is beautifully golden brown. Crucially, verify doneness by inserting a thermometer into the thickest part of the chicken; it should read 165°F (74°C). The buttermilk also aids in cooking the chicken through evenly while preserving its incredible moisture.
Phase 4: Draining and Holding Warm
Once fried to perfection, carefully remove the chicken from the oil using tongs. Place it immediately onto a wire rack set over a baking sheet.
This allows excess oil to drain away efficiently, keeping your crust crisp. To maintain warmth and crispness while you fry the remaining batches, place the baking sheet with fried chicken in a low oven set around 200°F (95°C).
Completing the Plate: Perfectly Paired Sides
Sunshine on Your Plate: Crafting Flavorful Yellow Rice
First, rinse one cup of long grain white rice under cold water until the water runs completely clear. This removes excess starch, preventing sticky rice.
In a medium saucepan, heat 1 tablespoon of vegetable oil over medium heat. Add the rinsed rice and cook for 1-2 minutes, stirring constantly, until it’s lightly toasted and fragrant.
Stir in 1 teaspoon of turmeric powder and 1/2 teaspoon of salt, ensuring the rice is evenly coated. Then, pour in 2 cups of chicken broth (or water).
Bring the liquid to a rolling boil, then immediately reduce the heat to its lowest setting. Cover the saucepan tightly and simmer for 15-18 minutes, or until all the liquid is fully absorbed and the rice is tender. Do not lift the lid during this critical cooking period.
Remove the saucepan from the heat and let it stand, still covered, for 5 minutes. Finally, fluff the vibrant yellow rice with a fork before serving to separate the grains.
Vibrant & Tender: Sautéed Green Beans
Bring a pot of lightly salted water to a boil. Add 1 pound of trimmed fresh green beans and cook for 3-5 minutes, just until they are bright green and perfectly tender-crisp.
Drain the green beans very well. In a skillet, heat 1 tablespoon of olive oil over medium heat, then add the drained beans, 1/4 teaspoon of salt, and 1/8 teaspoon of black pepper.
Sauté the green beans for 2-3 minutes, tossing continuously to coat them evenly and heat them through. This quick sauté enhances their natural sweetness and texture.
Chef’s Secrets: Elevate Your Crispy Fried Chicken Plate Experience
The Power of Patience: Why Marinating Longer Matters
While 4 hours is good, marinating your chicken in buttermilk for a full 12-24 hours (overnight) yields exceptional results. This extended time allows the lactic acid to work even deeper into the meat fibers.
You’ll notice a significant difference in tenderness, juiciness, and a more profound infusion of flavor, making your Classic Crispy Fried Chicken Plate truly outstanding.
Temperature is King: Maintaining Ideal Frying Heat
Consistent oil temperature is critical; aim for a steady 350°F (175°C). Use your thermometer vigilantly and adjust your burner as needed between batches.
If the oil is too cool, the chicken absorbs too much oil and becomes greasy. If too hot, the crust burns before the interior is cooked through, leading to a raw or dry center.
Don’t Crowd the Pot: Space for Optimal Crispness
Resist the urge to fry too many chicken pieces at once. Overcrowding significantly drops the oil temperature, leading to soggy chicken that lacks that desired crispness.
Frying in small batches (3-4 pieces) ensures the oil temperature remains stable, allowing each piece to cook evenly and achieve a beautifully crisp crust.
The Double Dredge Debate: An Even Crispier Option?
For an ultra-thick and extra-crispy crust, consider a “double dredge.” After the initial flour coating, dip the chicken back into the buttermilk, then into the flour mixture once more.
This optional technique builds up a more substantial layer of breading, resulting in an even crunchier exterior for your Classic Crispy Fried Chicken Plate.
Pre-Seasoning the Chicken (Before Marinade)
For an extra layer of flavor, lightly season your chicken pieces with a pinch of salt and pepper before they even go into the buttermilk marinade.
This foundational seasoning allows the salt to penetrate the meat fibers early, enhancing the overall taste profile of your homemade crispy chicken.
Troubleshooting Your Fried Chicken: Common Hurdles Solved
“My Chicken Isn’t Crispy Enough!”
Ensure your oil temperature is consistently at 350°F (175°C). If the oil is too cool, the breading won’t crisp properly.
Also, avoid overcrowding the pot, which lowers the oil temperature. Finally, always drain fried chicken on a wire rack to prevent sogginess.
“My Chicken is Greasy!”
Greasy chicken is often a sign that your oil wasn’t hot enough (below 350°F/175°C). The chicken absorbs oil instead of quickly forming a crust.
Make sure you’re not overcrowding the pot, as this also drops the oil temperature. Proper draining on a wire rack is essential to shed excess oil.
“The Breading Keeps Falling Off!”
Ensure you press the flour mixture firmly onto the chicken pieces during dredging to create a strong bond. Shake off only the excess, not all of it.
Avoid handling the breaded chicken excessively before frying. The buttermilk helps the breading adhere, so don’t let the chicken sit too long after dredging before frying.
“My Chicken is Dry, Even with Buttermilk!”
Overcooking is a primary culprit for dry chicken, even with a buttermilk marinade. Always rely on an internal temperature of 165°F (74°C).
Insufficient marinating time can also contribute to dryness. Aim for at least 4 hours, or preferably overnight, for maximum tenderness and moisture retention.
“Oil Temperature Keeps Dropping!”
This is common. Fry in smaller batches to prevent significant temperature drops; allowing the oil to recover between batches is crucial.
Use a heavy-bottomed pot, which retains heat better. Always have your thermometer visible to monitor and adjust heat as needed.
Enjoying Your Creation: Serving, Storage, and Make-Ahead Tips
Presentation Matters: Assembling Your Perfect Plate
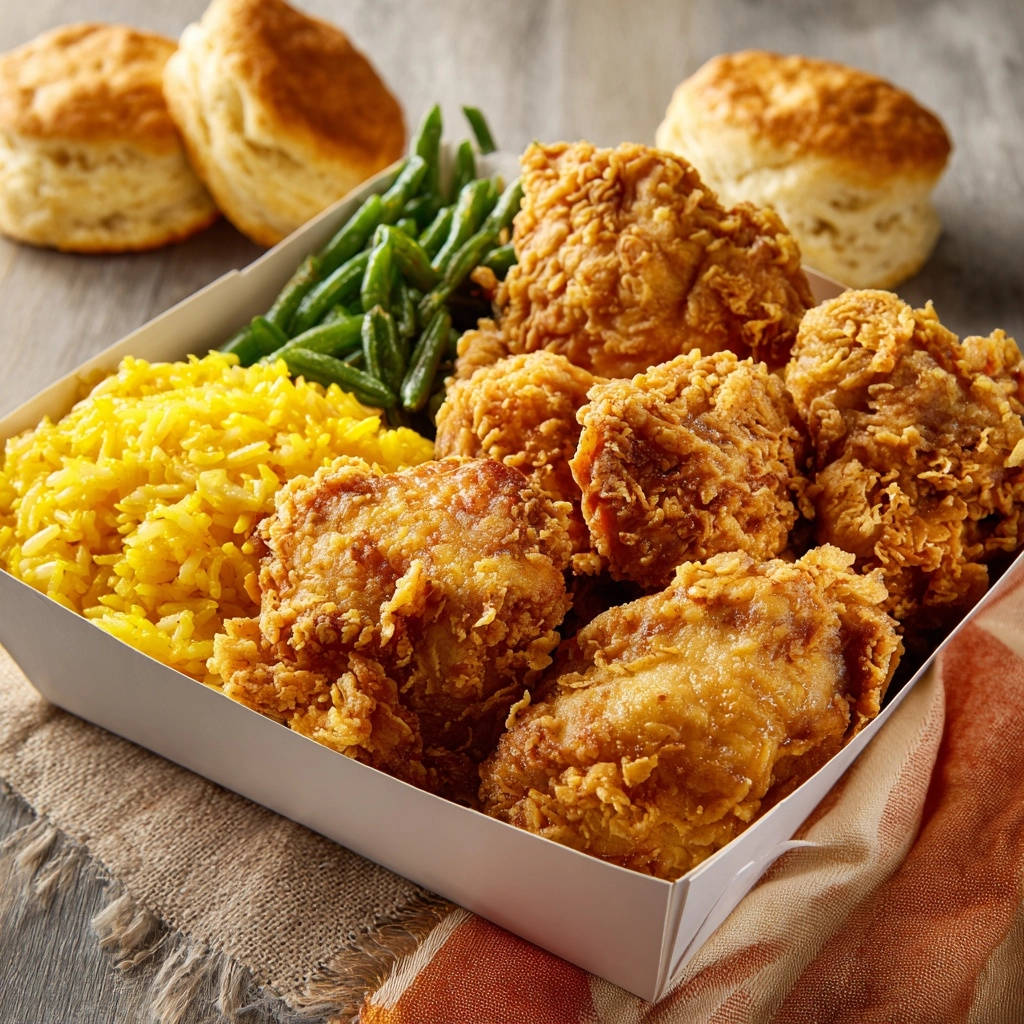
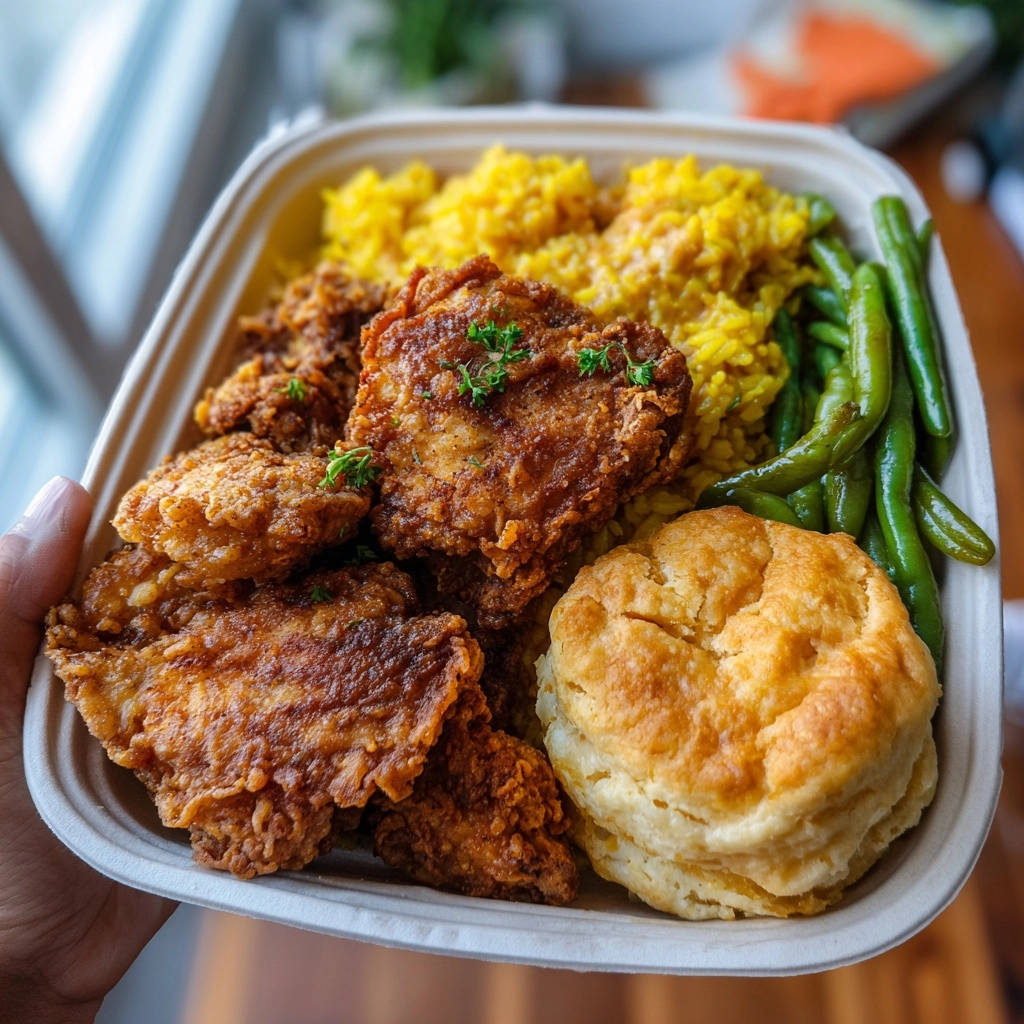
For a truly inviting Classic Crispy Fried Chicken Plate, arrange your golden fried chicken pieces artfully alongside a generous scoop of vibrant yellow rice.
Nestle the tender-crisp green beans next to them, perhaps with a sprinkle of fresh herbs for garnish. This thoughtful presentation enhances the dining experience.
Keeping it Fresh: Storing Leftover Fried Chicken
To store leftover fried chicken, allow it to cool completely at room temperature, but no longer than two hours. Then, transfer the pieces to an airtight container.
Refrigerate promptly for up to 3-4 days. This ensures freshness and safety for enjoying later.
Reheating for Revival: Bringing Back the Crisp
For best results, reheat fried chicken in the oven or an air fryer. Place pieces on a wire rack set over a baking sheet.
Bake at 375°F (190°C) for 15-20 minutes, or air fry at 350°F (175°C) for 8-10 minutes, until thoroughly heated and re-crisped.
Can You Prep Ahead? (Beyond the Marinade)
The chicken absolutely benefits from an overnight marinade. Beyond that, the yellow rice can be cooked a day in advance and reheated gently on the stovetop or in the microwave.
The green beans are best cooked fresh for optimal tender-crisp texture, but can be trimmed ahead of time to streamline meal preparation.
Your Top Questions Answered: Classic Crispy Fried Chicken Plate FAQs
What’s the best type of oil for frying chicken?
The best type of oil for frying chicken is one with a high smoke point and neutral flavor. Vegetable oil, canola oil, and peanut oil are excellent choices.
These oils can withstand the high temperatures required for frying without burning or imparting off-flavors to your Classic Crispy Fried Chicken Plate.
Can I use boneless chicken for this recipe?
Yes, you can use boneless chicken, but you will need to adjust your frying time significantly. Boneless pieces, especially breasts, cook much faster.
Be vigilant with your thermometer to prevent overcooking, as boneless chicken can dry out more easily. Internal temperature should still reach 165°F (74°C).
How do I make this gluten-free?
To make this recipe gluten-free, substitute the all-purpose flour with a high-quality gluten-free all-purpose flour blend. Look for blends designed for frying or baking.
Many such blends work beautifully to create a crispy crust. Ensure all other ingredients, like chicken broth, are also certified gluten-free.
Is hot sauce in the marinade necessary?
No, the hot sauce in the marinade is entirely optional. Its purpose is to add a subtle layer of flavor and zest, not intense heat.
If you prefer a milder taste or are sensitive to spice, feel free to omit it without compromising the chicken’s tenderness or crispness.
How do I know when the chicken is fully cooked without a thermometer?
While a thermometer is strongly recommended for food safety, visual cues can help. Cooked chicken will have a golden-brown crust and clear juices when pierced.
However, relying solely on visual cues risks undercooking or overcooking. A meat thermometer provides the most accurate and safest way to ensure your chicken reaches 165°F (74°C).
Ready to Delight? Share Your Crispy Fried Chicken Plate Masterpiece!
Now that you’re equipped with these expert techniques, you’re ready to create an unforgettable Classic Crispy Fried Chicken Plate right in your own kitchen. This recipe promises juicy, flavorful chicken encased in a perfect crispy crust, complemented by delightful sides.
Go ahead, embrace the joy of homemade deliciousness! We’d love to see your culinary success – share your creations and let us know how your perfectly fried chicken plate turned out in the comments below!
Crispy Fried Chicken
Course: Main CourseCuisine: AmericanDifficulty: medium4
servings20
hours30
minutes1000
kcal240
minutesThere’s nothing more disappointing than biting into a piece of fried chicken only to find it dry and stringy inside. This method ensures every bite is tender and full of flavor, making dry chicken a thing of the past. Served with delicious yellow rice and tender green beans.
Ingredients
For the Chicken:
8 pieces bone-in, skin-on chicken (such as thighs, drumsticks, breasts)
2 cups buttermilk
2 tablespoons hot sauce (optional, for flavor)
2 cups all purpose flour
2 teaspoons salt
1 teaspoon black pepper
1 teaspoon paprika
1/2 teaspoon garlic powder
1/2 teaspoon onion powder
Vegetable oil, for frying (about 4-6 cups)
For the Yellow Rice:
1 tablespoon vegetable oil
1 cup long grain white rice
1 teaspoon turmeric powder
1/2 teaspoon salt
2 cups chicken broth (or water)
For the Green Beans:
1 pound fresh green beans, trimmed
1 tablespoon olive oil
1/4 teaspoon salt
1/8 teaspoon black pepper
Directions
- For the Chicken:
- Prepare the marinade: In a large bowl, combine the buttermilk and hot sauce. Add the chicken pieces, ensuring they are fully submerged. Cover and refrigerate for at least 4 hours, or preferably overnight. This crucial step tenderizes the chicken and ensures incredible juiciness, directly preventing dry meat.
- Prepare the breading: In a separate shallow dish or bowl, whisk together the flour, salt, black pepper, paprika, garlic powder, and onion powder.
- Heat the oil: Pour vegetable oil into a large heavy-bottomed pot or Dutch oven, enough to submerge the chicken halfway (about 2-3 inches deep). Heat the oil over medium high heat until it reaches 350°F (175°C). Use a thermometer to ensure accuracy.
- Bread the chicken: Remove chicken pieces from the buttermilk marinade, allowing excess to drip off. Dredge each piece thoroughly in the flour mixture, pressing to ensure a thick, even coating. Shake off any excess flour.
- Fry the chicken: Carefully place 3-4 pieces of chicken into the hot oil, ensuring not to overcrowd the pot. Fry for about 6-8 minutes per side, turning occasionally, until golden brown and a thermometer inserted into the thickest part of the chicken reads 165°F (74°C). The buttermilk marinade helps the chicken cook through evenly while staying incredibly moist.
- Drain: Remove the fried chicken from the oil and place it on a wire rack set over a baking sheet to drain excess oil. Keep warm in a low oven (around 200°F/95°C) while you fry the remaining batches.
- For the Yellow Rice:
- Rinse the rice under cold water until the water runs clear.
- In a medium saucepan, heat 1 tablespoon of vegetable oil over medium heat. Add the rinsed rice and cook for 1-2 minutes, stirring constantly, until lightly toasted.
- Stir in the turmeric powder and salt.
- Pour in the chicken broth (or water). Bring to a boil, then reduce heat to low, cover, and simmer for 15-18 minutes, or until all liquid is absorbed and rice is tender. Do not lift the lid during cooking.
- Remove from heat and let stand, covered, for 5 minutes. Fluff with a fork before serving.
- For the Green Beans:
- Bring a pot of lightly salted water to a boil. Add the trimmed green beans and cook for 3-5 minutes, until bright green and tender-crisp.
- Drain the green beans well. In a skillet, heat 1 tablespoon of olive oil over medium heat. Add the drained green beans, salt, and pepper. Sauté for 2-3 minutes, tossing to coat and heat through.
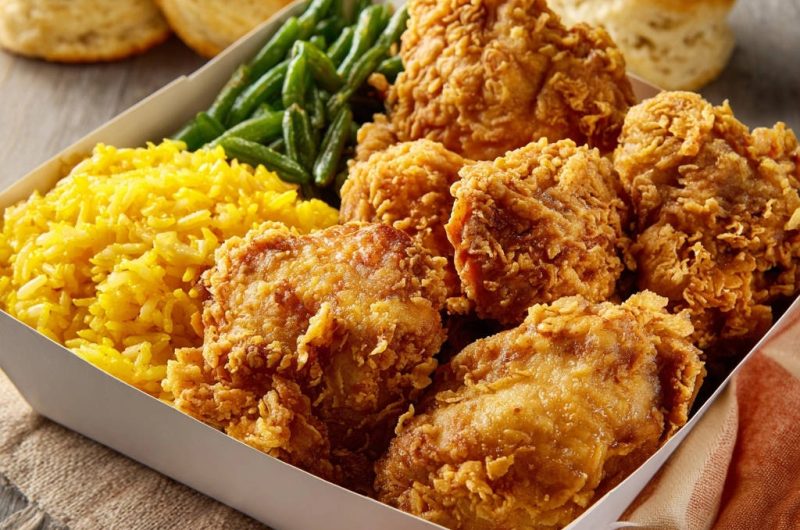
- To Serve:
- Arrange the crispy fried chicken, yellow rice, and sautéed green beans on plates or in a serving box. Enjoy!
Notes
- Marinating in buttermilk is crucial for tender, juicy chicken.


